Now that you have a working CMS, where do you go from here? As you probably noticed throughout this book, we touched upon a number of different areas and mentioned a few other options along the way, but there are still a number of other possibilities yet to be discovered. In this chapter, we'll try to touch upon a few other options so that you can see just how you may want to extend your site.
At the end of this chapter, we will have covered:
Possibilities for upsizing your SQL Server
Suggestions for additional modules for your site
Using base pages and inheritance
Handling (trapping) errors
The site we developed and designed in our book is based around the Microsoft SQL Express database engine. While this engine is quite robust, we mostly did this because of the cost involved, or lack thereof. Due to the nature of the database being a file-based engine, there are a number of hosting providers, and if you are going to use a third-party host, that may not allow you to use SQLExpress. You may also determine that your site will be a heavily used site with thousands of users. If this is the case, you may want to look at using the "full" version of Microsoft SQL Server. With this, you would have all of the additional capabilities, depending on the specific version you were to use, as well as the more robust engine. I highly recommend you go to the Microsoft web site and look at the different options available when choosing your database engine, and then use that in correlation with your needs and what your hosting provider may offer.
One of the best things about switching to the full version of SQL Server is that you don't have to change any of your code. SQL and SQLExpress have a shared "core" that does all of the database work, so all of the queries we've written within our application will work exactly the same way. The only piece of code within the application that you would need to update is the connection string within the web.config file.
To use the full version of SQL, you just need to first install it on a server. The full installation instructions for this will come with your SQL software. If you're using a hosting provider for your web site, then this has already been done for you. After that you have a couple of options. If you are starting off with a new web site, you can follow the same methods that were covered in Chapter 2, but if you are upsizing, it's even simpler. Open up your SQL Server Management Studio, connecting to your SQL Server. Expand the Object Explorer and you should see a number of folders in your tree, like this:
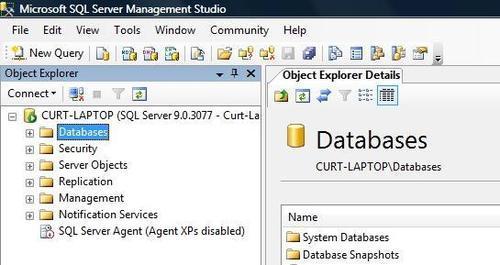
Right-click on the Databases folder and select the Attach menu option. Use the Add... button to browse to the SimpleCMS.mdf database file that you have for your existing site.

That's it. Your SQL Server Management Studio should now show your SimpleCMS database on your server.
From here, you can open your site and go into your web.config. Open the <connectionStrings /> section and find your connection string.
<add name="SimpleCMS_DatabaseConnectionString" connectionString="Data Source=.SQLEXPRESS;AttachDbFilename=C:InetpubwwwrootApp_DataSimpleCMS.mdf;Initial Catalog=SimpleCMS.mdf;User ID=sa;Password=SimpleCMS" />
You will want to replace it with the following, making sure to use your SQL Server name:
<add name="SimpleCMSConnectionString" connectionString="server=YOUR_SERVER;Integrated Security=True;Trusted_Connection=yes;database=SimpleCMS" providerName="System.Data.SqlClient"/>
If you need help with configuring your connection string, I highly recommend going on to the Internet for assistance. The web site www.ConnectionStrings.com is a great resource for all of this information. After you get your string configured, go ahead and run your application, and test it out. You may find that you get an increase in the performance because the full versions of SQL Server are much more optimized. Beyond simply connecting to the server, depending on the version of SQL Server you have, you may find a number of other options available to you. Automated backups, load balancing, and scheduled jobs are just a few things you may want to explore within SQL Server.
Beyond the Articles and Files (Documents and Gallery) Modules we've created within the site, you may want to look at adding some others. Many CMS sites will offer options such as Forums, Messaging, and Videos. These are all ideas you may want to incorporate within your site. For these, or any others you may think of, it's just a matter of following the same patterns we've been using throughout this site.
Start with planning out your Module. It's crucial to know how you want it to work before you start off, or you may find yourself rewriting large pieces of code (and I'm sure that no one really wants to do that). Once you have your concepts all laid out, start by creating the individual pieces. If you need some new tables in your database, get those created first.
Next, you'll want to take the time and get your DAL all "wired up" using the Typed Dataset option, as we did with the Articles module, or you may want to use the Object-based system like we did with the SiteSettings module—it's up to you. I highly recommend that whichever method you go with, you use it for all your modules. We purposely used differing methods in this book, simply to show you different possibilities. However, maintaining a site using a mixture of methodology is quite difficult at times.
The next step, just as we've done before, would be to create your BLL. Make sure to keep your specific business rules within the context of your BLL and not in the UI, just to make things easier for yourself as you expand and grow your site. In addition, you will want to make sure to write detailed validation rules to ensure your site is always getting the best possible data. Another item that I strongly recommend you incorporate into your BLL is the use of comments. Whenever possible, add a simple comment or note to your code explaining what, and why, that piece of code is there. This is because as your site grows and expands, you will always know what that piece is for. This will also allow other developers to come into a piece of code and know immediately why it was designed and what it's purpose is—a "must have" in any multi-developer situation.
Once the layers are in place, go ahead and create your UI. Take into account the Master Page(s) you may have created, the CSS/Skin/Theme files you've incorporated, and all the other shared bits. The UI is all the user ever sees, and while it's typically very straightforward, it's really your only chance to gain your users'/customers' attention. The best written code with a poor UI will suffer dramatically.
The key to using the module-based approach, as we've done here, is that these pieces are really designed to be implemented with as little direct impact on the rest of the site. By doing this, you ensure the stability of your site, which is critical. Along with this, you also ensure that when you've got the new pieces completed, you don't have to spend hours testing all the other pieces of your site again.
The concept of inheritance is one that is at the root of all object-oriented programming. All the pages in our site are currently "inheriting" from the System.Web.UI.Page class that is part of the ASP.NET framework—but they don't have to. One concept that you will find in many applications is the use of a "base" class. The idea behind this is that if you have all of your classes (or pages in our case) inheriting from a single class of your own, then you have given yourself a shared place for many things to reside. Just like in the idea behind the Master Page, we can do this ourselves. Create a new class in your app_code folder, calling it SimpleCMSBasePage.vb. It will start off simple and empty like this:
Imports Microsoft.VisualBasic
Public Class SimpleCMSBasePage
End Class
What you can do now is set it up so that it inherits from System.Web.UI.Page. (You'll come to know the reason in a while.) To do this, change the Class definitions to look like this:
Imports Microsoft.VisualBasic
Public Class SimpleCMSBasePage
Inherits System.Web.UI.Page
End Class
Now, let's take a look at all our existing pages. You'll see that every one of them has the following piece of code in them:
Protected Sub Page_PreInit(ByVal sender As Object, _
ByVal e As System.EventArgs) Handles Me.PreInit
Page.Theme = SiteSettingsBLL.ReadSiteSettings.SiteTheme
End Sub
Copy that piece from one of the pages and put it into our new class so that it looks like this:
Imports Microsoft.VisualBasic
Public Class SimpleCMSBasePage
Inherits System.Web.UI.Page
Protected Sub Page_PreInit(ByVal sender As Object, _
ByVal e As System.EventArgs) Handles Me.PreInit
Page.Theme = SiteSettingsBLL.ReadSiteSettings.SiteTheme
End Sub
End Class
Open the code (****.aspx.vb file) for each of our pages in our site. Remove the code that we just copied from all of them. And here comes the really cool part. Take the line that says:
Inherits System.Web.UI.Page
and change it so that it now reads:
Inherits SimpleCMSBasePage
What we've just done is make all our pages inherit from the SimpleCMSBasePage class that we've created, which in turn inherits from the System.Web.UI.Page class. We get all the functionality of the ASP.NET Page class in addition to any extra code we want to put into our own base class. Beyond using it just for the simple event we did above, you could easily add any number of things to this class. Functions, properties, and even other events are all available to you to put in this new class and remember, anything you put here will automatically be available to you from any of your pages. Perhaps you want to do additional logging of the visits to your pages, and this would be a great place to put that logger.
Another thing that you may want is a place to store static constants for use in your site. This would be another time when the base page would be useful. Now, isn't that pretty cool, but wait...there's more. Not only can we do this with our Page classes, but we can also do this with all our DAL and BLL classes. By having all your BLL classes inherit from a single one, you could write some of your functionality here, thereby not having to repeat it in each BLL class. The same thing goes for your DAL classes. You can create any number of extra inheritance layers that you need as well. These additional layers can add a nice way of separating code and keeping things from getting overly cumbersome in a single file, but be careful not to overdo it, as you can easily cross the line and turn the code into something tough to weed through. When you add too many layers, it's not always easy to track down where a problem may originate, and none of us want to spend more time than necessary on that kind of a thing.
One key concept that we really only briefly touched upon in our site is how you want to handle errors that may occur. There are a number of different methodologies that you may come across if you do some searching on the Internet, but the one thing you will nearly always see is that you need a common way of handling them for your application. Whether you log them into the Event Viewer in the Operating System of the server, write them to a table in your database, or even both. However, you will want to make sure you do this consistently. In addition, you will also want to make sure that your users always know how to find any information on an error that may impact them.
There are two basic concepts when it comes to errors in an application. The first is "handled" errors. These are things that you can expect to happen. Validation failures, missing data, incomplete data, and so on, are all common occurrences of a "handled" error. We have numerous points within our application where an IF/THEN check may produce a failure for us. For these you will want to:
Log the error appropriately.
Let the user know.
For logging the error, I'd suggest you put a simple LogError() method in the new SimpleCMSBase* classes that we created earlier. This one method can be called from any of the other classes that have inherited from this one, giving you a single, unified point for logging these messages. Beyond simply logging these errors, you will want to make sure the user knows what to do. For this, the best way is simply to put a message on the screen telling them what happened and what they can do, if anything. By using a consistent place on the screen to display these messages, and by displaying them in a consistent way (same color, font, and so on), your users will hopefully be able to handle most situations themselves.
The second type of error is what's called an "unhandled" error. These are errors that you haven't specifically coded for, but that doesn't mean they aren't expected. No matter how much time you spend making your site just perfect, and regardless of the countless hours you spent testing your site (you did test it—all right?), there is always the possibility of an error. For this you will want to look at a few key pieces—the Page, the web.config, and the global.asax file. I won't go into great depth on these, as you will surely find more information than you would ever want with a quick Internet search, but briefly:
The Page has a few built in methods for handling errors.
OnError()andPage_Error()are both exposed to us for use within thePageclass.The
global.asaxfile, if you add one to your site, will have some methods of its own that are called any time an error occurs, specifically theApplication_Errorevent.Lastly, but certainly not least, is the
web.config. Within this file is a<customErrors />section. This is where you can tell your application to do specific things such as redirect to special pages in your site, whenever certain types of errors occur.
Handling errors and properly logging them is really only half of the puzzle. Now you, as the person in charge of the code, need to know that an error occurred. Many sites will incorporate some messaging, through email, to let a specific user know whenever an error occurred. This lets you to be quickly responsive to your site and correct errors before many users may even report them.
In addition, I recommend that you have some way of reviewing your error logs, either manually or in a special error page in your site. We've briefly touched on this in the last chapter, but it's worth repeating a little here. A good report to view the errors, and perhaps a way to flag/mark a status on them, is incredibly useful. You will want to check this report frequently so that you can ensure your users are getting the best experience they can. I suggest that you even publish some of these to an Article on your site, so if a user is getting an error, he/she can know that it is being looked into, and you will especially want to let the users know when these fixes have been put into the site. This gives your users some feeling that they are part of a solution and not just a problem. These users will be your best interactions. This is because when they feel more comfortable, they will share their experiences more, and will be happy to share with you, any errors they may receive. By being vigilant, you can continuously work on making your site better, and that's what everyone wants in the end.
Now that you've got your site completed, modules written, UI looking sharp, interfaces running smoothly, and are feeling all-around good about the work you've done, what should you do now? The simple answer is "keep going". Take time to review what you've done. Re-evaluate the code you wrote. Nearly every developer out there finds that when he/she completes a project that they are a better developer than they were at the start. With that in mind, the code you did at the beginning is probably not as "good" as what you wrote at the end. See if you can make it better. Take the time to optimize the code, combine any duplicate code into shared functions, or make them into custom controls if they are pieces for your pages. Take time to look around the Internet at other sites with similar usages as yours, and look for ideas. Talk with your users and ask them what they like or don't like in the site, and see if you can improve upon it. Find out what new functionality may benefit the people who use your site and see what it would take to incorporate these concepts into your code.
The basic idea is that a web site, or really any application, is never really "done". Every good site out there is making improvements, or should be, on a continuing basis. There are always new techniques, new functionality, and new options available to developers to help them make better applications. Take time to see what's out there, collect that information, and see what it can do for you and your site.