In every MicroStrategy project, there is a default system hierarchy that is built automatically based on the information we set into the Parent/Children tabs of the Attribute Editor. The default system hierarchy cannot be modified and contains all the attributes in a project.
The hierarchies can be used to drill down and up in reports, for example, from Year to Month to Date; or from Product Category to Product.
In order to present the attributes in clear and understandable groups to the users, additionally, we can create other hierarchies that we will later use in reports and in dynamic selectors; think of it as a different way to show dimensions to the end user.
We are creating the most common hierarchy, the time:
- Click on the Schema Objects | Hierarchies folder. Then open the Data Explorer folder.
- Right-click on the right pane and from the context menu select New | Hierarchy.
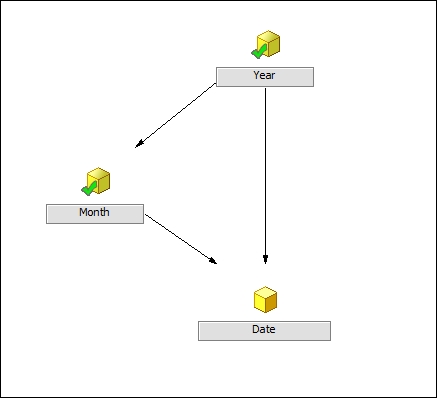
- In the shopping cart that appears, choose Year, Month, and Date attributes and move them to the right.
- By default all the relationship paths are already present in form of arrows from the parent to the child. You can check here if you set the attribute properties correctly.
- See the green check mark on Year? This means this is the highest of the three attributes, therefore MicroStrategy automatically selected it as an entry level.
- Click on Save and Close, a message warns you that this hierarchy will be used for drilling. Click on OK.
- Name it
Timeand click on Save. - Remember to update the schema and go to the Data Explorer folder.
- Here we can see the Time hierarchy, and inside it the entry level: Year.
We will see that the hierarchy is useful when we create reports and want to give the user the possibility to aggregate or filter by year, by month, or by date without previously knowing which attribute they are going to use.
Entry points are the objects from which the navigation begins inside a hierarchy. You have seen, when browsing the Time hierarchy that only the Year attribute appears at first. To set the Month attribute as another entry point, do this:
- Re-open the Time hierarchy by double-clicking on it in Schema Objects | Hierarchies | Data Explorer.
- Click on the Month attribute to select it, you will see eight small squares surrounding it.
- Now right-click on Month and in the context menu select Set as entry point.
- Click on Save and Close, update the schema.
- Now go to Data Explorer | Time and press F5 to refresh.
- The Month attribute now appears as an entry point.
It may seem useless now, but please wait until Chapter 5, Data Display and Manipulation – Reports.

Sometimes—while the project is in progress—we need to provide a quick and easy documentation about the dimensions. I found that doing a print screen of the Hierarchy Editor is very useful and gives a clear idea of how the users can move inside the data.
Create the Products hierarchy with the following attributes: Product Category, Product Subcategory, and Product.
Create the Geography hierarchy with the following attributes: Country, StateProvince, City, and Customer.
Set Country and City as entry points.
