This chapter will guide you through setting up your development environment to start the project. To recap, in Chapter 1 we captured the requirements in Azure DevOps (formaly known as VSTS), created the data model, and mapped the entities to Dynamics 365 entities. Now it is time to commence development. But before doing that, we must decide what tools are required for the implementation and how to configure them.
Dynamics 365 Online vs. On-Premises
Dynamics 365 is available in two flavors, online and on-premises. The decision of which one is best for the solution is totally dependent on the organizational requirements. Some organizations highly value their customer and transaction data, and they have policies to safeguard the privacy of that data. In such scenarios, they will hesitate to put the data online and prefer to maintain an on-premises server farm to host the application. So, Dynamics 365 on-premises is the ideal solution for such organizations. The most notable drawback of the on-premises version is that updates are not released frequently compared to the online version.
The Dynamics 365 online version is regularly updated, and issues are fixed promptly. Additionally, since Microsoft has data centers on every continent, it guarantees the security of the data. Still, sometimes more traditional people will want to stay on-premise with their data. Even though this book is based on the Dynamics 365 online version, all the examples are compatible with the on-premise version as well.
Before commencing any development work, you must download the latest SDK. Needless to say, you will be needing the XrmToolBox as well. In the Dynamics 365 development world, XrmToolBox provides you with a wealth of plugins to develop and troubleshoot your work. Make sure that you have the latest version downloaded to your development environment.
Setting Up a Dynamics 365 Development Environment
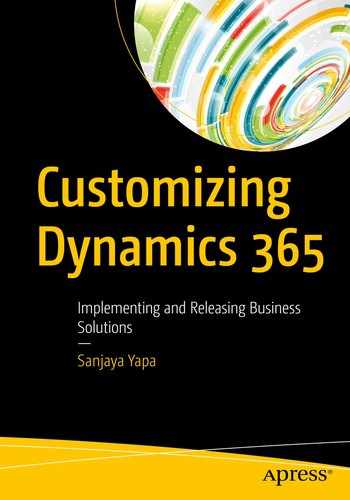
- 1.Navigate to dynamics.microsoft.com , and locate the Start Free option (see Figure 2-1). Click it.
 Figure 2-1
Start Free option to create the trial
- 2.As shown in Figure 2-2, select the Sales option. By default, this is selected.
 Figure 2-2
Selecting the app
- 3.Scroll down to the bottom of the page, and click the “Sign up here” link (see Figure 2-3).
 Figure 2-3
“Sign up here” option
- 4.You will be prompted with the message shown in Figure 2-4. Just click “No, continue signing up” at the bottom-right corner of the message box.
 Figure 2-4
Sign-up confirmation for partners and Microsoft employees
- 5.On the next screen, fill in your details and click the Next button, and you will be prompted to enter your account details. The details provided here will be used to create the Dynamics 365 URLs. Once you have populated the account details, click “Create my account” at the bottom of the page. See Figure 2-5.
 Figure 2-5
Creating an account
- 6.On the next screen, you will be asked to enter the phone number, and Microsoft will send you a text message containing a code if the “Text me” option is selected. See Figure 2-6.
 Figure 2-6
Entering the security code
- 7.Now that your account has been created, save the account details somewhere. They will also be e-mailed to the business e-mail address you provided. Now click the Set Up button, and you will be redirected to select the scenario that is right for you. For the purposes of this book, we will be selecting “None of these. Don’t customize my organization.” Even though this option is selected, you will be getting the Customer Engagement scenario as your base. So, it doesn’t matter whether you select any of these options. But, if you select “Field services” or “Project service automation,” there are some specific components that will be installed to your Dynamics 365 instance. See Figure 2-7.
 Figure 2-7
Selecting the organizational scenario
- 8.
Click the Complete Setup button, and your organization will be created in a few minutes.
Setting Up Visual Studio for Development

Visual Studio Productivity tools plugin

Visual Studio Web Essentials plugin
We all know that Dynamics 365 Toolkit and the Dynamics 365 Extensions are available, but still, they are not compatible with Visual Studio 2017 at the time of writing this book. There are workarounds to make them work with Visual Studio 2017, but this is not always successful. It is not essential to have them, and it is out of the scope of this book.
Plugins
Workflows
Customizations
Web resources
You will need Azure and Reporting projects as well, but they will be added to the solution later in the book. Now, you might be thinking about what might be the ideal design pattern to be used. For CRM projects, keeping it simple is best, so you will stick to the basics here. There is no harm in using a fancy design pattern, but for Dynamics 365 projects, keeping it simple is highly important.

Creating a Visual Studio project

Visual Studio solution and the projects
When creating the projects, make sure to select the .NET Framework 4.6; you are using the Dynamics 365 online version, and it requires the .NET Framework 4.6. Also, when creating the web resources project, create an empty ASP.NET Web Application (Framework) project. You will not compile this project; it is just a placeholder for the web resources.
Customizations: This will hold any customizations done against the entities.
Html: This will hold any HTML files.
images: This will contain the icons and other images used in the solutions.
js: All the JavaScript libraries will be stored in this folder. Later we will look at how to extend this to use TypeScript, which is becoming more and more popular among the CRM developers.
You can loacte previous versions and the command to execute at https://www.nuget.org/packages/Microsoft.CrmSdk.CoreAssemblies/ .
Note
The previous command will install the assemblies to the plugin project only. You will have to install it to the workflow project by just selecting the project from the “Default project” drop-down list.
Source Control
- 1.
In your Azure DevOps project, create a folder under Code to store the artifacts. See Figure 2-12.

Azure DevOps source code repository

New folder created in Azure DevOps for storing source code
- 2.
Now you need to connect to the project from Visual Studio. Open Visual Studio and open the Team Explorer. On the Home tab, click Manage Connections to add a new connection to the team project. See Figure 2-14.

Connecting to the team project via Visual Studio
Note
Follow the link to discover more details on setting up the connection: https://msdn.microsoft.com/en-us/library/ms181474(v=vs.80).aspx .
- 3.If you have successfully connected, you can see all the Azure DevOps organizations. Expand the one where your team project was created. Select the team project and click Connect. Now you can see the project from Team Explorer. See Figure 2-15.
 Figure 2-15
Azure DevOps Team Project connected to Visual Studio
- 4.Click the Home button and click Source Control Explorer. See Figure 2-16.
 Figure 2-16
Navigating to Source Control Explorer
- 5.Now you can see the Code section of the project. Navigate to the Solution Explorer and right-click the solution. Click Add Solution to Source Control, which will display the dialog shown in Figure 2-17.
 Figure 2-17
Add solution to Azure DevOps Source Safe dialog
- 6.Click OK, and your code will be added to TFS. Finally, right-click the solution in Solution Explorer and click Check In. You will have to add check-in comments and click Check In. It is always a best practice to add the some comment with your check-in, which will be extremely useful when you backtrack changes in source control. See Figure 2-18.
 Figure 2-18
Adding comments to a check-in

Solution added to the Azure DevOps source control
Explaining Solutions
Schema: Entities, attributes, relationships, global option sets
Process/code: Dialogs, actions, workflows, plugins, custom workflow activities
User interface: Site map, forms, entity ribbons, application ribbon, web resources
Security: Field-level security profiles, security roles
Templates: E-mails, contracts, articles
Analytics: Reports, dashboards, views, visualizations
Fundamentally, a solution is a bucket that can be used to carry your customizations from one environment to another. There are three different types of solutions.
Default Solution

The default solution
Unmanaged Solution
When you create a new solution, it will be an unmanaged solution. As a best practice, create a separate solution for every project or hotfix. But there are pros and cons to this approach, which we will discuss in the upcoming sections. In this unmanaged state of the solution, you can add, edit, update, remove, and test the customizations done against the components.
Managed Solutions
Once all the customizations to the components are completed, when you export your solution for distribution, you can export it as a managed solution. When a solution is set as managed, then no further customizations can be done. Managed solutions can be layered on top of each other, and you can declare unmanaged customizations on top of them. These solutions are installed on top of the default solution. Managed solutions are ideal for Independant Softare Vendors (also known as ISVs).
Managed vs. Unmanaged Solutions
When you are selecting between managed and unmanaged solutions, it all depends on how you want to release or distribute your customizations to target users.
If you are solving your software requirements in-house, then go for unmanaged solutions. Dynamics 365 solutions will be your baby, and you can create projects and hotfixes as solutions. Since you can create any number of unmanaged solutions, over time your production Dynamics 365 instance will end up in a huge pile of solutions, which will be a maintenance nightmare. Therefore, you should have some control over how you release your work. Your development environment may contain several solutions, but you must always have an integration environment where you can combine all the changes. Recently Microsoft introduced solution patches and solution upgrades, which removes most of the complexities related to solution deployment. We will be discussing this in detail in the next section.
Most of the time, the managed solutions are used by vendors to distribute solutions to their clients, and they do not want clients to modify the solution. It is like a piece of software that you would get from the market and install. Previously, managed solutions were locked for any changes. But now, by declaring managed properties, vendors can allow limited customizations. Also, when a managed solution is removed from your system, all the customizations that were in the managed solution will also be removed. This is similar to uninstalling a software component from your system.
Solution Patches and Upgrades
The solution patches enable you to release only the customizations done against a component, eliminating the risk of releasing unintended customizations to target environments. You can apply solution patches for both managed and unmanaged solutions. When creating patches, it should be based on the existing solutions. What does this mean? As a best practice, in addition to the default solution, you should create a base solution for your project. For instance, you can create a base solution that contains all the entities that are required for the project and both system and custom entities. You also can have the advanced customizations such as plugins and processes in one solution and web resources in another. Then you can create solution patches for the individual parent sollutions that you have created when changes are required.

Solution patch versioning
The beauty of this is that it does not contain any of the noncustomized components or any of the related components. Unlike solutions, patches do not have a dependency on each other, meaning that you can easily remove a patch without impacting another one. Remember, when you uninstall a parent solution from the target environment, then the patches related to that solution will also be removed.

Clone solution for an upgrade

Cloned solution
The advantage of the solution upgrade is that when you import the solution to the target environment, Dynamics 365 automatically detects that this is an upgrade to an existing solution and notifies you. During the import process, you will be asked to import the solution as a “holding solution.” By default, this option is selected if there are patches for the parent solution that you are upgrading. This is extremely useful when removing unwanted customizations. The holding solution will retain customizations until removing the existing customization and applying the new upgrade. Microsoft has simplified this process, and needless to say, it works like a charm. We will be looking at this process in more detail later in this book.
Management Strategy for SBMA
This book demonstrates the Dynamics 365 customization through a real application implementation as an independent software vendor (ISV). All the development work will be done with an unmanaged solution and released to the target environment as a managed solution. There are many debates about whether to use managed or unmanaged solutions, but this is out of the scope of this book.
Before you make any decisions, research the topic. If you are an ISV, then it is always best to use managed solutions. But if you are doing in-house development work, then there are many factors to consider. The following article gives you a wealth of information on this topic: https://community.dynamics.com/crm/b/razdynamicscrmconsultant/archive/2016/03/04/managed-vs-unmanaged-solutions .
Source Controlling the Customizations
So far, we have created a Visual Studio 2017 solution to hold all the plugins, custom workflow activities, and web resources. Now we are going to look at how to source control the customizations. For this, we will be using the Solution Packager tool provided by Microsoft, which is distributed as part of the Microsoft.CrmSdk.CoreTools NuGet package.
We need to come up with a proper solution to automate the repetitive work. For instance, we will be developing our solution and need to release it to a target environment. For simplicity, this book will use only two environments: Development and UAT. But you can have multiple environments or instances.

Release process
- 1.
The development work is done on the Dev instance. All the base solutions and patches are created as unmanaged solutions.
- 2.
Once the customizations are done, the Solution Packager will be executed to extract the solutions.
- 3.
You can then check in the extracted files to Azure DevOps. As you all know, it is not necessary to check in any DLLs. Besides, you already have the plugins and the workflows.
- 4.
Once that is done, you can start the build process and pack the solutions.
- 5.
As mentioned, we will be releasing the unmanaged version of the solution. You can use Azure DevOps release tooling or a third-party tool like Octopus to automate the releases. In your configuration, if you have multiple environments, you can use these systems to automate the releases.
- 6.
Also, there are other components such as Reports, Azure Logic Apps, and Azure WebJobs that we are planning to use, and the release mechanism will be different for them. We will discuss these when we add these components to the solution later in this book.
Why Is It Important to Automate Releases?
A few years ago, automating a release was a tedious task. At that time, automating Dynamics CRM releases was even more difficult. But now, both Dynamics 365 and release management software have been enhanced to a state where it can be done with minimum effort. The primary reason to automate releases is to eliminate the mistakes that people make when releasing. There is no point in wasting valuable time performing release activities manually over and over again. Besides, in Agile development environments, the releases are more frequent. In such scenarios, deployments must be automated.
Many release automation techniques can be used. SPKL Task Runner is a set of tools that can be used to automate deployment. You can find more details at https://github.com/scottdurow/SparkleXrm/wiki/spkl . Also, there is the Nullfactory Generator, which is a framework that is designed especially for Dynamics 365 projects. You can find more details at www.nullfactory.net/2018/06/generator-nullfactory-xrm-1-7-0-released/ . You also have the option to create your own process from scratch, and there are many resources to guide you.
In this book, we will be using SKPKL Task Runner to implement the build and release process. This was developed by Scott Durow, and it is a robust and well-tested set of tools. To begin with, let’s create the base solution.
Note
If you are going to create your own build and release process, then you will have to learn about Solution Packager and Solution Deployer. Needless to say, you will have to use PowerShell extensively to accomplish this. For PowerShell, you will also have to use the Microsoft.Xrm.Data.PowerShell PowerShell module.
Creating the Base Solution
You will be starting the application development process by creating the base solution. For the demonstration prposes of this book base solution will contain only the entities.
Creating the Publisher
- 1.Navigate to the Settings area and click Customizations. As illustrated in Figure 2-25, click the Publishers link.
 Figure 2-25
Customization landing page
- 2.In the top-left corner of the Publishers grid, click the New button, and the New Publisher window will pop up. Enter the display name, and the Name field will be automatically populated. Next, you can give a prefix of your choice. This value is important, especially for customizations. For instance, when you create a field or an entity in the solution, the prefix defined in the publisher of the entity or field. This is useful for ISVs to identify the solution components added by their solution. Also, the option value prefix will be used for the value of the option sets that you will be creating. You can enter other details such as contact details, but they are optional. After filling the required values, click Save and Close. See Figure 2-26.
 Figure 2-26
Creating a new solution publisher
- 3.To commence, go to Settings and select Solutions, as illustrated in Figure 2-27. This is where you create a base solution.
 Figure 2-27
Navigating to solutions
Creating the New Solution
- 1.Click the New button to create a new solution, and the new solution window will be displayed. After entering the display name, the Name field will be automatically populated. Next, click the lookup search button of the Publisher field. Click the lookup search button and select the new publisher you have created. At this point, the version number is set as 1.0.0.0, meaning that it is the first version. See Figure 2-28.
 Figure 2-28
Creating a new solution
- 2.After setting these initial values, click the Save button, and the solution will be created. You have not added any entities to the solutions. First, let’s add the existing entities identified in Chapter 1 that are required for our solution. You need the Account, Lead, Contact, Users, Knowledge Base Articles, and Incident entities. Click the Add Existing button on the toolbar to access the existing entities from the default solution. See Figure 2-29.
 Figure 2-29
Adding existing entities to the solution
Adding Entities to the Solution
- 1.On this screen, select the entities from the default solution. See Figure 2-30.
 Figure 2-30
Selecting the existing entities
- 2.The next step is to select the entity assets to be included in the solution. You have the option to select only the required components or all the components by just selecting the Add All Assets option. The important thing that you should consider here is when you select this option, it will select components that you may not require. It is always a best practice to select only the components required for the base solution. See Figure 2-31.
 Figure 2-31
Selecting all entity assets for the solution
- 3.Click the Next button. You will have to perform this action against all the entities you have selected. In this example, there are seven entities selected, so you will have to perform this action seven times. Now that your solution is filled with out-of-the-box entities, you will create the custom entities required by the solution. Similar to creating any database table, you will have to create all the required fields for these new entities. To create new entities, click the New button on the toolbar, as seen in Figure 2-32.
 Figure 2-32
Creating new entities
- 4.As shown in Figure 2-33, you must enter the required fields. Display Name, Plural Name, and Name will be automatically populated as soon as you tab away from the Display Name field. As a best practice, make sure you have entered a singular name. In addition to these fields, you must select the ownership of the entity. If Organization is selected, the entity will be displayed to the entire organization, and if User or Team is selected, it will be displayed to a specific team or a user in the system.
 Figure 2-33
Setting up entity properties
Other Entity Settings
- 1.
For instance, “Areas that display this entity” defines in what section of the Dynamics 365 navigation bar the entity should be visible. For this example, sales and service would be enough. This is not mandatory, but if you want the users to discover the entity easily, then you should do it. In fact, one of the key requirements of the SBMA application is that it must be user-friendly. Remember, you can’t change these settings for system entities. However, using the site map, you can modify where the entity should be visible. Since Dynamics 365 is moving toward an app model and a unified interface, this can be designed using the App Designer.
- 2.There are other options available under Communication & Collaboration, Data Services, Auditing, Outlook & Mobile, and Help that are self-explanatory. You can select these options at this stage or after creating the entity. But keep in mind once set, some of these options cannot be disabled or enabled in edit mode of the entity. See Figure 2-34.
 Figure 2-34
Entity metadata
- 3.Each entity defines a primary field, which is typically a link to the record that can be found on the Primary Field tab of this window. This field must be set to Single Line of Text with the format set to Text. See Figure 2-35.
 Figure 2-35
Primary Field properties of a custom entity
- 4.After setting all these properties, you can save the entity. You can add the other fields after saving, or you can add the fields after creating all the entities. Also, to make the solution more eye-catching, you could add icons to the entities you have created. You must first download the icons to the local machine and then navigate to the web resources of the solution. Click the New button, and a window will pop up to enter the details of the icon and import the icon to Dynamics 365, as illustrated in Figure 2-36. With the introduction of the Unified Interface, you cannot use traditional image formats such as jpeg. Instead you must use Scalable Vector Graphics (SVG). Following url will give you more details on how to create and add SVG icons to the Unified Interface: https://community.dynamics.com/365/projectserviceautomation/b/d365tipsandtricksfunctional/archive/2018/11/05/adding-icons-for-the-unified-interface .
 Figure 2-36
Upload icons for custom entities
Add Entity Icons
- 1.
Navigate to an entity where you want to add the icon and click the Update Icon. As you can see in this window, you can upload two images. One is for the web application, and the other one is for the entity forms. As mentioned earlier, the web application icon must be 16×16, and for the entity forms the icon must be 32×32.
- 2.When you click the lookup search button next to the field, you will see the topmost resources in the solution. If you cannot find your icon web resource there, then scroll down and click Lookup More Records, which will open the Lookup Search window where you can search and add your icons to the entity. See Figure 2-37.
 Figure 2-37
Mapping icons to the entity
- 3.
Keep in mind that you need to upload two images (a 16×16 version and a 32×32 version) to be used both for the entity and for the form. After uploading the icons, now you can map them to the entity. Navigate to an entity where you want to add the icon and click the Update Icon button, as shown in Figure 3-37. As you can see from this window, you can upload two images.
- 4.When you click the Lookup Search button next to the field, you will see the topmost resources in the solution. If you cannot find you icon web resource there, then scroll down and click Lookup More Records, which will open the Lookup Search window where you can search and add your icons to the entity. See Figure 2-38.
 Figure 2-38
Changing the entity display name
- 5.The next step is to create the relationships between the entities. Open the entity where you want to be set up the relationship and select 1:N Relationships. Since Member (Account) is a system entity, the relationship with other system entities like Contact is already set up. See Figure 2-39.
 Figure 2-39
The relationship between system entities
- 6.
When you click the New 1-to-Many Relationship button on the grid toolbar, a window to set up the relationship will be displayed. On this form, there are a few mandatory fields that you must enter before saving the relationship between the entities such as Related Entity, Display Name, Field Requirement, and so on.
Relationship Definition: This section lists the properties that describe the relationship.
Lookup Field: This is the field that is displayed at the related entity.
Navigation Pane Item for Primary Entity: This describes how the relationship is presented at the primary entity navigation.
Relationship Behavior: In general terms, these are the settings that preserve the data integrity.

Setting up a new entity relationship.

The relationship between system entities
This is an easy to use tool. You first have to set up the connection to the Dynamics 365 instance via the XrmToolBox. Then on the tool, there is an option to load the entities. This will load all the entities including the custom entities in the system. You can select the entities in your base solution to make sure all the relationships are set up as per the initial design.
Installing SPKL Task Runner

After installing the SPKL Task Runner
You only have to execute the .bat files under the spkl folder to export and import your solutions. First, open spkl.json and change the solution_uniquename and packagetype attributes. solution_uniquename is the name of the solution, and the package type is set to managed since we are going to release a managed version of the package to the target environment.

SPKL Task Runner configuration

Executing unpack.bat and providing credentials to connect to the Dynamics 365 instance

Unpacked solution
Now let’s deploy this to the target environment. For that, you will have to use the pack+import.bat command file from the spkl folder. Again, if your target environment is not in the tool’s memory, you can add it by selecting this option: [0] Add new server configuration. The process is the same as executing the unpack command.

Base solution deployed to target environment
Summary
With this, we end Chapter 2. In this chapter, you set up a development environment and dug deep into managed and unmanaged solutions. You also looked at the solution patching and upgrading. Lastly, the chapter discussed the release management approach suitable for the project. The book will demonstrate how to extend and improve the release process when the project get matures. From Chapter 3 onward, the book will guide you through how to customize Dynamics 365 with examples from the SBMA project.