
17. Bookmarklets
Resetting a Web Page’s Background 432
Displaying ISO Latin Characters 441
Converting RGB Values to Hex 444
You know that JavaScript can be used to control Web browsers from inside your Web pages. However, you can also use JavaScript to control your browser without using Web pages, by using what are called bookmarklets. Bookmarklets are bookmarks (or favorites, if you prefer Internet Explorer’s terminology; sometimes bookmarklets are called favelets) that contain a call to the browser’s JavaScript interpreter, instead of an external URL. The JavaScript in your bookmarklets can do anything from getting details about images, to giving you the definition of a word, to resizing your browser window. And because you know JavaScript, this functionality is easy to add to make your browser a smarter, better tool.
Bookmarklets differ from other JavaScript code that you’ll write because they have a significant and interesting formatting limitation: they must be written all in one line. You’ll use semicolons to string commands together.
In this chapter, you’ll be introduced to a variety of useful bookmarklets, and with a bit of effort, you’ll be able to go forth and write your own.
Your First Bookmarklet
OK, Listing 17.1 isn’t the most thrilling script you’ll ever see. It’s a variation on our old friend, the “Hello World” script. But what’s important is that you’re getting something to happen in a Web browser without ever loading a Web page. This example also demonstrates how to create and use a bookmarklet in the various browsers.
Listing 17.1. Yikes! It’s the return of “Hello World.”
javascript:alert('Hello World'),
To create a bookmarklet (Firefox 3 and later)
1. From the Bookmarks menu, choose Organize Bookmarks (Firefox 3) or Show All Bookmarks (Firefox 4+, ![]() ). The Library window opens.
). The Library window opens.
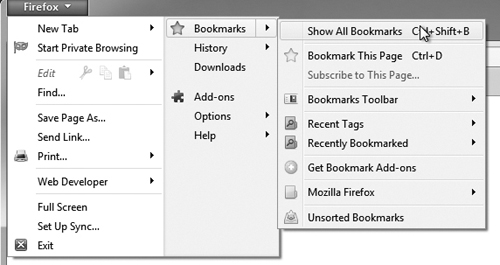
![]() Firefox (for Windows, in this case, but the Mac version is similar) allows you to enter bookmarklets in the Library by choosing Show All Bookmarks.
Firefox (for Windows, in this case, but the Mac version is similar) allows you to enter bookmarklets in the Library by choosing Show All Bookmarks.
2. In the left column, choose Bookmarks Toolbar. From the toolbar above, choose the Action menu (Mac, ![]() ) or the Organize menu (Windows,
) or the Organize menu (Windows, ![]() ), and select New Bookmark.
), and select New Bookmark.
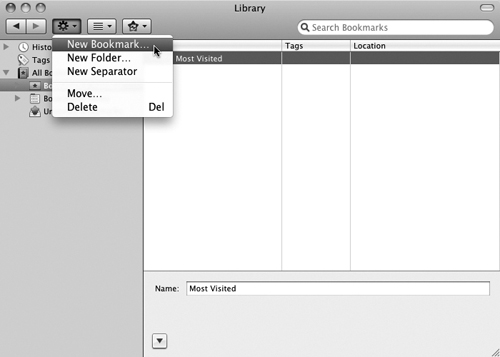
![]() Firefox for Mac has the New Bookmark menu item in the Action menu.
Firefox for Mac has the New Bookmark menu item in the Action menu.
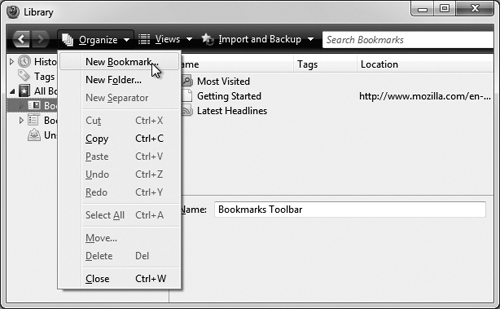
![]() Firefox for Windows has the New Bookmark menu item in the Organize menu.
Firefox for Windows has the New Bookmark menu item in the Organize menu.
3. In the Name field, type the name you want to appear on the toolbar. In this case, type Hello.
4. In the Location field ![]() , type
, type javascript:alert('Hello World'), and then click Add.
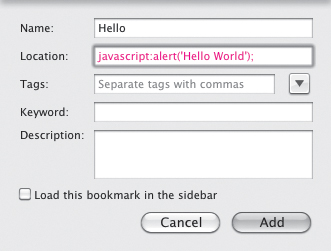
![]() In Firefox, add the bookmarklet code to the Location field in the New Bookmark dialog.
In Firefox, add the bookmarklet code to the Location field in the New Bookmark dialog.
We’ll return to the Library window.
5. Close the Library window. Our new button should appear on the Bookmarks Toolbar. Clicking the button activates the command and makes the alert box appear with the text “Hello World.”
If you can’t see the Bookmarks Toolbar in Firefox, choose View > Toolbars > Bookmarks Toolbar to display it.
To create a bookmarklet (Safari)
1. Make sure the Bookmarks Bar is visible by making sure that an item in the View menu displays “Hide Bookmarks Bar” and not “Show Bookmarks Bar.”
2. In the Address Bar, type
javascript:alert('Hello World'),
3. Drag the globe icon (to the left of the text you typed) from the Address Bar to the Bookmarks Bar, and release the mouse button.
A dialog appears, asking you to name the new bookmark ![]() .
.
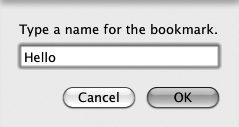
![]() After entering the bookmarklet code in the Address Bar and dragging it to the Bookmarks Bar, Safari prompts you to enter a name for the bookmarklet.
After entering the bookmarklet code in the Address Bar and dragging it to the Bookmarks Bar, Safari prompts you to enter a name for the bookmarklet.
4. Enter the bookmarklet’s name, and then click OK.
The new bookmarklet appears in the Bookmarks Bar as a button. Click the button to activate the command.
You can use Bookmarks > Show All Bookmarks to reposition the bookmarklet from the Bookmarks Bar to the Bookmarks menu, if you prefer.
To remove a bookmarklet from the Safari Bookmarks Bar, drag it off the bar and into the browser window. It disappears in a puff of animated smoke. If you accidentally delete the wrong bookmark, undo the mistake by pressing Cmd-Z/Ctrl-Z.
To create a bookmarklet (Internet Explorer 7)
1. From the Favorites menu, choose Add to Favorites. The Favorites Center dialog appears ![]() .
.
![]() Internet Explorer 7 calls its bookmarks Favorites, and has the Favorites Center.
Internet Explorer 7 calls its bookmarks Favorites, and has the Favorites Center.
2. In the Name field, type Hello.
3. In the “Create in” section of the dialog, choose the Links folder to ensure that the new bookmark appears in the Links Toolbar, and click Add.
4. Right-click the new “Hello” bookmarklet in the Links Toolbar, and choose Properties. The Properties dialog appears. In the URL field, we type javascript:alert('Hello World'), ![]() and, if you’re fine with the icon IE assigns to the button (it’s usually the icon of the current Web page you’re on), click OK.
and, if you’re fine with the icon IE assigns to the button (it’s usually the icon of the current Web page you’re on), click OK.

![]() Add the code in IE 7’s Properties dialog.
Add the code in IE 7’s Properties dialog.
5. (Optional) If you want to change the icon, click Change Icon in the Properties dialog. The Change Icon dialog appears ![]() ; choose the icon you want, click OK, and then click OK again to dismiss the Properties dialog.
; choose the icon you want, click OK, and then click OK again to dismiss the Properties dialog.
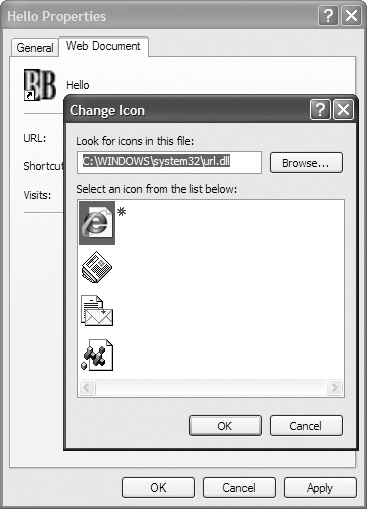
![]() If you want a different icon than the one IE assigns to the bookmarklet, use the Change Icon dialog.
If you want a different icon than the one IE assigns to the bookmarklet, use the Change Icon dialog.
6. The Problem with Shortcut dialog should appear, if IE’s security settings are appropriately set. This is to help prevent malicious scripts from being added to your browser. We’re not malicious (at least not toward our own computer!), so everything is OK. Click Yes.
7. Click the “Hello” button in the Links Toolbar to activate the command.
To create a bookmarklet (Internet Explorer 8 or 9)
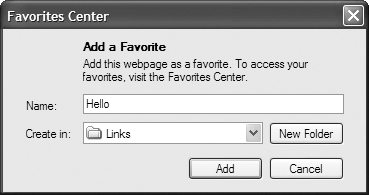
1. From the Favorites menu, choose Add to Favorites Bar. The Add a Favorite dialog appears ![]() .
.

![]() And in IE 8+, it’s a little different; here’s the Add a Favorite dialog.
And in IE 8+, it’s a little different; here’s the Add a Favorite dialog.
2. In the Name field, type Hello.
3. In the “Create in” section of the dialog, choose the Favorites Bar folder to ensure that the new bookmark appears in the Favorites Toolbar, and click Add.
4. Right-click the new “Hello” bookmarklet in the Links Toolbar, and choose Properties. The Properties dialog appears. In the URL field, type javascript:alert('Hello World'), ![]() and, if you’re fine with the icon IE assigns to the button (it’s usually the icon of the current Web page you’re on), click OK.
and, if you’re fine with the icon IE assigns to the button (it’s usually the icon of the current Web page you’re on), click OK.
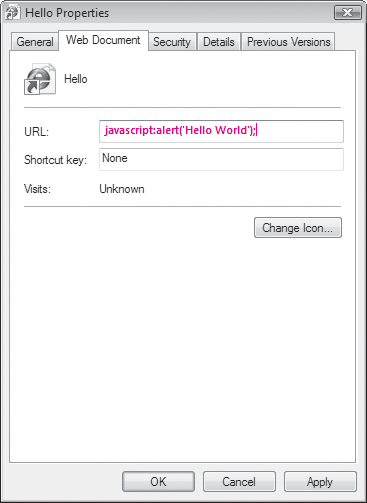
![]() Modify the properties to add the JavaScript code to your bookmarklet.
Modify the properties to add the JavaScript code to your bookmarklet.
5. (Optional) If you want to change the icon, click Change Icon in the Properties dialog. The Change Icon dialog appears; choose the icon you want, click OK, and then click OK again to dismiss the Properties dialog.
6. The Problem with Shortcut dialog should appear, if IE’s security settings are appropriately set. Click Yes.
7. Click the “Hello” button in the Links Toolbar to activate the command.
By default, IE9 hides its Favorites Bar. To show it, right-click the toolbar at the top of the window and choose Favorites Bar from the resulting shortcut menu.
Resetting a Web Page’s Background
Listing 17.2 is simple but powerful. Have you ever visited a site that you knew had lots of useful information, but the background color was so close to the text color that the information was unreadable? Or worse, the page’s author used violently clashing colors that made your eyes water? This little bookmarklet solves those problems. Note that at this point, using the bookmarklet changes the way that you’re viewing someone else’s page—that’s part of the power of bookmarklets. Of course, it doesn’t change the actual page, just the way that your browser displays it.
To reset the background of a page
• javascript:void(document.body.style.background='#FFF'),
This script uses the object document.body.style.background and resets it to white. Now, we can see what’s actually written, as shown in ![]() and
and ![]() .
.
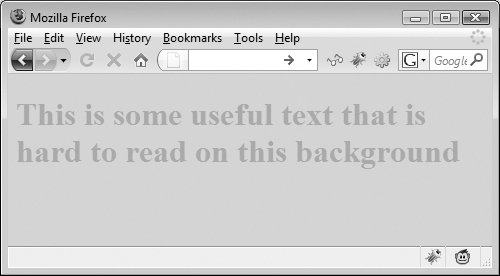
![]() It’s difficult to read the text on the page’s original background color.
It’s difficult to read the text on the page’s original background color.
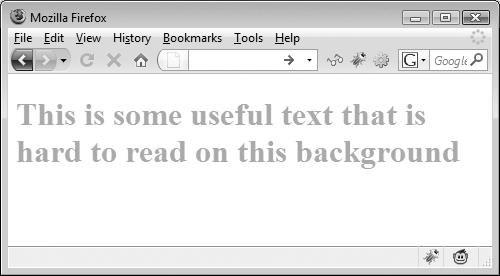
![]() Against white, the text is much more legible.
Against white, the text is much more legible.
Note that the bookmarklet uses the form javascript:void(command);. This is because a bookmarklet must return some value, which would normally be used to overwrite the contents of the current page. By using the void() method, nothing is returned, and nothing is overwritten.
Bookmarklets use single quotes, not double quotes. This is because, behind the scenes, each bookmarklet is inside an <a href=""> tag. Using double quotes would end the bookmarklet prematurely.
Listing 17.2. This script, which changes the background color to white, improves many a design-impaired page.
javascript:void(document.body.style.background='#FFF'),
Listing 17.3. Don’t be thrown off by the gray arrows; they’re only there because of the limited size of this book’s pages. Remember that the actual bookmarklet is all on one line. This script changes the styles on a page to make it more readable.
javascript:(function(){var nuStyle=document.createElement('link'),nuStyle.rel='stylesheet';nuStyle.href='data:text/css,* {background:#FFF !important; color:#000 !important;} :link, :link * {color:#00F !important;} :visited, :visited * {color:#93C !important;}';document.documentElement.childNodes[0].appendChild(nuStyle);})();
Changing a Page’s Styles
The previous example works fine if the background color of an offensive page is set in the page’s HTML. But it’s ineffective if the page uses style sheets to change the background color or to apply a background image to a page element. This next bookmarklet (Listing 17.3) replaces the CSS styles for a page’s background color, text color, and link colors. The background color changes to white and the text color to black; links will be blue; and visited links will be purple. You can see these sorts of changes in the example shown in ![]() and
and ![]() .
.
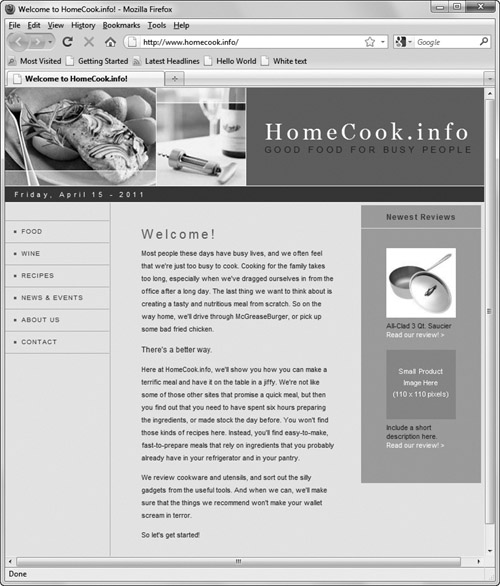
![]() The original page can be a bit difficult to read, so we want to swap out the CSS styles to make it more readable.
The original page can be a bit difficult to read, so we want to swap out the CSS styles to make it more readable.

![]() By changing the background and link colors, the page is easier to read.
By changing the background and link colors, the page is easier to read.
If you have trouble reading Web pages that use white text on a black background, or you get annoyed at sites that use too-similar colors for links and body text, this is the perfect bookmarklet for you. We use this one more than any other bookmarklet in our day-to-day Web browsing. Once again, we remind you that the bookmarklet just changes the look of the page in your browser, not the page itself. In fact, if you reload the page, it reappears in its original, hard-to-read glory. But with this bookmarklet, visual relief is just a button click away.
To change a page’s styles
1. javascript:(function(){
We’re changing things up here again a little bit: now, instead of using void() to return a null value to the browser, we’re instead putting the entire bookmarklet itself into an anonymous function.
2. var nuStyle=document.createElement('link'),
This line creates a new link element on the page and then stores that element in the new variable nuStyle.
3. nuStyle.rel='stylesheet';
This line creates a new rel attribute for the newly created link and then sets its value to 'stylesheet'. Here, the rel attribute tells the browser that we’re linking to a style sheet.
4. nuStyle.href='data:text/css,* {background:#FFF !important; color:#000 !important;} :link, :link * {color:#00F !important;} :visited, :visited * {color:#93C !important;}';
This line adds a new href attribute to the newly created link element and sets the styles that we want to add to the page: the background will be white, the text color black, the links blue, and visited links purple. The !important forces these styles to override all other styles, and the * says that these new styles apply to all elements on the page.
5. document.documentElement.childNodes[0].appendChild(nuStyle);
This line inserts the new link element into the Web page, causing the new styles to take effect and make the page readable.
6. })();
Here we end the anonymous function we started up above (the }) and then end the function wrapper (the )). The () next just says, “You know that function you just created? Run it now.”—which the browser then does.
Does that seem like a lot of trouble to go to just to avoid the void()? Here’s why it’s particularly useful: JavaScript sees bookmarklets as running inside the current page you’re on, and with the old way, there’s no way to be sure that the variables you’re using in the bookmarklet aren’t already in use by the page itself. When you wrap the entire bookmarklet inside a function, the variables stay within the scope (covered back in Chapter 2) of the function, and you’re guaranteed to be safe.
As mentioned in this chapter’s introduction, a bookmarklet must be a single line of code. Putting the semicolons between statements allows you to put all the commands on a single line.
Word Lookups
If you use your Web browser for writing (email in particular), you’ll find that you wish you had the dictionary and thesaurus tools that are available in most word processors. With Listings 17.4, 17.5, and 17.6, you’ll be able to have this functionality in all your writing. You do it using a bookmarklet to query an online dictionary or thesaurus. Because the scripts are so similar, we’ve presented them all in one task. Listing 17.4 shows how to do a dictionary lookup in Safari and Firefox, Listing 17.5 does a dictionary lookup in IE, and Listing 17.6 shows how to do a thesaurus lookup in Safari and Firefox. Because the code is virtually identical to Listing 17.5, we’ve omitted a script to do a thesaurus lookup in IE, trusting you’ll be able to figure it out.
To look up a word
1. var inText=window.getSelection ()+'';
or
inText=document.selection.createRange().text;
Our code will use one of the above two lines. The latter works in IE, the former in Safari and Firefox. This line creates a new variable, inText, which is set to the value of the selected text in the browser.
Note that in the first line, that very last bit is two single quotes, not one double-quote. That’s done because both Safari and Firefox may return something that isn’t a string, and this forces the result to be a string.
Listing 17.4. This bookmarklet performs a dictionary lookup in Safari and Firefox.
javascript:(function(){var inText=window.getSelection()+'';if(!inText){inText=prompt('Word:',''),}if(inText){window.open('http://www.answers.com/'+escape(inText)+'#Dictionary','dictWin', 'width=650,height=600,left=75, top=175,scrollbars=yes'),}})();
Listing 17.5. This script does a dictionary lookup in Internet Explorer.
javascript:(function(){inText=document.selection.createRange().text;if(!inText){inText=prompt('Word:',''),}if(inText){window.open('http://www.answers.com/'+escape(inText)+'#Dictionary','dictWin', 'width=650,height=600,left=75,top=175,scrollbars=yes'),}})();
Listing 17.6. This bookmarklet performs a thesaurus lookup in Safari and Firefox.
javascript:(function(){var inText=window.getSelection()+'';if(!inText){inText=prompt('Word:',''),}if(inText){window.open('http://www.answers.com/'+escape(inText)+'#Rogets_Thesaurus_d','thesWin', 'width=650,height=600,left=75,top=175,scrollbars=yes'),}})();
2. if(!inText){inText=prompt ('Word:',''),}
If we didn’t select any text, then we ask for a word to be entered.
3. if(inText){
The user has had two chances, so they should have entered something to look up by now. Even so, we check before doing the lookup.
4. window.open('http://www.answers.com/'+escape(inText)+'#Dictionary','dictWin', 'width=650,height=600,left=75,top=175,scrollbars=yes'),}
or
window.open('http://www.answers.com/'+escape(inText)+'#Rogets_Thesaurus_d,'thesWin', 'width=650,height=600,left=75,top=175,scrollbars=yes'),}
We pick one of these two, depending on whether we want to do a dictionary or thesaurus lookup, as shown in ![]() and
and ![]() . Either opens a new window, with the information that we requested. You can change the window dimensions to fit the size of your screen by changing the
. Either opens a new window, with the information that we requested. You can change the window dimensions to fit the size of your screen by changing the height and width attributes of the window.open() call.
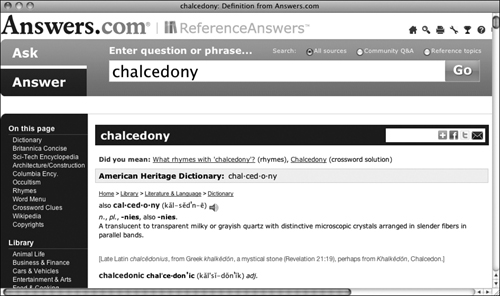
![]() Triggering the dictionary bookmarklet returns this window with the lookup’s results.
Triggering the dictionary bookmarklet returns this window with the lookup’s results.
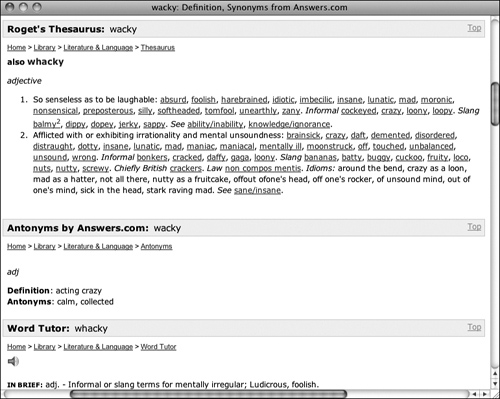
![]() The thesaurus lookup results.
The thesaurus lookup results.
This has nothing to do with JavaScript, but it’s cool and worth mentioning: if you’re on a Mac running Mac OS X 10.4 or later, in Safari or many other programs, you can just place the cursor over a word and press Cmd-Ctrl-D, and the OS pops up a dictionary/thesaurus window, based on the Dictionary application ![]() . This works in any Cocoa-based program (great), so if you use Firefox on the Mac, it doesn’t work (bummer). If you don’t know what a “Cocoa-based program” is, don’t worry about it; just give it a try and see if it works for the program you’re in.
. This works in any Cocoa-based program (great), so if you use Firefox on the Mac, it doesn’t work (bummer). If you don’t know what a “Cocoa-based program” is, don’t worry about it; just give it a try and see if it works for the program you’re in.
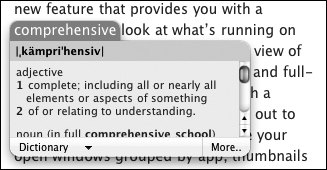
![]() Under Mac OS X, a dictionary and thesaurus are built in.
Under Mac OS X, a dictionary and thesaurus are built in.
Listing 17.7. You can view a table of page images with this script.
javascript:(function(){var iWin,i,t='',di=document.images;for(i=0;i<di.length;i++){if(t.indexOf(di[i].src)<0){t+='<tr><td><img src='+di[i].src+'/></td><td>'+di[i].height+'</td><td>'+di[i].width+'</td><td>'+di[i].src+'</td></tr>';}}if(t==''){alert('No images!'),}else{iWin=window.open('','IW', 'width=800,height=600,scrollbars=yes'),iWin.document.body.innerHTML='<table border=1 cellpadding=10 cellspacing=0><tr><th>Image</th><th>Height</th><th>Width</th><th>URL</th></tr>'+t+'</table>';}})();
Viewing Images
A useful tool for designers is the ability to view all the images on a page, apart from the layout of the page. Listing 17.7 allows you to peek behind the scenes of someone else’s page and see a list of the page’s individual images, the height and width of the images (in modern browsers), and their URLs.
To view images
1. var iWin,i,t='',di=document.images;
The bookmarklet starts and initializes four variables: iWin; i; t, which will later contain all the output; and di, which contains the document.images object.
2. for (i=0;i<di.length;i++){
We now loop through each image in the document.
3. if(t.indexOf(di[i].src)<0){
In this step, we check to see if we’ve already put the image on the page. This line of code keeps that from happening more than once.
4. t+='<tr><td><img src='+di[i].src+'/></td><td>'+di[i].height+'</td><td>'+di[i].width+'</td><td>'+di[i].src+'</td></tr>';}}
All the information we want is written out here, in a nice table format. The first cell contains the image; the second contains the height; the third, the width; and the last contains the URL of the image.
5. if(t==''){alert('No images!'),}
When the loop completes, check to see if we’ve found any images. If not, an alert window that says “No images!” is displayed.
6. else{iWin=window.open('','IW', 'width=800,height=600, scrollbars=yes'),
If we found images, open up a new window for the image information.
7. iWin.document.body.innerHTML='<table border=1 cellpadding=10 cellspacing=0><tr><th>Image</th><th>Height</th><th>Width</th><th>URL</th></tr>'+t+'</table>';}
Here is where the new window is created and displayed. The image information, with heading information for each column, is written out, as shown in ![]() .
.
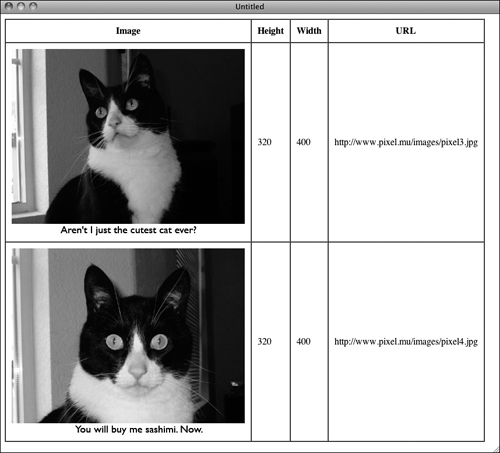
![]() The script formats the images and information into an attractive table.
The script formats the images and information into an attractive table.
Listing 17.8. Rather than look up an accented character in a book, let JavaScript generate a list whenever you need one.
javascript:(function(){var eWin,n,i,j,w,t='<table border=1 cellpadding=20 cellspacing=0>',l=document.createElement('p'),v='aAeEiIoOuUyY',s=new Array('acute','circ','elig','Elig','grave','ring','slash','tilde','uml'),for(i=0;i<v.length;i++){for(j=0;j<s.length;j++){w=v.charAt(i)+s[j]+';';l.innerHTML='&'+w;n=l.innerHTML;if(n.length==1){t+='<tr><td>&'+w+'</td><td>&'+'amp;'+w+'</td><td>&'+'amp;#'+n.charCodeAt(0)+';</td></tr>';}}}eWin=window.open('','EW','scrollbars=yes, width=300,height='+screen.height);eWin.document.body.innerHTML=t+'</table>';})();
Displaying ISO Latin Characters
If you’re authoring Web pages by hand, it can be a hassle to remember codes for different characters like à and á. Listing 17.8 shows you a list of common variations of the vowels.
To display ISO Latin characters
1. var eWin,n,i,j,w,t='<table border=1 cellpadding=20 cellspacing=0>',l=document.createElement('p'),
Start off the bookmarklet by initializing several variables.
2. v='aAeEiIoOuUyY',
Initialize a string, v, which contains all the vowels.
3. s=new Array('acute','circ','elig','Elig','grave','ring','slash','tilde','uml'),
Here’s an array, s, which contains all the diacritical character codes.
4. for(i=0;i<v.length;i++){
This line sets up i to loop through the characters in the v string.
5. for(j=0;j<s.length;j++){
And this line sets up j to loop through the s array.
6. w=v.charAt(i)+s[j]+';';
In this line, we set up the variable w to be the vowel concatenated with the code, followed by a semicolon.
7. l.innerHTML='&'+w;n=l.innerHTML;
For an upcoming step, we’ll need not the string representation of the entity, but the entity itself—that is, we want ã, not ã. We can get that by taking our string w (set in the previous step) and putting it (with a leading ampersand) into the innerHTML of an already created element, l. That converts it from the string value to its displayed value. In order to use that value, we set the variable n to the contents of that same innerHTML.
8. if(n.length==1)
In order to get every possible entity, our lists of vowels and diacritical characters have a few that don’t combine to make up a valid result. We know when that’s the case because the previous conversion step won’t actually convert our string. That is, while æ converts to æ and Á to Á, &Aelig; (while it looks like it should be Æ) isn’t—and so, the previous step leaves it as a seven-character string. Valid entities, though, will end up as one-character strings, and will do the next bit of code.
9. {t+='<tr><td>&'+w+'</td><td>&'+'amp;'+w+'</td><td>&'+'amp;#'+n.charCodeAt(0)+';</td></tr>';}
We’ve got a valid entity here, and so we want to put it into our table. In the first column we want the entity itself, the second its string representation, and in the third, its numeric representation. We get that last value by using the charCodeAt() method on our entity.
10. eWin=window.open('','EW','scrollbars=yes,width=300, height='+screen.height);eWin.document.body.innerHTML=t+'</table>';
When we’re done, we open a new window and then write our table into it, as shown in ![]() .
.
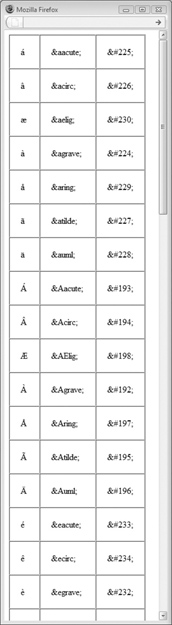
![]() The result of the script is a new window with all the possible variants of the vowels as HTML entities.
The result of the script is a new window with all the possible variants of the vowels as HTML entities.
Our table can be lengthy, so we’ve been a little tricky with the height of the window we’re opening. Instead of giving it a fixed height, it’s instead set based on the height of the user’s display. If that’s not what you want, you can set it to a fixed size instead.
If you’re now wondering how to get an Æ in HTML, it’s Æ—that is, it needs an uppercase E, not a lowercase e. Now you can see why we find bookmarklets like this so handy!
Converting RGB Values to Hex
Another useful little widget Web developers frequently wish they had on hand is an RGB-to-hexadecimal converter. This is useful whenever you need to translate a color value from a graphics program like Adobe Photoshop or Fireworks into a browser color, for page backgrounds or text colors. Listing 17.9 shows the conversion calculator done in JavaScript and turned into a bookmarklet.
Listing 17.9. This script takes RGB color values and turns them into their hexadecimal equivalents.
javascript:(function(){var s,i,n,h='#',x='0123456789ABCDEF',c=prompt('R,G,B:',''),if(c){s=c.split(','),for(i=0;i<3;i++){n=parseInt(s[i]);h+=x.charAt(n>>4)+x.charAt(n&15);}prompt('Hexcolor:',h);}})();
To convert RGB values to hexadecimal
1. var s,i,n,h='#',
Start off the bookmarklet by initializing four variables.
2. x='0123456789ABCDEF',
The variable x is set to the valid hexadecimal digits.
3. c=prompt('R,G,B:',''),
This line prompts the user for the requested RGB values, separated by commas, as shown in ![]() .
.
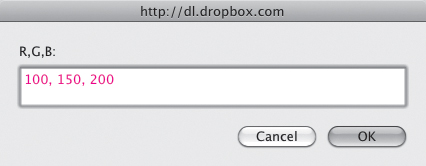
![]() The first part of the script prompts the user for the RGB values.
The first part of the script prompts the user for the RGB values.
If the user entered anything, continue with the code. Otherwise, the value of c will be null, and the bookmarklet skips all the following steps.
5. s=c.split(','),
Split the entry in c, separated by commas, and put the result into the s array.
6. for(i=0;i<3;i++){
Loop around the following lines once for each of the three red, green, and blue color values.
7. n=parseInt(s[i]);
Turn the current element of s into a number, and save it as n.
8. h+=x.charAt(n>>4)+x.charAt(n&15);
This line converts n into 2 hexadecimal digits and adds the result to h.
9. prompt('Hexcolor:',h);
The result (ready to be copied into an HTML page) is displayed via a prompt command, as shown in ![]() . It’s done this way instead of with an alert, so that we can copy the code and paste it later.
. It’s done this way instead of with an alert, so that we can copy the code and paste it later.
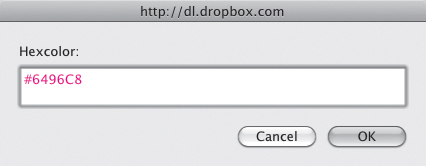
![]() Another prompt box provides the calculated hex value.
Another prompt box provides the calculated hex value.
Converting Values
The possibilities are endless for the types of values that can be converted from one form to another. Listing 17.10 shows just one example: how to convert kilometers to miles.
Listing 17.10. You can create bookmarklets for almost any kind of unit conversion. This script converts kilometers to miles.
javascript:(function(){var t,expr=prompt('Length in kilometers:',''),if(isNaN(parseFloat(expr))){t=expr+' is not a number';}else{t='Length in miles is '+ Math.round(expr*6214)/10000;}alert(t);})();
To convert kilometers to miles
1. var t,expr=prompt('Length in kilometers:',''),
The bookmarklet starts by prompting the user for a length in kilometers ![]() .
.
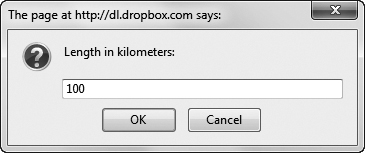
![]() First, ask for the number to be converted.
First, ask for the number to be converted.
2. if(isNaN(parseFloat(expr)))
Check to see if the user entered a numeric value.
3. {t=expr+' is not a number';}
If not, set t to be an error message.
4. else{t='Length in miles is '+Math.round(expr*6214)/10000;}
Otherwise, convert the value to miles and store it in t.
5. alert(t);
Whether the input value is good or bad, we’ve stored the result in t. Here we display that result, as shown in ![]() .
.
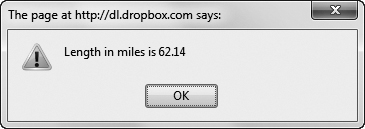
![]() JavaScript returns the result of the conversion.
JavaScript returns the result of the conversion.
It’s a straightforward process to adapt this script into any kind of conversion you need. Just change the label in step 1, and replace the math expression in step 4 to the correct expression for the particular conversion you’re looking for.
You can make up a bunch of bookmarklets with different conversions and then organize them all into folders in your Bookmarks or Favorites menu. Conversions can be just a mouse click away.
Listing 17.11. Surprisingly complex equations can be evaluated with this bookmarklet.
javascript:(function(){var evl,expr=prompt('Formula...(eg: 2*3 + 7/8)',''),with(Math)try{evl=parseFloat(eval(expr));if(isNaN(evl)){throw Error('Not a number!'),}prompt('Result of '+expr+':',evl);}catch(evl){alert(evl);}})();
A Bookmarklet Calculator
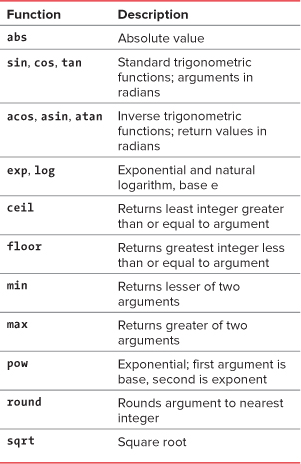
If you think about it, it’s really a bit too difficult to do a full-fledged calculator with buttons and a running value on just one long line of code. However, you can use a bookmarklet like Listing 17.11 to do fairly complex calculations, using JavaScript’s built-in Math functions, as described in Table 17.1.
Table 17.1. JavaScript’s Math Functionality
To use a JavaScript calculator
1. var evl,expr=prompt('Formula... (eg: 2*3 + 7/8)',''),
This line sets up a variable evl and then prompts the user for an expression or formula, as shown in ![]() , which is stored in
, which is stored in expr.
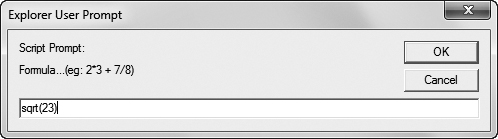
![]() The user must be prompted for a formula.
The user must be prompted for a formula.
2. with(Math)try{
The next few lines need to be evaluated using JavaScript’s built-in Math routines. The with(Math) part tells the interpreter that when any of these functions are seen, to evaluate them as Math commands.
The try{} warns JavaScript that what we’re doing may well fail, and if so, don’t panic. In fact, don’t even put up an error message if there’s a problem, as we’ll be handling the errors ourselves.
3. evl=parseFloat(eval(expr));
Evaluate the expression, and turn it into a floating-point number, which is then stored in evl.
If the resulting value in evl is not a number (NaN), do the following line.
5. {throw Error('Not a number!'),}
If we’re here, for some reason what the user entered didn’t work out to a number. When that happens we want to force an error message of “Not a number!” to display. Here’s where the message is set; it will be displayed in step 7.
6. prompt('Result of '+expr+':',evl);
Otherwise, the expression was valid, so display the result, as shown in ![]() .
.
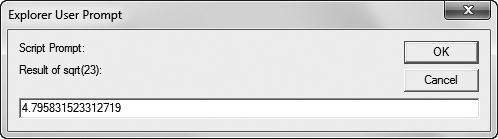
![]() JavaScript returns the result of the calculation.
JavaScript returns the result of the calculation.
7. }catch(evl){alert(evl);}
Here’s the end of that try{} block that started in step 2. To get here, one of two things happened: either we ran into the error in step 5, or some other error entirely occurred. Either way, we “catch” the error that was “thrown” and put it up on the screen in an alert.
Trying to remember where you’ve seen that try/throw/catch syntax before? It was originally covered back in the “Handling Errors” section of Chapter 2.
Listing 17.12. Shorten those URLs with a single click of a mouse (and this script).
javascript:(function(){window.open('http://tinyurl.com/create.php?url='+location.href,'','width=750,height=500,scrollbars=yes'),})();
Shortening URLs
There are a number of reasons why you might want a shorter version of a URL than the one of the page that you’re currently on—maybe you’re using a Twitter-like service with a short number of characters allowed, or maybe you’re going to paste the result into an email and you don’t want it to wrap. Either way, Listing 17.12 makes it simple.
To shorten URLs
• window.open('http://tinyurl.com/create.php?url='+location.href,'','width=750,height=500,scrollbars=yes'),
Here we’re opening a new window and using the TinyURL.com service to set our short URL. We pass it our current page location (found in location.href) and that’s all the information it needs. Because TinyURL.com immediately puts the new, shortened URL onto your clipboard for you, all you have to do (once you’re on the right Web page) is click the bookmarklet, glance at the page that opens to make sure everything worked as it should ![]() , close it, and paste your new location wherever you want.
, close it, and paste your new location wherever you want.
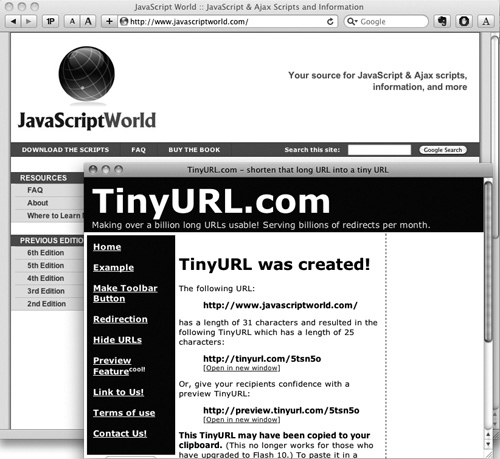
![]() There are a number of uses for shorter versions of URLs, and the bookmarklet makes it simple to get that short URL.
There are a number of uses for shorter versions of URLs, and the bookmarklet makes it simple to get that short URL.
There are a number of different URL-shortening services online. If you don’t like TinyURL.com, check out bit.ly, goo.gl, or is.gd.
Validating Pages
When creating your pages, it’s a great idea to make sure that you’re making sites that adhere to Web standards; such pages load more quickly in modern browsers and are easier to maintain. The easiest way to check a page that you’re working on for valid code is by running it against the page validator maintained by the World Wide Web Consortium (W3C), at http://validator.w3.org. This bookmarklet, Listing 17.13, checks the page currently shown in your browser for validity. It does this by taking the URL of the current page, passing it to the validator, and then opening a new window with the validator’s results, as shown in ![]() .
.
Listing 17.13. Use this script to make sure your pages contain Web-standard, valid markup.
javascript:(function(){window.open('http://validator.w3.org/check?uri='+location.href,'','width=800,height=900,resizable=yes,scrollbars=yes'),})();
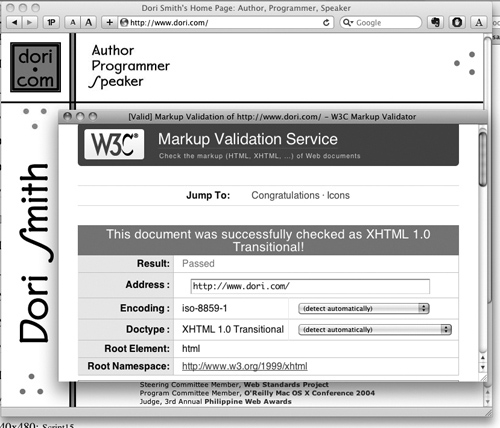
![]() Running your page against the W3C validator returns this happy result, if you’ve written your page correctly.
Running your page against the W3C validator returns this happy result, if you’ve written your page correctly.
To validate your pages
• window.open('http://validator.w3.org/check?uri='+window.location.href,'','width=800,height=900,resizable=yes,scrollbars=yes'),
This one, useful as it is, isn’t exactly rocket science. First, we open a window and pass that window the URL to the validator. You’ll note the validator has a parameter, uri, which accepts the URL of the current page, which we pass as location.href. The plus sign between the two concatenates the location object to the validator’s URL. The rest of the line is just parameters for the window’s size and other attributes.
Listing 17.14. If you want to mail all or part of a Web page to someone, you can’t make it much simpler than using this bookmarklet.
javascript:(function(){location.href='mailto:?SUBJECT='+document.title+'&BODY='+escape(location.href)+' '+window.getSelection();})();
Mailing Pages
Sometimes you’ll be surfing along, and you’ll find a page that’s so useful you need to share it with your co-workers, or maybe it’s so funny you need to share it with your best friend. This bookmarklet, Listing 17.14, takes the page you’re on, plus any highlighted text, and uses it to create a new outgoing email
To mail a Web page
• location.href='mailto:?SUBJECT='+document.title+'&BODY='+escape(location.href)+'
'+window.getSelection();
If you’ve ever put a mailto link on a Web page, you should recognize this syntax. All this does is act just as if you’ve clicked on a <a href='mailto:'></a> link. The subject of the email is set to the title of the current document, and the body of the email is set to the URL of the page plus any text you have currently selected, as seen in ![]() .
.

![]() One click opens a new window, with the start of your mail already begun.
One click opens a new window, with the start of your mail already begun.
Because we’re using window.getSelection() here, this bookmarklet won’t work “as is” in IE. You’ll need to modify it in ways similar to the changes in “Word Lookups,” earlier in this chapter.
No, you don’t have to be using Gmail, or even Web mail, for this to work. Whatever mail client you’ve set up as the default on your computer is what will open and create the mail.
Resizing Pages
When you’re working on a site, it’s useful to be able to see how a page looks with a smaller display than the one you’re using. This bookmarklet, Listing 17.15, resets your browser window to 640×480.
Listing 17.15. If you want to see how your page looks at a different size, bookmarklets like this one come in handy.
javascript:(function(){resizeTo(640,480); moveTo(0,0);})();
To resize your page
• resizeTo(640,480);moveTo(0,0);
The first command, resizeTo(), changes the dimensions of your browser window. The next, moveTo(), tells the browser where to put the top-left corner ![]() .
.
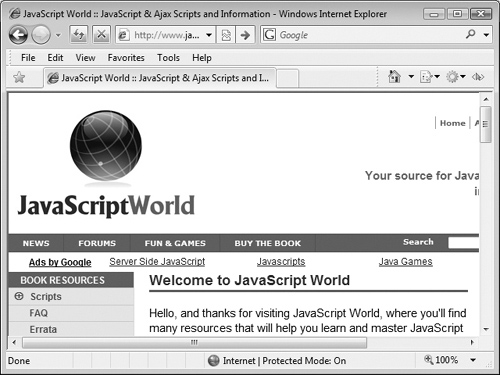
![]() We can see at a glance that the small screen version of this site doesn’t show much of the content.
We can see at a glance that the small screen version of this site doesn’t show much of the content.
By itself, this bookmarklet is only moderately useful. Where it shines is when you create a folder full of almost identical versions of this, with all the various sizes that you could want. As you can see, it’s straightforward to duplicate this for any size window.
It’s also useful (if your display is large enough) to be able to open windows side by side with identical dimensions. For instance, you can have one bookmarklet that resizes your window to be 700px wide by the max height of your display:
resizeTo(700,screen.availHeight); moveTo(0,0);
And also this one:
resizeTo(700,screen.availHeight); moveTo(screen.availWidth-700,0);
The latter resizes a page to the same 700px wide by the max height of your display, but positions the window such that it’s against the right edge of your screen versus the left. If your display is 1400 pixels or more, you should see them perfectly aligned without overlapping, each flush against one side.