Objects, including clip art, WordArt, pictures, and shapes that you draw on your slides, can all be formatted in several ways. You can fill an object with color or a pattern, change the outline of the shape by modifying the line style and thickness, and apply a wide variety of effects such as softening the edges or applying a 3-D rotation effect. Together these formatting options let you customize an object to make it appear just the way you want it to.
Apply a Fill Color or Effect
Select a shape, text box, or WordArt object.
Click the Drawing Tools, Format tab.
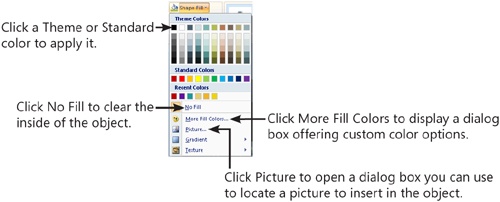
Click the Shape Fill button.
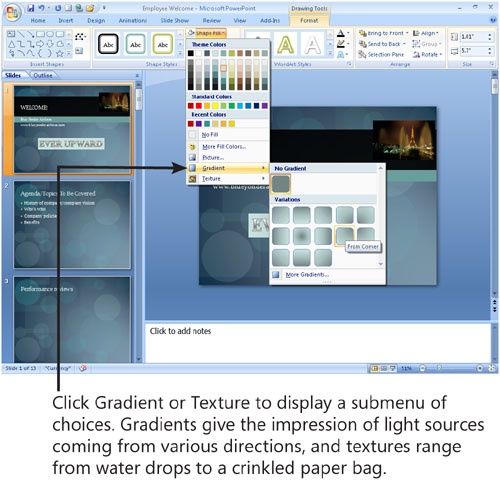
Use the Shape Fill gallery to make the changes you want to the selected object.
Try This!
The Fill gallery uses the new Live Preview feature. When you pass your mouse cursor over a Theme or Standard color, or over a Gradient or Texture option, it previews on the object on your slide.
Tip
You cannot add fill to clip art or a picture object because their "fill" is the image they contain. However, you can change their shape or border, or add effects such as 3-D. See those tasks elsewhere in this section to learn how to do this.
Change the Shape Outline
Click an object to select it.
Click the Format tab.
Click the Picture Border or Shape Outline button (depending on whether you’ve selected a picture or other type of object).
Use the gallery to make the changes you want to the selected object.
Tip
The Arrow option on the Shape Outline or Picture Border palette is only available if you are working with a line object.
Click the Picture Effects or Shape Effects button (depending on whether you’ve selected a picture or other type of object).
Move your mouse over a category of effect and then click on an effect in the drop down gallery that appears.
PowerPoint applies the effect.
Repeat steps 3 and 4 to apply additional effects to the object.
Tip
You can apply more than one effect to an object. For example, you might choose to add a shadow, a reflection, and 3-D effect to one image. Just remember that you have to apply these effects one by one, using the steps outlined here.
Try This!
You can click the Format Shape dialog box launcher in the Shape Styles group to open the Format Shape dialog box. From here you can make all kinds of effect settings for the selected object from one place. When you are done applying effects, click Close, and they are all applied.