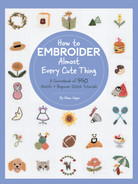
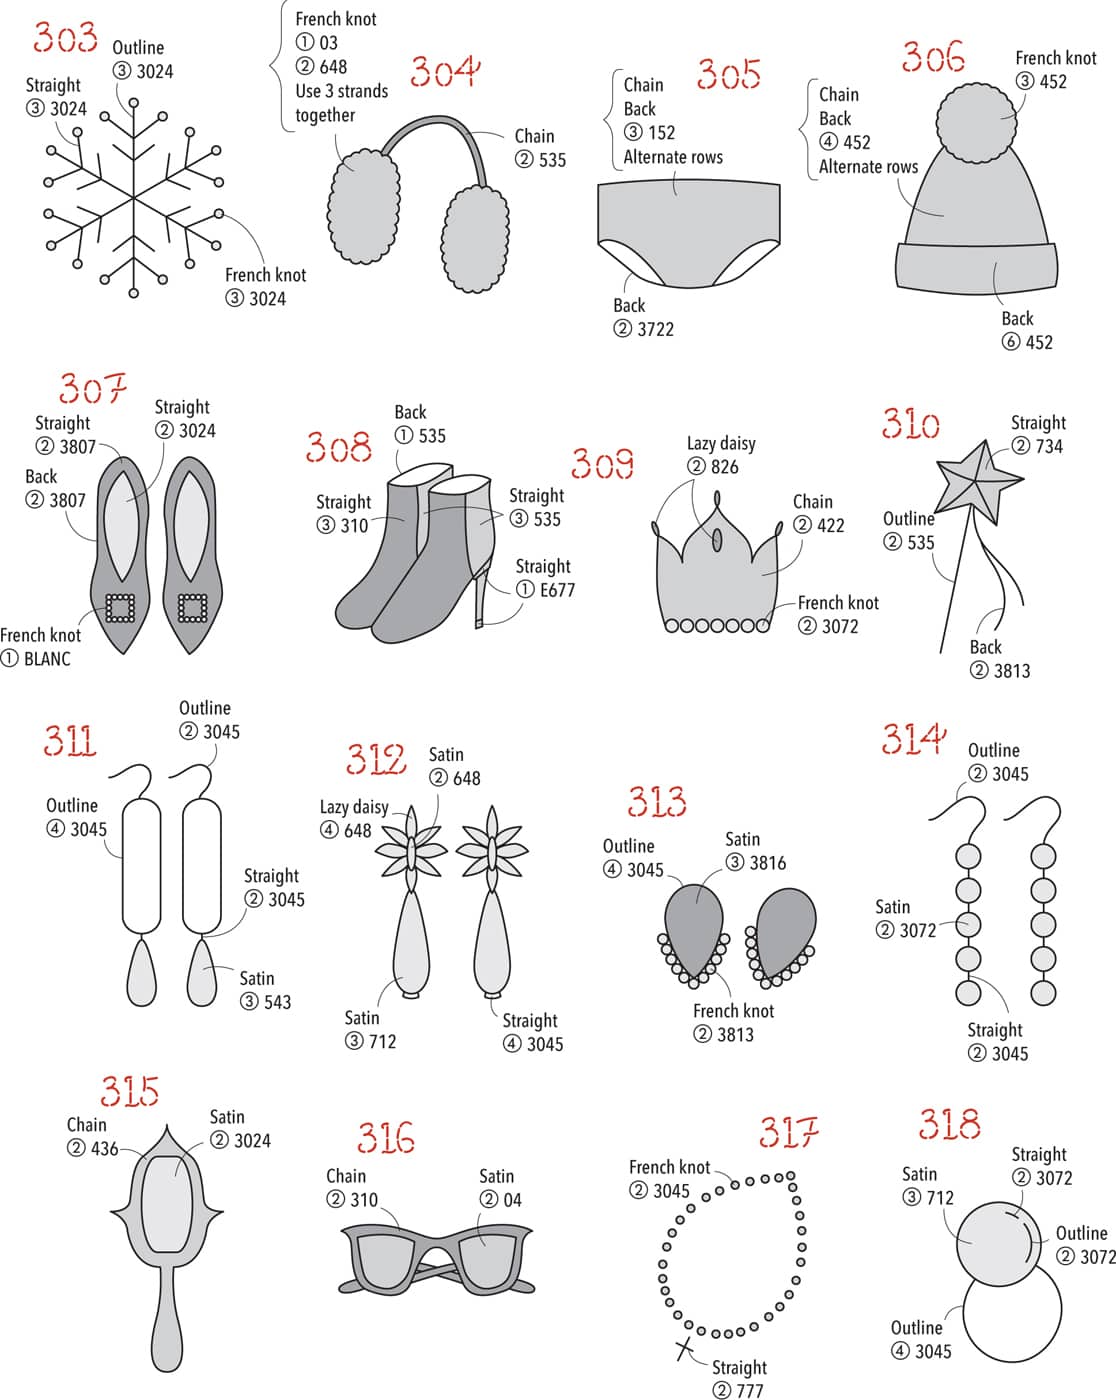
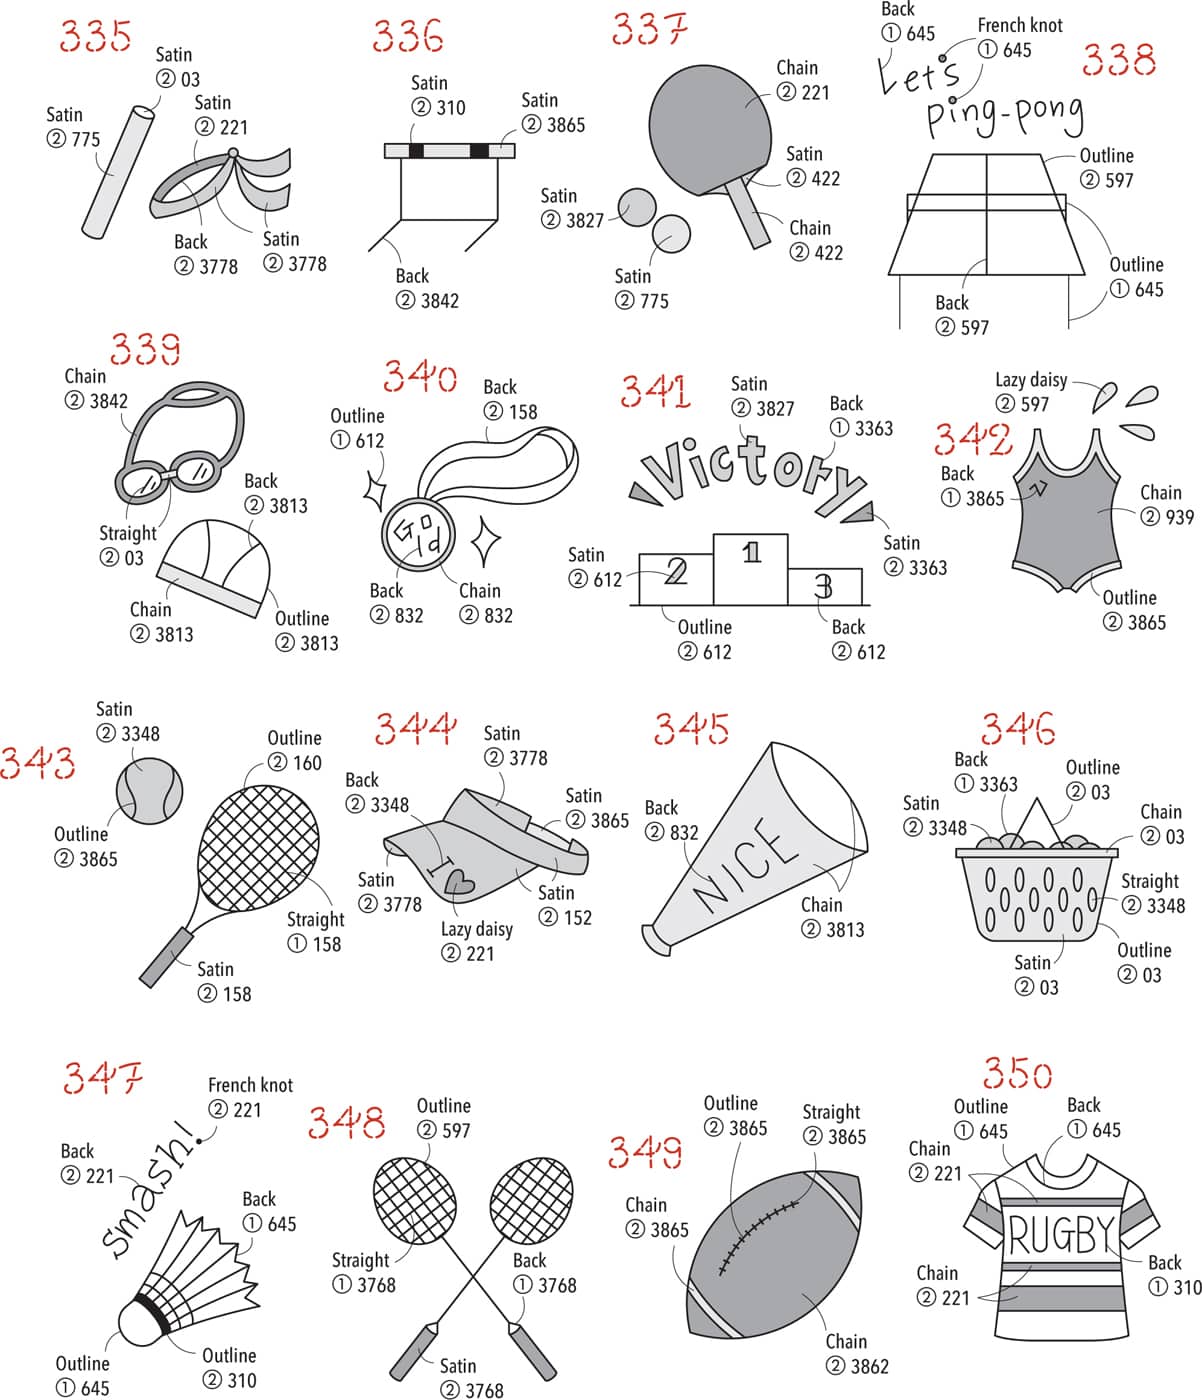
1. Draw the needle out from the wrong side of the fabric at . Make a straight line and insert the needle back into the fabric at . Draw the needle out again at to make the next stitch following the same process.
2. Follow this process to make short, straight stitches.
Straight stitch can also be used to fill an area with embroidery.
RUNNING STITCH
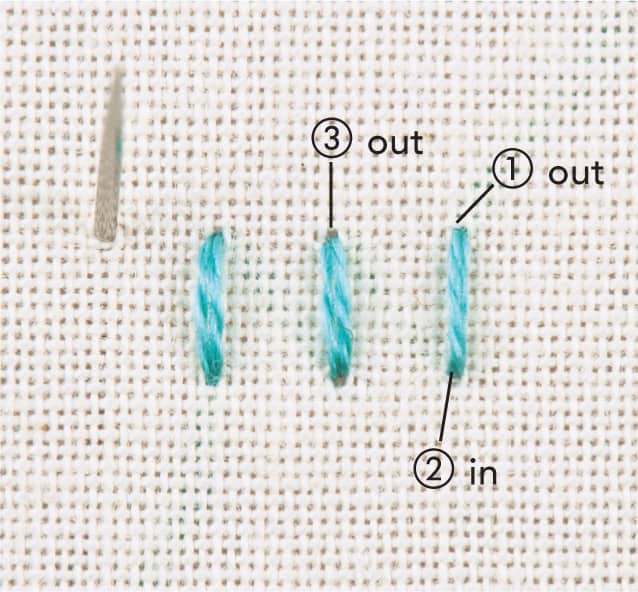
1. Draw the needle out from the wrong side of the fabric at . Insert the needle in and out of the fabric at regular intervals.
2. Pull to draw the thread through the fabric.
3. Repeat this process to make several stitches at once.
OUTLINE STITCH
1. Draw the needle out from the wrong side of the fabric at . Insert the needle back into the fabric at , which is two stitch lengths ahead of . Draw the needle out at , which is halfway between and .
2. Pull to draw the thread through the fabric.
3. Insert the needle back through the fabric at , which is two stitch lengths ahead of . Draw the needle out again at , which is the same hole as .
4. Pull to draw the thread through the fabric.
5. Repeat this process to continue stitching in a line, working from left to right.
Outline stitch can also be used to fill an area with embroidery.
BACKSTITCH
1. Draw the needle out from the wrong side of the fabric at , which is one stitch length ahead of the starting point of the design. Insert the needle back through the fabric at , which is the starting point. Draw it out again at , which is two stitch lengths ahead.
2. Pull to draw the thread through the fabric.
3. Insert the needle back through the fabric at , which is the same hole as . Draw the needle out again at , which is two stitch lengths ahead.
4. Pull to draw the thread through fabric.
5. Repeat this process to continue stitching in a line, working from right to left.
CHAIN STITCH
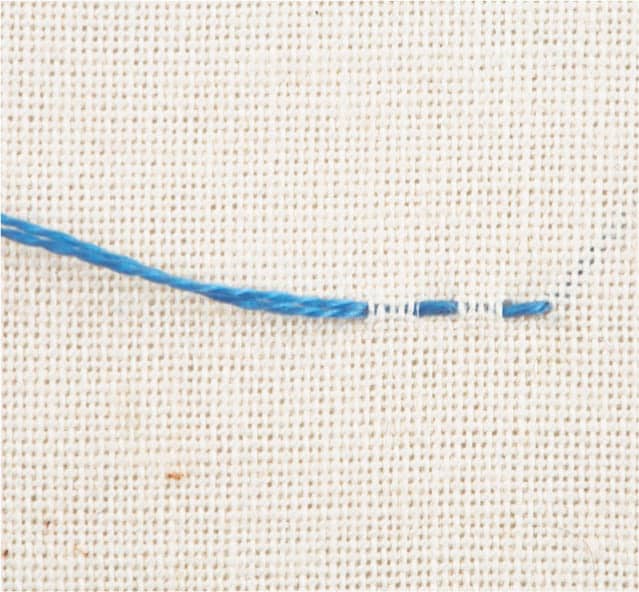
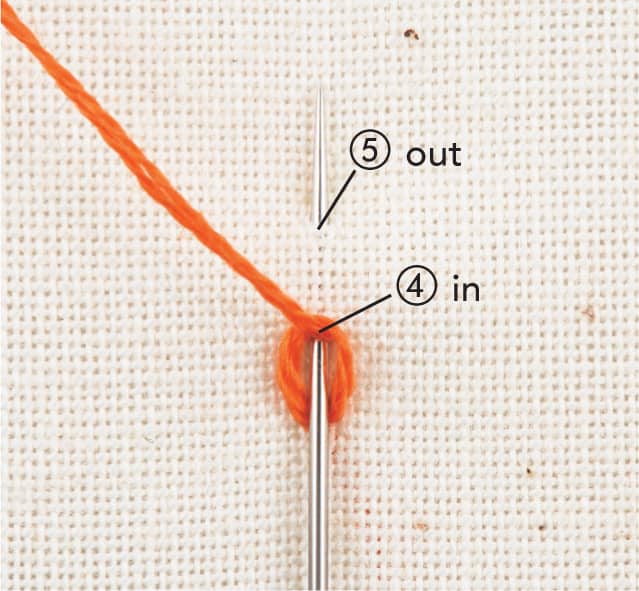
1. Draw the needle out from the wrong side of the fabric at . Insert the needle back through the same hole at , and then draw it out at .
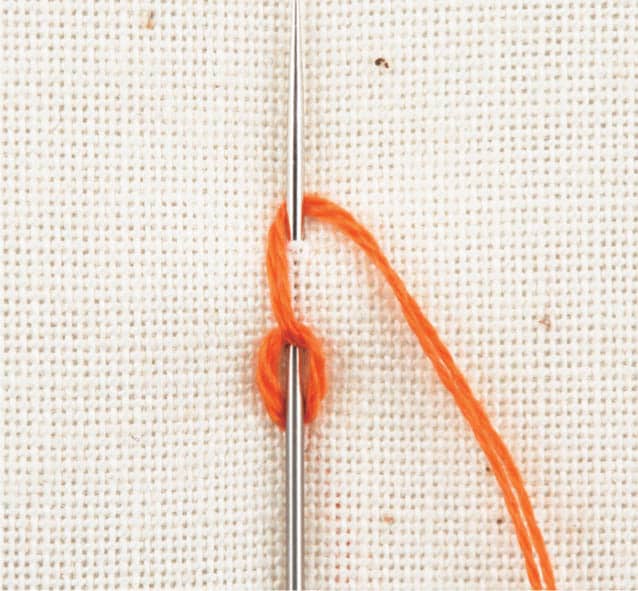
2. Wrap the embroidery floss around the needle.
3. Pull to draw the thread though the fabric, tightening the loop made by the stitches.
4. Insert the needle back through the fabric at , which is the same hole as . Draw the needle out again at .
5. Wrap the embroidery floss around the needle.
6. Pull to draw the thread though the fabric, tightening the loop. Repeat this process to make additional chain stitches.
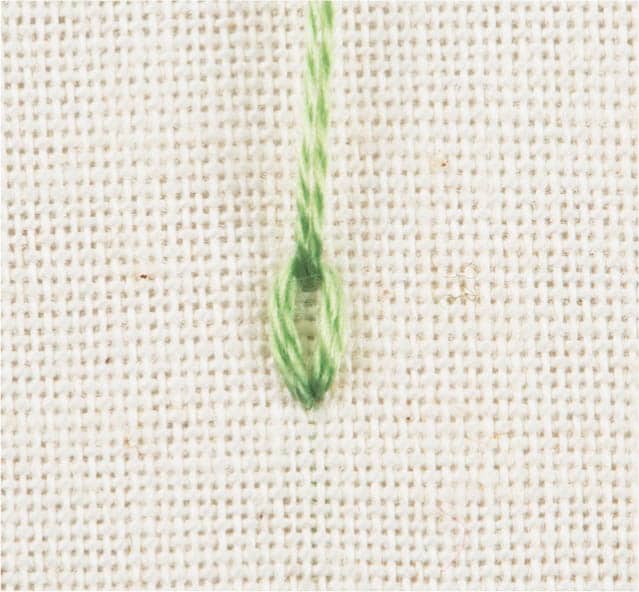
FRENCH KNOT (WRAP TWICE)
1. Draw the needle out from the wrong side of the fabric at . Wrap the embroidery floss around the needle twice (or as many times as noted in the individual instructions).
2. Insert the needle back through the fabric at , which is the same hole as , keeping the thread wrapped around the needle. Use your finger to help hold the wraps in place if necessary.
3. Pull the thread through the fabric, tightening the knot.
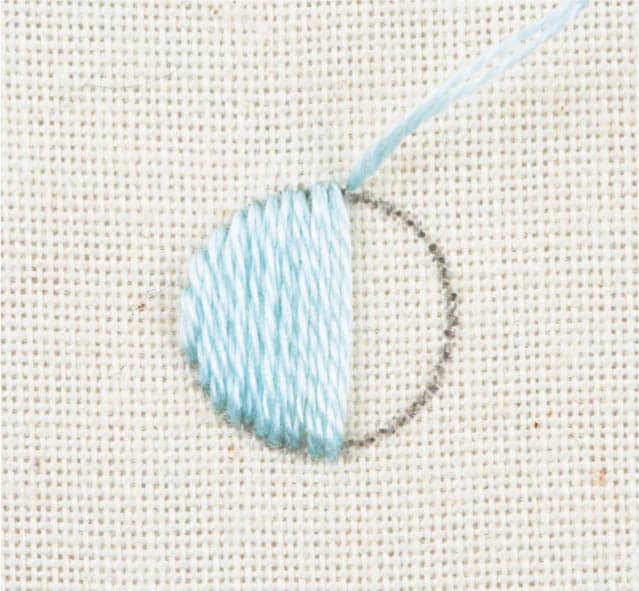
SATIN STITCH
1. Draw the needle out from the wrong side of the fabric at , which is positioned at the top center of the design. Insert the needle back through the fabric at , which is directly beneath .
2. Continue making long, straight stitches to fill the left half of the design. Make sure the stitches are parallel. After completing the left half of the design, return to the top center.
3. Follow the same process to stitch the right half of the design.
LAZY DAISY STITCH
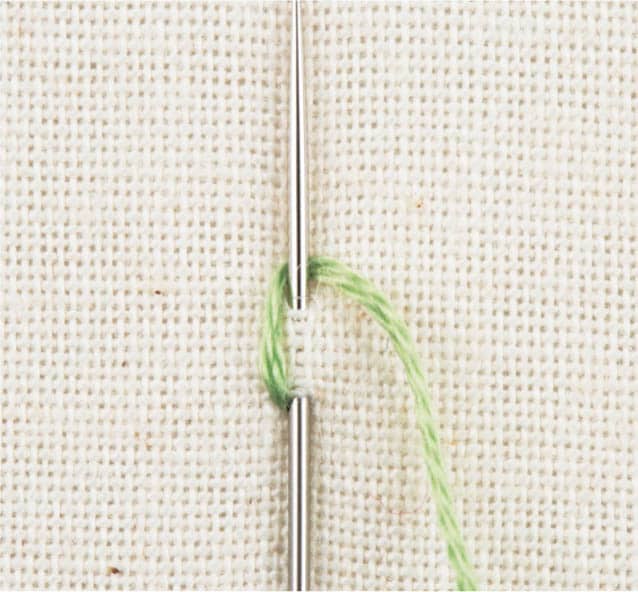
1. Draw the needle out from the wrong side of the fabric at . Insert the needle back into the fabric at , which is the same hole as , and then draw it out again at .
2. Wrap the thread around the needle.
3. Pull to draw the thread through the fabric, tightening the loop. This is the same process as making a chain stitch.
4. Insert the needle back through the fabric at , making a small straight stitch to secure the loop.