
Chapter 02
Stage 2 Concept Design
Stage 2
Concept Design


Chapter 02
Overview
This chapter looks at what Concept Design is, and how the design team makes progress towards it during Stage 2. It examines how the design process, using the Plan of Work, shapes the quality of a project and the information that supports it at the completion of the stage. It explores how Project Strategies can be used along with other Plan of Work tools to build an exemplary client service, and explains what outputs are expected from Stage 2.
Approaching the Concept Design
To many architects, Concept Design is ‘the exciting bit’ of the process of architecture. It might remind them of when they were students, thrashing around ideas with peers and tutors in order to pick up the essence of not only the practical outputs of the project in hand but also:
- Something of the ethos of the client.
- The cultural purpose of the building.
- The criteria that add to the ‘narrative’ of a designer’s portfolio.
To other members of the project team, the terminology surrounding Concept Design stage has historically been within the ownership of the architect member of the design team, even though their own disciplines use the term to mean something similar – namely, how their own contributions contribute to the emerging design principles.
Recent best practice and the collaborative methods of working promoted by the RIBA Plan of Work 2013 firmly move the activity behind the Concept Design stage into the ownership of the wider project team, and set it in the broader context of how the project will unfold across future stages. This chapter helps to set out how all project team members might expect to take part in and contribute to this stage.
In the setting of the design team, the Concept Design always ranks high in excitement due principally to the potential at this stage to come up with a successful design which exceeds expectations and create a reputation-enhancing project. This process can appear artistic, magical and often unforeseen by the client. It might seem that this is the almost exclusive territory of the architect, putting together a mixture of historical and cultural references about the built environment with imaginative, aesthetic and technical skill, creating ideas that carry more than the sum of their functional and imaginative parts.
Yet behind every Concept Design there has to be an organised and methodical examination of the facts and constraints; an incisive knowledge and inspection of the Initial Project Brief; and a strong, controlled sense of the essential components of any project – quality, time and cost. This level of investigation cannot be the exclusive preserve of one design team member. Indeed, steering a successful project through the early stages of development requires rigorous and complete input from each design team member in order to build confidence in concluding that stage with a strong robust design that has been tested by all. The lead designer should be appointed to steer the design team, ensuring that the developing design meets the Project Objectives by using various tools, including Project Strategies as set out during Stage 1 and reviewed during each Plan of Work stage. As a general rule, early and detailed considerations will pay dividends later in the process.
What is Stage 2 Concept Design?
Plan of Work Stage 2 is the point in a project at which the design team start to prepare a response to the Initial Project Brief from Stage 1. The design team will review the Project Objectives, Quality Objectives and Project Outcomes set up for the project during Stage 1, along with other prepared information. They use this information and work towards a Concept Design for the project for consideration by the client. The key characteristics of the Stage 2 Information Exchange are that the client will obtain a clear understanding of how the building will perform, what it will look like, when it can be delivered and how much it might cost. These factors are addressed in a series of Project Strategies, which consider the specific and detailed aspects of the project and set out what needs to be considered in further detail during Stage 3. Project Strategies are discussed in more detail later in this chapter, but first some questions arising within the Core Objectives task bar are considered.
 Project Team and Design Team
Throughout this guide, the terms ‘project team’ and ‘design team’ are used to identify specific groupings of people involved in project delivery. For clarity about what these terms cover, a definition is included here:
Project Team – includes the project lead, who may be the client, and any agent that they may appoint to act as manager or expert in their interests with regard to the project, financial or funding advice, legal advice and the design team.
Design Team – includes the lead designer who is typically the architect but who may also come from one of the following disciplines: building services engineer, structural engineer or cost consultant. Depending on the complexity of the project, the design team may also include additional specialist consultants including: a conservation architect, planning consultant, ecologist, acoustician, fire engineer, facade engineer, or transportation and highways engineer.
What Does the Client Know?
There are many instances in which the client and design team will have previous experience working with each other, and this might inform how they choose to reach the beginning of Stage 2. In many other situations, the architect and other members of the project team will be meeting and discussing ideas for the first time. In these cases, an understanding of how much the client knows about the process and ensuring that the client understands what to expect from the design team and when is vitally important.
Further discussion on the range of client types can be referred to in the Handbook of Practice Management (9th edition) from RIBA Publishing.
During the early part of Stage 2, managing client expectations might utilise the following prompts:
- Use the Stage 1 Information Exchange to set up design parameters relevant to Stage 2.
- Be realistic from the beginning of the stage about what the project is going to deliver by the end of it, given what is known about the brief, budget and programme.
- Illustrate what the client can expect from their project by reference to precedent projects of similar scale, type and cost.
- Use the above parameters to set creative targets for the design team during Stage 2.
It will be of significant benefit to the project for the whole project team to have the opportunity to gain a good understanding of the Initial Project Brief. Points worth considering in order to achieve this are:
- Develop commonly held Project Objectives early on in order to provide clarity of purpose.
- Acknowledge the role of all project and design team members in providing information for the Concept Design stage.
- Review the post-occupancy criteria set up in Stage 1 early in this design stage.
- Have a workable methodology for quickly checking cost and programme parameters as the Concept Design evolves.
- Work through a methodical and robust process towards Concept Design: this is enjoyable and rewarding, and can cement project team relationships for the whole project ahead.
How does the Project Fit Into: the design team’s practice?
Irrespective of the size, scope or complexity of the project, it is useful to be able to assess during this early stage what potential the project has, as a whole or in specific aspects. This contributes to the collective knowledge base of the practice as well as individual design team members – for example:
- Are there new processes that need to be carefully negotiated?
- Is there scope for the introduction of new construction techniques, new technologies or materials? What research is required in order to establish what these should be?
- Do any of these considerations form part of the Initial Project Brief?
- Has the Design Responsibility Matrix produced at Plan of Work Stage
- 1 Preparation and Brief earmarked areas of the building’s production information that individual design team members feel requires research during the early part of Stage 2?
The result of this enquiry may identify a particular research project that needs to be carried out in order to inform the Stage 2 process. It is important not to innovate for its own sake, but looking for opportunities to set up specific research projects, which may cross disciplines or be internal to architectural practice, helps to formalise a Research and Development strand to a practice – if this is not, in fact, already established. This is useful for improving the collective understanding of the practice and to develop a strand of work that could be productive in its own right. Expertise around published research can become a hallmark of quality, and of the rigour that a practice chooses to apply to the design process. This is rewarding for those involved, useful for both current and future clients, and excellent marketing by illustration of practice approach and methodology.
 Research and Development: Examples of Fields of Enquiry
Research is required when experience and knowledge fall short of the requirements of a project. Formalising research can result in practice-wide, as opposed to simply individual, knowledge growth – for example:
- Research into a building typology new to a practice, when an established client wants something different from their usual architect.
- Types of offsite construction and impacts on cost and programme.
- Colour psychology.
- Wall-to-floor ratios to promote efficient envelope design.
- Best practice in daylighting for work positions.
Another useful exercise to factor into the processes being undertaken at this stage is a consideration of risks. This should form the basis of the Stage 2 Risk Assessment. If appropriate to the project’s scope, a risk workshop involving all project team members might ask an iterative set of project questions, which could include:
- What risks lie within the project parameters themselves?
- Where, on the road ahead, are there obstacles or barriers to progress?
- If the above can be anticipated, how can they be avoided?
- What methodology can be employed to identify risks not yet foreseen?
- What lessons learnt from previous projects can be brought to bear on this one?
- What obstacle to a line of enquiry can be seen by one project team member but not by another?
Sharing the information being used to develop design ideas at this stage can avoid very significant problems later in the process. At this stage, there is time and good reason to adjust the concept direction in order to suit the collective knowledge of the project team; later on, there may be less time and little opportunity to properly address these issues, leading to a compromised design.
Where does design figure in the linear process towards a building?
It is no good any member of a project team, but particularly the design team, complaining about the lack of opportunity for design in the building and construction process. Every built project has a design component and, more often than not, design recurs throughout the initial, development and construction phases. How those moments are recognised, and who controls the series of decisions that are taken as a result of them, is critical to the role that design has in shaping and delivering a building. It is possible to influence design behaviour in the project team at this early stage by being clear and organised about how design decisions will be made and how coordination between design team members in accordance with the various Project Strategies is going to work. If the lead designer can generate acceptance of the fact that design is inherent in all decisions made within Stage 2, this will impact positively on the quality of the project being built and the user experience during occupation.

2.1 An illustration of a design concept.
What use are precedent projects for the type of project brief?
In responding to the Initial Project Brief at Stage 2, it is useful for the design team to assemble a series of precedent projects, or elements of projects, that illustrate previous building types: a so-called ‘precedent study’. For domestic clients, this is likely to be pictorial; for professional clients, it might also include operating data on energy consumption, maintenance costs, etc. The precedent study can also act as inspiration for the design team on how they will test and respond to the Initial Project Brief. If this is done across the project team and the collected examples used during the early stage meetings and workshop events, then it will promote design excellence and heighten the design team’s desire to produce a high-quality building.

2.2
A precedent sheet example.
 What Makes a Good Precedent Project?
A good precedent project helps in explaining to others involved in the design process where similar building types have been completed successfully. The success factor might be specific to part of the building or an element of operating data, but the precedent must clearly state what lessons are proposed to be learnt or avoided from illustrating it. The sort of overall project precedent illustrated might be:
- A building-type study with recommendations to visit, analyse the spatial plan or study the relationship of specific components of the brief.
- A demonstration of intended massing and response to a particular context.
- A façade-design treatment, including proportions of wall to openings.
- Sustainability credentials to act as a benchmark.
The sort of elemental precedent illustrated might be:
- Materials in use, explaining appearance and maintenance cycles, repairs and renewals.
- Doors, windows and wall openings.
- Glazing types for large sections of wall.
This process can be used to educate, illustrate and define ambition for the design process, determining the likes and dislikes of the client. It can also significantly inform the development of the Initial Project Brief into the Final Project Brief.
For community or group-based clients, a ‘field-study trip’ to look at similar building types, talk to peer clients and learn about their positive and negative observations of the process is of immense value. The trip provides plenty of informal time for the group to discuss the project, and how what they are seeing might affect how they want to tackle their own project. This exercise promotes a consensus on design-quality thresholds, how they will be discussed and set during the course of the Plan of Work design stages and how they can be evaluated at the end of the project.
Who Goes on the Field-Study Trip?
Field-study trips can quite easily appear to some like a luxury or a perk. They should be undertaken by the project team decision-makers in as small a group as feasible, and the itinerary should be full in order to ensure efficient use of the group’s time together and to reduce the likelihood of the trip being seen negatively. The planning and timetable for the trip ought to include the following:
- A comprehensive information pack for each member of the travelling group, to allow good preparation; this should include building plans and press cuttings where possible.
- Clear reasons for each building visit in the context of the group’s project, with clear research objectives to be answered.
- Built-in time for discussion with host clients, users and designers if possible.
- Built-in time for a discussion review of each visit within the group.
- A designated photographer, to ensure a good photographic record to illustrate the trip to others in the client/project team.
- A review workshop event after returning, at which observations/findings and recommendations can be fed back to the project team.
Precedents are also very useful as an organising tool for conceptual aspects of the design and the work of the project team. Representing an informal way of expressing different levels of experience, previous projects that have achieved high levels of satisfaction in use or due to some other factor might demonstrate:
- Award-winning prestige.
- Excellent sustainability performance.
- Use of Modern Methods of Construction (MMC).
- Successful use of particular materials.
Precedent studies can be included in the Stage 2 report, and invariably help to elucidate the Concept Design narrative in the Design and Access Statement at planning stage.
An Example of a Field-Study Trip: Dance City, Newcastle Upon Tyne
Supported by Arts Council England Lottery Funding, Dance City, an existing organisation based in Newcastle upon Tyne, had appointed Malcolm Fraser Architects (MFA) through a competitive interview process to design a new building in a prominent location in the city. Part of the briefing process comprised a discussion about precedent projects known to the team, and it was decided that the client, the Arts Council technical advisor and the principal and project architects from MFA should undertake a field-study trip in order to inform the Concept Design process. The buildings visited over a four-day period, along with their principal reason for inclusion, were:
- Dance Base, Edinburgh – the architect’s own award-winning precedent project.
- London Studio Centre, London – functional spaces for large numbers.
- Sadler’s Wells, London – functional spaces for small numbers.
- Royal Ballet, London – premium dance studios, high-spec ‘back of house’.
- Linbury Theatre, London – flexible performance space.
- The Place, London - the client’s UK benchmark project, small performance space.
- Tanzhaus, Düsseldorf – the client’s European benchmark project.
- Choreographisches Zentrum, Essen – a mid-scale performance space.
- Vooruit Centre, Gent – an arts centre with mid-scale performance space.
The information gathered far exceeded expectations, tangibly influencing the brief and the Concept Design thinking. The time spent discussing what had been seen and heard, and how this was influencing client thinking, proved invaluable and cemented a core team relationship that served the project well over its duration.
Who is in charge of overall design objectives?
On most mid- to large-scale projects, the client will have appointed a team member during Stage 1 as lead designer to provide leadership for the design team. The lead designer sets up the criteria for establishing the design process, and manages the design team in the assembly of documentation for the Information Exchange at the end of Stage 2. When the client is an organisation, it is worth them considering at the outset of Stage 2 appointing a ‘project champion’ with seniority in the client organisation who can complement the lead designer role and ensure that good design principles are maintained as the project progresses.
Project Champion
The project champion must be a senior, authoritative person from the client organisation who understands the role of good design in achieving a successful project for the client and is passionate in delivering it. They will be an advocate for good design to project stakeholders, and provide inspiration for the design team. Individual clients, like small developers and homeowners, should be encouraged to act as project champions themselves, and feel able to play an active role as project lead in the evolving design process – in particular, during Stage 2.
For the right projects, the project champion has a pivotal role to play between project stakeholders and the design team, whereby they act as the ‘guardians’ of the Project Objectives. Irrespective of the scale of a project, or whether its champion appears to be an obvious choice (as with a domestic project), it is worth identifying this role with written and circulated objectives that can be referred to and measured at important stages of the process. On any project, formalising these objectives and sharing ‘ownership’ of them helps to galvanise the project team in their efforts to achieve them.
What does designing ‘look like’?
The process of designing has many characteristics, and different design teams will have many different ways of illustrating how progress is being made. This chapter encourages collaborative working, and that involves being able to show ‘work in progress’ as readily as finished work. Often, the discussions that emerge around rough and partially modelled buildings get to the essence of the design intent and can inform the iterative design process in a qualitative way that the presentation of finished-looking design information cannot.
There are many ways to demonstrate this process, but these are some prompts commonly used by architects:
- Design parameters/constraints drawings.
- Figure-ground plan – describes the footprints of buildings against spaces around them.
- Overlay hand-drawn sketches of parts of plans, elevations or sections.
- Bird’s eye or axonometric views, to establish design hierarchy or contextual relationships.
- Block massing diagrams.
- Cardboard or wooden scale models.
2.3
3D block model. 2.4 A site-capacity study. 2.5
BIM image. 2.6 An emerging design sketch, exploring massing and materials. 2.7
A physical model: North Shore prototype. 2.8 An aerial area sketch: Byker Urban Renewal.
2.9 A sketch photomontage: valley view.


What is iterative design?
It is not very likely that the first drawn idea is going to meet universal approval. In fact, it is impractical to work in a collaborative environment in which iterative design processes are avoidable. The nature of iteration has to be planned and controlled, and should be seen as incremental steps towards the agreed design. There will be self-imposed design increments, information from design team members that informs progress, client commentary and external advice on criteria like design constraints or planning policy – all of which will drive iterations of the design process. The skill of the architect is to see clearly the purpose of each iteration, acknowledging that incremental improvements in design and the fulfilment of briefing criteria increase the qualitative outputs of Stage 2 and that this has long-term benefits for the project as it moves into future stages.
How to Design to Cost at Stage 2
Cost is a critical component in any project, and the lead designer and architect should ensure they understand cost criteria as well as the cost consultant does. The presentation of Cost Information during and at the completion of Stage 2 may take different forms depending on the chosen or expected procurement route, client needs and who is in the design team at this stage. (Some projects may not engage cost consultants until a later stage.) In all cases, however, clarity is a key objective, with the basis of cost calculations, inclusions and exclusions clearly identified.
With traditional types of procurement, cost information is firstly an estimate based on historical cost data. The more design information there is to work from, the more comprehensive the cost estimation can be. It is worth noting, however, that even in such circumstances it is only once tenders from the construction works are returned by contractors that a real cost for the project exists.
In other procurement scenarios, degrees of cost certainty can be requested by the client much earlier in the process, and this can have a significant effect on the design outcomes. For example, a cost cap that stretches the budget over too large a building will erode design quality. With that in mind, considering the design process as ‘designing to cost’ rather than ‘costing the design’ will help to steer the design team during Stage 2 to conceive of a Concept Design that delivers a high design ‘tariff’ at the same time as remaining affordable throughout future stages.
Common Terms Used in Cost Information
End-of-stage cost models are often called:
- Outline cost plan – used very early on in the design process, and generally based on measured areas of an element of construction – for example, a square-metre rate for Gross Internal Floor Area (GIFA), hard landscape, soft landscape or highways external works.
- Cost plan – still using measured areas of an element of construction, but applied to more detailed parts of the building.
- Cost estimate – using costs of elements of work, and multiplying by occurrence – for example, number of doors or windows; area of roof; area of floor with covering A, area of floor with covering B.
Other terms used in cost models:
- Provisional sums – rounded numbers to cover items of cost that are not defined yet; in some forms of building contract, provisional sums can be carried into the contract sum.
- Contingency – a sum of money to cover unforeseen elements of work; often expressed as a percentage, which should decrease at each stage as more is known about the design.
- Design development contingency – a sum of money anticipating increased costs as the design becomes more detailed during Stage 3; often expressed as a percentage.
- Preliminaries – often expressed as a percentage, this figure covers the contractor’s costs in carrying out the contract; for example, the site management costs, site welfare, scaffolding or plant hire.
The desire of the client will always be to have the best building they can afford, and behind that proposition lie a number of factors that should influence how the design team approach Stage 2 work – and particularly how they set up the conclusions of Stage 2 to be picked up at the beginning of Stage 3 Developed Design.
An Example of Designing to Cost
If the project brief requires a 1,000 sq m building and the cost plan historic and indexed data says that this type of building costs £1,500 per sq m (all figures excluding VAT), then the construction cost estimate is £1.5m. If this figure is felt acceptable, then design develops towards tender. Let us say that the accepted tender return cost is £1.65m (£1,650 per sq m) for a number of reasons and the client is insistent on the contract sum being the budgeted £1.5m, then the design team has to find £150,000 of savings. This is equivalent to having 90% of the building you thought you were buying, or to savings from across the cost plan eroding the design intent considerably.
If, in the first instance, the £1.5m Project Budget had been tested against projects with contingency or inflationary factors considered more fully, then the design team would have been able to say to the client that they can afford a 900 sq m building or that the Project Budget would need to increase to accommodate the additional estimated costs.
When designing to cost, this approach of presenting costs with better contingency levels would be supplemented by having as many large elements of the design as possible tested in the marketplace with budget costs. For instance, the structural-steel package, the envelope package or the services-installation package could be tested in order to produce subcontract cost information to inform the cost planning at Stage 2. This process does not lend itself easily to all forms of procurement, but it can form part of a constructive dialogue on cost with both suppliers and design team members who can modify designs to include specialist commentary from the process.
One factor that often surfaces during Stage 2 is that some members of the design team seek to leave elements of design unresolved until the next stage. The temptation to do this may relate to time allocation in the Project Programme, fees assigned to resources during this period or an unwillingness on the part of one or two design team members to close down the options within their discipline until more information is available in subsequent stages. The Design Responsibility Matrix (DRM) reduces these ambiguities, making deliverables clear, and the lead designer needs to be on top of this situation from the outset and agree with the cost consultant how cost information is going to be dealt with during this stage.
Tips and Techniques for Presenting Project Costs
- Separate out costs associated with easily verified elements of the building (eg new-build superstructure) from elements that cannot be based, at this stage, on known or quantitative cost information.
- Define clearly parameters used for estimating ground works, abnormal conditions and unknown elements. Describe what work is required to help firm up these early cost estimates.
- Clients will always be tempted to chop down design development and contingency sums, and it is useful to have some element of contingency placed against elemental headings as well as the project cost.
- On some projects it is worth avoiding, where possible, a long list of exclusions, as these often represent some cost to the project – for example: furniture and fit-out costs, professional fees and acquisition costs. Make an allowance for as many of these elements as you can, being clear that they are direct costs to the client and not part of the construction budget. This gives clearer sight of what the construction budget actually is.
It is self-evident that at the end of Stage 2 the client would like to understand the relationship between the Concept Design and cost. In tandem with this there is, of course, a programme component and an understanding of the risks associated with the cost plan. It is also self-evident that the more investigative and proving work that can take place during Stage 2, the more robust and informative the cost plan is going to be. After that, the presentation of possible additional cost factors may be better expressed as a percentage probability of expenditure rather than provisional sums that cover unresolved design elements. This method better reflects the complexities of a project, and is more likely to inform good decision-making at the conclusion of Stage 2.
Reviewing the Procurement Strategy
Although it seems a long way off, choosing the appropriate procurement route for any project is a key factor in a successful and well-run process. As part of the Initial Project Brief and Stage 1 procurement strategy, the client will have outlined their order of priorities for the three principal components of any project – quality, time and cost. For example, the client might have a rigid, maximum Project Budget figure but not be concerned about the period of time in which the project is delivered. In that case, the client’s question might be ‘How much building can this much money buy while maintaining high design-quality standards and without restrictions on time?’ Another question might be posed illustrating that the time factor is important, the cost critical but that quality is the third priority. This question might be ‘How quickly and cheaply can you deliver this simple shelter?’
Reviewing the procurement strategy during Stage 2 will only take a short time, but is worth doing to remind the design team of how the design information that they will produce will eventually be used. Even if a final decision is not made at this stage, the review may influence the types of information or levels of detail for elements of design that the design team produce both at Stage 2 and later. The review should be the subject of a specific workshop or a design team meeting agenda item, so that enough time is dedicated to exploring the options of this very important part of the project delivery.
Impact of Procurement Routes on Stage 2
- Traditional – A Concept Design emerges with clear levels of design information from the whole design team. The Information Exchange clearly sets out where Stage 3 is going to improve project and cost information, and often concentrates less on the measurable parts of the project as a result.
- Design and build single-stage – If a tender is to be released at the end of Stage 2 to find a contractor to lead the process from Stage 3, then Stage 2 information has to translate the design intent and costed design information into a set of employers’ requirements that is measurable against the changes that will inevitably take place later in the process.
- Design and build two-stage – The parameters need to be tightened for entering into Stage 3, where the contractor sits with the design team and they develop the design and cost information alongside one another.
- Management contract – The level of separation in building elements will have a great bearing on the Information Exchange at Stage 2, and more attention than is usual at this stage will need to be given to the coordination of elements of the project. The early relevance of construction information for certain packages will also need considering.
A key component of information that will be driven by procurement decisions is the specification document for the project. In general, the earlier the client and design team wish to fix the cost and let a contract, the more detailed the specification needs to be for that stage. Specification is a way of describing the performance of a building component, or the actual product or equipment that is required to meet the desired function or quality. Specification safeguards quality by being as explicit as possible about what the contractor should build.
Reviewing the Project Programme
The Project Programme will have been generated during Plan of Work Stages 0 and 1. It is created at the outset of the project, so that periods of time can be allocated to sequential stages of the project. It is also flexible enough to be able to illustrate how stages that would normally be sequential may need to overlap because of procurement decisions, and how that is to be managed. The Project Programme is reviewed at every stage, but it is also an excellent management tool for the project. It will have important, distinct components during Stage 2. The Design Programme, which is prepared by the lead designer with inputs from other design team members, and the Construction Programme are both important in establishing timeframes for each stage. In many projects in which a tender process and the appointment of a contractor is not planned until Stage 4, the Construction Programme line in the Project Programme will be a single bar of an estimated duration. If the procurement route chosen means that a contractor has already joined the project team, then the Construction Programme can reflect the level of detail known or assumed at the stage and will help inform the order in which decisions might need to be made in order to be able to achieve the Project Programme dates.

2.10
An illustration of a Project Programme extract.
The lead designer can use the Design Programme at this stage to ensure that Project Strategies are created or reviewed in a timely manner, in order to maintain progress. They can programme workshops, stakeholder meetings, external events, and third party and internal meetings. A determined rigour to complete this information not only informs the project in a task-orientated and clearly sequential way, but also coordinates all the Project Information into a timeline that is clear and can be easily referenced by all the project team members. Good information, delivered in a timely way, assembled to ensure a smooth transition to the next stage of the Plan of Work marks out the Design Programme as central to the success of the project. The Design Programme is often used as a ‘dry’ blunt tool when it should be active and alive with information transfers logged, new ideas shared, meetings and formal events noted. During the Concept Design stage, the programme records ideas and logs decisions in order to form a record of the stage for future reference if necessary.
How do ideas get organised?
Perhaps too often in architectural practice, Stage 2 activity will feel constrained by the period set for it within the Project Programme. Using a Design Programme to keep a clear framework of the order and timing of all design ideas and approaches will help to counteract this perception of time constraint. To assist with the organisation of this early Stage 2 thinking the Design Programme can log those ideas that predate an appointment, those that had average or good information on which to be based at the time they emerged and catalogue where ideas need further information to be fully tested against project criteria. It is necessary, as a core principle of the Plan of Work, to establish a Design Programme in the early part of Stage 2 – particularly on larger projects. Developing a Design Programme for a project offers the chance to illustrate how many discrete but connected activities there are in producing the Concept Design stage, and in what order they need to be so as to inform each other. This is useful as a visual tool as well, because it reflects a quantity of design work that progress can be checked off against.
2.11 An extract from a Design Programme.
There is an innate, logical sequence in which Concept Design emerges. Most designers would recognise this as a process from large-scale thinking about the whole project, through stages of considering parts of the project to eventually addressing the relatively small detail. All architects know that the user experience of a finished building starts with material choices, textures and colours, and an appreciation of the detail in material junctions. The Design Programme can be organised to reflect this way of thinking if it is appropriate for a particular project. It may be that the entrance gateway of a project is the critical design statement, or that a particular method is required for refuse and recycling collection that will characterise the project layout. These idiosyncrasies need ideas for their resolution earlier in the process than the simple ‘big to small’ sequence allows, and the lead designer can influence this alternative sequence through their use of the Design Programme.
What should happen if the project is to be submitted for planning permission at Stage 2?
The Programme task bar (Task Bar 3) on the RIBA Plan of Work 2013 is designated as a Variable task bar, along with (Town) Planning (Task Bar 4) and Procurement (Task Bar 2). This underlines the fact that certain actions overlap or can occur at different stages. In general, it will be a reasonably infrequent occurrence that a client will decide to submit a project for planning permission at the end of Stage 2 rather than at the end of Stage 3.
This scenario would cover projects where the client wished to establish the principle of development on a particular site while limiting their committed expenditure. It is also reasonably common for projects to be submitted during Plan of Work Stage 2 because the client is interested in establishing a site value that is generated by a quantum of development rather than a ‘market value’. While this situation often means a less robust design process during Stage 2 – and often no other design team members being involved, as the core aim is simply to establish a monetary value – it is quite possible, using previous experiences, to factor in design tolerances so that a credible planning application can be made. This approach has to be very carefully managed, and is not recommended for unfamiliar building types or reasonably complex buildings that are intended to be built.
Developing Plan of Work: Project Strategies
Task Bar 5, Suggested Key Support Tasks, encourages the development of Project Strategies for all relevant aspects of the project. Each strategy can state clearly the ambitions of the project and how it is positioned in relation to industry norms. They can compare tried and tested strategies or those from other projects, and establish what criteria will be used to steer the project through to a successful construction stage. As examples, Stage 2 may include the development of strategies for:
- Sustainability – including energy efficiency and whole-life costing.
- Fire engineering – resistance criteria for elements of structure, means of escape and fire-engineering inputs required.
- Acoustic – dealing with noise sources external to the project, or generated by the project operation.
- Security – what levels of access control are required at the site boundary, the building entrance and in circulation routes around the building?
- Health and Safety – assessment, management and the recording of health and safety issues.
- Building façade design – design parameters for façades of a building.
- Spatial quality – design assessment, review and scoring.
- Construction – use of site access, site set-up, contractor welfare, etc.
It can be seen that some of these strategies are technical in nature and others are cultural, economic or design orientated. These strategies will help explain to a client how aspects of the design process are being considered in detail. They will form a key part of the reference point at the conclusion of the Stage 2 process, and will be useful as a coordination tool for the lead designer. They must have built into them the review process at future stages and ideally be formatted in a way that allows for updates to be made easily, so that progress can be mapped and a Feedback loop can help to share the project knowledge around the design team.

2.12 Project Strategies and their relationship with work strands within the Plan of Work stages.
Trackers for Project Strategies
Developing a methodology for registering and updating project factors that are generated internally to the design team or imposed externally are an important management tool for the lead designer. A task-tracker document managed by the lead designer is a particularly powerful way of communicating the status of the design, cost items or actions required to develop the Project Strategies. In future stages, different trackers can be generated for planning conditions or Building Control conditions and, eventually, Construction stage information. For a small project, this could be a single document that tracks tasks and progress across the whole Project Programme. For larger or more complex projects, it might be more manageable to have Plan of Work stage trackers or task bar trackers, eg Procurement actions against Task Bar 2 or planning conditions against Task Bar 4. However this information is recorded, it is crucial that the lead designer regularly circulates updated trackers to the project team for information and action.
A tracker document can also be utilised to map the progress of a particular Project Strategy that runs throughout the project – for example, the Sustainability Strategy. In aligning information from across the design team in one document, it becomes more easily understood how design decisions across the team impact on one another. The lead designer maintains ownership of these documents, and it should not be underestimated how much resources this task will require. The project benefits substantially from better and more widely available information, and project trackers can form a significant part of the Plan of Work stage Information Exchanges.

2.13 Example of Plan of Work Stage 2 quality strategy tracker.
What is the Process for Review of: the Project Execution Plan?
The Project Execution Plan (PEP), when prepared correctly, is a key document that comes into being during Stage 1. It contains a collection of all the available information relating to the delivery protocols and processes that the project team will adhere to. It will have been prepared by the project lead perhaps in conjunction with the lead designer, and it makes clear expectations about how information and computing technology might be used in a Technology Strategy. This will include the standard formats for document exchanges between project team members, aligning elements of naming and numbering in order to enable universal understanding across the project team, and will establish the principles of collaborative working, formats for key Project Information and any bespoke processes for the project.
At the beginning of Stage 2, the PEP will be briefly reprised. This is particularly useful if there has been a programme break between Stages 1 and 2, as there are likely to be new members of the design team. This reprise can happen at a stage start-up meeting, electronically or via a specific workshop.
A further review of the PEP will be needed part-way through the Stage 2 period, so that an accurate update will be available as part of the Stage 2 Information Exchange. On large and complex projects, it may be pertinent to have the PEP review as a ‘live’ document on every design team meeting agenda. The review should include the whole project team, acting as a reminder of the project principles but providing the opportunity to catalogue and communicate all of the updated sections. The PEP must be kept up to date: it is one of a suite of project documents that are created at the beginning of projects, and not maintaining it can lead to a loss of focus, indiscipline in the production of Project Information and the consequent erosion of Project Objectives.
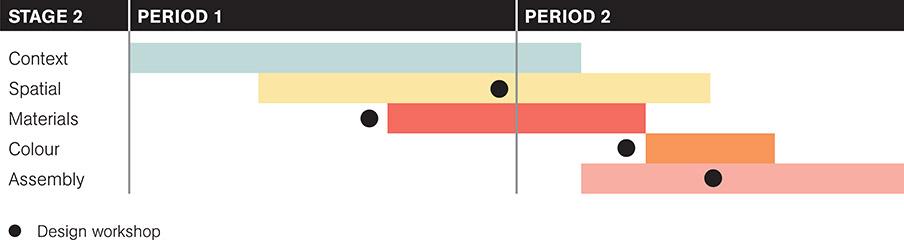
How can Design Workshops: be used productively?
Stage 2 Concept Design processes will be improved by the introduction of design workshops at key points during the process. This approach invites the whole design team, sometimes with the client, to investigate collaboratively various approaches to design problems. An identified problem from one design team member benefits from the immediate input of each discipline around the table, and, even if a solution is not settled on immediately, the further investigation of that problem will be better informed than previously. The design workshop can avoid the ‘how we did it last time’ default position, and should be planned by the lead designer as an entirely different experience to a design team meeting or project meeting.
table 2.1 The contents of a design workshop and a design team meeting.

As part of the Stage 1 Information Exchange, all project team members will have received a copy of the Initial Project Brief, including Project Objectives, Quality Objectives, Project Outcomes, Sustainability Aspirations, Project Budget, Project Programme and any Feasibility Studies and Site Information. This is a great deal of information – especially for small projects – and understanding this information as a summary presented to a design workshop is key to aligning the design team’s engagement with the aims of the project in hand.

2.14 A design workshop process diagram.
The workshop might have quite a free-ranging agenda, so that lines of enquiry raised during the session can be considered properly and ‘chased down’ to a conclusion based on their relevance to the project. Some elements of the design might require a Research and Development component to maximise their beneficial impact on the project. While this type of engagement is healthy, and marks out the key difference between a design workshop and a design meeting, the facilitator must use their agenda and briefing materials to ensure that all attendees are able to make their relevant contributions. At the outset of the workshop, it is useful to set the tone for the session and, for instance, establish that ‘all ideas are welcome and at this stage treated equally’. Another factor is to strike a balance between experience from a long career in the industry (‘that doesn’t work because…’) and ambition born of a short career (‘that detail tells the whole story of the building and we have to afford it…’).
Before the end of the workshop session, there ought to be a short summary of the discussions that have just taken place and the key actions that arise from them noted for distribution. Using a tracker document as described previously is a good way of doing this, and acting as a reminder of the Project Objectives at the same time.
The energy that can be generated from an inclusive, positive design-workshop experience at the beginning of a project can carry huge benefits for how contributors perceive the project in their own workload, and ultimately how the project has the potential to enhance the reputations and portfolios of the design team involved.
Design Workshops and Collaboration
Pre-planning how these sessions are going to be organised, facilitated and noted, and structuring the lines of enquiry that design team members are encouraged to make, is critical to fostering joint ownership of the project’s momentum and efficacy. Having an organised, shared platform from which to develop the project and to robustly test concepts against constraints and the brief increases the chances of the concept surviving future stages and forming the basis of clearly translated design intent as the project progresses towards Stage 5 Construction.
Successful collaboration within the design team is best delivered through design-workshop events, and involves understanding the criteria for experimentation that exists in the work patterns of your design team colleagues. This feeds understanding of what the nature of redesign and change means to them, so that your own thinking is modified in relationship to the project as a whole – and not just your own disciplinary boundaries. It should be noted that simply sharing information is a poor substitute for the collaborative benefits of design workshops.
Long enjoyed by multidisciplinary firms, it has recently become common for co-located working (or ‘co-working’) to be employed during the Concept Design stage, when periods of time spent in one office or studio can be quickly productive because the proximity of your co-working design team brings prompt answers or commentary that can progress your own design in the knowledge that it is safe to do so and without impacting on the efficacy of the design process.
For example, a building services engineer based in Edinburgh, working with architects based in Newcastle upon Tyne on two projects, spends two whole days a week in the architects’ office during Stage 2 of one project and Stage 3 of the other. This is concentrated time that allows significant progress during this co-located time and affords an insight into the working practices of each discipline.
Sustainability Checkpoints
Task Bar 6 provides for sustainability checkpoints at every Plan of Work stage. These checkpoints have developed from the 2011 publication Green Overlay to the RIBA Outline Plan of Work by Bill Gething (RIBA Publications). The sustainability credentials of any project are now central to all design processes. Whether the client has an ambition for an exemplar project or simply to meet current Building Regulations and relevant standards, achieving the best sustainability outcomes for projects can characterise both their process and their outcome. A sustainability checkpoint at Stage 2 should contain the following type of questions:
- Confirmation that a formal sustainability pre-assessment has taken place, and that key areas of design focus have been undertaken during the stage. Any areas that differ from the Sustainability Strategy should be highlighted.
- For the production of the initial ‘Part L’ model, has the design team considered a ‘Fabric First’ approach? (Fabric First is the strategy of prioritising an airtight, highly insulated envelope for the building before considering energy sources or heat or light emitting equipment.)
- Has the design team considered energy-efficient fittings and equipment?
- What renewable technologies might be appropriate for consideration in this project?
- Is it a high-tech control environment or a low-tech user-controlled project? Have ‘Plain English’ descriptions been used for internal environmental conditions, seasonal controls and control systems?
- Does the Construction Strategy refer to responsible material sourcing, recycling and environmental impacts?
- Are offsite prefabrication, recycled materials or local sourcing possible?
- Is a BREEAM, LEED (Leadership in Energy & Environmental Design) or similar environmental code or standard required?
- What is the design life of the building, and how will that be measured? Has resilience to future climate change been considered?
- How is the building to be operated? And by whom?
Information Exchanges: The Place: of sketches, drawings and documents in the process
Task Bar 7 in the Plan of Work comprises the Information Exchanges at each stage completion, requiring sign-off from the client in order to proceed to the next stage. At the end of Stage 2, the Information Exchange could include the following:
- An updated Project Execution Plan, containing Project Objectives and Project Outcomes.
- A Final Project Brief that collates the amended briefing information from Stage 2 and updates the Initial Project Brief to reflect the Concept Design.
- Concept Design represented in agreed formats and media. These may include a building information model and/or spatial design drawings. Both would include outline structural and building-services information. Each design team member will produce information in agreed formats in order to describe the following:
- ~ Architect – site context and building relationships; internal spatial arrangements; massing; heights; key strategic information related to layout, outline materials and finishes; specification; schedule of accommodation.
- ~ Structural engineer – structural grid, structural zones required, substructure strategy, outline specification.
- ~ Building services engineer – initial ‘Part L’ model; distribution strategy; sustainability statement, including energy consumption and renewables strategies; outline specification.
- ~ Landscape architect – landscape strategy, spatial plan and outline specification, and, possibly, draft planting schedule.
- Project Strategies, including a procurement strategy, Sustainability Strategy and Construction Strategy.
- Project Programme and Stage 3 Design Programme.
- Cost Information, in an agreed format.
It is useful to bear in mind what the Information Exchange contents are going to be at the outset of the stage. It is most likely that the content will be predominantly digital in media, and some thought is necessary in order to ensure that transfers of this information can happen in a secure environment and in a timely manner.
The likely range of information at all Plan of Work stages is increasing all the time, and will very likely include access to Building Information Modelling (BIM) digital files as well as any hand-drawn material that is felt to be important to the whole narrative of the stage. The ‘back of the envelope sketch’ analogy is still relevant on occasion, and such drafts can be introduced by any member of the design team.
More than at any other stage, the draft copies, test prints, tracing-paper overlays and document versions and revisions produced by the iterative design process and the collaborative working of the design team leads to a significant output of material. Is it worth keeping all these layers of process, which may never be referred to again? A quality management regime may dictate the answer to this question, but what is certainly true is that this momentary information tells the story of the project and should be methodically archived for future recall – even if this means just being able to reproduce the ‘eureka moment’ sketch for a project that has later on become award winning, and the narrative would be incomplete without it.
Task Bar 8 allows for UK Government Information Exchanges. This task bar will not be necessary on all projects; it is included to ensure that UK Government requirements are met when appropriate. More information on how this data will be collected and used can be found at www.bimtaskgroup.org or www.thenbs.com
One of the fundamental benefits to the RIBA Plan of Work 2013 is the framework that it sets up for comprehensive and logical progression through the project. At the completion of Stage 2, the Information Exchange demonstrates to the client the work done and should be presented in a way that allows client to easily sign off the work to date and allow Stage 3 to commence.
WHAT HAS HAPPENED TO OUR PROJECTS BY THE END OF STAGE 2? Although there has been some agreement that other design team members will be appointed during the design process, the architect has been working by themselves throughout Stage 2. They have produced a number of design iterations to illustrate some major and some more minor choices that the client will need to make. It became clear to the architect as some of the detail began being discussed that the adult couple of the family did not agree on everything. The architect has convinced them for future stages to make decisions as a ‘single voice’, and to speak through the architect to other consultants and, eventually, to the contractor. In assembling the Stage 2 Information Exchange, the architect has prepared plan and basic main-elevation drawings to demonstrate size and general appearance. An outline cost has been produced using historic square-metre data for domestic projects of this size, and a series of suggested adjustments has been scheduled in order to assist in staying within the Project Budget figure. A Sustainability Strategy has been prepared, with comparative information on zero-carbon technologies. In addition, a simple 3D computer model has been built to demonstrate how principal views internally and externally will appear. The client did not have any major concerns in relation to the Project Programme at Stage 0 and it had been developed to illustrate a more precise sequence of events and likely periods of time taken to reach significant milestones – and also to give a timetable covering when they will need to be ready with information themselves. For example, it records their last opportunity to amend the project brief, advise on kitchen-supplier preferences, or choice of light fittings, finishes and colours. The developer has appointed the architect and structural engineer on direct appointments. They are very keen to reduce any risks in the ground, and have commissioned the engineer to undertake site-investigative surveys so that the foundation design can progress and robust cost information be developed for the substructure and ground works. The developer has their own quantity surveyor, who is going to develop and control cost information throughout the project. Developing the Stage 1 Project Programme and procurement strategy has helped the client to decide to submit for planning permission at the end of Stage 2, and that a traditional form of contract is most likely to deliver the desired high-quality results. The architect has advised that submitting an application at this stage is likely to result in a significant number of planning conditions being imposed, but the client’s interest is in securing a planning permission before committing to further expenditure. The client has decided not to undertake a pre-application process, relying on recent successful residential applications to indicate what will be acceptable to the planning authority. The architect and client visited three similar-sized developments locally in order to inform a discussion on the local housing market and how the design needed to reflect the high aspirations of the target purchaser, which, in turn, would maximise the value of the development to the client. The design team have been appointed up to the completion of Stage 3. The procurement strategy makes provision for that appointment to be extended, but intends that the design team will then be novated to the design and build contractor. The Design Responsibility Matrix (DRM) reflects this, leaving the post-novation DRM to be agreed later with the contractor. The university have introduced their health and safety advisor, who has established a risk register and circulated a schedule for their intended health and safety audits. The university also has, in addition to their original scope of services, asked that the design team work within BIM protocols for the rest of the project. This is to be a pilot project for the university, and they intend that a building information model should be the principal tender documentation tool at the end of Stage 3. The architect has prepared a scheme that closely reflects the Initial Project Brief requirements, and has provided for slightly more teaching space than anticipated. The Cost Information produced at Stage 2 is a little higher than the Project Budget, but the client has agreed that this can be resolved during Stage 3 when a financial appraisal can be adjusted to take cognisance of the additional teaching space. Each of the design team consultants has prepared separate reports on the existing building and the refurbishment scheme with recommendations for elements of work, which have been factored into the cost model. These reports – together with the architect’s scheme drawings; the Project Programme; and a series of short Project Strategies, including a Sustainability Strategy – form the Stage 2 Information Exchange. A risk workshop is planned at the beginning of Stage 3 to help identify mitigation measures for the Developed Design stage. A thorough and necessary review of the Stage 1 Information Exchange has been useful, together with a field-study trip to five similar-sized library projects funded in the same way and each with very high-quality design aspirations as part of a regeneration effort. The leader of the council is going to be the project champion. The early site-investigation surveys have allowed the structural engineer and architect to work up a site-capacity model that demonstrates how a smaller than expected ground-floor footprint can deliver the appropriate project brief spatial requirements, and this in turn has delivered a more detailed cost plan than might normally be expected. At Stage 1 the procurement strategy developed with the client determined that cost certainty together with a quality design project was paramount. To achieve this, they decided on a two-stage design and build Building Contract, with the contractor gaining preferred contractor status during Stage 2 and being appointed at the end of that stage. It is also anticipated that the client’s architect will be retained by the unitary authority to monitor the contractor’s design team and their Stage 4 design development. The procurement strategy also contains a BIM execution plan, setting out expectations of the design team and contractor, establishing project protocols and scheduling Information Exchanges for each Plan of Work stage. The unitary authority had chosen this new library project to be an exemplar sustainable development in its ambition to be a leader in this area. The Sustainability Strategy at the end of Stage 2 responds to a very ambitious target of BREEAM ‘Outstanding’ (with a score of over 95%) included in the Sustainability Aspirations and includes a carbon-positive energy system utilising geothermal energy over 24 hours, photovoltaics and the highest standards of airtightness and build quality. The Stage 3 element of the Project Programme reflects the significant amount of activity that will need to take place in order to produce robust tender returns, and the Information Exchange is supplemented with an expected information schedule for Stage 3. The contractor is appointed on a pre-construction arrangement with sufficient time to contribute to buildability aspects and prepares the Construction Strategy that is aligned with the Concept Design. The digital entrepreneur and CEO of the company is to be the project champion. They have been instrumental in appointing a well-known architect and a design team that has established design credentials. The Stage 1 Initial Project Brief and accompanying Project Strategies have set a high bar for an award-winning sustainability-exemplary and user-friendly headquarters building. Rather than setting a strict Project Budget from the outset, the client is concerned with value for money and has developed a project matrix that is intended to measure design quality, time and money factors against data sets for equivalent buildings. The design team are excited by the possibilities of their design work benefiting from this balanced view, and have scheduled the Stage 2 Information Exchange documentation to assist this measurement. The Concept Design progresses well and the client has selected a preferred option from six prepared by the architect. The lead designer has progressed the strategic coordination issues with the rest of the design team and the project is going well. A management contractor has been appointed following a tender process and with a grid established and the building location on the site determined the preparation of the first packages for construction is underway. A number of façade options were prepared and the client has provided a clear direction on the way forward.Chapter 02
Summary
Scenario Summaries
A Small residential extension for a growing family
B Development of five new homes for a small residential developer
C Refurbishment of a teaching and support building for a university
D New central library for a small unitary authority
E New headquarters office for high-tech internet-based company