Chapter 6
Managing Operational Settings
Microsoft Exam Objectives Covered in This Chapter:
- Maintaining a SharePoint Environment
- Configure Service Applications
- Managing a SharePoint Environment
- Manage Operational Settings
In general, managing SharePoint operational settings includes the collective tasks required to maintain the SharePoint server and server farm environment as well as site, site collection, and solution administration. Since this area is vast, it is addressed in a number of chapters in this book, starting with this one. In this chapter, you will learn how to manage metadata operations, database management, and reporting services as they pertain to SharePoint, and you’ll learn how to maintain the Business Connectivity Services (BCS).
Managing Metadata
The short definition of metadata is that it’s “data about data.” That doesn’t seem terribly illuminating, though. In slightly more detail, metadata is information about the data to which it refers and is used by disciplines such as information management, information science, and information technology to organize content. In an old-fashioned library, it’s what the Dewey decimal system used to be (somewhat) to the books in the library.
The advantage of using metadata for data management is that a single metadata system can organize and track not only a wide variety of content but also a wide variety of content containers including books, CDs, database tables, DVDs, graphics, web pages, and so on.
Specifically applied to SharePoint, managed metadata is a hierarchical collection of managed items that lets you define data and then structure that information within SharePoint information containers, such as libraries and lists.
Administering Managed Metadata Operations
As you’ve discovered by now, everything users consume in SharePoint is provided as a service. For users to be able to consume a service, it first has to be created and then made available, both within and across site collections and web applications. Beyond that, service connectors must be established to the applications and then term stores have to be added for tagging and tag clouds.

A term store repository in SharePoint lets you centralize vocabulary management across multiple site collections.
Administering a Managed Metadata Service Application
The first step in administering managed metadata is to create the managed metadata service application. Exercise 6-1 will show you how to do this. To successfully complete this task, you must be an administrator on the machine containing the SharePoint Central Administration site.
Exercise 6-1: Creating a Managed Metadata Service Application
1. Navigate to Central Administration and click Manage Service Applications under Application Management.
2. On the Manage Service Applications page, click the Service Applications tab, which may be already selected.
3. On the Ribbon, click New and then click Managed Metadata Service.
4. On the Create A New Managed Metadata Service page, type a name for the service in the Name field.
5. In the Database Server field, type the name of the database server that is hosting the term store or accept the default setting.
6. In the Database Name field, type the name of the database that you want to host the term store.
When SharePoint is installed, the managed metadata service and a database for that service, using the same name, are created. You may have to add yourself as an administrator of that database if you want to use it. If you want to use a different database on a separate SQL Server database server computer, you may have to run SQL Server Management Studio to get the name of the database.
7. Select the authentication type to connect to the SQL Server instance, such as Windows authentication or SQL authentication. If you choose SQL authentication, type the account name in the Account field and then type the account’s password in the Password field.
8. If you choose to use SQL server failover, type the name of the database server to be used for failover in the Failover Database Server field; otherwise, leave the field empty.
9. Under Application Pool, select either Use Existing Application Pool and then select a pool from the drop-down list or select Create New Application Pool and then select an account under which to run the pool.
If you want to run the new pool under an existing account, select Predefined and then select the account from the drop-down list. To use a managed account, select Configurable and then either select an account from the drop-down list or click Register New Manage Account and create a new managed account. However, it is optimal to create application pools only for customizations and to consolidate the rest. See Chapter 14, “Optimizing SharePoint,” for more details.
10. If you optionally want the managed metadata service to access a content type library in addition to a term store, type the URL to the site collection containing the content type library in the Content Type Hub field.
11. If you plan on having another web application import content types shared with this service and you want to record any errors associated with this process, select Report Syndication Import Errors From Site Collections Using This Service Application.
12. To create a connection to this service automatically when a new web application is added to the farm, select Add This Service Application To The Farm’s Default List.
13. When you’re finished, click OK.

A content type library, mentioned in the prior exercise in step 10, contains a reusable collection of metadata used by SharePoint lists or document libraries. Using content types lets you manage the settings for categories of information from a centralized point.
Editing or updating an existing managed metadata service application is a substantially similar task to creating one, with the differences outlined in Exercise 6-2.
Exercise 6-2: Editing a Managed Metadata Service Application
1. Navigate to Central Administration, and click Manage Service Applications under Application Management.
2. On the Manage Service Applications page, select the row for the service you want to update by clicking in a column for the row other than on the service name.
3. On the Ribbon, click Properties.
Clicking the service name in step 2 will open the Term Store Management Tool.
At this point, edit any of the information or properties you created starting in step 4 of Exercise 6-1 and then click OK when you’re finished.
The service becomes available in the web application where the service was created, but you must publish the service if you want to share it with other web applications. Exercise 6-3 shows you the procedure.
Exercise 6-3: Publishing a Managed Metadata Service Application
1. Navigate to Central Administration, and click Manage Service Applications under Application Management.
2. On the Manage Service Applications page, click the Service Applications tab, if it hasn’t already been selected.
3. Select the row of the service you want to publish, but do not click the service name.
4. On the Ribbon, click Publish.
5. When the Publish Service Application screen opens, use the drop-down menu under Connection Type to select a connection type such as HTTP or HTTPS.
6. Under Publish To Other Farms, select the Publish This Service Application To Other Farms check box to make the service available to other server farms.
7. Under Trusted Farms, click the Click Here To Add A Trust Relationship With Another Farm link, and when the Trusts screen opens, select a farm in the list, click the New button, and use the Establish Farm Trust screen to create a name for the trust. Then add a root certificate for the Trust relationship and provide an STS certificate for the Trust relationship.
8. Under Published URL, make a note of the URL to the service so you can provide it to administrators who want to make a connection to the service.
9. Type a description of the published service in the Description field.
10. If you have created a web page with information about this service, type the URL of the web page in the Help URL field.
11. When you’re finished, click OK.
Typing a description in step 9 and creating a help web page for the published service as in step 10 are optional steps, but that information may be helpful to other SharePoint administrators who want to connect to the service you created.
Deleting a service is fairly simple. For instance, follow steps 1 through 3 in Exercise 6-3 and on the Ribbon click Delete. Click OK; when prompted, click OK again. Do not click Delete Data Associated With The Service Application because this option yields no result. Once you delete the service, you cannot recover it, and any web application that has a connection to the deleted service will be unable to use the connection.
Administering Managed Metadata Service Connections
In the previous section of this chapter, you learned how to create a managed metadata service application and particularly how to publish it so that other server farms can consume the resource. Now you’ll learn the tasks associated with creating a connection to the resource.
This entire process is very similar to publishing and creating connections to just about any other service, as you saw in Chapter 4, “Configuring Service Applications.”
Exercise 6-4 will show you how to create a connection to an already published managed metadata service connection from a separate server farm. You will need the URL to the published service on the farm where it resides in order to successfully complete this task.
Exercise 6-4: Creating a Connection to a Managed Metadata Service Application
1. Navigate to Central Administration, and click Manage Service Applications under Application Management.
2. On the Manage Service Applications page, click the Service Applications tab, if it’s not already selected.
3. On the Ribbon, click Connect and then in the menu click Managed Metadata Service Connection.
4. On the Connect To A Remote Service Application page, type the URL to the managed metadata service in the Farm Or Service Application address field, and then click OK.
5. Select the service application you want to connect to by clicking its name in the appropriate row.
6. If you want to have your connection provide the service to all web applications in your server farm, select Make This Connection To Be The Default For All Sites On My Farm and then click OK.
7. If you desire, type a descriptive name for the connection in the Connection Name field and then click OK.
8. When you are notified that the connection has been created, click OK.
Ironically, creating the connection doesn’t define all of the behaviors between the connection and the service. To accomplish this, you must update the connection after you create it. Exercise 6-5 shows you the process.
Exercise 6-5: Updating a Managed Metadata Service Connection
1. Navigate to Central Administration, and click Manage Service Applications under Application Management.
2. On the Manage Service Applications page, click the service connection row of the service you want to publish, but do not click the service name.
3. On the Ribbon, click Properties.
4. If you desire, select the This Service Application Is The Default Storage Location For Keywords check box to store new enterprise keywords in the term store associated with the connection.
Only one connection can be the default location for keyword storage.
5. If you want to make the content types associated with the managed metadata service accessible to users of the sites in the web application, select Consumes Content Types from the Content Type Gallery At <URL> field.
This option is available only if the service provides access to a content type library.
6. If you want to update existing instances of changed content types in subsites and libraries, select Push-Down Content Type Publishing Updates From The Content Type Gallery To Sub-Sites And Lists Using The Content Type.
7. When finished, click OK.
Deleting a connection is very much like deleting a service. On the Manage Service Applications page, you click to the right of the connection, not on the connection’s name. Then on the Ribbon, click Delete. Clicking Delete Data Associated With The Service Application Connections will have no impact. Click OK when you’re done.
Managing Term Store Administrators
A term store is a container for terms, which are words or phrases that are associated with a particular item in SharePoint. Terms can be collected in sets of related terms, and term sets can then be collected into groups. You can create managed terms, or terms you can predefine, and then organize them into a hierarchy. These terms are then selected by users in a column in a document library.
You can also use managed keywords, which are words and phrases you add to SharePoint items, tagging them in whatever manner you choose, to develop an appropriate folksonomy.
Users can then tag items using whatever keywords they believe fit the items. Unlike managed terms, keywords are not usually organized into hierarchies, and usually, as an administrator, you have to add a Keyword column. However, some content types in SharePoint use a Keyword column by default.
Although all this may seem rather conceptual, the practical use for managed metadata allows departments and divisions to develop different metadata services with different scopes. For instance, each department can have its own local metadata service for site collections in a web application, another metadata service can be shared among all the departments in a single division that use multiple web applications within a server farm, and a third global metadata service is used for the entire enterprise-level organization across all server farms.
Using the Term Store Management Tool
Once the managed data services and service connection are available, you can use the Term Store Management Tool to create metadata terms for the SharePoint enterprise environment. This tool is a centralized database that allows term sets to be shared across the SharePoint farm. The following set of steps shows you the basics of how to use this tool.
If you cannot access this page or cannot add a term, you may have to add yourself as a term store administrator. See Exercise 6-7 for details.
1. On the main page in Central Administration, click Manage Service Applications under Application Management.
2. On the Manage Service Applications page, click the desired managed metadata service.
3. When the Term Store Management Tool page opens, select the desired language under Taxonomy Term Store on the left and then expand Managed Metadata Service.
4. Expand System and then click Keywords.
5. On the page that appears, to add an Enterprise Keywords column, select the Enterprise Keywords check box under Add Enterprise Keywords.
6. Under Metadata Publishing, to allow the Managed Metadata and Enterprise Keywords columns to be shared as social tags on My Sites, select the Save Metadata On This List As Social Tags check box.
7. Click OK.
You can also create terms for a document library in a site collection. Exercise 6-6 shows you how to create a Managed Metadata column in a library, such as a document library, which will then allow you to create terms that you can assign to documents in the library. In this example, you’ll need to have a document library available and navigate to the library in order to get started.
Exercise 6-6: Creating Metadata Terms for a Library
1. Navigate to the desired document library.
2. On the Library Tools menu, click the Library tab. Then on the Ribbon, click Create Column.
3. When the Create Column window opens, type the name you want the column to have in the Column name field.
4. Under The Type Of Information In This Column Is, select Managed Metadata.
5. Select Customize Your Term Set and give the term set a descriptive name in the Description field.
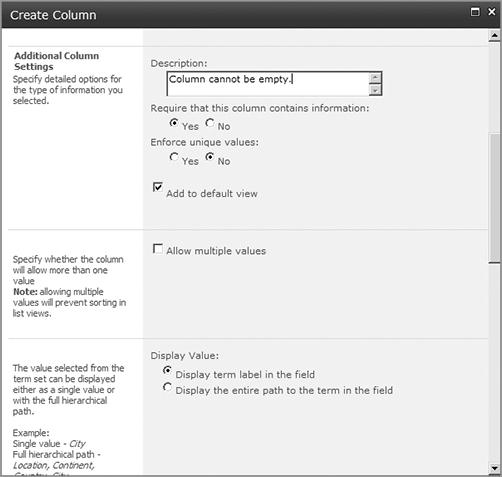
6. Under Additional Column Settings, if you want to add more conditions for the column settings, add a description of those conditions in the Description field. Then select either Yes or No for Require That This Column Contains Information and for Enforce Unique Values. Finally, select or deselect the Add To Default View check box.
7. Select Use A Managed Term Set, type one or more terms in the Find Term Sets That Include The Following Terms field separated by semicolons, and click the Find button, which looks like a pair of binoculars, to locate the desired terms.
8. When the desired term set appears that contains the desired list of values to display for the column you are creating, click the term to select the first level of the hierarchy you want to show in the column.
9. If you are using an open term set, you can select Yes under Allow ‘Fill In’ Choices if you want to enable this feature.
10. If desired, type or browse for a default value for the column in the Default Value field.
11. Click OK to create the column.
The metadata terms you create are stored in the library in the terms store. You can find the metadata terms in the term store by using the Term Store Management Tool.
Once a term store exists, you can add an administrator to the store and, if necessary, later remove the administrator. Exercise 6-7 shows you how to add a term store administrator.
Exercise 6-7: Adding a Term Store Administrator
1. On the Central Administration home page, click Manage Service Applications under Application Management.
2. On the Manage Service Applications page, click the Service Applications tab, if it isn’t already selected.
3. Select the Managed Metadata service you want and then click Manage in the Ribbon.
4. When the Term Store Management Tool opens, in the Properties pane, either type the name of the user in the Term Store Administrators field or use the address book to add a user.
5. When you are finished, click Save.
If you later need to remove an administrator, repeat the process and select the name you want to remove in the Term Store Administrators field and delete the name. Click Save to make the process final.
Term store administrators possess a variety of abilities over the term store, including being able to create and delete term groups; assign or remove users from the group manager role; assign or remove users from the contributor role; import a term set; create, edit, or remove term sets; and edit the working languages for a term store.
Managing Database Operations for SharePoint
Database operations for SharePoint can include a wide variety of tasks, perhaps more database and database server–related tasks than you might consider for a SharePoint administrator. However, all of the content consumed in SharePoint is stored in databases, and to ensure the smooth operation of your environment, you must be able to manage and monitor the databases you rely upon.
Administering Database Operations
Although this might sound like you are being turned into a database administrator (DBA) instead of a SharePoint administrator, you aren’t actually responsible for managing all database operations. You do have a responsibility to manage those aspects of the database that have a direct impact on SharePoint operations, including monitoring the health of the database. You also need to be able to add database content, move site collections from one database to another, and, if necessary, manage a server farm using a read-only content database.
Adding a Content Database
It’s not beyond your purview as a SharePoint administrator to add content to a database and then attach it to a web application. The basics of performing this task using Central Administration are illustrated in Exercise 6-8. You must know the name of the database server on the farm for which you want to connect. You must also be the administrator on the local computer containing Central Administration and belong to the dbcreator fixed server role on the database server.
Exercise 6-8: Adding a Content Database Using Central Administration
1. Navigate to Central Administration and click Application Management.
2. Under Databases, click Manage Content Databases.
3. On the Manage Content Databases page, click Add A Content Database.
4. When the Add Content Database page appears, use the Web Application menu to select the desired web application for the new database.
5. Type the name of the database server you want to host the new database in the Database Server field.
6. Type the name of the database you want to use in the Content Database field.
7. Under Database Authentication, select either Windows Authentication or SQL Authentication. If you choose the latter, use the Account And Password field to enter the necessary credentials.
8. If you want to use a failover server, specify the server in the Failover Database Server field.
9. Specify the total number of top-level sites that can be created using the database as well as the number of sites that, when crossed, will trigger a warning message.
10. When finished, click OK.

You can perform the same task using Windows PowerShell. To do so, you must be a member of the SharePoint_Shell_Access role on the configuration database and a member of the WSS_ADMIN_WPG local group on the computer where SharePoint 2010 Products is installed.
Open Windows PowerShell, type the following command, and then press Enter, replacing -Name with the name of the content database you want to create, and replacing -WebApplication with the name of the specific web application to which you want to connect the database.
New-SPContentDatabase -Name <String> -WebApplication <SPWebApplicationPipeBind>
Typically, the web application is enclosed in quotes, such as "SharePoint - 80", but you can also specify it by its URL or URL: port number, such as http://test or http://test:12345. A typical example is as follows:
New-SPContentDatabase -Name "SPContentDB" -WebApplication "SPWebApp1"
Moving Site Collections between Databases
One error message that will likely send a cold chill down the spine of a neophyte SharePoint administrator is the announcement that a database has insufficient space because of the size of a site collection. Your SharePoint environment isn’t expected to be static, and if your company is growing, so are your site collections.
When you create a site collection, you should set site quotas and email alerts to notify you when site space limitations are in danger of being exceeded.
Although you shouldn’t have to move a site collection from a cramped to a roomier database very often, you will find yourself performing this task from time to time. Interestingly enough, you may also encounter the opposite, when one or more site collections doesn’t grow to the expected size. In that case, you have the option to move multiple site collections to a single content database.
You typically perform these tasks using Windows PowerShell, but it’s also possible using SharePoint’s backup and restore features.
See Chapter 12, “Backing Up and Restoring SharePoint,” for more information on this procedure.
A number of prerequisites must be satisfied before you can perform such a move. You must be a member of the db_owner fixed database role and the SharePoint_Shell_Access role in the SQL Server source content database, administration content database, destination content database, and configuration database. You must also belong to the WSS_ADMIN_WPG group on the local computer.
You must have already created the content database to which you want to move the site collection, and the source and destination databases must reside on the same instance of SQL Server. Also, the source and destination content databases must be attached to the same web application.
If you haven’t added the destination content database yet, see Exercise 6-8 for details.
Even when all those conditions have been met, it’s always a good idea to determine the size of the site collection before moving it from one content database to another. The free space available in the content database should be three times the amount of space required by the site collection.
You can perform this task only using Windows PowerShell. Open PowerShell; at the prompt, type the following; and then press Enter, replacing http://ServerName/Sites/SiteName with the name of the site collection:
$used = (Get-SPSiteAdministration -Identity <http://ServerName/Sites/SiteName>).DiskUsed
The $used variable contains the amount of disk space being used by the site collection.
The Windows PowerShell command Move-SPSite is used to move a single site collection from one content database to another. To move numerous site collections, you must use the Get-SPSite and Move-SPSite commands.
To move a single site collection from one database to another, type the following command at the PowerShell prompt and then press Enter, replacing http://ServerName/Sites/SiteName with the name of the site collection and replacing <DestinationContentDb> with the name of the destination database:
Move-SPSite <http://ServerName/Sites/SiteName> -DestinationDatabase <DestinationContentDb>
To move multiple site collections from one content database to another, type the following command at the PowerShell prompt and then press Enter, replacing <SourceContentDb> with the name of the source content database and replacing <DestinationContentDb> with the name of the destination content database:
Get-SPSite -ContentDatabase <SourceContentDb> | Move-SPSite -DestinationDatabase <DestinationContentDb>
In moving multiple site collections from one database to another, you are moving the entire contents from one database to another, rather than selecting specific site collections to move.
Running a Server Farm on a Read-Only Database
You may decide to conduct server farm operations against a read-only content database for a number of reasons. You can perform this action as part of an upgrade or disaster recovery procedure. This allows users to continue to access SharePoint during the maintenance or emergency condition. Users will not be able to write and save changes to the SharePoint content database during this time.
If a SharePoint user tries to execute an action requiring writing to the content database, the user will discover that the task is unavailable either because it has been disabled in the UI or because the user no longer has permissions to execute the action. Occasionally, a write task will appear to be available but will return an error when the user tries to complete the write task.
It’s important to understand that only the SharePoint server farm content databases are in a read-only state. The Central Administration content database, configuration database, and search database all continue to operate as read/write.
Other content databases can be set to read-only using the SQL Server Management Studio tool. To do so, perform these steps:
1. Open the SQL Server Management Studio utility on your computer and connect to the desired database server.
2. Right-click the desired content database and then click Properties.
3. Select the Options page and scroll to the State section of the Other options list.
4. In the Database Read-Only row, click the arrow next to False, select True, and then click OK.
When you set a content database to read-only, all of the connections to the database are stopped except for the connection used to set the read-only flag. When the read-only flag is removed, the other connections are restored.
Prior to setting a content database to read-only, you should make sure which site collection will be affected. You must use Windows PowerShell to find out which content database is associated with which site collection. As with other similar tasks, you must be a member of the SharePoint_Shell_Access role on the configuration database and a member of the WSS_ADMIN_WPG local group on the computer where SharePoint 2010 Products is installed.
At the PowerShell command prompt, type the following command and then press Enter, replacing <Site URL> with the URL of the site collection you want to determine is or is not associated with the content database. The command will return the name of the content database associated with the site.
Get-SPContentDatabase -Site <Site URL>
To set the desired content database to a read-only state, you will need access to SQL Server Management Studio and belong to the db_owner fixed database role for the required database. Exercise 6-9 shows you the steps.
Exercise 6-9: Setting a Content Database to Read-Only
1. Open SQL Server Management Studio, right-click the content database on which you want to set as read-only, and then click Properties.
2. Select the Options page and, in the Other options list, scroll to the State section.
3. In the Database Read-Only row, select the arrow next to False and set it to True.
4. When you are finished, click OK.
Repeat these steps on all the content databases you want to set as read-only.
SQL Server Reporting Services (SSRS)
Microsoft SQL Server 2008 Reporting Services (SSRS) is a server-based reporting system designed to offer a complete set of reporting functions for numerous data source types. SSRS allows the SQL Server administrator to manage a suite of utilities that can be used to create, manage, and return reports within the Microsoft Visual Studio environment. As a SharePoint administrator, you won’t be responsible for having a comprehensive knowledge of SSRS, but you will need to understand how to integrate this tool within SharePoint and use it to monitor the health of the databases relative to your content.
SQL Server 2008 Reporting Services SharePoint Integration
SRSS SharePoint Services integrated mode allows SRSS reports to be viewed directly from a SharePoint site. SharePoint treats SQL Server SRSS reports, report models, and shared data sources the same way as any other content that is accessed via the SharePoint interface. Using SRSS SharePoint integrated mode, you can check reports in and out, configure alerts to notify you when report content changes, and even workflow report in the reporting environment.
SQL Server 2008 SharePoint integrated mode is available only for SQL Server 2008 R2. The SQL Server 2008 R2 CTP Reporting Services Add-in for Microsoft SharePoint Technologies 2010 must be installed on a computer running SharePoint Server 2010. Once the add-in is installed and the servers are configured to use integration, you can publish SQL Reporting Services content to a SharePoint library and manage reports as you would any other document managed in SharePoint.
Supported operating systems are as follows:
- Windows Server 2008 R2
- Windows 7
- Windows Vista
- Windows XP Service Pack 3
The add-in requires about 25 MB of hard drive space. To find the download, go to www.microsoft.com/downloads/ and search for SQL Server 2008 R2 CTP Reporting Services Add-in for Microsoft SharePoint Technologies 2010 on the download site. In the search results, select the link that specifies the reporting services add-in for SharePoint Server 2010.
On the download page, read all the information and then download the add-in to the desired server.
The following steps assume you have not yet downloaded the add-in package to the required SharePoint Server computers. You must install the add-in package on all the frontend web servers in your server farm. The recommended procedure is to use the Installation Wizard to install the add-in on the first frontend web server and then subsequently use the files-only method to install the add-in on all the other web servers. Only after the add-in has been installed on all the web servers in the farm can you use Central Administration to configure the report server integration.
Preparing to Install the Reporting Services Add-in
To get started, follow these steps:
1. Log in to the SharePoint Server containing Central Administration with an account that has farm administrator permissions.
2. In addition to SharePoint Server being active, verify that SQL Server 2008 is online and acting as the report server.
3. Go to the download page at Microsoft.com and navigate to the location of the add-in download.
4. Select the desired language on the download page so that the Report Viewer web part will be available in that language.
5. Start the download of the rsSharepoint.msi file.
6. Once the download is complete, copy the rsSharepoint.msi file to all the frontend web servers on the server farm.
After the files have been downloaded and copied to the required web servers in the server farm, you can install the add-in on the first web server using the Installation Wizard. Remember that the service cannot be configured until after all the files are installed on the frontend web servers.
Installing the Reporting Services Add-in Using the Installation Wizard
To install the add-in, follow these steps:
1. On the first frontend web server, log in and navigate to the location of the rsSharePoint.msi file.
2. Double-click the rsSharePoint.msi file to launch the Installation Wizard.
3. When the wizard launches, navigate through the welcome page, the license agreement page, and the registration information page, performing the required actions on each page.
4. Click Install to run Setup.
5. After Setup has run, go to Central Administration and click Application Management to see that Reporting Services has been added as a new section and that links are available to be used to configure integration settings.
Now that the add-in has been installed on the first frontend web server using the Installation Wizard, you can proceed with installing the add-in on the remaining web servers in the farm using the files-only method. You can start the installation on one web server; once it begins to run, you can move to the next server and start a separate installation process, and so on.
This method uses the Installation Wizard to copy the application files to the computer. After the files have been copied, run the following actions to complete the installation.
You can also use the files-only mode installation method if you encounter errors performing the installation using the regular Setup.
Installing the Reporting Services Add-in Using Files-Only Mode
1. Run rsSharePoint.msi SKIPCA=1.
2. Open a command-line utility and navigate to the location of the rsCustomAction.exe file.
Setup should have copied the file to the path Documents and Settings<your name>LOCALS~1Temp.
3. At the command prompt, type the following and then press Enter. This process may take several minutes and will restart the W3SVC.
4. After Setup is finished, go to Central Administration, click Application Management, and verify that Reporting Services has been created.
Now that the add-in has been installed on all the required web servers, you must activate and configure Reporting Services in Central Administration.
One of the requirements you may not have responsibility for is the creation of a report center connected to a report server database on SQL Server 2008 to act as the target report server for SharePoint. This setup usually falls to the SQL Server administrator in your organization, but if this requirement is not met, you will not be able to use the SQL Server 2008 R2 CTP Reporting Services Add-in for Microsoft SharePoint Technologies 2010.
Activating Reporting Services in Central Administration
To activate Reporting Services, follow these steps:
1. In Central Administration, click Site Actions and then click Site Settings.
2. On the Site Settings page, click Site Collection Features under Site Collection Administration.
3. On the Features page, find Report Server Integration Feature and next to it click the Activate button.
Now that the feature has been activated, you can configure the add-in.
Configuring the Reporting Services Add-in in Central Administration
To configure Reporting Services, follow these steps:
1. In Central Administration, click Application Management.
2. On the Application Management page, click the Manage Integration Settings link under Reporting Services.
3. On the Manage Integration Settings page, enter the URL to the SQL Server 2008 report server in the Report Server Web Service URL field.
If you were not provided the URL to the report server, you can acquire it by using the Reporting Services Configuration tool to connect to the report server; then click Web Service URL and copy the URL displayed into the Report Server Web Service URL field referenced in the previous step.
4. Under Authentication Mode, select either Windows Authentication or Trusted Authentication and then click OK.
5. Under Reporting Services, click Grant Database Access and, if necessary, specify the name of the report server.
6. Specify whether the instance is the default or a named instance and then click OK.
7. When the Enter Credentials dialog box opens, enter the username and password used to connect to the report server in order to retrieve service account information.
8. Under Reporting Services, click Set Server Defaults.
9. For Report History Default, set the value for the number of copies of report history to retain site-wide.
10. For Report Processing Timeout, set the value for the number of seconds that must elapse before report processing times out.
11. For Report Processing Log, determine whether the report server should generate logs and, if so, set a value in days for how long the logs are to be retained.
12. For Enable Windows Integrated Security, determine whether a connection to the report data source can be made using the Windows security token of the user requesting the report.
13. For Enable Ad Hoc Reporting, set this option to let users perform ad hoc queries from the Report Builder report. Deselect it if you do not want the report server to create click-through reports for the reports that use a report model as a data source.
14. When you’re finished, click OK.
Now you should be able to see and manage report server items directly from inside a SharePoint site. When the Reporting Services add-in was installed, the Custom Reporting Services application pages were added to a SharePoint web application. Pages should now be available that let you set data source properties, report history, report processing options, schedules, subscriptions, and so on.
Viewing Report Server Items
Report server items are located in libraries or in folders in a library. For a given site, open the default document library and look for items with an .rdl file extension. Once you locatethe reporting services item or items in the library, perform the following actions:
1. Select the desired item.
2. Click to the right of the item to click the down-arrow and open the menu for the item.
3. Choose the desired action in the menu, such as View Properties or Edit Properties.
Using the Report Viewer Web Part
You can use the Report Viewer web part on a SharePoint site to view report server data. This is a custom web part that is installed on SharePoint when the Reporting Services Add-in is installed. The web part lets you view, navigate, print, and export reports for the report server running in SharePoint integrated mode. The web part reads report definition files with the .rdl file extension but cannot read any other report formats.
You can add the Report Viewer Web Page part to a web part page in the same manner as you add other web parts. When you click Site Actions, Edit Page, and then Add A Web Part, all under All Web Parts in Miscellaneous, select SQL Server Reporting Services Report Viewer.
You can then use the web part to open reports stored in a library, library folder, report history, or link from a Library web part to a Report Viewer web part. You also can only view a single report in a Report Viewer web part. If you need to view multiple reports, you’ll need to either create a dashboard with this capacity or add multiple Report Viewer web parts to a web parts page, with each web part displaying data from a different report.
Managing Business Data Connectivity
Microsoft Business Connectivity Services is a collection of features and services used to connect SharePoint solutions to external data sources and to define external content types based on external data. These external content types can be presented and interacted with in SharePoint lists and web parts as well as in Microsoft Office 2010 applications such as Outlook and SharePoint Workspace 2010.
BCS can connect to data sources such as SQL Server databases, SAP applications, and web services. BCS lets you design and build solutions that can extend SharePoint’s collaboration abilities to information sources well outside SharePoint’s traditional grasp. For instance, BCS can allow you to combine various services and features from external data sources and Office 2010 client applications within SharePoint to provide solutions targeting highly specific requirements.
Performing Administrative Tasks in Business Data Connectivity
You can perform a number of administrative tasks for BDC in Central Administration. The first one is assigning an administrator for a particular instance of the BDC service application. Exercise 6-9 will show you how. To complete this task, you must be a member of the Farm Administrators group. Once you assign an administrator for the instance of this service application, that person will be able to perform the same task and assign other administrators.
Exercise 6-9: Assigning an Administrator to an instance of the Business Data Connectivity Service
1. Navigate to Central Administration and click Manage Service Applications under Application Management.
2. On the Service Applications tab, click the desired instance of Business Data Connectivity.
3. On the Business Data Connectivity page, click the Edit tab.
4. Under Permissions, click Set Metadata Store Administrators.
5. On the Set Metadata Store Permissions page under Permissions, type the name for the user or account you want to make and administrator and then click Add.
6. You can assign one or a combination of the permissions Edit, Execute, Selectable In Clients, and Set Permissions.
7. If you desire, click Propagate Permissions To All Sub-items if you want the permissions you’re assigning to apply to all items nested in the BDC service application.
The permissions you had the option of setting in the previous exercise are defined as follows:
- Edit allows editing of external systems, BDC models, and external content types.
- Execute allows executing operations, such as create, read, update, delete, or query, on external content types.
- Selectable In Clients allows creating external lists on external content types.
- Set Permissions allows setting permissions on external content types, external systems, and BDC models.

Learning More about Business Data Connectivity Authentication
You are a SharePoint administrator for your company and have recently deployed a SharePoint Server 2010 server farm for one of your organization’s major divisions. You have been tasked with creating a series of connections to external data sources required by the management team and are currently reviewing the documentation regarding authentication and authorization to several databases on a SQL Server in a separate division of your organization.
You know you must create an identity in SharePoint and on the SQL Server that has the required permissions and access to data on external data sources as well as the ability to retrieve that data for use in SharePoint.
You want to configure pass-through authentication for users from SharePoint to SQL Server databases for ease of use. You work with the DBA who administers the SQL Server instance containing the required databases, and the DBA assists you in creating an account on the SQL Server and then configures the authentication and access requirements.
Once the SQL data source is configured with the appropriate authentication, you must configure permissions in SharePoint using Central Administration. You give an Active Directory group, on the Business Data Connectivity permissions page, the permissions Edit, Execute, and Selectable In Clients permissions. The management team, which will be using this group and requires access to this external data source, must have the ability to update, edit, and delete objects such as BDC models as well as being able to create lists on the external data source.
Once you’ve completed this task, you assist the members of the management team with accessing the data directly from within the team’s SharePoint site collection.
Managing External Systems
An external system is a source of information completely outside SharePoint, such as a relational database or a web service, that is accessed by users or services within a SharePoint solution. One or more instances of an external system can be set up to an external data source and must include the connection and authentication information for the external system.
Once you assign an administrator or administrators to the desired instances of the BDC service, you or a BDC administrator can perform a number of other tasks. One major class of tasks is managing external systems. Remember, for a BDC administrator to perform such tasks, you must have given them the correct permissions for such tasks, as previously stated.
Exercise 6-10 gets you started with setting permissions on an external system. When you perform this task, you determine who can perform edit and execute operations in the system or on external content types stored on the system. You can also decide who can create external lists and who else can set permissions on the system. You must be a member of the Farm Administrators group or the assigned administrator for this instance of the BDC service application to perform this task.
Exercise 6-10: Setting Permissions on an External System
1. Navigate to Central Administration and click Manage Service Applications under Application Management.
2. On the Service Applications tab, click the desired instance of Business Data Connectivity.
3. On the Business Data Connectivity page, click Edit.
4. Under View, click Application Models.
5. Click the check box for the external system on which you want to set permissions.
6. In the Permissions group, click Set.
7. In the available fields, type the user accounts, groups, or claims for which you want to add permissions and then click Add.
8. Set one or a combination of the permissions Edit, Execute, Selectable In Clients, or Set Permissions.
9. If you desire, click Propagate Permissions To All Sub-items.
As you can see, Exercise 6-10 was substantially similar to Exercise 6-9. The permission types granted are the same as you previously assigned a BDC service application instance administrator.
In the desired BDC instance, on the Edit tab as you saw in the previous exercise in step 3, you have access to a wide variety of actions. For instance, if you want to view all external systems, in the View group, click External Systems. Once you’ve done that, you can click View External Content Types to see the content types available for a particular external system. Under the View group, when you click External Systems, you can also click next to a particular system, click the arrow to make the menu appear for that external system, and then click Delete to remove it.
In addition to setting permission on an external system, you can configure some of the settings of that system from Central Administration. Exercise 6-11 takes you through the process.
By default, the only external system you can configure is a web service.
Exercise 6-11: Configuring an External System
1. Navigate to Central Administration and click Manage Service Applications under Application Management.
2. On the Service Applications tab, click the desired instance of Business Data Connectivity.
3. On the Business Data Connectivity page, click Edit.
4. In the View group, click External Systems.
5. Click the arrow next to the desired external system and, in the menu that appears, click Settings.
6. You can view or edit the settings.
Depending on the nature of the service running on the external system, the configuration options will vary quite a bit.
7. When finished, click OK.
If, for instance, you are configuring a web service, the following settings are available:
- WSDL URL is the full web address of the Web Service Description Language or .wsdl file of the service.
- Under WSDL Authentication Mode, you can configure the default method incoming credentials are passed through the service:
- PassThrough uses the credentials of the logged in user for authentication to the service.
- RevertToSelf uses the application pool account under which BCS is running for authentication to the service.
- Credentials uses basic or digest authentication rather than Windows authentication and uses the Secure Store service to map the user’s credentials to the specific individual or group credentials required by the service.
- WindowsCredentials is used for Windows authentication and uses the Secure Store service to map the user’s credentials to the specific individual or group credentials required by the service.
- WSDL SSO ApplicationId is used if you selected Credentials or WindowsCredentials under WSDL Authentication Mode and is the target application identifier for the service, which is configured in the Secure Store service.
You can also configure multiple instances of an external system. Multiple external system instances allow solution designers to set different security settings on external data connections in order to support multiple methods of connecting to the same external system. You can access these instances on any external system by following steps 1 through 4 from Exercise 6-11 and then performing the steps in Exercise 6-12.
Exercise 6-12: Configuring an Instance of an External System
1. Double-click the desired external system to view its instances.
2. Click the arrow next to the desired instance and, in the menu, click Settings.
3. View or edit the settings for the available service.
4. If you are using integrated security, in the Integrated Security field, type the string SSPI, and the BDC service will use the user’s Windows credentials to connect to the external system; otherwise, leave the field blank.
5. The Connection Pooling field is selected if the BDC service has ownership of connections to external systems in a pool as an optimization.
6. When you’re finished, click OK.
By default, the only instances of an external system you can configure are databases and web services. For both, you can configure Authentication Mode, just as you saw previously after Exercise. 6.11. For web services, you can also configure Web Service URL and SSO ApplicationId as previously shown. In addition, you can configure Web Service Proxy Timeout in milliseconds, which is the amount of time the service will wait before ending a request to a web service for external data.
For databases, you can configure Access Provider, which is the type of database; Data Source, which is the name of the database server; Initial Catalog, which is the name of the database; and Integrated Security and Connection Pooling, as previously mentioned.
Managing BDC Models
Part of managing BDC is managing BDC models. BDC models are XML files that contain collections of descriptions of one or more external content types. They also contain information about related external data systems and environmental properties. The models contain metadata that defines the fields of the data in each external content type, as well as the operations that are supported on the external data system.
The BDC service application supports the various operations used to import and export BDC models, as well as setting permissions for the models and viewing the external content types they contain. You can perform the same functions on resource file, which contain the localized names and properties for one or more of the external content types.
The primary reason for importing a BDC model is to add the model and the content containing external content types and external systems into the metadata catalog in SharePoint. Exercise 6-13 will show you how this is done. To begin, you must navigate to Central Administration and, just as you’ve done in previous exercises, click Manage Service Applications under Application Management, access the desired BDC instance, and then click the Edit tab. To perform this task, you must belong to the Farm Administrators group or be an administrator of the service application.
Exercise 6-13: Importing a BDC Model or Resource File
1. Under BDC models, click Import.
2. On the Import BDC Model page, type the full path to the model file in the DBC Model File field, or click Browse and navigate to the location of the model file or resource file.
3. In the File Type field, type either Model or Resource to identify the file type.
4. If you are importing a resource file, continue with the following steps; otherwise, you have completed the task.
5. Under Advanced Settings, to continue to import a resource file, click Localized Names to import the localized names for the external content types in a specific locale.
6. Click Properties to import properties for external content types.
7. Click Permissions to import permissions for external content types.
8. Use the Use Setting field to type a unique name for a set of environment settings if you plan to save the group of imported resource settings in a file that you can later export for that environment.
For imported resource files, imported localized names are merged with the existing localized names in the BDC service database. Imported properties are merged with the existing property descriptions in the BDC service database. Imported permissions are stored with the existing permissions data in the BDC service application. If an entry for an existing external content type is present in the access control list (ACL), the import operation will overwrite the existing permissions. This could lock out any users who access the content type currently stored in the service application by writing the permissions of a different user to the ACL.
What you can import you can also export. The operation to export a BDC model or resource file is almost the same as the import operation. On the Business Data Connectivity Service page, click the Edit tab to get started. Exercise 6-14 describes the rest.
Exercise 6-14: Exporting a BDC Model or Resource File
1. Under View, click BDC Models.
2. On the Business Data Connectivity Models page, select the model or resource file you want to export.
3. Under BDC models, click Export.
4. On the Export page, type either BDC Model or Resource in the File Type field.
5. If you are exporting a resource file, continue with the following steps; otherwise, proceed to the final step in the task.
6. Under Advanced Settings, to export a resource file, click Localized Names to export localized names for external content types in a specific locale.
7. Click Properties to export properties for external content types.
8. Click Permissions to export permissions for external content types.
9. Click Proxies to export an implementation-specific proxy used to connect to an external system.
10. Use the Use Setting field to type the unique name of the file containing environmental settings to export if you saved a set of resources in the file to be exported for a specific environment.
11. When finished, click Export.
When you click Export, the network location interface on your computer will appear, allowing you to navigate to a location to which you can save the BDC model or resource file.
You also have the ability to set permissions on a BDC model. Follow the steps in Exercise 6-15 to learn the process.
Exercise 6-15: Setting Permissions on a BDC Model
1. Under View, click BDC Models.
2. On the Business Data Connectivity Models page, select the check boxes for each of the BDC models on which you want to set permissions.
3. Under Permissions, click Set.
4. In the available field, type the user accounts, groups, or claims for which you want to give permissions and then click Add.
5. To set the permissions, click Edit if you want to allow the designated accounts to edit the BDC model.
6. Click Set Permissions if you want to allow the designated accounts to set permissions on the BDC model.
7. If you want to propagate these permissions to nested items in the model, click Propagate Permissions To All Sub-items.
You’ve already seen how to view all the BDC models by clicking the Edit tab and then, under View, clicking BDC models. You can also view a model’s external content types by clicking the arrow next to a particular model and, in the menu that appears, clicking View External Content Types.
To delete a BDC model, you also click BDC Models under View and then on the Models page select the model you want to delete. Next, click Delete under BDC Models and then, when you are prompted, click OK.
Managing External Content Types
An external content type is an XML file that is used to define objects such as Contact, Customer, or Order and is used in a business application. The definition includes fields of data contained in the object; operations used to create read, update, or delete the object; any actions users can perform on the object; and any information used to support connecting to the external data source for the object’s data.
An external content type is also used to define data stored on supported external systems such as a SQL Server database, some other relational database, a SharePoint site, a web service, or other data container.
You can add an external content type to a BDC service application in several ways:
- Create a new external content type with SharePoint Designer 2010.
- Create a new external content type with an external content type designer in Visual Studio 2010.
- Import an application model containing one or more external content types into the BDC service application.
Although you, as a SharePoint administrator, are not expected to create external content types, once they are imported, you will be asked to perform any number of tasks related to these content types.
Exercise 6-16 will show you how to set permissions on an external content type. You will need to belong to the Farm Administrators group or be an administrator on the selected instance for the BDC service application to perform this task. This task begins in the same location as all the other related BDC exercises.
Exercise 6-16: Setting Permissions on an External Content Type
1. Click the Edit tab and click External Content Types under View.
2. Select the check boxes for each of the external content types on which you want to set permissions.
3. Under Permissions, click Set.
4. In the available field, enter the user accounts, groups, or claims for which you want to grant permissions and then click Add.
5. To set permissions, click Edit to allow the selected accounts to edit the external content types.
6. Click Execute to allow the selected accounts to execute create, read, update, delete, and query operations.
7. Click Selectable In Clients to allow the selected accounts to create external lists of any of the external content types.
8. Click Set Permissions if you want to allow the selected accounts to set permissions on the external content types.
9. Click Propagate Permissions To All Sub-items to allow the permissions to propagate to items nested under the external content types.
As you can see, the steps are very much like the previous exercise where you set permissions on a BDC model. Although you can set permissions to allow designated accounts to perform a default set of actions, you can also add a customized action to an external content type. The action can be a program or a web page that is accessible via URL.
Once the action is associated with the content type, you can pass parameters to the action based on the contents of one or more customized fields in the content type. When you set the action, it will not become available in any previously existing external lists for the content type; however, it will become available for external lists created after you create the action.
To successfully perform this exercise, you must possess the same permissions as you did for the previous task. Exercise 6-17 will take you through the steps.
Exercise 6-17: Adding an Action to an External Content Type
1. Click the Edit tab, and click External Content Types under View.
2. Select the external content type on which you want to add the action.
3. Click the arrow near the content type to show the menu and then click Add Action.
4. On the Add Action page, type the name of the action, which can be any text string, in the Action Name field.
5. Type the complete URL of the command in the Navigate To The URL field.
The command can include any parameters and placeholders for the parameters. The parameters will be populated with the contents of one or more of the fields in the external content type. Placeholders should be numbered with integers starting with zero and progressing, as in 0, 1, 2, 3, and so on, and contained in curly brackets, as in {0}. An example of a URL providing the parameters p0, p1, and p2 is http://www.wiredwriter.com/test.aspx?p0={0}&p1={1}&p2={2}. Remember that not all commands will provide numeric parameters.
1. If you want to include parameter placeholders in the URL, for each desired parameter starting with {0}, click Add Parameter in the Parameter Property field. In the list that appears, click the field containing the contents you want to pass for that parameter; repeat for each parameter you want to include.
2. If you want to associate an icon with the custom action, click Standard Icon under Icon to select an icon from the list. Or, in The Image At This URL, type the complete URL to an image you want to use for the icon.
3. Click Default Action if you want this to be a default action.
4. When you are done, click OK to add the action.
Profile pages are used to display information for an item in an external content type. You can specify such a page for an instance of a BDC service application. They are stored in a site in the server farm that hosts the BDC service, and you can choose where the profile page will be hosted.
After clicking the Edit tab, click Host under Profile Pages. Then on the Entity Profile Host page, type the URL of the site where profile pages are created and stored, which must be in the same server farm as where the BDC service application instance exists. Any user who creates or updates profile pages must have read/write permissions on the site, while users who will only view the profile pages need read-only permissions only. If you create a new site for this purpose in a new web application, associate the web application with the desired instance of the BDC service application.
You can also create or update a profile page for an external content type. Exercise 6-18 shows you step-by-step.
Exercise 6-18: Creating or Editing a Profile Page for an External Content Type
1. Click the Edit tab and click External Content Types under View.
2. On the View External Content Types page, select the desired content type.
3. Click next to the content type to make the arrow appear and then, in the menu, click Create/Upgrade Profile Page.
4. On the Create/Upgrade Profile Pages page, to create a new version of the profile page, overwriting the current page, select the Allow Overwriting Of Existing Profile Pages check box.
5. To create a new profile page without overwriting the existing pages, clear the Allow Overwriting Of Existing Profile Pages check box.
6. When you’re done, click OK.
You can create or update profile pages for multiple external content types by clicking the Edit tab and clicking Create/Upgrade under Profile Pages.
To delete an external content type, after clicking the Edit tab, under View, click External Content Types. On the page that appears, select the content type you want to delete. Click next to the content type, and when the arrow appears, click the arrow and then click Delete in the menu.
Summary
In this chapter, you learned a about a number of aspects of SharePoint operations.
- Managing metadata service applications, connections, and term stores
- Administering database operations, such as adding content to a database, moving site collections between databases, and using an read-only database
- Using SQL Server Reporting Services by integrating it into SharePoint and viewing reporting from SharePoint using web parts
- Performing Business Data Connectivity administration such as managing external systems, BDC models, and external content types
Exam Essentials
Learning the Administrative Tasks Associated with Metadata Service Applications Demonstrate the ability to manage all the required tasks related to creating and maintaining a metadata service application and application connections and publishing the application.
Managing Database Operations Related to SharePoint Perform all the tasks necessary to manage information in content databases that SharePoint depends upon, move data from one database to another, and read SQL Server reports regarding such content from within SharePoint.
Performing Business Data Connectivity Administration Demonstrate all the behaviors related to effective creation and management of Business Data Connectivity services, including administering permissions on service applications and connections, importing and exporting BDC model and resource files, and managing external content types.
Review Questions
1. You are a SharePoint administrator for your company, and you’ve been tasked by the CIO with providing specific external data sources required by the management team relating to strategic planning for the next fiscal year. This is the first step in creating a managed metadata service application that will be used by the management team to access the external data. In Central Administration, you begin the process of creating the service application and input the name of the SQL server containing the desired database. Next, you need the name of the database but don’t have it readily available. Of the following options, which one will most likely provide the name of the database residing on the SQL server?
A. Run the SharePoint 2010 Products Configuration Wizard to acquire the name of the database.
B. Run Windows PowerShell in administrator mode to query SQL Server for the database name.
C. Run the SQL Server Management Studio tool to get the name of the database.
D. Leave a voice mail for the DBA responsible for SQL Server asking her for the name of the database.
2. You are a SharePoint administrator for your company, and you’ve been tasked by the CIO with providing specific external data sources required by the management team relating to strategic planning for the next fiscal year. This is the first step in creating a managed metadata service application that will be used by the management team to access the external data. In Central Administration, you begin the process of creating the service application, and now you must select an authentication method. Of the following, which are valid authentication types to use with SQL Server in this situation? (Choose two.)
A. Basic authentication
B. SQL authentication
C. Trusted authentication
D. Windows authentication
3. You are a SharePoint administrator for your company, and you’ve been tasked by the CIO with providing specific external data sources required by the management teams of several key divisions of the company relating to strategic planning for the next fiscal year. You have created the managed metadata service application, but now you must publish it so that teams using other SharePoint server farms can access the application. You are currently publishing the application and are configuring the connection type. Of the following, which are valid default connection types available when publishing the metadata service application? (Choose all that apply.)
A. FTP
B. HTTP
C. HTTPS
D. TCP
4. You are a SharePoint administrator for your company, and you’ve been tasked by the CIO with providing specific external data sources required by the management teams of several key divisions of the company relating to strategic planning for the next fiscal year. You have created the managed metadata service application, but now you must publish it so that teams using other SharePoint server farms can access the application. You have published the application and performed all the other required tasks, but the administrator of the other SharePoint server farms cannot create a connection to your application. You suspect the problem occurred when you published the application. Of the following, what are the most likely causes of this problem? (Choose all that apply.)
A. You selected a connection type other than HTTP or HTTPS.
B. You failed to create a description for the published service and without it the other server farm administrators cannot locate the published service.
C. You failed to select the Publish This Service Application To Other Farms check box on the Publish Service Application page.
D. You failed to create a trust relationship with the other farms using the Establish Farm Trust page during the publication process.
5. You are a SharePoint administrator for your company, and you’ve been tasked by the CIO with providing specific external data sources required by the management teams of several key divisions of the company relating to strategic planning for the next fiscal year. You have created a managed metadata service connection to a metadata service application that’s been published on another server farm. You want to define additional behaviors of the connection and now are in the process of updating the connection. Management teams are accessing the external data in a variety of sites and site collections using lists and libraries, among other interfaces. How can you make sure that updated content will be able to be accessed throughout these venues? (Choose all that apply.)
A. On the Managed Metadata Service Connection page, click the Refresh button in the Ribbon to update all the libraries and lists in all of the site collections using the service.
B. On the Managed Metadata Service Connection page, select Consumes Content Types From The Content Type Gallery At and then enter the URL of the content gallery.
C. On the Managed Metadata Service Connection page, select Push-Down Content Type Publishing Updates From The Content Type Gallery To Sub-sites and list using the content type.
D. On the Managed Metadata Service Connection page, select Update in the Ribbon, and then select Update All Content Types in the menu that appears.
6. You are a SharePoint administrator for your company, and you’ve been tasked by the CIO with providing specific external data sources required by the management teams of several key divisions of the company relating to strategic planning for the next fiscal year. You have created a term store to be used as a container for various terms associated with data items to team members accessing the external data service you created. You want to hand off responsibility of the term store to a member of your staff, and to do that, you need to create your staff member as a term store administrator. Of the following options, where will you most likely be able to perform this task?
A. In Central Administration by selecting the Business Data Connectivity instance and then, on the Ribbon, clicking Manage to open the Term Store Management Tool
B. In Central Administration by selecting the Business Data Connectivity instance and then, on the Ribbon, clicking Properties to open the Term Store Management Tool
C. In Central Administration by selecting the Business Data Connectivity instance and then, on the Ribbon, clicking Administrators to open the Term Store Management Tool
D. In Central Administration by selecting the Business Data Connectivity instance and then, on the Ribbon, clicking New, and then selecting Term Store Management to open the Term Store Management Tool
7. You are a SharePoint administrator for your company, and you need to add a content database to a SQL Server instance in order to move a site collection that is running out of room on its current database to a new database. You know you have more than one option to use to create the new content database. Of the following, which are valid options? (Choose all that apply.)
A. Central Administration
B. Windows PowerShell
C. SQL Server Management Studio
D. The Stsadm command-line tool
8. You are a SharePoint administrator for your company, and you need to add a content database to a SQL Server instance in order to move a site collection that is running out of room on its current database to a new database. You know more than one type of authentication method can be configured when connecting to the SQL service when create the database. Of the following, which are valid authentication options? (Choose all that apply.)
A. Basic authentication
B. SQL authentication
C. Trusted authentication
D. Windows authentication
9. You are a SharePoint administrator for your company. You have recently received an alert in SharePoint stating that a site collection is running out of room on its current database. You create a larger database on the SQL Server instance and prepare to move the site collection from the smaller database to the larger one. Of the following options, which can you use to move the site collection? (Choose all that apply.)
A. Central Administration Application Management
B. Central Administration Backup and Restore
C. Central Administration System Settings
D. Windows PowerShell
10. You are a SharePoint administrator for your company, and you are preparing an upgrade operation for SharePoint. To that end, you must set the content database to read-only. You inform all your SharePoint users when the operation will occur, the duration of the operation, and what to expect. Then you and your staff prepare for the upgrade. In setting the content database to read-only, what method must you use?
A. Central Administration
B. Windows PowerShell
C. SQL Server Management Studio
D. The Stsadm.exe command-line tool
11. You are a SharePoint administrator for your company, and you are preparing an upgrade operation for SharePoint. To that end, you must set the database to read-only. You are briefing your staff on the operation and describing which databases will be set to read-only. Of the following, which databases will be set to read-only? (Choose all that apply.)
A. The Central Administration content database
B. The SharePoint server farm content database
C. The Configuration database
D. The Search database
12. You are the SharePoint administrator for your company, and as part of configuring the health and monitoring system in SharePoint, you are performing actions that will enable SQL Server Reporting Services (SRSS) integration. There are a number of tasks that must be performed, and the first one is preparing SharePoint for the integration. Of the following, which are valid steps in the preparation? (Choose all that apply.)
A. From Central Administration, accessing the SQL Server instance that will act as the report server
B. On the Reporting Services add-in download page, selecting the desired language for the download
C. Once the Reporting Services add-in package has been downloaded, copying it to all application servers in your server farm
D. Setting the reporting server database to read-only while the Reporting Services add-in is being installed
13. You are the SharePoint administrator for your company, and as part of configuring the health and monitoring system in SharePoint, you are performing actions that will enable SQL Server Reporting Services (SRSS) integration. You must install the SRSS add-in package on all web servers in the server farm. Choosing the first web server, what is the method you should use?
A. The Installation Wizard.
B. Files-Only Mode.
C. Either the Installation Wizard or Files-Only Mode.
D. The add-in must be installed on all web servers using Windows PowerShell.
14. You are the SharePoint administrator for your company, and as part of configuring the health and monitoring system in SharePoint, you are performing actions that will enable SQL Server Reporting Services (SRSS) integration. You have installed the SRSS add-in package on all web servers in the server farm. As a result, what has changed in Central Administration?
A. Under Application Management, Reporting Services has been added.
B. Under Monitoring, Reporting Services has been added.
C. Under System Settings, Reporting Services has been added.
D. Nothing has changed in Central Administration.
15. You are the SharePoint administrator for your company, and as part of configuring the health and monitoring system in SharePoint, you have enabled SQL Server Reporting Services (SSRS) in SharePoint. As part of installing the SRSS add-in, the Report Viewer web part was added. You are assisting a SharePoint website administrator in using the web part on his team’s web part page. Of the following, what report types can the Report Viewer web part read? (Choose all that apply.)
A. Administrative Reports
B. Diagnostic Logs
C. Health Reports
D. SRSS Reports
16. You are a SharePoint administrator for your organization. You have been tasked with configuring Business Data Connectivity (BDC) services to enable connections to external data sources such as SQL servers, SAP applications, web services, and other sources. You want to assign a member of your staff to have administrator access to the BDC service. What are the permission types you can assign her? (Choose all that apply.)
A. Edit
B. Execute
C. Select
D. Set Permissions
17. You have been assigned to be an administrator of an instance of the Business Data Connectivity service by a SharePoint administrator in your organization. You have been tasked with managing external systems associated with the BDC service including setting permissions on an external system, which you have been assigned rights to do. Of the following, which are valid permission options you can set to an external system? (Choose all that apply.)
A. Edit
B. Execute
C. Selectable In clients
D. Set Permissions
18. You have been assigned to be an administrator of an instance of the Business Data Connectivity service by a SharePoint administrator in your organization. You have been tasked with managing external systems associated with the BDC service. You are currently configuring an external system to use a service. Of the following, which is the only service an external system can be configured to use by default?
A. Application service
B. Database service
C. User Profile service
D. Web service
19. You have been assigned to be an administrator of an instance of the Business Data Connectivity service by a SharePoint administrator in your organization. You have been tasked with managing external systems associated with the BDC service. You are currently configuring an external system to use a service, and you are about to choose a WSDL Authentication Mode. You want to choose the mode that uses the application pool account under which Business Connectivity Services is running. Of the following, which is the correct mode?
A. PassThrough
B. RevertToSelf
C. Credentials
D. WindowsCredentials
20. You are a SharePoint administrator for your organization, and you are configuring BDC services in the server farm. You want to import a BDC model that contains a collection of descriptions for an external content type. You are aware that you can also use the import process for resource files, but you’re not sure if the import process is identical to the process for importing a BDC model. You investigate, and find which of the following are true? (Choose all that apply.)
A. You can select to import either a BDC model or a resource file in one action, but you can’t import both at the same time.
B. Resource files import properties for external content types, and BDC models don’t.
C. Resource files import permissions for external data types, and BDC models don’t.
D. There is no difference in the process of importing a BDC model or a resource file.
Answers to Review Questions
1. C. Although you could just ask the DBA responsible for the SQL Server instance in question the name of the database, using SQL Server Management Studio will most likely provide you with the information you need.
2. B, D. SQL authentication and Windows authentication are the only two options available when creating a managed metadata service application in Central Administration.
3. B, C. The only options available on the Publish Service Application screen in the drop-down menu are HTTP and HTTPS. The other options are bogus.
4. C, D. Option A cannot be the answer, since you can only select HTTP or HTTPS as connection types. Failing to create a description couldn’t be the problem, since, although the description text provides a friendlier description of the service, it’s not required to successfully publish the application service.
5. B, C. If the service allows access to a content type library, choosing the action described in option B provides the URL to the content type library, and option C allows the data from the content type library to be pushed down to all subsites, lists, and libraries. Options A and D are bogus.
6. A. Only the option described in A opens the Term Store Management Tool so you can create a term store administrator.
7. A, B. You can either use Central Administration or use Windows PowerShell. Options C and D are not valid options.
8. B, D. The only options available for you to select for authentication types are SQL authentication and Windows authentication.
9. B, D. The primary method of moving a site collection from one database to another is with Windows PowerShell, although you can also use Backup and Restore in Central Administration. No other Central Administration tool will accomplish this task.
10. C. While you can use Windows PowerShell to determine which site collection uses a given content database, you must use SQL Server Management Studio to set the database to a read-only state.
11. B. Only the SharePoint server farm content database will have the read-only flag set. All other databases will continue to be completely available.
12. A, B. You must be able to connect to the report server from SharePoint, and choosing a language on the download site makes sure that the Report Viewer web part, which will be installed with the add-in, will be available in that language. You do not need to set the report server database to read-only, and you must copy the add-in package to all web servers in the farm, not all application servers.
13. A. It is recommended that you install the add-in package on the first web server using the Installation Wizard and use the Files-Only Mode for all other web servers.
14. A. The Reporting Services area has been created under Application Management and contains a number of links that allows you to administer SRSS services.
15. D. The SQL Server Reporting Services Report Viewer, otherwise called the Report Viewer web part, can only read SRSS reports that use the .rdl extension. It can interpret no other file or report type.
16. A, B, D. Option C would have been correct if it had been Selectable In Clients.
17. A, B, C, D. You are allowed to set the same permissions on an external system that can be assigned to you as an administrator of a BDC service.
18. D. You can only configure an external system to use a web service by default.
19. B. PassThrough uses the credentials of the logged in use, Credentials uses either basic or digest authentication, and WindowsCredentials uses Windows authentication and utilizes the Secure Store Service to map a user’s credentials to the credentials required by the service.
20. A, B, C. Although you can import both a BDC model and a resource file, during the import operation you must choose one or the other. Resource files import localized names, properties, and permissions to external content types, but BDC models don’t.