
Chapter 9. UI Testing
Apple added quite a good framework for UI testing in Xcode 7. This is so much fun, I am sure you are going to enjoy writing UI tests. UI tests go hand-in-hand with accessibility, so knowing a bit about that is very useful, if not necessary.
When you are debugging accessibility-enabled apps on the simulator, you may want to use a really handy dev tool that comes with Xcode: the Accessibility inspector (Figure 9-1). You can find it by right-clicking Xcode’s icon in the Dock and then choosing Accessibility Inspector from Open Developer Tool. The Accessibility inspector allows you to move your mouse over items on the screen and then get information about their accessibility properties, such as their values, identifiers, etc. I suggest that you use this program whenever you want to figure out the identifiers, labels, and values of UI components on your views.
In this chapter we will have a look at how to write UI tests and evaluate the results. We will use Xcode’s automated UI tests and also write some tests by hand.
9.1 Preparing Your Project for UI Testing

Figure 9-1. The Accessibility inspector shows information for a button on the screen, in the simulator
Solution
If you have an existing project, simply add a new UI Test target to your project. If you are creating a new project from scratch, you can add a UI Test target in the creation process.
Discussion
If you are starting a new app from scratch, upon setting your project’s properties, you will be given a chance to create a UI testing target (see Figure 9-2). Enable the “Include UI Tests” option.
If you have an existing project and want to add a new UI testing target to it, create a new target. In the templates screen, under iOS, choose Test and then “Cocoa Touch UI Testing Bundle” (see Figure 9-3).

Figure 9-2. The “Include UI Tests” option in the Xcode’s new project sheet
In the next screen, you will then be asked on which target inside your project you want to create the UI testing target. Make sure that you choose the right target. You can change this later, if you want, from the properties of your UI Test target (see Figure 9-4).

Figure 9-3. You can also add a new UI testing bundle to your existing apps
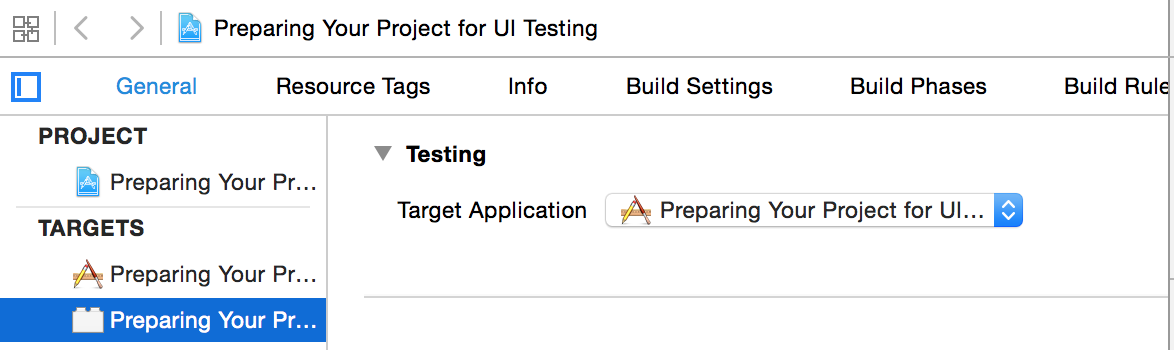
Figure 9-4. You can change the target to which your UI tests are attached even after the creation of your UI Test target
9.2 Automating UI Test Scripts
Solution
Use the new record button in Xcode when you are in your UI testing target’s code (see the red circle near the upper-left corner of Figure 9-5). This will really be handy if you want to automatically get all your UI test codes written for you (but sometimes you’ll still have to write some yourself).

Figure 9-5. The little circular record button on the debugger section of Xcode’s window automatically gets UI test codes
Note
You can write all your UI tests in pure Swift code. No more mocking around with JavaScript. Jeez, isn’t that a relief?!
Discussion
Let’s say that you have a UI that looks similar to that shown in Figure 9-6. In this UI, the user is allowed to enter some text in the text field at the top of the screen. Once she is done, she can just press the button and the code will translate her input into its equivalent capitalized string and place it in the label at the bottom.

Figure 9-6. Sample UI with text fields and button
I assume that you have arranged these UI components inside a storyboard. In the Identity inspector in IB, set the accessibility label of your text field to “Full Name,” the label for your button to “Capitalize,” and your label to “Capitalized String.” Now hook up your text field and your label to your code under the names of “lbl” and “txtField” as I’ve done. It just makes understanding the code easier. Otherwise you can name them what you want. Then hook the action of your button to your code. I’ve named this action method capitalize(). Now when the user presses the button, we read the text and capitalize it:
@IBActionfunccapitalize(){guardlettxt=txtField.textwheretxt.characters.count>0else{return}lbl.text=txt.uppercaseStringlbl.accessibilityValue=lbl.text}
Now head over to the main Swift file for your UI tests and you should see a simple and empty method usually named testExample(). Put your cursor inside that method and then press the record button. Xcode will open your app and you will be able to interact with your app as you would normally. Acting as a user would be expected to act, select the text field by tapping on it and then type some text in it like “Hello, World!” Finally, press the capitalize button. Xcode will generate a test that looks more or less like:
letapp=XCUIApplication()letfullNameTextField=app.textFields["Full Name"]fullNameTextField.tap()fullNameTextField.typeText("Hello, World")app.buttons["Capitalize"].tap()
We have a problem, Watson! We now need to make sure that the capitalized text inside our label is correctly capitalized. How can we do that in Xcode and get Xcode to generate the code for us? Well, the answer is: we can’t! This is a logical task that you cannot automate with Xcode, so let’s do it ourselves. In the app object, there is a property called staticTexts, so let’s get our label from there:
letlbl=app.staticTexts["Capitalized String"]
This will give us an item of type XCUIElement. The app object is of type XCUIApplication, just so you know. Every element has a value property that is an optional value of type AnyObject. For our label, this is going to contain a string. So let’s read its value as a string and then compare it with the string that we expect it to be:
letenteredString="Hello, World!"letexpectedString=enteredString.uppercaseStringletapp=XCUIApplication()letfullNameTextField=app.textFields["Full Name"]fullNameTextField.tap()fullNameTextField.typeText(enteredString)app.buttons["Capitalize"].tap()letlbl=app.staticTexts["Capitalized String"]XCTAssert(lbl.valueas!String==expectedString)
Note
I took the opportunity to put the entered and expected strings inside string objects so that we don’t have to write them multiple times.
Now press the little play button next to your test method and let Xcode do its thing. You should now see that the text has succeeded if everything went well.
9.3 Testing Text Fields, Buttons, and Labels
Solution
All the aforementioned items are instances of type XCUIElement. That means that you can work with some really cool properties of them in UI testing, such as the followings:
existstitlelabelenabledframedebugDescriptiondescendantsMatchingType(_:)childrenMatchingType(_:)
The last two in the list are a bit more advanced than what I’d like to discuss in this recipe, so we are going to talk about them later in this chapter when we discuss queries.
Discussion
Let’s say that you have a label and a button. When the button is pressed, you are hiding the label (by setting its hidden property to true). You now want to write a UI test to see whether the desired effect actually happens. I assume that you’ve already set up your UI and you’ve given an accessibility label of “Button” to the button and “Label” to the label.
Note
I recommend that you do as much as possible in Xcode’s automated recording system, where you can just visually see your UI and then let Xcode write your UI test code for you. So I will do that, not only in this recipe, but as much as possible in all other recipes in this book if appropriate.
So open the recording section of UI tests (see Figure 9-5) and press the button. The code that you’ll get will be similar to this:
letapp=XCUIApplication()app.buttons["Button"].tap()
You can see that the app object has a property called buttons that returns an array of all buttons that are on the screen. That itself is awesome, in my opinion. Then the tap() method is called on the button. We want to find the label now:
letlbl=app.staticTexts["Label"]
As you can see, the app object has a property called staticTexts that is an array of labels. Any label, anywhere. That’s really cool and powerful. Regardless of where the label is and who is the parent of the label, this property will return that label. Now we want to find whether that label is on screen:
XCTAssert(lbl.exists==false)
You can, of course, also read the value of a text field. You can also use the debugger to inspect the value property of a text field element using the po command. You can find all text fields that are currently on the screen using the textFields property of the app that you instantiated with XCUIApplication().
Here is an example where I try to find a text field on the screen with a specific accessibility label that I have set in my storyboard:
letapp=XCUIApplication()lettxtField=app.textFields["MyTextField"]XCTAssert(txtField.exists)XCTAssert(txtField.value!=nil)lettxt=txtField.valueas!StringXCTAssert(txt.characters.count>0)
See Also
Recipe 9.1 and Recipe 9.2
9.4 Finding UI Components
Solution
Construct queries of type XCUIElementQuery. Link these queries together to create even more complicated queries and find your UI elements.
The XCUIElement class conforms to the XCUIElementTypeQueryProvider protocol. I am not going to waste space here and copy/paste Apple’s code in that protocol, but if you have a look at it yourself, you’ll see that it is made out of a massive list of properties such as groups, windows, dialogs, buttons, etc.
Here is how I recommend going about finding your UI elements using this knowledge:
- Instantiate your app with
XCUIApplication(). - Refer to the
windowsproperty of the app object to get all the windows in the app as a query object of typeXCUIElementQuery. - Now that you have a query object, use the
childrenMatchingType(_:)method to find children inside this query.
Let’s say that you have a simple view controller. Inside that view controller’s view, you dump another view, and inside that view you dump a button so that your view hierarchy looks something like Figure 9-7.

Figure 9-7. Hierarchy of views in this sample app
This hierarchy was created by placing a view inside the view controller’s view, and placing a button inside that view. We are now going to try to find that button and tap it:
letapp=XCUIApplication()letview=app.windows.childrenMatchingType(.Unknown)letinnerView=view.childrenMatchingType(.Unknown)letbtn=innerView.childrenMatchingType(.Button).elementBoundByIndex(0)XCTAssert(btn.exists)btn.tap()
Discussion
Let’s write the code that we wrote just now, but in a more direct and compact way using the descendantsMatchingType(_:) method:
letapp=XCUIApplication()letbtn=app.windows.childrenMatchingType(.Unknown).descendantsMatchingType(.Button).elementBoundByIndex(0)XCTAssert(btn.exists)btn.tap()
Here I am looking at the children of all my windows that are of type Unknown (view) and then finding a button inside that view, wherever that button may be and in whichever subview it may have been bundled up. Can this be written in a simpler way? You betcha:
letbtn=XCUIApplication().buttons.elementBoundByIndex(0)XCTAssert(btn.exists)btn.tap()
Note
The buttons property of our app object is a query that returns all the buttons that are descendants of any window inside the app. Isn’t that awesome?
Those of you with a curious mind are probably thinking, “Can this be written in a more complex way?” Well yes, I am glad that you asked:
letmainView=XCUIApplication().windows.childrenMatchingType(.Unknown)letviewsWithButton=mainView.descendantsMatchingType(.Unknown).containingType(.Button,identifier:nil)XCTAssert(viewsWithButton.count>0)letbtn=viewsWithButton.childrenMatchingType(.Button).elementBoundByIndex(0)XCTAssert(btn.exists)btn.tap()
Here I am first finding the main view inside the view controller that is on screen. Then I am finding all views that have a button inside them as a first child using the awesome containingType(_:identifier:) method. After I have all the views that have buttons in them, I find the first button inside the first view and then tap it.
Now let’s take the same view hierarchy, but this time we will use predicates of type NSPredicate to find our button. There are two handy methods on XCUIElementQuery that we can use to find elements with predicates:
elementMatchingPredicate(_:)matchingPredicate(_:)
The first method will find an element that matches a given predicate (so your result has to be unique) and the second method finds all elements that match a given predicate. I now want to find a button inside my UI with a specific title:
letapp=XCUIApplication()letbtns=app.buttons.matchingPredicate(NSPredicate(format:"title like[c] 'Button'"))XCTAssert(btns.count>=1)letbtn=btns.elementBoundByIndex(0)XCTAssert(btn.exists)
Now another example. Let’s say we want to write a test script that goes through all the disabled buttons on our UI:
letapp=XCUIApplication()letdisabledBtns=app.buttons.containingPredicate(NSPredicate(format:"enabled == false"))XCTAssert(disabledBtns.count>1)fornin0..<disabledBtns.count{letbtn=disabledBtns.elementBoundByIndex(n)XCTAssert(btn.exists)}
See Also
Recipe 9.1, Recipe 9.2, and Recipe 9.3
9.5 Long-Pressing on UI Elements
Discussion
Create a single-view app and when your view gets loaded, add a long gesture recognizer to your view. The following code waits until the user long-presses the view for 5 seconds:
overridefuncviewDidLoad(){super.viewDidLoad()view.isAccessibilityElement=trueletgr=UILongPressGestureRecognizer(target:self,action:"handleLongPress")gr.minimumPressDuration=5view.addGestureRecognizer(gr)}
The gesture recognizer is hooked to a method. In this method, we will show an alert controller and ask the user for her name. Once she has answered the question and pressed the Save button on the alert, we will set the entered value as the accessibility value of our view so that we can read it in our UI tests:
funchandleLongPress(){letc=UIAlertController(title:"Name",message:"What is your name?",preferredStyle:.Alert)c.addAction(UIAlertAction(title:"Cancel",style:.Destructive,handler:nil))c.addAction(UIAlertAction(title:"Save",style:.Destructive){actioninguardletfields=c.textFieldswherefields.count==1else{return}lettxtField=fields[0]guardlettxt=txtField.textwheretxt.characters.count>0else{return}self.view.accessibilityValue=txt})c.addTextFieldWithConfigurationHandler{txtintxt.placeholder="Foo Bar"}presentViewController(c,animated:true,completion:nil)}
Now let’s go to our UI test code and do the following:
- Get an instance of our app.
- Find our view object with the
childrenMatchingType(_:)method of our app. - Call the
pressForDuration(_:)method on it. - Call the
typeText(_:)method of our app object and find the Save button on the dialog. - Programmatically press the save button using the
tap()method. - Check the value of our view and check it against the value that we entered earlier. They should match:
letapp=XCUIApplication()letview=app.windows.childrenMatchingType(.Unknown).elementBoundByIndex(0)view.pressForDuration(5)XCTAssert(app.alerts.count>0)lettext="Foo Bar"app.typeText(text)letalert=app.alerts.elementBoundByIndex(0)letsaveBtn=alert.descendantsMatchingType(.Button).matchingPredicate(NSPredicate(format:"title like[c] 'Save'")).elementBoundByIndex(0)saveBtn.tap()XCTAssert(view.valueas!String==text)
Note
I highly recommend that you always start by using the auto recorded and written UI tests that Xcode can create for you. This will give you an insight into how you can find your UI elements better on the screen. Having said that, Xcode isn’t always so intelligent in finding the UI elements.
See Also
Recipe 9.1 and Recipe 9.2
9.6 Typing Inside Text Fields
Solution
- Find your text field with the
textFieldsproperty of your app or one of the other methods mentioned in Recipe 9.4. - Call the
tap()method on your text field to activate it. - Call the
typeText(_:)method on the text field to type whatever text that you want. - Call the
typeText(_:)method of your app with the value ofXCUIKeyboardKeyReturnas the parameter. This will simulate pressing the Enter button on the keyboard. Check out otherXCUIKeyboardKeyconstant values such asXCUIKeyboardKeySpaceorXCUIKeyboardKeyCommand. - Once you are done, read the
valueproperty of your text field element asStringand do your tests on that.
Discussion
Create a single-view app and place a text field on it. Set the accessory label of that text field to “myText.” Set your text field’s delegate as your view controller and make your view controller conform to UITextFieldDelegate. Then implement the notoriously redundant delegate method named textFieldShouldReturn(_:) so that pressing the return button on the keyboard will dismiss the keyboard from the screen:
importUIKitclassViewController:UIViewController,UITextFieldDelegate{functextFieldShouldReturn(textField:UITextField)->Bool{textField.resignFirstResponder()returntrue}}
Then inside your UI tests, let’s write the code similar to what I suggested in the solution section of this recipe:
letapp=XCUIApplication()letmyText=app.textFields["myText"]myText.tap()lettext1="Hello, World!"myText.typeText(text1)myText.typeText(XCUIKeyboardKeyDelete)app.typeText(XCUIKeyboardKeyReturn)XCTAssertEqual((myText.valueas!String).characters.count,text1.characters.count-1)
See Also
Recipe 9.1 and Recipe 9.3
9.7 Swiping on UI Elements
Solution
Use the various swipe methods on XCUIElement such as the following:
swipeUp()swipeDown()swipeRight()swipeleft()
Discussion
Let’s set our root view controller to a table view controller and program the table view controller so that it shows 10 hardcoded cells inside it:
classViewController:UITableViewController{letid="c"lazyvaritems:[String]={returnArray(0..<10).map{"Item ($0)"}}()overridefunctableView(tableView:UITableView,numberOfRowsInSectionsection:Int)->Int{returnitems.count}overridefunctableView(tableView:UITableView,cellForRowAtIndexPathindexPath:NSIndexPath)->UITableViewCell{letc=tableView.dequeueReusableCellWithIdentifier(id,forIndexPath:indexPath)c.textLabel!.text=items[indexPath.row]returnc}overridefunctableView(tableView:UITableView,commitEditingStyleeditingStyle:UITableViewCellEditingStyle,forRowAtIndexPathindexPath:NSIndexPath){items.removeAtIndex(indexPath.row)tableView.deleteRowsAtIndexPaths([indexPath],withRowAnimation:.Automatic)}}
With this code, the user can swipe left on any cell and then press the Delete button to delete that cell. Let’s test this in our UI test. This is what I am going to do:
- Get the handle to the app.
- Using the
cellsproperty of the app, I am going to first count to make sure there are initially 10 items in the table view. - I am then going to find the fifth item and swipe left on it.
- I will then find the “Delete” button using the
buttonsproperty of the app object and tap on it with thetap()method. - Then I will assert that the cell was deleted for sure by making sure the cell’s count is now 9 instead of 10:
letapp=XCUIApplication()letcells=app.cellsXCTAssertEqual(cells.count,10)app.cells.elementBoundByIndex(4).swipeLeft()app.buttons["Delete"].tap()XCTAssertEqual(cells.count,9)
See Also
9.8 Tapping UI Elements
Discussion
Create a single-view app and then add a gesture recognizer to the view that sets the accessibility of the view whenever two fingers have been tapped on the view:
classViewController:UIViewController{funchandleTap(){view.accessibilityValue="tapped"}overridefuncviewDidLoad(){super.viewDidLoad()view.isAccessibilityElement=trueview.accessibilityValue="untapped"view.accessibilityLabel="myView"lettgr=UITapGestureRecognizer(target:self,action:"handleTap")tgr.numberOfTapsRequired=1tgr.numberOfTouchesRequired=2view.addGestureRecognizer(tgr)}}
Now our UI tests will do a two-finger tap on the view and check its value before and after to make sure it checks out:
letapp=XCUIApplication()letview=app.descendantsMatchingType(.Unknown)["myView"]XCTAssert(view.exists)XCTAssert(view.valueas!String=="untapped")view.twoFingerTap()XCTAssert(view.valueas!String=="tapped")