
A workflow is combination of multiple tasks connected with links that trigger in a proper sequence to execute a process. Every workflow contains a start task along with other tasks. When you execute the workflow, you actually trigger the Start task, which in turn triggers other tasks that are connected in the flow.
The following figure shows you a sample workflow:

Informatica PowerCenter provides options to create Workflow manually and automatically; these options are discussed in the upcoming sections.
To create a workflow manually, perform the following steps:
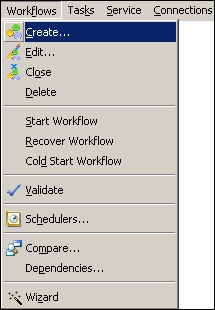
- In the Workflow Manager, navigate to Workflows | Create.
- Specify the name of the workflow. Please read the naming conventions to be followed while working on the PowerCenter tool. Use http://dw-learnwell.com/Informatica_naming_conventions.php to download the naming convention document. The name of the workflow should be
wf_WORKFLOWNAME. Then, and click on OK. We are usingwf_PASS_THROUGHas the workflow name for our reference.
A start symbol appears on the screen in Workflow Manager. Also, the wf_PASS_THROUGH workflow appears under the navigator, as shown in the following screenshot:

With this, we have learned how to add the start task as a first step to creating the workflow. In the next section, we will create the workflow directly from designer screen.
Informatica PowerCenter provides a utility to create the workflow directly from the designer client tool. This feature lets you create a workflow for a particular mapping from designer screen. To create a workflow from designer screen, perform the following steps:
- In the designer, open the mapping for which you wish to generate the workflow. Navigate to Mappings | Generate Workflow.

- On the next screen, select the appropriate option for your session task that will be created. By default, you create workflows with nonreusable sessions.

- On the next screen, select Integration Service (if you have multiple services available) from the drop-down list. Also, specify Connection Object. For our reference, we have selected Oracle as our source and target in the mapping below the Oracle database. Specify the name of the workflow and the session task. We are using
wf_PASS_THROUGH_EMPLOYEEands_m_PASS_THROUGH_EMPLOYEEas our workflow and session task name. Now, click on Next.
- On the next screen, you can modify the workflow and session task details. Usually, you need not change anything unless you see any conflict. Then, click on Next.

- The next window gives you a confirmation that the workflow has been created successfully. Click on Finish.

PowerCenter will generate a workflow with a start task and session task in Workflow Manager. Open the Workflow Manager screen to check the workflow. If you are already connected to Workflow Manager, disconnect the repository and connect again to see the workflow under the navigator.