
Once you create a workflow, you can add multiple tasks to the workflow. You can directly add the task by creating it in Workflow Manager, or you can create the task in the Task Developer and use it in the workflow.
To add a task to the workflow, perform the following steps:
- In Workflow Manager, navigate to Task | Create.

- Select the type of task from the drop-down list you wish to add to the workflow, and specify the name of the task. The selected task will appear on the screen. Read the naming convention. For our reference, we are creating the session task. The name of the session task should be
s_mappingname. Click on OK.
Note that we will discuss all the tasks in detail in the next chapter.
- If you create a session task, another window will pop up, asking you to select the mapping that you wish to associate with the session. The window displays a list of all the valid mappings present in your repository. Select the appropriate mapping and click on OK.
We are selecting
m_PASS_THROUGH_EMPLOYEEfor our reference.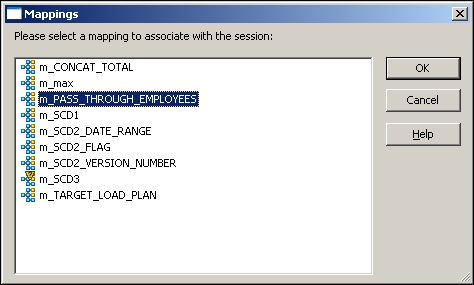
The session task appears in the workspace, as shown in the following screenshot:

Also, as you can see in the preceding screenshot, s_m_PASS_THROUGH_EMPLOYEE is added to the navigator.
Note that every task will have a different appearance, and based on the task you select to create, the icon will appear in the workspace.
In the preceding section, we saw how to create nonreusable tasks in Workflow Manager. As mentioned, we can create reusable tasks in Task Developer. Follow these steps to create the tasks in Task Developer:


The selected task will appear in Task Developer, as shown in the following screenshot:

The task will also get added under Tasks in the navigator. This indicates that a reusable task is created in the repository.
If you have created a task earlier in Task Developer, you can use these tasks in Workflow Manager. Open the navigator and drag the appropriate task to the workspace where you workflow is already open; the task will appear in the workspace.
To add the reusable task created in the previous step to Workflow, drag-and-drop the em_NOTIFICATION task to the workspace. The task will appear in the workflow, as shown in the following screenshot:

A small icon under em_NOTIFICATION indicates that this is a reusable task.