
Attributes may have more forms than just an ID or a name. More often than not you'll find long descriptions, SKUs, Social Security Numbers, previous companies' codes still in use, and so on. Or, in the case of a customer, you may have an e-mail address that sometimes you want to use in a report. Those descriptive fields that uniquely refer to an element of an attribute can be used as alternate forms. When creating an alternate form, it is always useful to ask the question: is this a form or a totally different attribute? The customer's birthday, for example, would be a different attribute, since we may later filter or GROUP BY this column; and surely does not uniquely identify a single customer.
You need to have completed the previous recipes to do this one. We are now adding the long description to the Product attribute.
We are modifying the Product attribute:
- Go to the Schema Objects | Attribute folder. Double-click on the yellow Product icon.
- If you see a message like the one in the following screen capture, it is very important that you click on the second option Edit: This will lock all schema objects in this project from other users. Otherwise, you won't be allowed to modify the attribute:

- When the Attribute Editor opens, click on New.
- In Create New Form Expression drag the column EnglishDescription to the Form Expression text area. Mapping method should be Manual. Click on OK.
- Check the DimProduct table, and now look at the Form general information area down to the left.
- In the textbox called Name, type
LDESCand close this dialog clicking on the OK button. See that in the Attribute Editor now we have three forms. - Click on Save and Close, update the schema.
We can have as many forms as we want in an attribute, as long as they come from the same lookup table. Forms can be text, numbers, dates, or other datatypes. When it comes to displaying forms on a report, DESC will be always displayed by default (if present), and you will have the option to select which other forms are shown by right-clicking on an attribute header.
If you selected Read Only in step 2 in this recipe, the project schema is now locked. You won't be able to make changes until you unlock it. This is useful in development environments where multiple persons are working on the same metadata and you want to freeze the project.
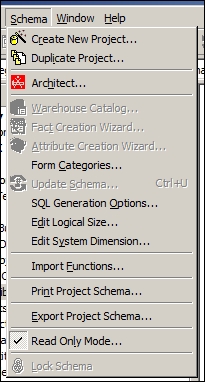
To unlock it, use the Schema | Read Only Mode… menu and uncheck the option.
