
A starter class defines the entry point (starting point) of a LibGDX application. It is specifically written for a certain platform. Usually, these kinds of classes are very simple and mostly consist of not more than a few lines of code to set certain parameters that apply to the corresponding platform. Think of them as a kind of bootup sequence for each platform. Once booting is finished, the LibGDX framework hands over control from the starter class (for example, the demo-desktop project) to your shared application code (for example, the demo/demo-core project) by calling different methods from the ApplicationListener interface that the MyDemo class implements. Remember that the MyDemo class is where the shared application code begins.
We will now take a look at each of the starter classes that were generated during the project setup.
The starter class for the desktop application is called Main.java. The following listing is Main.java from the demo-desktop project:
package com.packtpub.libgdx.demo;
import com.badlogic.gdx.backends.lwjgl.LwjglApplication;
import com.badlogic.gdx.backends.lwjgl.LwjglApplicationConfiguration;
public class Main {
public static void main(String[] args) {

LwjglApplicationConfiguration cfg = new LwjglApplicationConfiguration();
cfg.title = "demo";
cfg.width = 480;
cfg.height = 320;
new LwjglApplication(new MyDemo(), cfg);
   }
}
In the preceding code listing, you can see the Main class: a plain Java class without the need to implement an interface or inherit from another class. Instead, a new instance of the LwjglApplication class is created. This class provides a couple of overloaded constructors to choose from. Here, we pass a new instance of the MyDemo class as the first argument to the constructor. Optionally, an instance of the LwjglApplicationConfiguration class can be passed as the second argument. The configuration class allows you to set every parameter that is configurable for a LibGDX desktop application. In this case, the window title is set to demo, and the window's width and height is set to 480 by 320 pixels.
This is all you need to write and configure a starter class for a desktop project. Let's try to run the application now. To do this, right-click on the demo-desktop project in Project Explorer in Eclipse and then select the Java Application option from the Run As menu. Eclipse might ask you to select the Main class when you do this for the first time. Simply select the Main class, and also check whether the correct package name (com.packtpub.libgdx.demo) is displayed next to it, as shown in the following screenshot:

For those who use Gradle to set up the project, remember that the starter class of the desktop project will be DesktopLauncher.java and the correct package name will be com.packtpub.libgdx.demo.desktop.
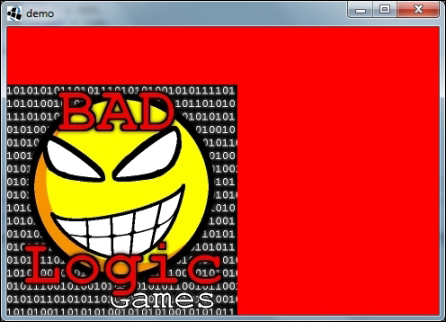
The desktop application should now be up and running on your computer. If you are working on Windows, you should see the following window:

For Gradle users, this image will be displayed:
The starter class for the Android application is called MainActivity.java. For a Gradle-based project, the starter class will be AndroidLauncher.java.
The following listing is MainActivity.java from demo-android:
package com.packtpub.libgdx.demo;
import android.os.Bundle;
import com.badlogic.gdx.backends.android.AndroidApplication;
import com.badlogic.gdx.backends.android.AndroidApplicationConfiguration;
public class MainActivity extends AndroidApplication {
@Override
public void onCreate(Bundle savedInstanceState) {
super.onCreate(savedInstanceState);
AndroidApplicationConfiguration cfg = new AndroidApplicationConfiguration();
initialize(new MyDemo(), cfg);
    }
}
In the preceding code listing, you can see the MainActivity class that is inherited from the AndroidApplication class. This is how LibGDX encapsulates tasks such as creating a so-called activity that registers handlers to process touch input, read sensor data, and much more. What is left to do for you is to create an instance of a class that implements the ApplicationListener interface. In this case, it is an instance of the MyDemo class. The instances of MyDemo and AndroidApplicationConfiguration are passed as arguments to the initialize() method. If you are interested in the latest development of Android hardware statistics, be sure to check out the Dashboards section on the official Android developer website (http://developer.android.com/about/dashboards/index.html#OpenGL).
The following screenshot of the OpenGL statistics was taken in May 2014 from the preceding mentioned website:

Note that GLES 1.1 is nearly zero. So what's the big deal about GLES 2.0? A better question to ask would be whether you plan to use shaders in your application. If this is the case, opt for GLES 2.0.
In any other case, there will be no real benefit except being able to use Non-Power-Of-Two (NPOT) textures—arbitrarily sized textures that do not equal to widths or heights representable by the formula 2^n, such as 32 x 32, 512 x 512, and 128 x 1024.
Note
NPOT textures are not guaranteed to work on all devices. For example, Nexus One ignores NPOT textures. Also, it might cause performance penalties on some hardware, so it is best to avoid using this feature at all. In Chapter 4, Gathering Resources, you will learn about a concept called Texture Atlas. This will allow you to use arbitrarily sized textures even when you are not using GLES2.
Additionally, on Android, you will have to take care of a manifest file that defines a huge list of parameters to configure the application. If you are not yet familiar with Android's manifest file, read the official documentation at http://developer.android.com/guide/topics/manifest/manifest-intro.html.
The following listing is AndroidManifest.xml from demo-android:
<?xml version="1.0" encoding="utf-8"?>
<manifest xmlns:android="http://schemas.android.com/apk/res/android"
    package="com.packtpub.libgdx.demo"
    android:versionCode="1"
    android:versionName="1.0" >
    <uses-sdk android:minSdkVersion="8" android:targetSdkVersion="19"/>
    <uses-feature android:glEsVersion="0x00020000" android:required="true"/>
    <application
         android:icon="@drawable/ic_launcher"
         android:label="@string/app_name" >
         <activity
              android:name=".MainActivity"
              android:label="@string/app_name"
              android:screenOrientation="landscape"
             android:configChanges="keyboard|keyboardHidden|orientation">
             <intent-filter>
                 <action android:name="android.intent.action.MAIN" />
                 <category android:name="android.intent.category.LAUNCHER"/>
             </intent-filter>
         </activity>
    </application>
</manifest>
There will be an error displayed in android:configChanges after changing to Android API level 8, as shown in the following screenshot:
This is because the value screenSize is not supported by the API Level 8. Just remove this value for our project. To know more about this android:configChanges element and other elements, visit http://developer.android.com/guide/topics/manifest/activity-element.html.
The following short (and incomplete) list is meant to give you a quick idea of what could be defined in the manifest file:
minSdkVersion: This is the minimum API Level required for the application to run. Devices running with lower API Levels will not be able to run this application; if left undeclared, an API Level of1is assumed, which might cause your app to crash at runtime when trying to access unavailable APIs.targetSdkVersion: This is the API Level the application targets. This is used for forward compatibility, where later API Levels can change the behavior of the API that might break old applications. This specification does not prevent the application from running on devices with lower API Levels down tominSdkVersion. If left undeclared, its value is set equal tominSdkVersion.icon: This is the application's icon.name: This is the main class of the application (or the main activity). Note that in terms of LibGDX, this will be the starter class for Android.label: This is the application's name shown next to the application icon and in the title bar.screenOrientation: This defines the display orientation of the application. The usual values areportrait(tall) andlandscape(wide). See the documentation for more details.
Another crucial part of the manifest file is the correct definition of the permissions that the application should request when a user wants to install it on a device.
Note
Make sure that you will never request unnecessary permissions and put as much information as required into the description text of your application. Users are extremely suspicious and justifiably so when it comes to the list of requested permissions. It is not 100 percent clear for which reason an application needs a certain permission.
For an introduction and much more detail on the topic of permissions on Android, refer to the official documentation at http://developer.android.com/guide/topics/security/permissions.html.
Now, let's try to run the application on a real, physical device. First, make sure that your Android device is connected via a USB cable and is set up for development. To set up your Android device, follow the instructions at http://developer.android.com/tools/device.html.
Now, right-click on the demo-android project in Project Explorer in Eclipse and select the Android Application option from the Run As menu.
The Android application should now be installed and be happily running on your Android device. The following image is of the application running on an HTC Desire HD:

With regards to the Android emulator that comes with the Android SDK, just a few final words, do not use it!
Emulators cannot accurately reflect how a device responds, so instead of using an emulator, it is highly recommended to try and test your applications on as many real devices as you can get your hands on.
The starter class for the WebGL application is called GwtLauncher.java. The following listing is GwtLauncher.java from demo-html:
package com.packtpub.libgdx.demo.client;
import com.packtpub.libgdx.demo.MyDemo;
import com.badlogic.gdx.ApplicationListener;
import com.badlogic.gdx.backends.gwt.GwtApplication;
import com.badlogic.gdx.backends.gwt.GwtApplicationConfiguration;

public class GwtLauncher extends GwtApplication {
    @Override
    public GwtApplicationConfiguration getConfig () {
        GwtApplicationConfiguration cfg = new GwtApplicationConfiguration(800, 480);
          return cfg;
    }
    @Override
   public ApplicationListener getApplicationListener () {
       return new MyDemo();
    }
}
In the preceding code listing, you can see the GwtLauncher class that is inherited from the GwtApplication class. LibGDX encapsulates GWT and only requires you to implement the two abstract methods, getConfig() and getApplicationListener(). The getConfig() method returns an instance of the GwtApplicationConfiguration class. In this case, the window's width and height are directly passed on to its constructor. The getApplicationListener() method returns an instance of a class that implements the ApplicationListener interface, which is the MyDemo class in the preceding code.
Additionally, GWT is organized in so-called modules that bundle together all the configuration settings. In this case, we only have one module called MyDemo.gwt.xml. It defines the source path where GWT should look for Java source files, in this case, com/packtpub/libgdx/demo. These source files will then be cross-compiled by GWT to optimize the JavaScript code that is runnable on all major web browsers.
The following listing is MyDemo.gwt.xml from demo project:
<?xml version="1.0" encoding="UTF-8"?>
<!DOCTYPE module PUBLIC "-//Google Inc.//DTD Google Web Toolkit trunk//EN" "http://google-web-toolkit.googlecode.com/svn/trunk/distro-source/core/src/gwt-module.dtd">
<module>
   <source path="com/packtpub/libgdx/demo" />
</module>
Let's try to run the application now. To do this, right-click on the demo-html project in Project Explorer in Eclipse and then select the Web Application option in the Run As menu. A new tab titled Development Mode will open at the bottom. Simply do what the description preceding the URL says and double-click on it. Your default browser should launch shortly after this. Then try to load the website that is hosted on your local machine right now. Hence, the URL points to 127.0.0.1, the infamous IPv4 loopback address that is just another fancy name for this device or computer:
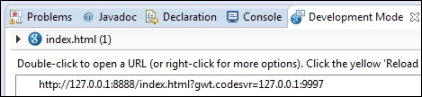
Keep in mind that using the URL suggested by Eclipse will run your WebGL application in debug mode, which is excruciatingly slow for most games. Just remove everything after the question mark in the URL to run your application in normal mode. The resulting URL should look like http://127.0.0.1:8888/index.html.
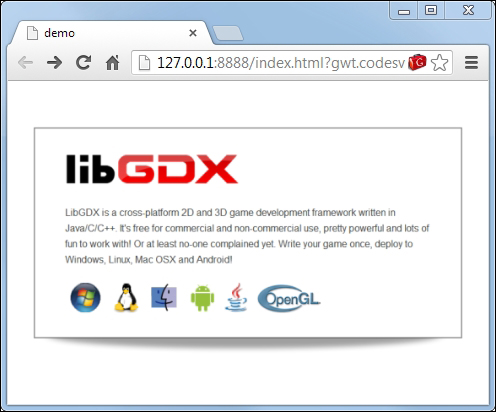
You might be asked to install the Google Web Toolkit Developer Plugin for your web browser to use the Development Mode, as shown in the following screenshot. You need to install it to develop your local machine.

After the plugin has been successfully installed, you will see the following window:
If you want to run this application on a real web server and share it with other users on the Internet, you will have to cross-compile the project first. This is a pretty straightforward process. Simply right-click on the demo-html project in Project Explorer in Eclipse and then select the GWT Compile option from the Google menu, as shown here:

A window with the title GWT Compile will open. Here, you can choose a log level to narrow down on certain messages such as errors only. Keep the default settings for now and click on Compile to begin the cross-compile process, as shown here:

The compilation process is quite lengthy compared to all the other ones shown in this book. It took over two minutes to finish on an Intel Core i7 (3.4GHz) processor. A good moment to exercise your patience!

Once the compilation is finished, go to the war subfolder in the demo-html project, as shown in the following screenshot:
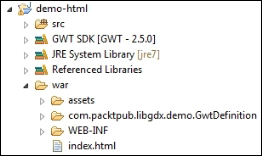
You can now upload everything to your web server that is contained in this folder except the WEB-INF folder, which is not needed. Now, you or anyone else can open the URL to your web server and enjoy your LibGDX cross-platform application in a WebGL-capable web browser without having to install any plugin for it to work.
The starter class for iOS application is RobovmLauncher.java. For Gradle, it is IOSLauncher.java. The following listing is from RobovmLauncher.java in demo-robovm:
package com.packtpub.libgdx.demo;

import org.robovm.apple.foundation.NSAutoreleasePool;
import org.robovm.apple.uikit.UIApplication;
import com.badlogic.gdx.backends.iosrobovm.IOSApplication;
import com.badlogic.gdx.backends.iosrobovm.IOSApplicationConfiguration;

public class RobovmLauncher extends IOSApplication.Delegate {
   @Override
   protected IOSApplication createApplication() {
       IOSApplicationConfiguration config = new IOSApplicationConfiguration();
       config.orientationLandscape = true;
       config.orientationPortrait = false;
       return new IOSApplication(new MyDemo(), config);
   }

   public static void main(String[] argv) {
       NSAutoreleasePool pool = new NSAutoreleasePool();
       UIApplication.main(argv, null, RobovmLauncher.class);
       pool.close();
   }
}
In the preceding code, you can see the RobovmLauncher class that is inherited from the IOSApplication.Delegate class. Here is where LibGDX encapsulates tasks and registers handlers to process touch input, and other sensor data, and much more. The instances of MyDemo and IOSApplicationConfiguration are passed as arguments to the IOSApplication function.
In Android, we saw the AndroidManifest.xml file that specifies the characteristics, permissions, and other features of our Demo-Android app. Similarly, our iOS app has Info.plist.xml to hold such details. Before explaining Info.plist.xml, let's see the robovm.properties and robovm.xml file.
The following code is taken from robovm.properties file in our demo-robovm project:
app.version=1.0
app.id=com.packtpub.libgdx.demo
app.mainclass=com.packtpub.libgdx.demo.RobovmLauncher
app.executable=MyDemo
app.build=1
app.name=MyDemo
This brief file contains, as the statements indicate, the app version, app ID, main class, executable, build number, and name of app. These values will be used in the Info.plist.xml file:
The following listing is taken from robovm.xml in our demo-robovm project:
<config>
  <executableName>${app.executable}</executableName>
  <mainClass>${app.mainclass}</mainClass>
  <os>ios</os>
  <arch>thumbv7</arch>
  <target>ios</target>
  <iosInfoPList>Info.plist.xml</iosInfoPList>
  <resources>
    <resource>
       <directory>../android/assets</directory>
       <includes>
         <include>**</include>
       </includes>
       <skipPngCrush>true</skipPngCrush>
    </resource>
  <resource>
       <directory>data</directory>
    </resource>
  </resources>
  <forceLinkClasses>
    <pattern>com.badlogic.gdx.scenes.scene2d.ui.*</pattern>
  </forceLinkClasses>
  <libs>
    <lib>build/libs/ios/libgdx.a</lib>
    <lib>build/libs/ios/libObjectAL.a</lib>
  </libs>
  <frameworks>
    <framework>UIKit</framework>
    <framework>OpenGLES</framework>
    <framework>QuartzCore</framework>
    <framework>CoreGraphics</framework>
    <framework>OpenAL</framework>
    <framework>AudioToolbox</framework>
    <framework>AVFoundation</framework>
  </frameworks>
</config>
This file holds the important link: the path to the assets folder in the demo-android project. Under the <resource> key, the path to the Android assets folder is set. However, we need iOS-specific icons and splash images, and we don't need to put this in the Android assets folder (believe me, you don't want to increase your Android APK size with unwanted data). Instead, we put it in the folder data inside the demo-robovm project and include the path under the <resources> key in robovm.xml.
Now comes the crucial part: the Info.plist file. Every iOS app contains the Info.plist file and it holds crucial information about the characteristics, permissions, and other features about the app. In our RoboVM version, it is named Info.plist.xml. The following code is taken from the Info.plist.xml file in our demo-robovm project:
<?xml version="1.0" encoding="UTF-8"?>
<!DOCTYPE plist PUBLIC "-//Apple//DTD PLIST 1.0//EN" "http://www.apple.com/DTDs/PropertyList-1.0.dtd">
<plist version="1.0">
<dict>
    <key>CFBundleDevelopmentRegion</key>
    <string>en</string>
    <key>CFBundleDisplayName</key>
    <string>${app.name}</string>
    <key>CFBundleExecutable</key>
    <string>${app.executable}</string>
    <key>CFBundleIdentifier</key>
    <string>${app.id}</string>
    <key>CFBundleInfoDictionaryVersion</key>
    <string>6.0</string>
    <key>CFBundleName</key>
    <string>${app.name}</string>
    <key>CFBundlePackageType</key>
    <string>APPL</string>
    <key>CFBundleShortVersionString</key>
    <string>${app.version}</string>
    <key>CFBundleSignature</key>
    <string>????</string>
    <key>CFBundleVersion</key>
    <string>${app.build}</string>
    <key>LSRequiresIPhoneOS</key>
    <true/>
    <key>UIStatusBarHidden</key>
    <true/>
    <key>UIViewControllerBasedStatusBarAppearance</key>
    <false />
    <key>UIDeviceFamily</key>
    <array>
        <integer>1</integer>
        <integer>2</integer>
    </array>
    <key>UIRequiredDeviceCapabilities</key>
    <array>
        <string>armv7</string>
    </array>
    <key>UISupportedInterfaceOrientations</key>
    <array>
        <string>UIInterfaceOrientationLandscapeLeft</string>
        <string>UIInterfaceOrientationLandscapeRight</string>
    </array>
    <key>UISupportedInterfaceOrientations~ipad</key>
    <array>
        <string>UIInterfaceOrientationLandscapeLeft</string>
        <string>UIInterfaceOrientationLandscapeRight</string>
    </array>
    <key>CFBundleIcons</key>
    <dict>
        <key>CFBundlePrimaryIcon</key>
        <dict>
            <key>CFBundleIconFiles</key>
            <array>
                <string>Icon</string>
                <string>Icon-72</string>
            </array>
        </dict>
    </dict>
</dict>
</plist>
The following short (and incomplete) list will give you a quick idea of what the Info.plist keys means:
UISupportedInterfaceOrientations: This key is used to set the allowed device orientations:- For iPads, it is
UISupportedInterfaceOrientations~ipad - For iPhones and iPads, the values for these keys are:
UIInterfaceOrientationPortraitUIInterfaceOrientationPortraitUpsideDownUIInterfaceOrientationLandscapeRightUIInterfaceOrientationLandscapeLeft
- For iPads, it is
UIRequiredDeviceCapabilities: This key lets you declare the hardware or specific capabilities that your app needs in order to run. For example, Wi-Fi, Bluetooth, accelerometer, open GLES 2.0, and so on.CFBundleName: This is the name of the application as specified in therobovm.propertiesfile.CFBundleIdentifier: This is the unique identifier of the application as specified in therobovm.propertiesfile. For ourdemo-robovmproject, it isCFBundleIdentifier com.packtbub.libgdx.demo.CFBundleIconFiles: These are the application icons.
For more information on the topic of the Info.plist keys, check out the official documentation at https://developer.apple.com/library/mac/documentation/general/Reference/InfoPlistKeyReference/Articles/iPhoneOSKeys.html#//apple_ref/doc/uid/TP40009252-SW1.
For more about the device capabilities, check out the official documentation at https://developer.apple.com/library/mac/documentation/general/Reference/InfoPlistKeyReference/Articles/iPhoneOSKeys.html#//apple_ref/doc/uid/TP40009252-SW3.
Now, right-click on the demo-robovm project in Project Explorer in Eclipse and select the iOS Device App option in the Run As menu.
The iOS application should now be installed as an application icon and should be happily running on your iOS device. The following image is of the application running on an IPad 3:
