Chapter 6: Data Modeling and Storage
We have gone through five chapters already in this book, but we have yet to cover a topic that has to do with one of the main purposes of a CMS—data storage. Okay, we hinted at it in the previous chapter and also saw an example of a configuration object in the second one. However, we merely scratched the surface of what is possible. It's now time to go ahead and dive into everything related to how you can store data in Drupal 9.
In this and the next chapter, we will talk about a lot of things related to storage and data manipulation, and take a look at a lot of examples in the process. The focus of this chapter will, however, be more theoretical. There is a lot of ground to cover, as there are many APIs and concepts that you will need to understand. However, we will still see plenty of code examples to demonstrate in practice what we are talking about. In the next chapter, though, to make up for it, we will almost entirely work with code and build a few functionalities.
More concretely, however, this chapter will be divided into three main logical parts (not necessarily represented by headings).
First, we will talk about your options for data storage. We will talk about the State system with its key/value store, tempstore, user data, configuration, and finally, entities—the big one. We will leave the cache out of this, because it will be covered in Chapter 11, Caching. We will see examples of all these options and go into the architectural details necessary to understand how they work.
Second, we will dive deep into the Drupal Entity API to understand the architecture behind it—how data is stored and, more importantly, modeled. I am referring to the TypedData system here.
Finally, we will look at how we can manipulate entities; in other words, how we can work with them and extract data—basically, the day-to-day of working with entities. One of the main topics here will be, of course, querying and loading entities. Moreover, we will also cover the validation aspect of this process.
The main topics we will cover in the chapter are:
- Different types of data storage: State, Configuration, Entities, Fields, etc.
- The TypedData API
- Interacting with the Entity API
By the end of this chapter, you should be able to understand a great deal about storage in Drupal and make decisions on which options to choose for your requirements. You'll know the differences and the reasons for using one over another. Moreover, you'll get a good understanding of the Entity API, which, in turn, will allow you to more easily navigate through Drupal code and integrate with the entity system. Lastly, and probably, the most common thing Drupal developers do, you'll be able to work with entities: perform CRUD operations, read and write field values, and more of this good stuff.
So, let's begin.
Different types of data storage
Storing and using data are a critical part of any (web) application. Without somehow persisting data, we wouldn't be able to build much of anything. However, different uses of data warrant different systems for storing and manipulating it. For the purposes of this chapter, I will use the word data to mean almost anything that has to be persisted somewhere, for any given period of time.
Since Drupal 8, various layered APIs have been introduced to tackle common use cases for data storage. The strength of these new systems is mirrored in the fact that we rarely, if ever, need to even use the mother of all storage APIs, the database API. This is because everything has been abstracted into different layers that help us handle most of what we need.
State API
The State API is a key/value database storage and the simplest way you can store some data in Drupal. One of its main purposes is to allow developers to store information that relates to the state of the system (hence the name). And because the state of the system can be interpreted in various ways, think of this as simple information related to the current environment (Drupal installation) that is not editorial (content). An example would be the timestamp of the last time the Cron ran or any flags or markers that the system sets to keep track of its tasks. It is different from caching in the sense that it is not meant to be cleared as often, and only the code that sets it is responsible for updating it.
One of the main characteristics of this system is the fact that it is not designed for human interaction. I mean this in the sense that it is the application itself that needs to make use of it. The option for humans is the configuration system that we will talk about in detail in a later section.
So now that we know about the State API, let's jump into the technicalities and see what it's made of and how we can use it.
The State system revolves around the DrupalCoreStateStateInterface, which provides all the methods you need to interact with it. This interface is implemented by the State service, which we can inject into your classes or use statically via the Drupal::state() shorthand. Once we have that, things could not be easier, as the interface tells us exactly what we can do.
We can set a value:
Drupal::state()->set('my_unique_key_name', 'value');
Or we can get a value:
$value = Drupal::state()->get('my_unique_key_name');
We can also set/get multiple values at once (how convenient!):
Drupal::state()->setMultiple(['my_unique_key_one' => 'value', 'my_unique_key_two' => 'value']);
$values = Drupal::state()->getMultiple(['my_unique_key_one', 'my_unique_key_two']);
Isn't that easy? We can also get rid of them:
Drupal::state()->delete('my_unique_key_name');
Drupal::state()->deleteMultiple(['my_unique_key_one', 'my_unique_key_two']);
There are a couple of things to note here:
First, the key names you choose live in a single namespace, so it's recommended that you prefix them with your module name—my_module.my_key. That way you avoid collision.
Second, the values you store can also be more complex than simple strings. You can store any scalar value, but also objects as they get serialized and deserialized automatically. Be careful, though, about which objects you plan on storing and ensure they can get properly serialized/deserialized.
By now, you are probably wondering where these values end up. They go into the key_value table, namespaced under the state collection. Also, the latter is a nice segue into a talk about the underlying system that powers the State API: the key/value store.
Note that the State system is only one implementation of an underlying framework of key/value stores. If you look at the State service, you will note that it uses the KeyValueFactoryInterface (which by default is implemented by the KeyValueDatabaseFactory). This, in turn, creates a key/value storage instance (by default, the DatabaseStorage), which implements the public API to interact with the store. If you take a look at the key_value table in the database, you'll note other collections besides state. Those are other implementations specific to various subsystems, such as the Entity API and System schema. Guess what? You can easily write your own and customize it to your needs. However, the reason why the State API was created was so that module developers can use it. Also, valid uses of it cover much of the need for something such as a key/value store. So, odds are that you won't have to implement your own.
TempStore
The next system we will look at is the TempStore (temporary store).
The tempstore is a key/value, session-like storage system for keeping temporary data across multiple requests. Imagine a multistep form or a wizard with multiple pages as great examples of tempstore use cases. You can even consider "work in progress", that is, not yet permanently saved somewhere but kept in the tempstore so that a certain user can keep working on it until it's finished. Another key feature of the tempstore is that entries can have an expiration date, at which point they get automatically cleared. So that user had better hurry up.
There are two kinds of tempstore APIs: a private and a shared one. The difference between the two is that with the first one, entries strictly belong to a single user, whereas with the second one, they can be shared between users. For example, the process of filling in a multistep form is the domain of a single user, so the data related to that must be private to them. However, that form can also be open to multiple users, in which case the data can either be shared between the users (quite uncommon) or used to trigger a locking mechanism that blocks user B from making changes while user A is editing (much more common). So, there are many options, but we will see some examples soon.
First, though, let's look at some of the key players in this system.
We start with the PrivateTempStore class, which provides the API for dealing with the private tempstore. It is not a service, because in order to use it, we must instantiate it via the PrivateTempStoreFactory. So that is what we have to inject into our classes if we want to use it. The latter has a get($collection) method which takes a collection name that we decide upon and creates a new PrivateTempStore object for it. If you look closely, the storage it uses is based on the KeyValueStoreExpirableInterface, which is very similar to the KeyValueStoreInterface used by the State API. The only difference is that the former has an expiration date, which allows the automatic removal of old entries. By default, the storage used in Drupal 9 is the DatabaseStorageExpirable, which uses the key_value_expire table to store the entries.
Up to this point, the SharedTempStore is strikingly similar to the private one. It is instantiated using the SharedTempStoreFactory service and uses the same underlying database storage by default. The main difference is the namespace occupied in the key_value_expire table, which is composed as user.shared_tempstore.collection_name, as opposed to user.private_tempstore.collection_name.
Additionally, when asking the factory for the SharedTempStore, we have the option of passing an owner to retrieve it for. Otherwise, it defaults to the current user (the logged-in user ID or the anonymous session ID). Also, the way we interact with it and its purpose, more than anything, differ.
So, let's take a look at how we can work with the private and the shared tempstores.
Private TempStore
The following is a simple example of what we just talked about:
/** @var DrupalCoreTempStorePrivateTempStoreFactory $factory */$factory = Drupal::service('tempstore.private');$store = $factory->get('my_module.my_collection');$store->set('my_key', 'my_value');$value = $store->get('my_key');
First, we get the PrivateTempStoreFactory service and ask it for the store identified by a collection name we choose. It's always a good idea to prefix it with your module name to avoid collisions. If another module names their own collection my_collection, it's not going to be pretty (even if the store is private).
Next, we use very simple setters and getters to set values similar to how we did with the State API.
If you run this code as user 1 (the main admin user), you'll note a new entry in the key_value_expire database table. The collection will be user.private_tempstore.my_module.my_collection, while the name will be 1:my_key. This is the core principle of the private tempstore: each entry name is prefixed with the ID of the user who is logged in when the entry was created. Had you been an anonymous user, it would have been something like this: 4W2kLm0ovYlBneHMKPBUPdEM8GEpjQcU3_-B3X6nLh0:my_key, where that long string is the session ID of the user.
The entry value will be a bit more complex than with the State API. This time it will always be a serialized stdClass object, which contains the actual value we set (which itself can be any scalar value or object that can be properly serialized), the owner (the user or session ID), and the last updated timestamp.
Lastly, we have the expire column, which, by default, will be one week from the moment the entry was created. This is a "global" timeframe set as a parameter in the core.services.yml definition file and can be altered in your own services definition file if you want. However, it is still global.
We can also delete entries like so:
$store->delete('my_key');
And we can also read the information I mentioned before about the entry (the last update date, owner):
$metadata = $store->getMetadata('my_key');
This returns the stdClass object that wraps the entry value, but without the actual value.
Shared TempStore
Now that we've seen how the private tempstore works, let's look at the shared one. The first thing we need to do in order to interact with it is to use the factory to create a new shared store:
/** @var DrupalCoreTempStoreSharedTempStoreFactory $factory */
$factory = Drupal::service('tempstore.shared');
$store = $factory->get('my_module.my_collection');
However, unlike the private tempstore, we can pass a user identifier (ID or session ID) as a second parameter to the get() method to retrieve the shared store of a particular owner. If we don't, it defaults to the current user (logged in or anonymous).
Then, the simplest way we can store/read an entry is like before:
$store->set('my_key', 'my_value');
$value = $store->get('my_key');
Now, if we quickly jump to the database, we can see that the value column is the same as before, but the collection reflects that this is the shared store and the key is no longer prefixed by the owner. This is because another user should be able to retrieve the entry if they like. And the original owner can still be determined by checking the metadata of the entry:
$metadata = $store->getMetadata('my_key');
Also, we can delete it exactly as with the private store:
$store->delete('my_key');
Okay. But what else can we do with the shared store that we cannot do with the other one?
First, we have two extra ways we can set an entry. We can set it if it doesn't already exist:
$store->setIfNotExists('my_key', 'my_value');
Alternatively, we can set it if it doesn't exist or it belongs to the current user (that is, the user owns it):
$store->setIfOwner('my_key', 'my_value');
Both these methods will return a Boolean, indicating whether the operation was successful or not. And essentially, they are handy to check for collisions. For example, if you have a big piece of configuration that multiple users can edit, you can create the entry that stores the work in progress only if it doesn't exist, or if it exists and the current user owns it (virtually overwriting their own previous work, which may be okay).
Then, you also have the getIfOwner() and deleteIfOwner() methods which you can use to ensure that you only use or delete the entry if it belongs to the current user.
All this fuss, and for what? Why not just use the private store? This is because, in many cases, a flow can only be worked by one person at the time. So, if somebody started working on it, you will need to know in order to prevent others from working on it, but even more than that, you can allow certain users to "kick out" the previous user from the flow if they "went home without finishing it". They can then continue or clear out all the changes. It all depends on your use case.
Also, as a final point, the shared tempstore also works with the same expiration system as the private one.
Tempstore recap
So, there we have two different, albeit similar, tempstores that you can use for various cases. If you need to store session-like data available to the user across multiple requests but which is private to them, you can use the PrivateTempStore. Alternatively, if this data needs to be used by either multiple users at the same time or the opposite, preventing multiple users from working on something at the same time, you can use the SharedTempStore.
Both of them have an easy-to-understand API with simple methods and you can be flexible in terms of creating your own collections for whichever use case you need.
UserData API
Now, I want to briefly talk about another user-specific storage option, provided by the User module, called UserData.
The purpose of the UserData API is to allow the storage of certain pieces of information related to a particular user. Its concept is similar to the State API in that the type of information stored is not configuration that should be exported. In other words, it is specific to the current environment (but belonging to a given user rather than a system or subsystem).
Users are content entities who can have fields of various data types. These fields are typically used for structured information pertaining to the user, for example, a first and a last name. However, if you need to store something more irregular, such as user preferences or flag that a given user has done something, UserData is a good place to do that. This is because the information is either not something structured or is not meant for the users themselves to manage. So, let's see how this works.
The UserData API is made up of two things—the UserDataInterface, which contains the methods we can use to interact with it (plus developer documentation), and the UserData service, which implements it and can be used by the client code (us):
/** @var DrupaluserUsedDataInterface $userData */
$userData = Drupal::service('user.data');
We are now ready to use the three methods on the interface:
- get()
- set()
- delete()
The first three arguments of all these methods are the same:
- $module: to store data in a namespace specific to our module name, thereby preventing collisions
- $uid: to tie data to a given user—it doesn't have to be the current user
- $name: the name of the entry being stored
Naturally, the set() method also has the $value argument, which is the data being stored, and this can be any scalar value or serializable object.
Together, all these arguments make for a very flexible storage system, a much improved one compared to the Drupal 7 option. We can essentially, for one module, store multiple entries for a given user and it doesn't stop there. Since that is possible, many of these parameters are optional. For example, we can get all the entries for a given module at once or all the entries for a given module and user combination at once. The same goes for deleting them. But where does all this data go?
The user module defines the users_data database table whose columns pretty much map to the arguments of these methods. The extra serialized column is there to indicate whether the stored data is serialized. Also, in this table, multiple records for a given user can coexist.
That is all there is to say about the UserData API. Use it wisely. Now it's time to turn to the configuration API, one of the biggest subsystems in Drupal 9.
Configuration API
The configuration API is one of the most important topics a Drupal developer needs to understand. There are many aspects to it that tie it into other subsystems, so it is critical to be able to both use and understand it properly.
In this sub-chapter, we will cover a lot about the configuration system. We start by understanding what configuration is and what it is typically used for. Then, we will go through the different options we have for managing configuration in Drupal, both as a site builder and a developer using the Drush commands. Next, we will talk about how configuration is stored, where it belongs, and how it is defined in the system. We will also cover a few ways in which configuration can be overridden at different levels. Finally, we look at how we can interact with simple configuration programmatically. So, let's begin with an introduction.
Introduction
Configuration is the data that the proper functioning of an application relies upon. It is those bits of information that describe how things need to behave and helps control what code does. In other words, it configures the system to behave in a certain way with the expectation that it could also configure it to behave in a different way. To this end, configuration can be as simple as a toggle (turning something on or off) or as complicated as containing hundreds of parameters that describe an entire process.
The configuration system since Drupal 8 is nothing short of a revolution in the Drupal world. It is not an improvement—it is a brand-new way of thinking about managing configuration (as compared to how it used to be managed in Drupal 7 and before). Previously, there was no configuration management to speak of. Everything was stored in the database in a way that made it impossible to properly and consistently deploy the many configuration options that Drupal is known for. Yes, there was the Features module and the Ctools exportables, but their very existence highlighted that lack of consistency and this meant many a headache for lots of Drupal developers.
Since Drupal 8, the entire thing has been revamped into a well-defined and consistent subsystem, upon which any little thing that needs to be configured can depend. It hasn't started out perfectly, but lots of improvements have been made on it during the course of the Drupal 8 release cycle. To the point that we are now looking at the best it's ever been, albeit with room for further improvement, expected to happen during the release cycle of Drupal 9.
What is configuration used for?
Configuration is used for storing everything that has to be synchronized between the different environments (for example, moving from development to production). As such, it differs from the other types of data storage we have seen so far in that they were specific to one environment and configuration is not.
Another way of looking at configuration is by examining the role of a traditional site builder. They typically navigate the UI and configure the site to behave in a certain way—show this title on the home page, use this logo, show this type of content on the home page, and so on. As we mentioned, the result of their interactions materializes into configuration that the site builder expects would travel easily to the acceptance environment where it could be reviewed, and finally, to production.
Some configuration can actually be critical to the proper functioning of the application. Certain code might break without a parameter having a value it can use. For example, if there is no site-wide email address set, what email will the system use to send its automated mails to the user from? For this reason, many of these configuration parameters come with sane defaults (upon installation). However, this also shows that configuration is a part of the application and just as important as the actual code.
An important example of configuration that is required for the running of a site is the list of modules that are enabled. Since Drupal 8.8, and consequently in Drupal 9, we have the option of marking certain modules as "development only" (in the settings.php file). That is to say, their enabled status would not be included in the list of exported configurations meant to be deployed to other environments. We talk about how configuration is exported and imported in the next section.
Managing configuration
As we will see in a bit, Drupal stores configuration data in the database (for performance reasons), but it makes it all exportable to YAML files. So, a typical flow for managing it will have you perform changes in the UI, export the configuration, add it into Git, and deploy the code upstream to the next environment. There, it's just a matter of importing what is in code.
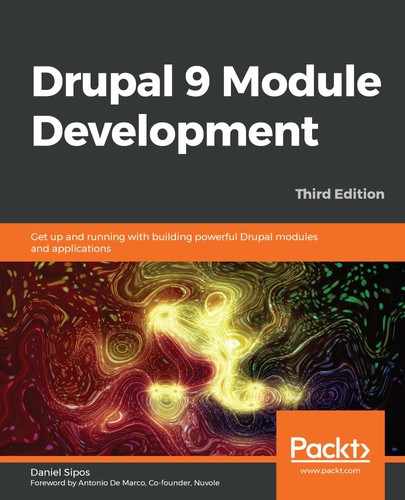
The import, export, and synchronization can be done both via Drush and through the UI at admin/config/development/configuration:
Figure 6.1: Configuration sync UI
The typical flow is for the active site configuration to be synchronized with the one in the YAML files. This means importing into the database all the configurations that are different in the YAML files from those in the database. These YAML files are inside the configuration sync folder, which should be committed to Git (you can configure in the settings.php file which directory should be the sync folder) and the opposite is to export the active configuration to the YAML files in order to commit them into code.
The UI allows only the first option (sync what's in the YAML files with the database), but it provides you with a nice Diff interface to see what is different in YAML compared with the database:

Figure 6.2: Diff interface between YAML and the database
In this screenshot, we can see that the YAML files contain a small change in the site name configuration. Clicking on Import all will bring the database in line with the YAML files.
The first time you install a Drupal site, the configuration sync folder will be empty. It is up to you to do a manual export of all the active configuration and put it there. You can do so via the UI manual export tool or via Drush:
drush config-export
You would perform this step every time you make configuration changes through the UI that you want exported into YAML files.
Then, you can synchronize either in the UI as we've seen, or through Drush, with the following command:
drush config-import
As a Drupal developer, you will be mostly using these two Drush commands.
In addition to the entire set of configuration items, you can also import/export individual ones by copying and pasting. Be careful though, as some dependencies might not allow you to do so. However, this is useful if you want to quickly see something working in another environment, but the approach does not lend itself to a nice version control-based flow if you abuse it.
Different types of configuration
Drupal comes with two distinct types of configuration—simple and configuration entities. Let's see what the difference is.
Simple configuration is the type that stores basic data, typically represented by scalar values such as integers or strings (or sets of such data). On the other hand, configuration entities are more complex and use the same CRUD API as the content entities.
Typically, simple configuration items are one of a kind. A module, for instance, may create and manage a configuration item that enables or disables one of its features. Most likely, this module needs this configuration to know what it should do about that feature. However, even if it doesn't, it is still a singular item that relates to that piece of functionality. And this configuration does not, however, have to be a small thing. It can contain lots of data needed for the module.
Configuration entities, on the other hand, are multiple instances of the same configuration type. For example, a View is a configuration entity and a given site can have an unlimited number of Views. It can even have none. We will talk more about configuration entities when we cover entities in general.
Configuration storage
Configuration is essentially stored in two places:
Here is an example of a simple configuration YAML file:
my_string: 'Hello!'
my_int: 10
my_boolean: true
my_array:
my_deep_string: 'Yes, hello!'
The name of this file is given by the ID you need to use with the configuration API to read this data.
In addition to the actual data, you can have a dependencies key under which you can list what this configuration item depends on:
dependencies:
module:
- views
theme:
- bootstrap
config:
- system.site
There are three types of dependencies: modules, themes, and other configuration items.
If you remember in Chapter 2, Creating Your First Module, we created a configuration object with the hello_world.custom_salutation ID in which we stored a simple value:
salutation: 'Whatever the user set in the form'
And we did so programmatically through our form and did not provide a YAML file. This meant that our code for displaying the salutation did not depend on this configuration item existing or having a value of some kind. Had it been mandatory for our code to work, we could have created it upon module installation. There are two ways this can be done.
The most common way is statically. Inside the config/install folder of a module, we can have YAML configuration files that get imported when the module is installed. However, if the values we need to set in this configuration are unknown (they need to be retrieved dynamically), we can do so in a hook_install() implementation (remember those from Chapter 3, Logging and Mailing?). There, we can try to get our value and create the configuration object containing it.
Note
Configurations found inside the config/install folder of the module will not be imported when the module is installed if they have unmet dependencies; that is, if whatever they depend on does not exist in the system. As a matter of fact, the module itself would not install.
As a bonus, you can also provide configuration files with the module that should only be imported if their dependencies are met. In other words, optional configuration. If dependencies of these configurations are not met, the module will install correctly but without those configurations. Moreover, if later on the dependencies are met, these optional configurations do get also imported automatically. Keep in mind, however, that optional configuration is reserved for configuration entities as it does not make sense with simple configurations.
Schema
In order for various systems to properly interact with the configuration items, configuration schemas have been introduced. Schemas are a way to define the configuration items and specify what kind of data they store, be it strings, Booleans, integers, and so on. They are, of course, notated in YAML format and go inside the config/schema folder of a module.
There are three main reasons why configuration needs a schema definition:
- Multilingual support: As we will see later, configuration is translatable in Drupal. However, in order to know which parts of the configuration are needed to be, or can be, translated, the schema system has been brought in to provide this additional layer. This way, configuration items that ship with contributed modules can get their own translations on the localize.drupal.org website. Moreover, the schema identifies which configuration bits can be translated, and this allows users to provide translations for those in the UI.
- Configuration entities: Configuration entities require schema definitions in order for the proper identification in the persistence layer of the data types that need to be exported with them. Moreover, schemas are used for the validation of configuration entity data.
- Typecasting: The configuration schema ensures that the configuration API is able to always typecast properly the values to their right data types.
Let's look at a configuration example provided by Drupal core to see how the schema works, namely the system.mail configuration provided by the System module. Remember in Chapter 3, Logging and Mailing, we talked about how this configuration item controls the mail plugin used for sending out emails? Well, by default, this is what it looks like:
interface:
default: 'php_mail'
It's a very simple multidimensional array. So, if we now look in the system.schema.yml file for the schema definition, we will find the definitions for all the configuration items that come with the System module. The top-level line represents the name of the configuration item, so if we scroll down, we will find system.mail:
system.mail:
type: config_object
label: 'Mail system'
mapping:
interface:
type: sequence
label: 'Interfaces'
sequence:
type: string
label: 'Interface'
If we look past the irony of the schema being five times bigger than the actual configuration, we can get a pretty good understanding of what this configuration item is all about. And more importantly, Drupal itself can too.
We can see that the system.mail configuration is of the config_object type. This is one of the two main types of configurations, the other being config_entity. The label key is used to indicate the human-readable name of this item, whereas the mapping key contains the definition of its individual elements. We can see the interface having the label "Interfaces" and the type sequence. The latter is a specific type that denotes an array in which the keys are not important. Whenever we want the keys to be taken into account, we will use mapping (as it's done at the top level of this schema definition). And since we are looking at a sequence type, the individual items inside it are also defined as a string type with their own label.
Let's now write our own schema definition for the example configuration file we saw before:
my_string: 'Hello!'
my_int: 10
my_boolean: true
my_array:
my_deep_text: 'Yes, hello, is anybody there?!'
If this configuration was found inside a file called my_module.settings.yml, this would be the corresponding schema definition:
my_module.settings:
type: config_object
label: 'Module settings'
mapping:
my_string:
type: string
label: 'My string that can also be of type text if it was longer'
my_boolean:
type: Boolean
label: 'My boolean'
my_array:
type: mapping
label: 'My array in which the keys are also important, hence not a sequence'
mapping:
my_deep_text:
type: text
label: 'My hello string'
As a bonus piece of information, any config_object-typed configuration inherits the following property:
langcode:
type: string
label: 'Language code'
This helps with the multilingual system and invites us to add a langcode property to each configuration item.
Most of the properties we've seen so far have been type, label, mapping, and sequence. There are two more that you should be aware of:
- translatable: very important as it indicates whether a data type can be translated. By default, the text and label types are already set to translatable, so you don't need to do so yourself.
- nullable: indicates whether the value can be left empty. If missing, it's considered as being required.
Here are some types you can use to define configuration:
- Scalar types: string, integer, boolean, email, float, uri, path
- Lists: mapping, sequence
- Complex (extending scalar types): label, path, text, date_format and more.
Make sure you check out the core.data_types.schema.yml file where all of these are defined.
Before we move on, let's make sure we create the configuration schema for our configuration item we created programmatically in Chapter 2, Creating Your First Module, namely the one storing the overridden salutation message. So, inside the /config/schema folder of the Hello World module, we can have the hello_world.schema.yml file with the following:
hello_world.custom_salutation:
type: config_object
label: 'Salutation settings'
mapping:
salutation:
type: string
label: 'The salutation message'
That takes care of some technical debt we introduced back when we didn't know about configuration schemas.
Overrides
We saw that configuration exists in the database, but actually belongs in organized and well-described YAML files. In order for the configuration from the YAML files to be used, they need to be imported—either via synchronization or upon module installation for those provided by modules. So, this means that the database still holds the active configuration.
To make things more dynamic, the configuration API also provides an override system by which we can, at various levels, override the active configuration on the fly. We have three different layers at which we can do this: global, module and language overrides.
The configuration API then takes into account these overrides in a way that prevents leaking them by accident into the active configuration. We will see examples when we talk about how to interact with the configuration API in general.
Global overrides
The global override happens via the global $config variable. It's available in the settings.php file for site-wide overrides, but you can also use it inside your module (if you really have to, but don't) in order to override a specific piece of configuration:
global $config;
$config['system.maintenance']['message'] = 'Our own message for the site maintenance mode';
In this example, we changed, on the fly, the message used for the site maintenance mode. Why you would want to do that is beside the point, but you may have some other configuration which would benefit from being overridable like this. In any case, you notice the array notation we use. The first key is the name of the configuration item (name of the file minus the .yml extension) and then we have the key of the individual element in the configuration file. If this were to be nested, we'd be traversing further down.
Global config overrides are a great place where you can use environment-specific and/or sensitive data such as API keys. Things like this should never be exported to the sync storage. Instead, you can define a configuration object in the module and have it installed without a value. Then, using the global override, you provide the value specific to the relevant environment.
Module overrides
Although you can simply use the global $config array, that is not really the place where modules should be tinkering. First of all, because it's a global variable and it's never a good idea to change global variables. That should be left to the settings.php file. Second of all, because there is no way of controlling priority if multiple modules try to change it in the same way. Instead, we have the module override system that we can use.
Via the module overrides, we can create a service with the config.factory.override tag (remember what tagged services are?) and in this service, handle our overrides. To exemplify, let's use this system to override the maintenance mode message. Inside our Hello World module, we can have the following service class:
namespace Drupalhello_world;
use DrupalCoreCacheCacheableMetadata;
use DrupalCoreConfigConfigFactoryOverrideInterface;
use DrupalCoreConfigStorageInterface;
/**
* Overrides configuration for the Hello World module.
*/
class HelloWorldConfigOverrides implements ConfigFactoryOverrideInterface {
/**
* {@inheritdoc}
*/
public function loadOverrides($names) {
$overrides = [];
if (in_array('system.maintenance', $names)) {
$overrides['system.maintenance'] = ['message' => 'Our own message for the site maintenance mode.'];
}
return $overrides;
}
/**
* {@inheritdoc}
*/
public function getCacheSuffix() {
return 'HelloWorldConfigOverrider';
}
/**
* {@inheritdoc}
*/
public function createConfigObject($name, $collection = StorageInterface::DEFAULT_COLLECTION) {
return NULL;
}
/**
* {@inheritdoc}
*/
public function getCacheableMetadata($name) {
return new CacheableMetadata();
}
}
Here, we have to implement the ConfigFactoryOverrideInterface interface which comes with four methods:
- In loadOverrides() we provide our overridden configuration values.
- In getCacheSuffix() we return a simple string to be used in the static cache identifier of our overrides.
- In createConfigObject() we don't actually do anything but we could create a configuration API object that would be used during installation or synchronization.
- In getCacheableMetadata() we return any cache metadata related to our override. We don't have any, so we return an empty object.
Since this is a service, we can inject dependencies and make use of them if we want to calculate the overrides. Depending on this calculation, it can become important to set some proper cache metadata as well, but we will cover caching in another chapter.
Next, we register this as a tagged service:
hello_world.config_overrider:
class: Drupalhello_worldHelloWorldConfigOverrides
tags:
- { name: config.factory.override, priority: 5 }
We set the priority to 5 and, with this, we can control the order in which modules get their chance at overriding configuration. The higher priority will take precedence over the lower one.
And that's it. Clearing the cache will register this service and alter our configuration. If you now put the site in maintenance mode, you will notice that the message is the one we set here. However, if you go to the maintenance mode administration page at admin/config/development/maintenance, you will still see the original message. This is so that administrators do not, by accident, save the override value into the configuration storage.
Language overrides
Although we will talk some more about the multilingual features of Drupal, let's briefly note the possibility of the language overrides.
If we enable configuration translation and add some more languages to our site, we can translate configuration items that are translatable (as described by their schema). In doing so, we are overriding the default configuration for a particular language, an override that gets stored in the configuration storage and can be exported to YAML files.
We can make use of this override programmatically, even if we are not in a specific language context. This is what the code would look like, assuming we have an override in French for our maintenance mode message and we want to use that:
$language_manager = Drupal::service('language_manager');
$language = $language_manager->getLanguage('fr');
$original_language = $language_manager->getConfigOverrideLanguage();
$language_manager->setConfigOverrideLanguage($language);
$config = Drupal::config('system.maintenance');
$message = $config->get('message');
$language_manager->setConfigOverrideLanguage($original_language);
This looks a bit complicated, but it's not really. First, we load the language manager service and get the Language object for our language (the one we want to get the overridden value for). Then, we keep track of the original configuration override language (which is essentially the current language) but also set the French language as the one to be used going forward. Finally, we load the system.maintenance configuration object and read its message in French before restoring the original language on the language manager. This is a quick way to illustrate an approach by which we can temporarily switch language contexts for configuration overrides. And this will be the way to load configuration entities in a different language to the current one.
The language override is in fact a complex version of the module override, provided by the core language module and integrated with its services for creating an API. So, I do encourage you to explore the code to better understand how this works.
Priority
We have three layers for configuration overrides: global, modules, and languages. This is actually also the order of the actual priority they have. Global overrides take precedence over everything else, while module overrides take precedence over the language ones. This is why, if we have overridden the system.maintenance configuration in the module, we cannot use the language override in our code. So, keep this in mind.
Interacting with simple configuration
Now that we have talked about what the Drupal configuration system is, it's time to talk about the API itself and how we can interact with it. In this section, we will focus only on simple configuration as we will talk more about configuration entities when we cover all entities.
In Chapter 2, Creating Your First Module, we already became somewhat exposed to the configuration API in our SalutationConfigurationForm where we stored and read a simple configuration value. Now it's time to go a bit deeper to understand the API and look at some more examples of how we can use it.
The class that represents simple configuration is DrupalCoreConfig and it wraps around the data found in one individual configuration item. Moreover, it does all the necessary in terms of interacting with the underlying storage system in order to persist the configuration (by default into the database). In addition, it handles the overrides we talked about earlier automatically.
An important subclass of Config that we work with a lot is ImmutableConfig. Its purpose is to prevent changes being made to the configuration object, and as such, it is for read-only uses.
The way we get to use instances of these classes is through the ConfigFactory service, which has two handy methods for getting a configuration object:
/** @var DrupalCoreConfigConfigFactoryInterface $factory */
$factory = Drupal::service('config.factory');
$read_only_config = $factory->get('hello_world.custom_salutation');
$read_and_write_config = $factory->getEditable('hello_world.custom_salutation');
The get() method returns an ImmutableConfig object that is read-only, while the getEditable() method returns a Config object that can be used also for changing the configuration values. The way we do this is via the set() and save() methods:
$read_and_write_config->set('salutation', 'Another salutation'); $read_and_write_config->save();
Very simple. We also have the setData() method which allows us to change the entire data of the configuration item at once. As a parameter, it expects an associative array of values.
If you cannot inject the ConfigFactory but have to rely on the static call, the Drupal class has a shortcut for loading config objects directly:
$config = Drupal::config('system.maintenance');
The config() method takes the name of the configuration as a parameter and returns an ImmutableConfig object.
To read the data, we have a number of options. We can read one element from the config:
$value = $read_and_write_config->get('salutation');
If the element is nested, we can traverse down via the dot (.) notation:
$config = $factory->get('system.site');
$value = $config->get('page.403');
This will return the value set for the 403 page in the system.site configuration. We can also get all the values by simply not passing any parameters to the get() method, which would return an associative array.
If you remember our discussion about the configuration overrides, by default, the get() method will return the values as they had been overridden through the module or globally (or as a language if the language manager has a different language set for configuration). However, if we want, we can also retrieve the original value:
$config = $factory->get('system.maintenance');
$value = $config->getOriginal('message', FALSE);
The second parameter of getOriginal() indicates whether to apply overrides and, by default, it is TRUE. So this way, we get the configuration value that is set in the active storage.
Finally, we can also clear configuration values or the entire objects themselves. For example, consider the following code:
$config->clear('message')->save();
It will remove the message key from the configuration object and save it without that value. Alternatively, we can also remove the entire thing:
$config->delete();
That is pretty much it. The power of this API also stems from its simplicity.
Configuration recap
In this section we have covered a lot of ground for when it comes to the Configuration API. We've seen what configuration is and what types of configuration we have, as well as how we can manage it in Drupal. Then we've seen how it's stored: database and YAML files and how we can describe configuration using schemas. Finally, we looked at how we can interact with simple configuration as module developers, right after we went over the different ways we can override existing configuration.
In the next section we will talk about entities and see also more about configuration entities.
Entities
We have finally reached the point where we talk about the most complex, robust, and powerful system for modeling data and content in Drupal—the Entity API.
Entities have been around since Drupal 7, which shipped with a few types such as node, taxonomy terms, users, comments, files, and so on. However, Drupal core only provided a basic API for defining entities and loading them consistently. The Entity API contributed module bridged a large gap and provided a lot of functionality to make entities much more powerful. Since Drupal 8, however, these principles (and more) are found in core as part of a robust data modeling system.
The Entity API integrates seamlessly with the multilingual system to bring fully translatable content and configuration entities. This means that most data you store can be translated easily into multiple languages.
Content versus configuration entity types
Let's start by establishing some basic terminology in order to prevent confusion down the line:
- Entities are instances of a given entity type. Thus, we can have one or more entities of a certain type, the latter being like a blueprint for the individual entities.
- Entity types can be of two kinds: content and configuration.
We talked a little bit about configuration entities in the previous section. There, we saw that they are multiple instances of a certain type of configuration, as opposed to simple configuration, which is only one set of configuration values. Essentially, configuration entities are exportable sets of configuration values that inherit much of the same handling API as content entities.
Here are some examples of configuration entity types:
- View: A set of configuration values that make up a view
- Image Style: Defines how an image needs to be manipulated in that given style
- Role: Defines a role that can be given to a user
Content entities, on the other hand, are not exportable and are the most important way we can model and persist data in Drupal. These can be used for content and all sorts of other structured data used in your business logic that needs to be persisted but not deployed to other environments.
Here are some examples of content entity types:
- Node
- Comment
- User
- Taxonomy Term
Apart from the exportability aspect, the main difference between content and configuration entities is the type of fields they use. The latter uses simpler fields, the combination of which gets stored as one entity "record" in the database (and exported to YAML). The content entity fields are complex and structured, both in modeling and in the persistence layer (the database).
Moreover, configuration entities also lack bundles. Bundles are yet another categorization of entities that sit below the content entity type. That means that each content entity type can have (but it doesn't have to have) one or more bundles, to which configurable fields can be attached. And not to throw more confusion at you, but bundles are actually configuration entities themselves as they need to be exported, and there can be multiples of them.
The Entity API is very flexible in terms of the types of data that you can store. Content entity types come with a number of different field types for various forms of data, from primitive values to more complex ones such as dates or references.
Content entities can also be made revisionable. This means content entity types can be configured to keep in store older versions of the same entity with some extra metadata related to the change process.
In this section and going forward, I will illustrate the most common features of entities by way of exemplifying two entity types:
- Node: The most prolific content entity type that comes with Drupal core and that is typically used as the main content modeling entity type
- NodeType: The configuration entity type that defines Node bundles
In the next chapter, we will learn how to create our own. But after everything we will learn in this one, it will be a breeze.
Entity type plugins
Entity types are registered with Drupal as plugins. Yes, again. The DrupalCoreEntityAnnotationEntityType class is the base annotation class for these plugins and you will mainly see two subclasses (annotations): ContentEntityType and ConfigEntityType. These are used to register content and configuration entity types, respectively.
The annotations classes map to plugin classes used to represent the entity types. The base class for these is DrupalCoreEntityEntityType, which is then extended by another ContentEntityType and ConfigEntityType. These plugin classes are used to represent the entity types in the system and are a good resource for seeing what kind of data we can use on the annotation of these plugins. At a quick glance we can already see that the differences between the two types is not so big.
The plugin manager for entity types is the EntityTypeManager, an important service you will probably interact with most as a Drupal developer. Apart from various handy things we will see a bit later, it is responsible for managing the entity type plugins using the regular annotation-based discovery method.
The Node entity type is defined in Drupal odeEntityNode, where you will see a huge annotation at the top of the class. The NodeType configuration entity type, on the other hand, is found in Drupal odeEntityNodeType. You can spot the difference in the annotation they use.
Identifiers
The entity type annotations start with some basic information about them: ID, label, and things like that. For example, consider the Node entity:
* id = "node",
* label = @Translation("Content"),
* label_singular = @Translation("content item"),
* label_plural = @Translation("content items"),
* label_count = @PluralTranslation(
* singular = "@count content item",
* plural = "@count content items"
* ),
These are used in various places in the system to properly reference the entity type by machine and human-readable names.
Bundles
The Node entity type happens to have bundles which is the reason why we have a bundle_label property as well:
bundle_label = @Translation("Content type"),
We can deduce that Node has bundles by the fact that it references the ID of the plugin defining the bundle configuration entity type:
bundle_entity_type = "node_type",
Lo and behold, that is the NodeType's ConfigEntityType plugin ID. On its plugin annotation, we can find the reverse bundle_of property that references the Node entity type. Needless to say, this is not mandatory for all configuration entity types but used for the ones that act as content entity bundles. For example, the View configuration entity type does not have this.
In addition, we also find on the Node plugin annotation the route to where the bundles are configured:
field_ui_base_route = "entity.node_type.edit_form",
This is a route defined for the NodeType configuration entity.
As I mentioned earlier, bundles do not exist for configuration entities.
Database tables
Another important bit of information for content entities is the database table name they will use for storage:
base_table = "node",
data_table = "node_field_data",
The node table in this case holds the primary information about the entities such as ID, uuid, or bundle, while the node_field_data table holds field data that is singular and not translatable. Otherwise, these fields get their own database tables automatically. I will explain how field data is stored a bit later on.
Entity keys
The entity API defines a set of keys that are consistent across all entity types and by which common entity information can be retrieved. Since not all entity types need to have the same fields for storing that data, there is a mapping that can be done in the annotation for these:
* entity_keys = {
* "id" = "nid",
* "revision" = "vid",
* "bundle" = "type",
* "label" = "title",
* "langcode" = "langcode",
* "uuid" = "uuid",
* "status" = "status",
* "published" = "status",
* "uid" = "uid",
* "owner" = "uid",
* },
The Node entity type has a relatively comprehensive example of entity keys. As you can see, the unique identifier field for Nodes has always been nid. However, the common identifier for entities across the system is id. So, a mapping here facilitates that.
Links
Each entity type has a series of links the system needs to know about. Things like the canonical URL, the edit URL, the creation URL, and so on. For the node entities we have the following:
* links = {
* "canonical" = "/node/{node}",
* "delete-form" = "/node/{node}/delete",
* "delete-multiple-form" = "/admin/content/node/delete",
* "edit-form" = "/node/{node}/edit",
* "version-history" = "/node/{node}/revisions",
* "revision" = "/node/{node}/revisions/{node_revision}/ view",
* "create" = "/node",
* }
Like the entity keys, these links are meant to ensure some commonality between entity types (depending on their enabled capabilities).
One thing to note about these paths is that they need to be defined as routes. So, you can find them inside the node.routing.yml file (where you also find the routes used by the NodeType configuration entity type). Alternatively, though, these routes can be defined dynamically in order to prevent duplication. This can be done using a route provider handler. We will talk about handlers soon but also see a concrete example in the next chapter. In case you were wondering where the missing routes for the Node links are, check the NodeRouteProvider that registers them.
Entity translation
Entities are translatable across the board—like most of everything else in Drupal. To mark an entity type as such, all we need is the following in the plugin annotation:
translatable = TRUE,
This exposes the entity type to all the multilingual goodness. However, as we will see a bit later, the individual fields also need to be declared translatable.
Entity revisions
All content entity types can be made revisionable (and publishable) with minimal effort. Since Node is such an example, we can check out how it's built to understand this better.
First, the annotation needs to have the database table information where revisions are stored. This mirrors exactly the original tables we saw before:
revision_table = "node_revision",
revision_data_table = "node_field_revision",
Second, the annotation needs to have the entity keys for the revision ID and the published status we saw earlier:
* entity_keys = {
* "revision" = "vid",
* "published" = "status",
* },
Third, also in the annotation, the revision metadata keys need to be referenced:
* revision_metadata_keys = {
* "revision_user" = "revision_uid",
* "revision_created" = "revision_timestamp",
* "revision_log_message" = "revision_log"
* },
These map to table columns in the revision table. And in order to ensure that all the necessary columns get created, the entity type class should extend from EditorialContentEntityBase, which provides the necessary field definitions for this. But good to know also that this base class already implements the EntityPublishedInterface, which allows to make the entity type publishable.
Finally, the entity fields themselves are not automatically revisionable so a flag needs to be also set on them. Again, we will see that in a minute when we talk about the fields.
Configuration export
Configuration entity types have a few extra options on their plugin definitions that relate to the exportability of the entities. By default, a number of configuration entity fields are persisted and exported. However, the config_export property needs to be used to declare which other fields should be included in the export. For example, the NodeType configuration entity type defines the following:
* config_export = {
* "name",
* "type",
* "description",
* "help",
* "new_revision",
* "preview_mode",
* "display_submitted",
* }
Keep in mind that, without this definition, the configuration schema is used as a fallback to determine which fields to persist. If the configuration entity type doesn't have a schema (which it should though), no extra fields will get persisted. It is, however, recommended that all config entity types declare the config_export key in their annotation.
Additionally, configuration entity types have a prefix that is used for the namespace in the configuration system. This is also defined in the plugin annotation:
config_prefix = "type",
Handlers
The last main group of settings (that we will cover here) found on the entity type plugin annotations are the handlers. Handlers are the objects used by the entity API to manage various tasks related to entities. The Node entity type is a good example to look at because it defines quite a lot of them, giving us an opportunity to learn:
* handlers = {
* "storage" = "Drupal odeNodeStorage",
* "storage_schema" = "Drupal odeNodeStorageSchema",
* "view_builder" = "Drupal odeNodeViewBuilder",
* "access" = "Drupal odeNodeAccessControlHandler",
* "views_data" = "Drupal odeNodeViewsData",
* "form" = {
* "default" = "Drupal odeNodeForm",
* "delete" = "Drupal odeFormNodeDeleteForm",
* "edit" = "Drupal odeNodeForm",
* "delete-multiple-confirm" = "Drupal odeForm DeleteMultiple"
* },
* "route_provider" = {
* "html" = "Drupal odeEntityNodeRouteProvider",
* },
* "list_builder" = "Drupal odeNodeListBuilder",
* "translation" = "Drupal odeNodeTranslationHandler"
* },
As we can immediately notice, these are all simple references to classes. So, when in doubt, it's always a good idea to go and see what they do and how they work. But let's briefly talk about all of them and see what their main responsibilities are:
- The storage handler is one of the most important. It does all that has to do with CRUD operations and interacting with the underlying storage system. It is always an implementation of EntityStorageInterface and a parent of the ContentEntityStorageBase or ConfigEntityStorage classes. If the entity type does not declare one, it will default to SqlContentEntityStorage (since we are using a SQL database most of the time) or ConfigEntityStorage for configuration entities.
- The storage_schema handler is not something you will deal with too much. Its purpose is to handle the schema preparations for the storage handler. It will default to the SqlContentEntityStorageSchema if one is not provided and it will take care of the database tables needed for the entity type definition.
- The view_builder handler is an EntityViewBuilderInterface implementation responsible for creating a render array out of an entity with the purpose of preparing it for display. If one is not specified, it defaults to EntityViewBuilder.
- The access handler is an EntityAccessControlHandlerInterface implementation responsible for checking access for any of the CRUD operations on a given entity of the respective type. If one is not provided, the default EntityAccessControlHandler is used; it also triggers the access hooks modules can implement to have a say in the access rules of a given entity. We will talk a lot more about access in a dedicated chapter later on.
- The views_data handler is an EntityViewsDataInterface implementation responsible for exposing the respective entity type to the Views API. This is used so that Views is able to properly understand the entity and its fields. By default, it uses the generic EntityViewsData if one is not provided.
- The form handlers are EntityFormInterface implementations used for various types of entity manipulations such as create, edit and delete. The referenced classes are forms that are used for managing the entities.
- The route_provider handlers are EntityRouteProviderInterface implementations responsible for dynamically providing routes necessary for the respective entity type. The Node entity type defines one for HTML pages, but others can be defined for other kinds of HTTP formats as well.
- The list_builder handler is an EntityListBuilderInterface implementation responsible for building a listing of entities of the respective type. This listing is typically used on the administration screen for managing the entities. This is an important one to have since, without it, the admin listing won't work. The default implementation is EntityListBuilder.
- The translation handler is a ContentTranslationHandlerInterface implementation responsible for exposing the entities of this type to the translation API.
We can add our own handlers to any entity type, be it one we define or one defined by Drupal core, and then use it via the entity manager. If we define the entity type, it's enough to include it in the annotation like all the others. Otherwise, we do it using hook_entity_type_alter().
Then, we can use the handler like so:
Drupal::entityTypeManager()->hasHandler('node', 'my_handler');
Drupal::entityTypeManager()->getHandler('node', 'my_handler');
Fields
The principal way data is modeled by entities is through fields. Entities themselves are essentially just a collection of different types of fields that hold various types of data.
Configuration entity fields
Configuration entities have relatively simple fields, due to their storage handling. We can store complex configuration but there is no complex database schema to reflect that. Instead, we have the configuration schema layer that describes configuration entities so the Entity API can understand the types of data they store and represent. We talked about this earlier in the chapter when we looked at the configuration system. But let's examine the NodeType configuration entity type to better understand its fields.
The fields on configuration entities are essentially declared as class properties. So, we can see that NodeType has fields such as $description, $help, and others. As I mentioned a bit earlier, the plugin annotation includes a reference to the class properties that are to be persisted and exported. As you can imagine, a class should be allowed to also have some properties that are not actually field values that need to be exported.
The configuration entity class can also have some specific getter and setter methods for its fields, but can also rely on the ConfigEntityBase parent class set() and get() methods for setting and accessing field values. Things are relatively simple to understand.
Now, let's check out the NodeType configuration schema found in node.schema.yml and see what that is all about:
node.type.*:
type: config_entity
label: 'Content type'
mapping:
name:
type: label
label: 'Name'
type:
type: string
label: 'Machine-readable name'
....
new_revision:
type: Boolean
label: 'Whether a new revision should be created by default'
...
This is just a sample of the schema definition without some of the fields because we already know how to read those. However, there are some things that are new though.
We can see the wildcard notation that indicates that this schema should apply to all configuration items that start with that prefix. So, essentially, to all entities of a certain type. In this case, the entity type name is type, as denoted in the NodeType annotation config_prefix property. Of course, the namespace is prefixed by the module name.
Next, we see that the type is config_entity, which is the other major complex type, besides config_object that is used to denote simple configuration (and which we saw earlier). Both of these types are extensions of the mapping type with some extra information. In the case of configuration entities, the extra values are the definitions for the fields that automatically get exported—uuid, langcode, status, dependencies and third_party_settings. That is to say, these fields exist on all configuration entities of any type and are always persisted/exported.
Lastly, we have the schema definitions for each individual field, such as name, type, and more. So, now the system knows that the new_revision field should be treated as a Boolean, or that the name field is translatable (since it is of a type label that extends the simple string type which has the translation flag on).
So, as you can see, the field matrix of a configuration entity type is not so complex to understand. Content entities are much more complex, and we will talk about those next.
Content entity fields
Content fields can be of two types: base fields and configurable fields. For Drupal 7 developers, the former are essentially the old "property" fields, while the latter are the "Field UI" fields. However, as we will see in a moment, they are now very different implementations in that they are very similar to each other actually.
First and foremost, content entity fields are built on top of the low-level TypedData API. The latter is a complex system for modeling data in code and is widely used in Drupal. Unfortunately, it is also one of the APIs least understood by developers. Not to worry, in the next section I will break it down for you. Since we still don't know anything about it, we will now talk about fields from a higher-level perspective.
Base fields
Base fields are the fields closest to a given entity type, things like the title, creation/modification date, publication status, and so on. They are defined in the entity type class as BaseFieldDefinition implementations and are installed in the database based on these definitions. Once installed, they are no longer configurable from a storage point of view from the UI (except in some cases, in which certain aspects can be overridden). Additionally, some display and form widget configuration changes can still be made (also depending on whether the individual definitions allow this).
Let's check out the Node entity type's baseFieldDefinitions() method and see an example of a base field definition:
$fields['title'] = BaseFieldDefinition::create('string')
->setLabel(t('Title'))
->setRequired(TRUE)
->setTranslatable(TRUE)
->setRevisionable(TRUE)
->setSetting('max_length', 255)
->setDisplayOptions('view', [
'label' => 'hidden',
'type' => 'string',
'weight' => -5,
])
->setDisplayOptions('form', [
'type' => 'string_textfield',
'weight' => -5,
])
->setDisplayConfigurable('form', TRUE);
This is the definition of the Node title field. We can deduce that it is of the string type due to the argument passed to the create() method of the BaseFieldDefinition class. The latter is a complex data definition class on top of the TypedData API.
Other common types of fields that can be defined are boolean, integer, float, timestamp, datetime, entity_reference, text_long, and many others. You can find out what field types you can use by checking the available FieldType plugins provided by Drupal core and any other modules. These are the same types of fields that can be used by configurable fields in the UI. In a later chapter, we will see how we can write our own custom field type.
The field definition can have a number of options that may also differ depending on the type of field being defined. I will skip the obvious ones here and jump to the setTranslatable() and setRevisionable() methods and ask you to remember when we saw earlier how the Node entity type plugin annotation indicated that Nodes will be translatable and revisionable. This is where the fields themselves are configured to that effect. Without these settings, they'd be left out of the translation capability and revisions.
Note
If you take a look at how the baseFieldDefinitions() method starts, you'll see that it inherits some fields from the parent class as well. This is where common field definitions are inherited from, which allow the entity type to be revisionable and publishable.
The setSetting() method is used to provide various options to the field type. In this case, it's used to indicate the maximum length, which is also mirrored in the table column in the database. Then, we have the display options that configure the view formatter as well as the form widget the field should use. They reference the plugin IDs of the FieldFormatter (string) and FieldWidget (string_textfield) plugin types, respectively. In a later chapter, we will see how we can define our own field plugins that can be used for both base and configurable fields.
Lastly, we have the setDisplayConfigurable() method, which is used to enable/disable configuration changes on the form widget or display through the UI. In this case, only the form widget is exposed to changes.
Not all these options and configurations are always used or mandatory. It depends on what type of field we are defining, how we want the field to be configured, and whether defaults are okay for us. An important option that can be used on all field types is cardinality—whether the field can have more than one value of the same type. This allows a field to store multiple values that follow the same data definition on that entity field.
If we create our own entity type and want to later add or modify a base field, we can do that in the same place as we originally defined them—in the entity class. However, for entities that do not "belong" to us, we need to implement some hooks in order to contribute our own changes. To provide a new base field definition to an existing entity type, we can implement hook_entity_base_field_info() in our module and return an array of BaseFieldDefinition items, just as we saw before in the Node entity type. Alternatively, we can implement hook_entity_base_field_info_alter() and alter existing base field definitions to our liking. Do keep in mind that this latter hook might be changed in the future, although at the time of writing, no great priority has been given to that.
Configurable fields
Configurable fields are typically created through the UI, attached to an entity type bundle, and exported to code. The part highlighted with bold is a critical difference between these and base fields in that base fields exist on all bundles of the entity type. You should already be familiar with the UI for creating a configurable field:
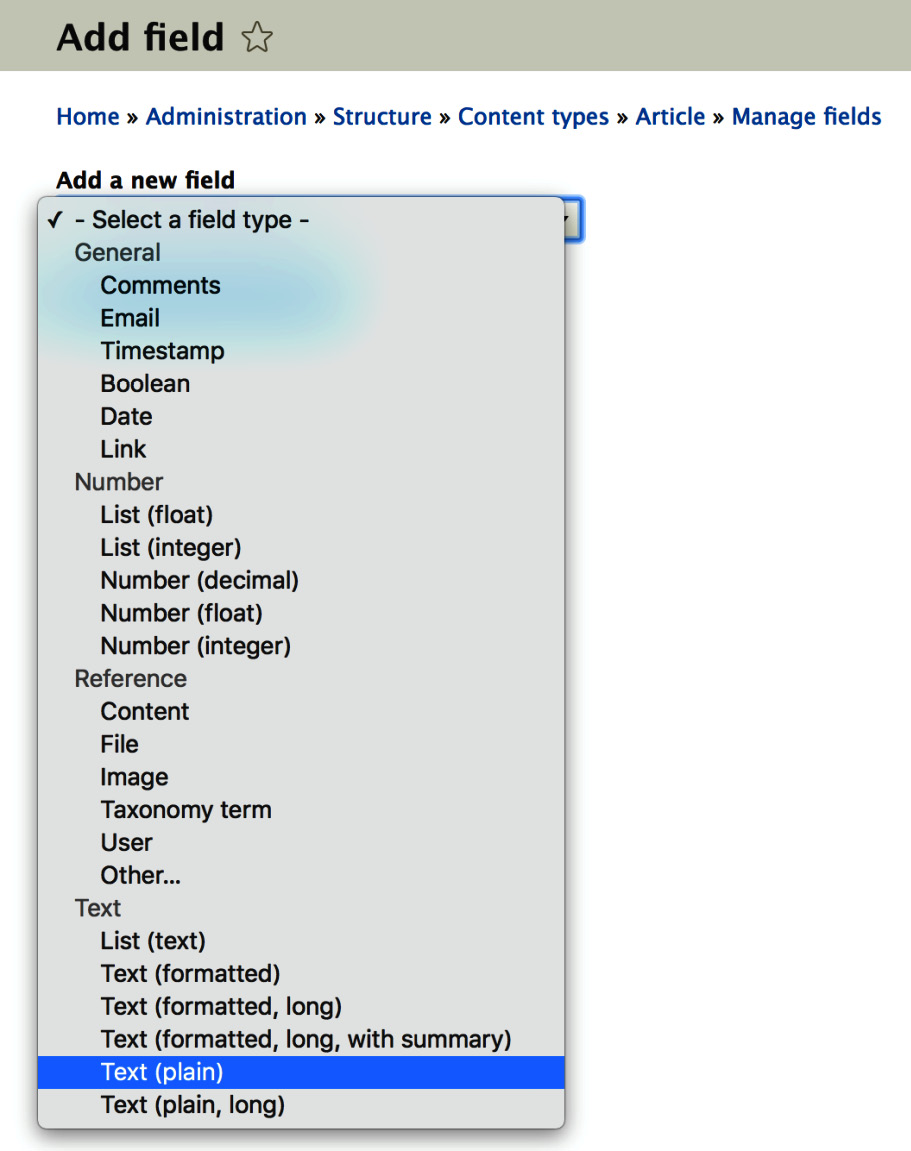
Figure 6.3: Selecting a field type
They also use the TypedData API for their definitions, as well as the same field type, widget, and formatter plugins we talked about earlier. Architecturally speaking, the main difference between base and configurable fields is that the latter are made up of two parts: storage configuration (FieldStorageConfig) and field configuration (FieldConfig). These are both configuration entity types whose entities, together, make up a configurable field. The former defines the field settings that relate to how the field is stored. These are options that apply to that particular field across all the bundles of an entity type it may be attached to (such as cardinality, the field type, and so on). The latter defines options for the field specific to the bundle it is attached to. These can, in some cases, be overrides of the storage config but also new settings (such as the field description, whether it is required, and more).
The easiest way to create configurable fields is through the UI. Just as easily, you get them exported into code. You could alternatively write the field storage configuration and field configuration yourself and add it to your module's config/install folder, but you can achieve the same more easily if you just export them through the UI.
Moreover, you can use a couple of hooks to make alterations to existing fields. For example, by implementing hook_entity_field_storage_info_alter(), you can alter field storage configurations, while with hook_entity_bundle_field_info_alter(), you can alter field configurations as they are attached to an entity type bundle.
Field storage
We earlier saw how configuration entities are persisted and exported based on the configuration schema and plugin definition. Let's quickly talk about how the fields used on content entities are stored in the database.
Base fields, by default, end up in the entity base table (the one defined in the plugin annotation as base_table). This makes things more performant than having them in individual tables. However, there are quite a lot of exceptions to this. More exceptions than not, in fact.
If the entity type is translatable, a "data" table gets created where records of the same entity base field values in different languages can be stored. This is the table the Node entity type plugin annotation declared with the data_table property. If this property is missing, the table name will, by default, be [base_table]_field_data.
Moreover, if the field cardinality of a given field is higher than 1, a new table is created for the field with the name [entity_type_name]__[field_name] where multiple records for the same field can be stored.
If the entity and field have translation enabled and the respective field cardinality is higher than 1, the "data" table holds the records for an entity in all languages it is translated into, while the [entity_type_name]__[field_name] table holds all the value records in all languages for a given field.
Configurable fields, on the other hand, always get a separate field data table named [entity_type_name]__[field_name], where the multiple values for the same field and in multiple languages can be stored.
Entity types recap
The Entity API is quite complex. We have only begun our journey to understanding the different kinds of entity types, bundles, fields, and so on. We have so far talked about the differences between configuration and content entity types and what exactly they are made up of. To this end, we also touched upon the different types of fields they can use and how the data in these fields is stored.
However, there is still a lot to understand about entities, especially content entities, which will be our focus in the next sections. We are going to first look at the TypedData API to better understand how content entity field data is modeled. As of now, that is still a black box; am I right? Next, we'll look at how to actually work with the API to query, create, and manipulate entities (both content and configuration). Finally, we'll talk a bit about the validation API the content entities and fields use consistently to ensure they hold proper data. So, let's get to it.
TypedData
In order to really understand how entity data is modeled, we need to understand the TypedData API. Unfortunately, this API still remains quite a mystery for many. But you're in luck because, in this section, we're going to get to the bottom of it.
Why TypedData?
It helps to understand things better if we first talk about why there was the need for this API. It all has to do with the way PHP as a language is, compared to others, and that is, loosely typed. This means that in PHP it is very difficult to use native language constructs to rely on the type of certain data or understand more about that data.
The difference between the string "1" and integer 1 is a very common example. We are often afraid of using the === sign to compare them because we never know what they actually come back as from the database or wherever. So, we either use == (which is not really good) or forcefully cast them to the same type and hope PHP will be able to get it right.
In PHP 7, we have type hinting for scalar values in function parameters which is good, but still not enough. Scalar values alone are not going to cut it if you think of the difference between 1495875076 and 2495877076. The first is a timestamp while the second is an integer. Even more importantly, the first has meaning while the second one does not. At least seemingly. Maybe I want it to have some meaning because it is the specific formatting for the IDs in my package tracking app.
Drupal was not exempt from the problems this loosely typed nature of PHP can create. Drupal 7 developers know very well what it meant to deal with field values in this way. But not anymore because we now have the TypedData API in Drupal.
What is TypedData?
The TypedData API is a low-level and generic API that essentially does two things from which a lot of power and flexibility is derived.
First, it wraps "values" of any kind of complexity. More importantly, it forms "values". This can be a simple scalar value to a multidimensional map of related values of different types that together are considered one value. Let's take, for example, a New York license plate: 405-307. This is a simple string but we "wrap" it with TypedData to give it meaning. In other words, we know programmatically that it is a license plate and not just a random PHP string. But wait, that plate number can be found in other states as well (possibly, I have no idea). So, in order to better define a plate, we need also a state code: NY. This is another simple string wrapped with TypedData to give it meaning—a state code. Together, they can become a slightly more complex piece of TypedData: US license plate, which has its own meaning.
Second, as you can probably infer, it gives meaning to the data that it wraps. If we continue our previous example, the US license plate TypedData now has plenty of meaning. So, we can programmatically ask it what it is and all sorts of other things about it, such as what is the state code for that plate. And the API facilitates this interaction with the data.
As I mentioned, from this flexibility, a lot of power can be built on top. Things like data validation are very important in Drupal and rely on TypedData. As we will see later in this chapter, validation happens at the TypedData level using constraints on the underlying data.
The low-level API
Now that we have a basic understanding of the principles behind TypedData and why we need it, let's start exploring the API, starting from the smallest pieces and going up.
There are two main pillars of this API: DataType plugins and data definitions.
DataType plugins
DataType plugins are responsible for defining the available types of data that can be used in the system. For example, the StringData plugin is used to model a simple primitive string. Moreover, they are responsible for interacting with the data itself; things like setting and accessing the respective values.
The DataType plugins are managed by the TypedDataManager and are annotated by the DataType annotation class. They implement the TypedDataInterface and typically extend the TypedData base class or one of its subclasses.
There are three main types of DataType plugins out there, depending on the interface they implement:
- First, there is the TypedDataInterface I mentioned before; this is typically used for simple primitive values such as strings or integers.
- Second, there is the ListInterface which is used to form a collection of other TypedData elements. It comes with methods specific to interacting with lists of elements.
- Third, there is ComplexDataInterface which is used for more complex data formed of multiple properties that have names and can be accessed accordingly. Going forward, we will see examples of all these types.
The best way to understand how these plugins are used is to first talk about data definitions as well.
Data definitions
Data definitions are the objects used to store all that meaning about the underlying data we talked about. They define the type of data they can hold (using an existing DataType plugin) and any kind of other meaningful information about that data. So, together with the plugins, the data definitions are one mean data modeling machine.
At the lowest level, they implement the DataDefinitionInterface and typically extend the DataDefinition class (or one of its subclasses). Important subclasses of DataDefinition are ListDefinition and ComplexDefinitionBase, which are used to define more complex data types. And as you might expect, they correlate to the ListInterface and ComplexDataInterface plugins I mentioned earlier.
Let's see an example of a simple usage of data definitions and DataType plugins by modeling a simple string—my_value.
It all starts with the definition:
$definition = DataDefinition::create('string');
The argument we pass to the create() method is the DataType plugin ID we want to be defining our data as. In this case, it is the StringData plugin.
We already have some options out of the box to define our string data. For example, we can set a label:
$definition->setLabel('Defines a simple string');
We can also mark it as read only or set whatever "settings" we want onto the definition. However, one thing we don't do is deal with the actual value. This is where the DataType plugin comes into play. The way this happens is that we have to create a new plugin instance, based on our definition and a value:
/** @var DrupalCoreTypedDataTypedDataInterface $data */
$data = Drupal::typedDataManager()->create($definition, 'my_value');
We used the TypedDataManager to create a new instance of our definition with our actual string value. What we get is a plugin that we can use to interact with our data, understand it better, change its value, and so on:
$value = $data->getValue();
$data->setValue('another string');
$type = $data->getDataDefinition()->getDataType();
$label = $data->getDataDefinition()->getLabel();
We can see what kind of data we are dealing with, its label, and other things. Let's take a look at a slightly more complex example and model our license plate use case we talked about earlier.
We first define the number:
$plate_number_definition = DataDefinition::create('string');
$plate_number_definition->setLabel('A license plate number.');
Then, we define the state code:
$state_code_definition = DataDefinition::create('string');
$state_code_definition->setLabel('A state code');
We are keeping these generic because nobody says we cannot reuse these elsewhere; we might need to deal with state codes in another place.
Next, we create our full plate definition:
$plate_definition = MapDataDefinition::create();
$plate_definition->setLabel('A US license plate');
We use the MapDataDefinition here which, by default, uses the Map DataType plugin. Essentially, this is a well-defined associative array of properties. So, let's add our definitions to it:
$plate_definition->setPropertyDefinition('number', $plate_number_definition);
$plate_definition->setPropertyDefinition('state', $state_code_definition);
This map definition gets two named property definitions: number and state. You can see now the hierarchical aspect of the TypedData API.
Finally, we instantiate the plugin:
/** @var DrupalCoreTypedDataPluginDataTypeMap $plate */
$plate = Drupal::typedDataManager()->create($plate_definition, ['state' => 'NY', 'number' => '405-307']);
The value we pass to this type of data is an array whose keys should map to the property names and values to the individual property definitions (which in this case are strings).
Now, we can benefit from all the goodness of the TypedData API:
$label = $plate->getDataDefinition()->getLabel();
$number = $plate->get('number');
$state = $plate->get('state');
The $number and $state variables are StringData plugins that can then be used to access the individual values inside:
$state_code = $state->getValue();
Their respective definitions can be accessed in the same way that we did before. So, we managed in these few lines to properly define a US license plate construct and make it intelligible by the rest of our code. Next, we will look at even more complex examples and inspect how content entity data is modeled using TypedData. Configuration entities, as we saw, rely on configuration schemas to define the data types. Under the hood, the schema types reference DataType plugins themselves. So, behind the scenes, the same low-level API is used. To keep things a bit simpler, we will look at content entities where this API is much more explicit and you will actually have to deal with it.
Content entities
Let's now examine entities and fields and see how they make use of the TypedData API for modeling the data they store and manage. This will also help you better understand how data is organized when you are debugging entities and their fields.
The main place where data is stored and modeled is fields. As we saw, we have two types: base fields and configurable fields. However, when it comes to TypedData, they do not differ very much. They both use the FieldItemList DataType plugin (either directly or a subclass). In terms of definitions, base fields use BaseFieldDefinition instances while configurable fields use FieldConfig instances. The latter are slightly more complicated because they are actually configuration entities themselves (to store the field configuration), but that implement down the line the DataDefinitionInterface. So, they combine the two tasks. Moreover, base fields can also use BaseFieldOverride definition instances, which are essentially also configuration entities and are used for storing alterations made through the UI to the fields defined as base fields. Just like the FieldConfig definitions, these extend the FieldConfigBase class because they share the same exportable characteristics.
In addition to fields, entities themselves have a TypedData plugin that can be used to wrap entities and expose them to the API directly—the EntityAdapter. These use an EntityDataDefinition instance which basically includes all the individual field definitions. Using plugin derivatives, each entity type gets an EntityAdapter plugin instance dynamically.
Let's now examine a simple base field and understand the usage of the TypedData API in the context of fields. The BaseFieldDefinition class extends ListDataDefinition, which is responsible for defining multiple items of data in a list. Each item in the list is an instance of DataDefinitionInterface as well, so you can see the same kind of hierarchy as we had with our license plate example. But why is one field a list of items?
You probably know that when you create a field, you can choose how many items this one field can hold—its cardinality. You typically choose one, but can choose many. The same is true with all types of fields. Regardless of the cardinality you choose, the data is modeled as a list. If the field has a cardinality of one, the list will only have one item. It is as simple as that. So, if base field definitions are lists of definitions, what are the individual item definitions? The answer is extensions of of FieldItemDataDefinition.
In terms of DataType plugins, as I mentioned, we have the FieldItemList class which implements the ListInterface I mentioned earlier as one of the more complex data types. The individual items inside are subclasses of FieldItemBase (which extends the Map DataType we encountered earlier). So, we have the same kind of data structure. But just to make matters slightly more complicated, another plugin type comes into play here—FieldType. The individual field items are actually instances of this plugin type (which extend FieldItemBase and down the line a DataType plugin of some kind). So, for instance, a text field will use the StringItem FieldType plugin, which inherits a bunch of functionality from the Map DataType. So, you can see how the TypedData API is at a very low level and things can be built on top of it.
So now, if we combine what we learned and look at a base field, we see the following: a FieldItemList data type using a BaseFieldDefinition (or BaseFieldOverride) data definition. Inside each item is a FieldItemBase implementation (a FieldType plugin extending some sort of DataType plugin) using a FieldItemDataDefinition. So, not that complicated after all. We will put this knowledge to good use in the final section of this chapter when we see how we can interact with entities and field data. I am not throwing all these notions at you just for the sake of it.
The configurable fields work almost exactly the same way, except that the definition corresponding to the FieldItemList is an instance of FieldConfig (which is also a configuration entity that stores the settings for this field, and which is similar to the BaseFieldOverride). However, it is also a type of list definition with the individual list items being the same as with the base fields.
TypedData recap
So, as we've seen, the scope of understanding the TypedData API in Drupal is quite broad. We can make things very simple, as with our first example, but then hit some really complicated territory with its use in the Entity system. The point of this section has been to make you aware of this API, understand its reasoning, see a couple of simple examples, and break down all the components that are used in the Entity API.
However, I admit, it must have been quite a difficult section to follow. All this terminology and theory can be pretty daunting. But don't worry if you didn't fully understand everything, that's fine. It's there for you to reference as we go through the next section because we will apply all that knowledge and you will see why it's useful to be aware of it. In other words, we will now focus on interacting with entities (both content and configuration) and in doing so, make heavy use of the functionality made possible by the TypedData API. But do also take the time to navigate the code and see the classes I mentioned.
Interacting with the Entity API
In this final section of the chapter, we're going to cover the most common things you will be doing with content and configuration entities. These are the main topics we will discuss going forward:
- Querying and loading entities
- Reading entities
- Manipulating entities (update/save)
- Creating entities
- Rendering entities
- Validating entity data
So, let's hit it.
Querying entities
One of the most common things you will do as a programmer is querying stuff, such as data in the database. The entity API offers a layer that reduces the need to query the database directly. In a later chapter, we will see how we can still do that when things become more complex. For now, since most of our structured data belongs in entities, we will use the entity query system for retrieving entities.
If you remember when we spoke about the entity type handlers, one of them was the storage handler that provides the API for CRUD operations on the entities. This is the handler we will use to access also the entity query. And we do this via the entity_type.manager service (EntityTypeManager):
$query = Drupal::entityTypeManager()->getStorage('node')->getQuery();
We request the storage handler which can then give us the query factory for that entity type. In this example, I used a static call but, as always, you should inject the service where you can.
Building queries
Now that we have an entity query factory on our hands, we can build a query that is made up of conditions and all sorts of typical query elements. Here's a simple example of querying for the last 10 published article nodes:
$query
->condition('type', 'article')
->condition('status', TRUE)
->range(0, 10)
->sort('created', 'DESC');
$ids = $query->execute();
The first thing you can see is that the methods on the factory are chainable. We have some expected methods to set conditions, range, sorting, and so on. As you can already deduce, the first parameter is the field name and the second is the value. An optional third parameter can also be the operator for the condition. Moreover, the name of the $ids variable also tells you what the result of the execute() method is: the IDs of the entities found (keyed by their revision IDs).
Tip
I strongly recommend you check out the DrupalCoreEntityQueryQueryInterface class for some documentation about these methods, especially the condition() method, which is the most complex.
Here is a slightly more complex condition that would return nodes of two different types:
->condition('type', ['article', 'page'], 'IN')
Additionally, you can also use condition groups, with OR or AND conjunctions:
$query
->condition('status', TRUE);
$or = $query->orConditionGroup()
->condition('title', 'Drupal', 'CONTAINS')
->condition('field_tags.entity.name', 'Drupal', 'CONTAINS');
$query->condition($or);
$ids = $query->execute();
In the previous query, we see a few new things. First, we create a condition group of the type OR in which we add two conditions. One of them checks whether the node title field contains the string "Drupal". The other checks whether any of the entities referenced by the field_tags field (in this case, taxonomy terms) has the string "Drupal" in their name. So, you can see the power we have in traversing into referenced entities. Finally, we use this condition group as the first parameter to the condition() method of the query (instead of field name and value).
Note
Entity queries for the Node entity type take access restrictions into account as they are run from the context of the current user. This means that, for example, a query for unpublished nodes triggered on a page hit by an anonymous user is not going to return results, but it will if triggered by an administrator. You can disable this by adding the ->accessCheck(FALSE) instruction to the query IF you are sure the results are not going to expose unwanted content to users. We will talk more about node access in a later chapter.
Configuration entities work in the same way. We get the query factory for that entity type and build a query. Under the hood, the query is of course run differently due to the flat nature of the storage.
Each configuration entity gets one record in the database, so they need to be loaded and then examined. Moreover, the conditions can be written to also match the nested nature of configuration entity field data. For example:
$query = Drupal::entityTypeManager()->getStorage('view')->getQuery();
$query
->condition('display.*.display_plugin', 'page');
$ids = $query->execute();
This query searches for all the View configuration entities that have the display plugin of the type "page". The condition essentially looks inside the display array for any of the elements (hence the * wildcard). If any of these elements has a display_plugin key with the value "page", it's a match. This is what an example view entity looks like in YAML format:
...
base_field: nid
core: 8.x
display:
default:
display_options:
...
display_plugin: default
display_title: Master
...
page_1:
display_options:
...
display_plugin: page
display_title: Page
I removed a bunch of data from this entity just to keep it short. But as you can see, we have the display array, with the default and page_1 elements, and each has a display_plugin key with a plugin ID.
Loading entities
Now that we have our entity IDs found by the query, it's time to load them. It couldn't be simpler to do so. We just use the storage handler for that entity type (and we get that from the entity type manager):
$nodes = Drupal::entityTypeManager()->getStorage('node')->loadMultiple($ids);
This will return an array of EntityInterface objects (in this case NodeInterface). Or if we have only one ID to load:
$nodes = Drupal::entityTypeManager()->getStorage('node')->load($id);
This will return a single NodeInterface object.
The Entity type storage handler also has a shortcut method that allows you to perform simple queries and load the resulting entities in one go. For example, if we wanted to load all article nodes:
$nodes = Drupal::entityTypeManager()->getStorage('node')->loadByProperties(['type' => 'article']);
The loadByProperties() method takes one parameter: an associative array that contains simple field value conditions that need to match. Behind the scenes, it builds a query based on these and loads the returning entities. Do keep in mind that you cannot have complex queries here and access checks will be taken into account in the query being built under the hood. So, for full control, just build the query yourself.
Reading entities
So, we have our entity loaded and we can now read its data. For content entities, this is where the TypedData knowledge comes into play. Before we look at that, let's see quickly how we can get the data from configuration entities. Let's inspect the Article NodeType for this purpose:
/** @var Drupal odeEntityNodeType $type */
$type = Drupal::entityTypeManager()->getStorage('node_type')->load('article');
The first and simplest thing we can do is inspect the individual methods on the entity type class. For example, NodeType has a getDescription() method, which is a handy helper to get the description field:
$description = $type->getDescription();
This is always the best way to try to get the field values of configuration entities, because you potentially get return type documentation that can come in handy with your IDE. Alternatively, the ConfigEntityBase class has the get() method that can be used to access any of the fields:
$description = $type->get('description');
This is going to do the same thing and it is the common way any field can be accessed across the different configuration entity types. The resulting value is the raw field value, in this case a string. So, this is pretty simple.
Apart from the typical field data, we have the entity keys (if you remember from the entity type plugin definitions). These are common for both configuration and content entities and the relevant accessor methods are found on the EntityInterface. Here are some of the more common ones:
$id = $type->id();
$label = $type->label();
$uuid = $type->uuid();
$bundle = $type->bundle();
$language = $type->language();
The resulting information naturally depends on the entity type. For example, configuration entities don't have bundles or some content entity types either. So, the bundle() method will return the name of the entity type if there are no bundles. By far the most important one is id(). You will often also use label() as a shortcut to the primitive field value of the field used as the label for the entity. There are other entity keys as well that individual entity types can declare. For example, entity types that extend the EditorialContentEntityBase, such as the Node entity, have a published entity key and a corresponding isPublished() method. So, for any other entity keys, do check the respective entity type if you can use them.
Here are some extra methods you can use to inspect entities of any type:
- isNew() checks whether the entity has been persisted already.
- getEntityTypeId() returns the machine name of the entity type of the entity.
- getEntityType() returns the EntityTypeInterface plugin of the given entity.
- getTypedData() returns the EntityAdapter DataType plugin instance that wraps the entity. It can be used for further inspection as well as validation.
Moreover, we can also check whether they are a content or a configuration entity:
$entity instanceof ContentEntityInterface
$entity instanceof ConfigEntityInterface
Similarly, we can also check whether they are a specific type of entity:
$entity instanceof NodeInterface
This is similar to using $entity->getEntityTypeId === 'node' but it is much more explicit and clear, plus the IDE can benefit from the information in many cases.
Now, let's turn to content entities and see how we can read their field data.
Similar to configuration entity types, many content entity types can have helper methods on their class (or parent) to make accessing certain fields easier. For example, the Node entity type has the getTitle() method, which gets the first primitive value of its title field. However, let's see how we can apply what we learned in the TypedData section and navigate through the field values like a pro. To exemplify this, we will examine a simple article node.
Content entities also have the get() method, but unlike configuration entities, it doesn't return the raw field value. Instead, it returns an instance of FieldItemList:
/** @var Drupal odeNodeInterface $node */
$node = Node::load(1);
/** @var DrupalCoreFieldFieldItemListInterface $title */
$title = $node->get('title');
For quick prototyping, in this example I used the static load() method on the content entity class to load an entity by ID. Under the hood, this will delegate to the relevant storage class. This is a quick alternative to using the entity manager, but you should only rely on it wherever you cannot inject dependencies.
Here are some of the things we can learn about the title FieldItemList:
$parent = $title->getParent();
This is its parent (the DataType plugin it belongs in; in this case, the EntityAdapter):
$definition = $title->getFieldDefinition();
This is the DataDefinitionInterface of the list. In this case, it's a BaseFieldDefinition instance, but can be a BaseFieldOverride or a FieldConfig for fully configurable fields:
$item_definition = $title->getItemDefinition();
This is the DataDefinitionInterface for the individual items in the list, typically a FieldItemDataDefinition:
$total = $title->count();
$empty = $title->isEmpty();
$exists = $title->offsetExists(1);
These are some handy methods for inspecting the list. We can see how many items there are in it, whether it's empty, and whether there are any values at a given offset. Do keep in mind that value keys start at 0, so if the cardinality of the field is 1, the value will be at the key 0.
To retrieve values from the list, we have a number of options. The most common thing you'll end up doing is the following:
$value = $title->value;
This is a magic property pointing to the first primitive value in the list. However, it's very important to note that, although most fields use the value property, some fields have a different property name. For example, entity reference fields use target_id:
$id = $field->target_id;
This returns the ID of the referenced entity. As an added bonus, if you use the magic entity property, you get the fully loaded entity object:
$entity = $field->entity;
But enough of this magic way of doing things; let's see what other options we have:
$value = $title->getValue();
The getValue() method is present on all TypedData objects and returns the raw values that it stores. In our case, it will return an array with one item (since we only have one item in the list) that contains the individual item raw values. So, an array with one element keyed value and the title string as its actual value. We will see in a moment why this is keyed value.
In some cases, we might want this to be returned and can find it useful. In other cases though, we might just want the one field value. For this, we can ask for a given item in the list:
$item = $title->get(0);
$item = $title->offsetGet(0);
Both of these do the same thing and return a FieldType plugin which, as we saw, extends FieldItemBase, which is nothing more than a fancy Map DataType plugin. Once we have this, we again have a few choices:
$value = $item->getValue();
This again returns an array of the raw values, in this case with one key called value and the string title as the actual value. So, just as we called getValue() on the list, but this time returning the raw values of only one item instead of an array of raw values of multiple items.
The reason why we have the actual title string keyed by value is because we are requesting the raw value from the StringItem field type plugin, which in this case happens to define the value columns as value. Others might differ (for example the entity reference field that stores a target_id named value).
Alternatively, again, we can navigate a bit further down:
$data = $item->get('value');
We know that this field uses the name value for its property so we can use the get() method from the Map DataType (which, if you remember, is subclassed by the StringItem field type) to retrieve its own property by name. This is exactly the same as we did with the license plate map and when we requested the number or state code. In the case of StringItem field types, this is going to be a StringData DataType plugin.
And as we did before, we can ask this final plugin for its value:
$value = $data->getValue();
Now we have the final string for the title. Of course, all the way down from the top, we have the opportunity to inspect the definitions of each of these plugins and learn more information about them.
Typically, day to day, you will use two methods for retrieving values from fields, depending on the cardinality. If the field has only one value, you will end up using something like this:
$title = $node->get('title')->value;
$id = $node->get('field_referencing_some_entity')->target_id;
$entity = $node->get('field_referencing_some_entity')->entity;
If the field can have multiple values, you will end up using something like this:
$names = $node->get('field_names')->getValue();
$tags = $node->get('field_tags')->referencedEntities();
The referencedEntities() method is a helper one provided by EntityReferenceFieldItemList (which is a subclass of FieldItemList) that loads all the referenced entities and returns them in an array keyed by the position in the field (the delta).
Manipulating entities
Now that we know how we can read field data programmatically, let's see how we can change this data and persist it to the storage. So, let's look at the same Node title field and update its value programmatically.
The most common way you can change a field value on a content entity is this:
$node->set('title', 'new title');
This works well with fields that have only one value (cardinality = 1) and, behind the scenes, essentially this happens:
$node->get('title')->setValue('new title');
This one value gets transformed into a raw array of one value because we are dealing with a list of items and the first item receives the changed value. If the field has a higher cardinality and we pass only one value as such, we essentially remove all of them and replace them with only one. So, if we want to make sure we are not deleting items but instead adding to the list, we can do this:
$values = $node->get('field_multiple')->getValue();
$values[] = ['value' => 'extra value'];
$node->set('field_multiple', $values);
If we want to change a specific item in the list, we can do this:
$node->get('field_multiple')->get(1)->setValue('changed value');
This will change the value of the second item in the list. You just have to make sure it is set first before chaining:
$node->get('field_test')->offsetExists(1);
All these modifications we make to field values are, however, kept in memory (they are not persisted). To save them to a database, we have to do something extremely complicated:
$node->save();
That's it. We can achieve the same thing via the entity type manager as well:
Drupal::entityTypeManager()->getStorage('node')->save($node);
Since we are talking about saving, deleting entities can be done in the exact same way, except by using the delete() method on the entity object. We also have this method on the storage handler. However, it accepts an array of entities to delete, so you can use that to delete more entities at once.
Configuration entities have it a bit easier. This is how we can easily change the value of a configuration entity field:
/** @var Drupal odeEntityNodeType $type */
$type = Drupal::entityTypeManager()->getStorage('node_type')->load('article');
$type->set('name', 'News');
$type->save();
Nothing too complex going on here. We load the entity, set a property value, and save it using the same API.
Creating entities
Programmatically creating new entities is also not rocket science and, again, we use the entity type storage handler to do so:
$values = [
'type' => 'article',
'title' => 'My title'
];
/** @var Drupal odeNodeInterface $node */
$node = Drupal::entityTypeManager()->getStorage('node')->create($values);
$node->set('field_custom', 'some text');
$node->save();
The storage handler has the create() method, which takes one argument in the form of an associative array of field values. The keys represent the field name and the values the value. This is where you can set initially some simpler values, and for more complex fields you still have the API we covered earlier.
If the entity type has bundles, such as the Node example above, the bundle needs to be specified in the create() method. The key it corresponds to is the entity key for the bundle. If you remember the Node entity type plugin, that is type.
That is pretty much it. Again, we need to save it in order to persist it in our storage.
Rendering content entities
Now, let's see what we can do with an entity to render it on the page. In doing so, we will stick to the existing view modes and try not to break it up into pieces for rendering in a custom template through our own theme hook. If you want to do that, you can. You should have all the knowledge for that already:
- Defining a theme hook with variables
- Querying and loading entities
- Reading the values of an entity
- Creating a render array that uses the theme hook
Instead, we will rely on the entity's default building methodology that allows us to render it according to the display mode configured in the UI, so, for example, as a teaser or as the full display mode. As always, we will continue with the Node as an example.
The first thing we need to do is get our hands on the view builder handler of the entity type. Remember this from the entity type plugin definition? Just like the storage handler, we can request it from the EntityTypeManager:
/** @var Drupal odeNodeViewBuilder $builder */
$builder = Drupal::entityTypeManager()->getViewBuilder('node');
Now that we have that, the simplest way of turning our entity into a render array is to use the view() method:
$build = $builder->view($node);
By default, this will use the full view mode, but we can pass a second parameter and specify another, such as teaser or whatever we have configured. A third optional parameter is the langcode of the translation (if we have it) we want to render in.
The $build variable is now a render array that uses the node theme hook defined by the Node module. You will notice also a #pre_render theme property that specifies a callable to be run before the rendering of this array. That is actually a reference back to the NodeViewBuilder (the node entity type view builder) which is responsible for preparing all the field values and all sorts of other processing we are not going to cover now. But the node.twig.html template file, preprocessed by the *_preprocess_node() preprocessors, also plays a big role in providing some extra variables to be used or rendered in the template.
If we want, we can also build render arrays for multiple entities at once:
$build = $builder->viewMultiple($node);
This will still return a render array that contains multiple children for each entity being rendered. The #pre_render property I mentioned earlier, however, will stay at the top level and, this time, be responsible for building multiple entities.
Essentially, it is that simple to get from loading an entity to turning it into a render array. You have many different places where you can take control over the output. As I said, you can write your own theme hook and break up the entity into variables. You can also implement the preprocessor for its default theme functions and change some variables in there. You can even change the theme hook used and append a suggestion to it and then take it from there, as we saw in the chapter on theming:
$build = $builder->view($node);
$build['#theme'] = $build['#theme'] . '__my_suggestion';
Another important way in which we can control the output is by implementing a hook that gets fired when the entity is being built for rendering: hook_entity_view() or hook_ENTITY_TYPE_view(). So, let's see an example by which we want to append a disclaimer message at the bottom of all our Node entities when they are displayed in their full view mode. We can do something like this:
function module_name_entity_view(array &$build, EntityInterface $entity, EntityViewDisplayInterface $display, $view_mode) {
if ($entity->getEntityTypeId() === 'node' && $view_mode === 'full') {
$build['disclaimer'] = [
'#markup' => t('The content provided is for general information purposes only.'),
'#weight' => 100
];
}
}
The three important arguments we work with are the $build array passed by reference, and which contains the render array for the entire entity, the $entity object itself, and the $view_mode the latter is being rendered in. So, all we have to do is add our own render bits inside the $build array. As a bonus, we try to ensure that the message gets printed at the bottom by using the #weight property on the render array.
Pseudo-fields
Drawing from our example on implementing hook_entity_view(), there's a neat little technique we can use to empower our site builders further with respect to that disclaimer message. This is by turning it into a pseudo field. By doing this, site builders will be able to choose the bundles it should show on, as well as the position relative to the other fields, all through the UI in the Manage Display section:

Figure 6.4: Pseudo-fields
So, there are two things we need to do for this. First, we need to implement hook_entity_extra_field_info() and define our pseudo field:
/**
* Implements hook_entity_extra_field_info().
*/
function module_name_entity_extra_field_info() {
$extra = [];
foreach (NodeType::loadMultiple() as $bundle) {
$extra['node'][$bundle->id()]['display']['disclaimer'] = [
'label' => t('Disclaimer'),
'description' => t('A general disclaimer'),
'weight' => 100,
'visible' => TRUE,
];
}
return $extra;
}
As you can see, we loop through all the available node types and for the node entity display, we add our disclaimer definition with some defaults to use. The weight and visibility will, of course, be overridable by the user, per node bundle.
Next, we need to go back to our hook_entity_view() implementation and make some changes. Because we know we want this applied to Node entities only, we can implement the more specific hook instead:
/**
* Implements hook_ENTITY_TYPE_view().
*/
function module_name_node_view(array &$build, EntityInterface $entity, EntityViewDisplayInterface $display, $view_mode) {
if ($display->getComponent('disclaimer')) {
$build['disclaimer'] = [
'#markup' => t('The content provided is for general information purposes only.'),
];
}
}
In this case, we don't need to check for view modes or entity types, but rather use the entity view display configuration object to check for the existence of this extra disclaimer field (technically called a component). If found, we simply add our markup to the $build array. Drupal will take care of things like weight and visibility to match whatever the user has set through the UI, and that's it. Clearing the cache, we should still see our disclaimer message, but we can now control it a bit from the UI.
Entity validation
The last thing we are going to talk about in this chapter is entity validation and how we can make sure that field and entity data as a whole contains valid data. When I say valid, I don't mean whether it complies with the strict TypedData definition but whether, within that, it complies with certain restrictions (constraints) we impose on it. As such, most of the time, entity validation applies to content entities. However, we can also run validation on configuration entities but only insofar as to ensure that the field values are of the correct data type as described in the configuration schema. And in this respect, we are talking about TypedData definitions under the hood.
Drupal uses the Symfony Validator component for applying constraints and then validating entities, fields, and any other data against those constraints. I do recommend that you check out the Symfony documentation page on this component to better understand its principles. For now, let's quickly see how it is applied in Drupal.
There are three main parts to a validation: a constraint plugin, a validator class and potential violations. The first is mainly responsible for defining what kind of data it can be applied to, the error message it should show, and which validator class is responsible for validating it. If it omits the latter, the validator class name defaults to the name of the constraint class with the word Validator appended to it. The validator, on the other hand, is called by the validation service to validate the constraint and build a list of violations. Finally, the violations are data objects that provide helpful information about what went wrong in the validation: things like the error message from the constraint, the offending value and the path to the property that failed.
To better understand things, we have to go back to the TypedData and see some simple examples, because that is the level at which the validation happens.
So, let's look at the same example I introduced TypedData with earlier in this chapter:
$definition = DataDefinition::create('string');
$definition->addConstraint('Length', ['max' => 20]);
The data definitions have methods for applying and reading constraints. If you remember, one of the reasons why we need this API is to be able to enrich data with meta information. Constraints are such information. In this example, we are applying a constraint called Length (the plugin ID of the constraint) with some arbitrary parameters expected by that constraint (in this case, a maximum length but also a minimum would work). Having applied this constraint, we are essentially saying that this piece of string data is only valid if it's shorter than 20 characters. And we can use it like so:
/** @var DrupalCoreTypedDataTypedDataInterface $data */
$data = Drupal::typedDataManager()->create($definition, 'my value that is too long');
$violations = $data->validate();
DataType plugins have a validate() method on them that uses the validation service to validate their underlying data definition against any of the constraints applied to it. The result is an instance of the ConstraintViolationList iterator that contains a ConstraintViolationInterface instance for each validation failure. In this example, we should have a violation from which we can get some information like so:
/** @var SymfonyComponentValidatorConstraintViolationInterface $violation */
foreach ($violations as $violation) {
$message = $violation->getMessage();
$value = $violation->getInvalidValue();
$path = $violation->getPropertyPath();
}
The $message is the error message that comes from the failing constraint, the $value is the actual incorrect value, and $path is a string representation of the hierarchical path down to the value that has failed. If you remember our license plate example or the content entity fields, TypedData can be nested, which means you can have all sorts of values at different levels. In our previous example, $path is, however, going to be "" (an empty string) because the data definition has only one level.
Let's revisit our license plate example and see how such a constraint would work there. Imagine we wanted to add a similar constraint to the state code definition:
$state_code_definition = DataDefinition::create('string');
$state_code_definition->addConstraint('Length', array('max' => 2));
// The rest of the set up code we saw earlier.
/** @var DrupalCoreTypedDataPluginDataTypeMap $plate */
$plate = Drupal::typedDataManager()->create($plate_definition, ['state' => 'NYC', 'number' => '405-307']);
$violations = $plate->validate();
If you look closely, I instantiated the plate with a state code longer than two characters. Now, if we ask our individual violations for the property path, we get state, because that is what we called the state definition property within the bigger map definition.
Content entities
Let's now see an example of validating constraints on entities. First of all, we can run the validate() method on an entire entity, which will then use its TypedData wrapper (EntityAdapter) to run a validation on all the fields on the entity plus any of the entity-level constraints. The latter can be added via the EntityType plugin definition (the annotation). For example, the Comment entity type has this bit:
* constraints = {
* "CommentName" = {}
* }
This means that the constraint plugin ID is CommentName and it takes no parameters (since the braces are empty). We can even add constraints to entity types that do not "belong" to us by implementing hook_entity_type_alter(), for example:
function my_module_entity_type_alter(array &$entity_types) {
$node = $entity_types['node'];
$node->addConstraint('ConstraintPluginID', ['option']);
}
Going one level below and knowing that content entity fields are built on top of the TypedData API, it follows that all those levels can have constraints. We can add the constraints regularly to the field definitions or, in the case of either fields that are not "ours" or configurable fields, we can use hooks to add constraints. Using hook_entity_base_field_info_alter(), we can add constraints to base fields while with hook_entity_bundle_field_info_alter(), we can add constraints to configurable fields (and overridden base fields). Let's see an example of how we can add constraints to the Node ID field:
function my_module_entity_base_field_info_alter(&$fields,
EntityTypeInterface $entity_type) {
if ($entity_type->id() === 'node') {
$nid = $fields['nid'];
$nid->addPropertyConstraints('value', ['Range' => ['mn' => 5, 'max' => 10]]);
}
}
As you can see, we are still just working with data definitions. One thing to note, however, is that when it comes to base fields and configurable fields (which are lists of items), we also have the addPropertyConstraints() method available. This simply makes sure that whatever constraint we are adding is targeted toward the actual items in the list (specifying which property), rather than the entire list as it would have happened had we used the main addConstraint() method. Another difference with this method is that constraints get wrapped into a ComplexDataConstraint plugin. However, you don't have to worry too much about that; just be aware when you see it.
We can even inspect the constraints found on a data definition object. For example, this is how we can read the constraints found on the Node ID field:
$nid = $node->get('nid');
$constraints = $nid->getConstraints();
$item_constraints = $nid->getItemDefinition()->getConstraints();
Where the getConstraints() method returns an array of constraint plugin instances.
Now let's see how we can validate entities:
$node_violations = $node->validate();
$nid = $node->get('nid');
$nid_list_violations = $nid->validate();
$nid_item_violations = $nid->get(0)->validate();
The entity-level validate() method returns an instance of EntityConstraintViolationList, which is a more specific version of the ConstraintViolationList we talked about earlier. The latter is, however, returned by the validate() method of the other cases above. But for all of them, inside we have a collection of ConstraintViolationInterface instances from which we can learn some things about what did not validate.
The entity-level validation goes through all the fields and validates them all. Next, the list will contain violations of any of the items in the list, while the item will contain only the violations on that individual item in the list. The property path is something interesting to observe. The following is the result of calling getPropertyPath() on a violation found in all three of the resulting violation lists from the example above:
nid.0.value
0.value
value
As you can see, this reflects the TypedData hierarchy. When we validate the entire entity, it gives us a property path all the way down to the value: field name -> delta (position in the list) -> property name. Once we validate the field, we already know what field we are validating, so that is omitted. And the same goes for the individual item (we also know the delta of the item).
A word of warning about base fields that can be overridden per bundle such as the Node title field. As I mentioned earlier, the base definition for these fields uses an instance of BaseFieldOverride, which allows certain changes to be made to the definition via the UI. In this respect, they are very close to configurable fields. The "problem" with this is that, if we tried to apply a constraint like we just did with the nid to, say, the Node title field, we wouldn't have gotten any violations when validating. This is because the validator performs the validation on the BaseFieldOverride definition rather than the BaseFieldDefinition.
This is no problem, though, as we can use hook_entity_bundle_field_info_alter() and do the same thing as we did before, which will then apply the constraint to the overridden definition. In doing so, we can also account for the bundle we want this applied to. This is the same way you apply constraints to a configurable field you create in the UI.
Configuration entities
Configuration entity fields are not exposed to the TypedData API in terms of data definition. If you remember, though, we do have the configuration schema that describes the type of data that is considered valid in the entity. This is, for the moment, the extent to which we can validate configuration entities as they are not (yet) exposed to the constraint-validator system.
But before we conclude this chapter, let's quickly see how we can validate a configuration entity. Here is a quick example:
$config_entity = View::load('content');
$config_entity->set('status', 'not a boolean');
$typed_config_entity = ConfigEntityAdapter::createFromEntity($config_entity);
$violations = $typed_config_entity->validate();
The first thing we do is load a configuration entity. In this case, it's a View, but it doesn't matter as it's backed by a schema definition (found in views.schema.yml). By default, the entity is valid, so in this example, I change the status field to a string (not a Boolean). Then, for the actual validation, we create a new ConfigEntityAdapter instance (which is like the EntityAdapter we saw earlier for content entities). And we can now call validate() on that like before. The result will be a list of violations, which in the case of this example, will contain one that says we are using an incorrect primitive value for the status field. And that is pretty much it.
Validation recap
As we've seen, Drupal applies the Symfony validation component to its very own TypedData and plugin API both for discoverability and data validation handling. In doing so, we get a low-level API for applying constraints to any kind of data, ranging from simple primitive data definitions all the way to complex entities and fields. We have not covered this here, but we can also easily create our own constraints and validators if the ones provided are not enough.
Moreover, we saw that we can also apply schema validations to configuration entities. This capability has been made available in version 8.6. And work is underway to expose configuration entities to the full validation system.
Summary
You didn't think you were ever going to see this heading did you? This chapter has been very long and highly theoretical. We haven't built anything fun and the only code we saw was to exemplify most of the things we talked about. It was a difficult chapter as it covered many complex aspects of data storage and handling. But trust me, these things are important to know and this chapter can serve both as a starting point to dig deeper into the code and a reference to get back to when unsure of certain aspects.
We saw what the main options for storing data in Drupal are. Ranging from the State API all the way to entities, you have a host of alternatives. After covering the simpler ways, such as the State API, the private and shared tempstores and the UserData API, we dove a bit more into the configuration system, which is a very important one to understand. There, we saw what kinds of configuration types we have, how to work with simple configuration, how it's managed and stored, and so on. Finally, in what is arguably the most complex part of the chapter, we looked at entities, both content and configuration. Just as you were recovering from reading all about how entity types are plugins with so many options, I hit you with the TypedData API. But right after that we put it to good use and saw how we can interact with entities: query, load, manipulate and validate data based on TypedData.
In the next chapter, we will apply in a very practical way a lot of the knowledge we learned in this one, especially related to content and configuration entities, but also plugin types and so on. So, that should be much more enjoyable, as we are going to create a new module that actually does something useful.