
In this recipe, we will call a Spring bean from within a composite. This is useful if we have an existing Spring bean that we wish to use; it is also a useful way to wrap other Java code.
- Copy Java libraries to a composite.
Copy any JAR file you will be using to the
SCA-INF/libdirectory and any class that is not in a JAR file to theSCA-INF/classesdirectory of your project. Open the Project Properties by right-clicking on the project name in the Application Navigator. Select the Libraries and Classpath section and click on the Add JAR Directory button, and select the JAR file in theSCA-INF/libdirectory or theSCA-INF/classesdirectory and add it to the project.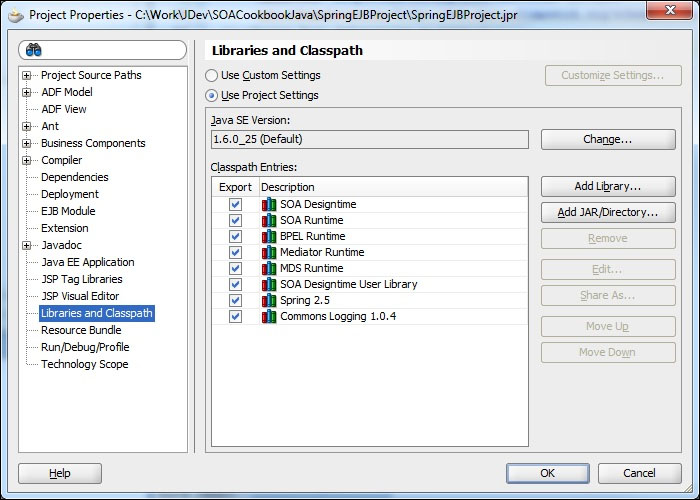
- Add Spring Context to the composite.
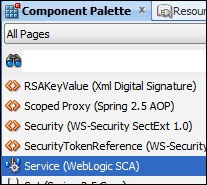
Open the composite in JDeveloper and drag the Spring Context from the Service Components section of the Component Palette onto the Components section of the
composite.xmlDesign View.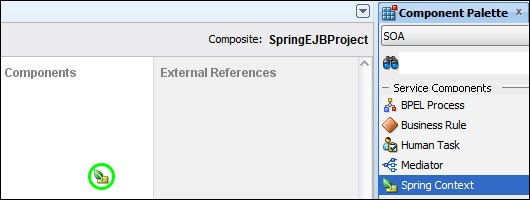
- Start configuring Spring Context Component.
Select a Name for the Spring Context Component. Select Create New Context and provide a name for the Spring Context XML file. Then click on OK to create the Spring component.

- Add a bean to Spring Context.
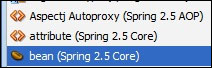
Double-click on the Spring component to start configuring Spring Context. This will open a Source view of the Spring Context XML file. Drag bean from Component Palette onto the Spring Context XML file immediately after the
<!--Spring Bean definitions go here-->comment.
- Configure the bean.
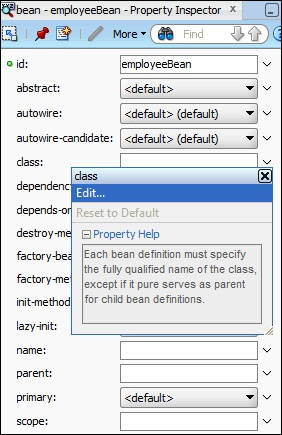
Click on the newly created
Click on the down arrow<bean/>tag and then use Property Inspector to set id of the bean. next to the class property and choose Edit... from the pop up. This will launch the Edit Property: class dialog from where you can browse the class hierarchy for the bean class, as shown in the following screenshot:
Your bean should now look like this:
<bean id="employeeBean" class="soa.cookbook.EmployeeEJBClient"/>
- Configure a service on Spring Context.
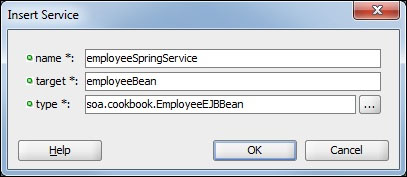
Having loaded a bean into our Spring Context, we can now make it available to other components by dragging a service from the Component Palette onto our Spring Context XML.
This will bring up the Insert Service dialog where we can enter a name for the service, a target bean that will receive service requests (the previously created bean), and the interface type that is being exposed (which must be implemented by the previously created bean). The type can be selected by using the hierarchy browser accessed via the ellipsis button to the right-hand side of the type input field.
- Wire Spring Context to a component.
Wire a Spring component to another component, by selecting the inbound service arrow
 on the Spring component in the Components section of the Design view and dragging it onto a component in the Components section. The outbound reference arrow will automatically appear as you move close to a component.
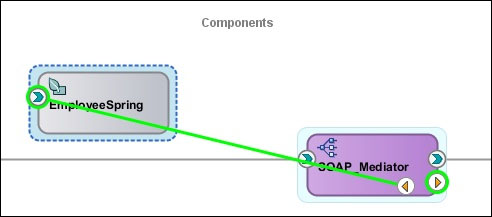
If the component is not a Java component, then a dialog box will appear telling you that a WSDL file was generated for you based on the Java interface that was chosen.

The Spring container is now ready for use in the selected component. It can be accessed just like any other component.
The Spring Context file is a standard Spring Context, and within it we have access to the full power of Spring. When we wire another component in our application to Spring Context, we have access in our context to a new interface that can be injected as a parameter to an existing Spring bean. This has a couple of benefits; first, it makes it easy to consume other components and references in our Spring bean, and secondly, it makes our dependencies visually obvious by having them appear as wires in our composite visual editor. It is always better to have visible references because then developers and maintainers of the code can clearly see what dependencies exist. There is minimal, if any, runtime overhead to making Spring dependencies explicitly visible in the composite.
Spring is a very powerful development framework for Java that plays well with the JEE platform that SOA Suite is built on. If we need to implement new functionalities in Java, the Spring component is a good way to implement that, because the SOA framework takes care of all the details of deployment and context, and leaves the Spring bean implementer free to concentrate on providing the business service logic in Java.