
Up to this point, the application has only one page and a simple form, which would not be acceptable as the interface provided for our fictional customers. To fix that we're going to add a few more pages and templates to make the application look better and leverage what we have already learned from the previous chapters and also by adding some JSF Facelets and PrimeFaces components.
Let's create a template with the basic components of an application such as header, menu, main page, and so on. On OEPE, open the Store web project and perform the following actions:
- Create a new folder under the
WEB-INFdirectory namedtemplates. - Now we need to create the basis for our template, which will basically consist of two files:
template.xhtmlandtop.xhtml. - The main part of
template.xhtmlis to the define areas (variables) that will be replaced by other pages, using the inner structure declared at each of them. In our example, we have only two areas:headerandcontent. They're defined by the<ui:insert>tag of Facelets as follows:... <p:layout fullPage="true"> <p:layoutUnit position="north"> <ui:insert name="header" > <ui:include src="top.xhtml" /> </ui:insert> </p:layoutUnit> <p:layoutUnit position="south" style="border:0px"> <p:notificationBar position="bottom" effect="slide"widgetVar="bar" styleClass="top" /> </p:layoutUnit> <p:layoutUnit position="center" style="border:0px"> <ui:insert name="content" > <ui:include src="index.xhtml" /> </ui:insert> </p:layoutUnit> </p:layout> ...
Note
The complete code of
template.xhtmlis part of the code bundle of this chapter, available at the Packt Publishing website, www.packtpub.com. - The
top.xhtmlfile renders the menu for the application and eventually the logo and login information. This file is included by default intemplate.xhtml. Here is the relevant portion of code from this file:... <ui:composition> <h:form> <h:graphicImagevalue="resources/images/movieStoreLogo.png"style="margin: 0px auto;margin-left:5%;" height="15%"width="15%" /> <p:panelGrid columns="2" id="loginPanel" style="float: right; right:50%; margin-right:10%;padding:0px; font-size:10px; border:none;"> <p:inputText id="loginUser"> <p:watermark for="loginUser"value="[email protected]" /> </p:inputText> <p:password id="loginPass"> </p:password> <div /> <p:row> <p:commandButton value="Login" /> <p:commandButton value="Sign up" /> </p:row> </p:panelGrid> <p:megaMenu style="height:90%; font-size:12px;"> <p:menuitem value="Home" url="/" /> <p:menuitem value="Theaters"url="/theaters/theaters.jsf" /> <p:menuitem value="Movies" url="/movies/movies.jsf"/> <f:facet name="options"> <p:inputText id="searchText"style="padding: 4px; margin:0px;font-size: 12px; margin-right:10px" /> <p:watermark for="searchText" value="Search..." /> <p:splitButton value="Search" actionListener="#"style="margin:0px; font-size: 10px;"> <p:menuitem value="by Exhibition dates"actionListener="#" /> <p:menuitem value="by Movies"actionListener="#" /> <p:menuitem value="by Theaters"actionListener="#" /> <p:separator /> <p:menuitem value="Advanced Search" url="#" /> </p:splitButton> </f:facet> </p:megaMenu> </h:form> </ui:composition>Note
The complete code of
top.xhtmlis part of the code bundle of this chapter, available at the Packt Publishing website, www.packtpub.com. - Open
index.xhtmland replace the content of the<body>tag with the following code:<ui:composition template="/WEB-INF/templates/template.xhtml"> <ui:define name="title">Home</ui:define> <ui:define name="content"> <h:form> <p:panel header="In Theaters"> <p:ring id="basic" value="#{movie.movies}"var="item"> <p:outputPanel style="text-align:center;"layout="block"> #{item.name} <p:rating /> </p:outputPanel> </p:ring> </p:panel> </h:form> </ui:define> </ui:composition> - Save all files and publish the project. Access the index page and you will see the current application:
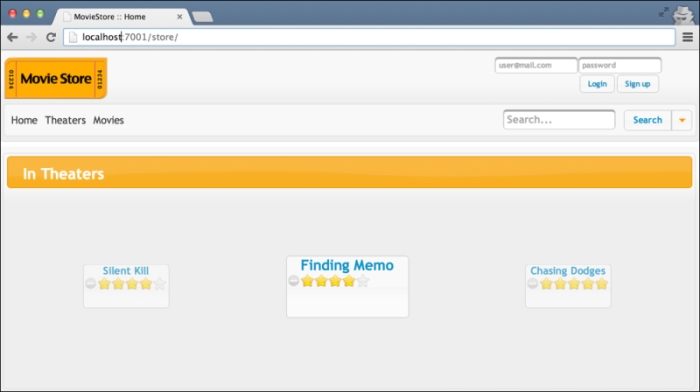
Some functionalities like the login or signup are not yet implemented and we will learn how to do so in the next chapters. But with the knowledge acquired from Chapter 3, Java EE Basics – Persistence, Query, and Presentation, and this chapter, we can create the Theater and Movie listing pages. To demonstrate, we're going to show how to create one for Theater and leave the creation of the Movie listing page as an exercise to the reader, although the complete code for all this is available at the Packt Publishing website, www.packtpub.com.
We are going to build a generic example that will leverage our template and create a listing page for Theaters.
Start by creating an abstract class named AbstractRepository under the com.packt.store package. The important methods of the class are shown in the following code snippet:
...
public abstract class AbstractRepository<T> {
   private Class<T> entityClass;
   public AbstractRepository() { }
...
   public AbstractRepository(final Class<T> entityClass) {
      this.entityClass = entityClass;
   }

   protected abstract EntityManager getEntityManager();

   public T find(Object id) {
      return getEntityManager().find(entityClass, id);
   }

   public List<T> findAll() {
      CriteriaQuery<T> cq = (CriteriaQuery<T>)getEntityManager().getCriteriaBuilder().createQuery();
         cq.select(cq.from(entityClass));
         return getEntityManager().createQuery(cq).getResultList();
    }
...
Note
The complete code of AbstractRepository is part of the code bundle of this chapter, available at the Packt Publishing website, www.packtpub.com.
Note that we have a method that lists all entities, findAll(), and another method that returns an entity given an ID, find(). These are basic methods that will be reused on several points throughout the application.
Now create a named CDI bean TheaterManager under com.packt.store.theater package that will be bound to the web page. This class will extend the abstract repository class by only implementing a very few necessary methods. The following is the complete code:
@Named("theater")
@RequestScoped
public class TheaterManager extends AbstractRepository<Theater> {

   private List<Theater> theaters;
   @PersistenceContext(unitName = "StoreBO")
   EntityManager em;

   public TheaterManager() {
      super(Theater.class);
   }

   @PostConstruct
   public void init() {
      theaters = this.findAll();
   }

   @Override
   protected EntityManager getEntityManager() {
      return em;
   }

   public List<Theater> getTheaters() {
      return theaters;
   }
}
Now the last part is the web page, so under WebContent create a new folder named theaters. In this folder, create a file named theaters.xhtml; it will just define the value of the content area of the template. Here is the example:
<ui:composition template="/WEB-INF/templates/template.xhtml">
<ui:define name="title">Theaters</ui:define>
<ui:define name="content">
<p:panel header="Theaters">
<h:form>
<p:dataList value="#{theater.theaters}" var="item"itemType="none"
paginator="true" rows="5" paginatorAlwaysVisible="false"
paginatorPosition="bottom">
<p:fieldset styleClass="fdsetNoBorder"legend="#{item.name}"
toggleSpeed="500" style="margin:10px">
<h:panelGrid columns="2" cellpadding="10">
<h:outputText value="City: #{item.city}" />
</h:panelGrid>
</p:fieldset>
</p:dataList>
</h:form>
</p:panel>
</ui:define>
</ui:composition>
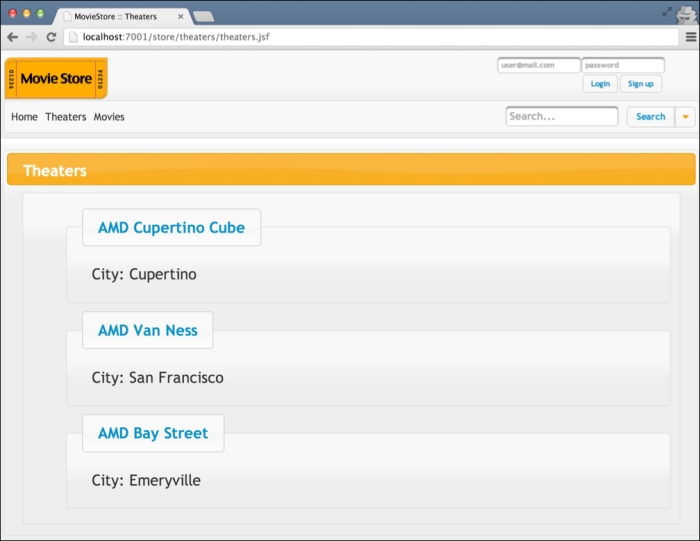
...Save all files and publish the project. Then access the index page of the Store application and click on the Theaters link on the menu. You should see a list of current theaters on the system, built by reusing the code and concepts we've learned so far:
Now to create the same kind of listing page for movies will be very easy and we encourage the reader to do so. In the following chapters, we're going to assume that you have the application working and we're going to enhance it by adding extra features.