
In this chapter, you will learn
How to manage flows
How the Admin Center works
How to manage environments and data policies
Manage Flows
In this section, you will learn how to manage flows via a variety of tasks, such as turning a flow on or off, editing, deleting, troubleshooting, and more.
Turn a Flow On or Off
Perform the following steps to turn a flow on or off:
Navigate to the Flow site at https://flow.microsoft.com .
In the top navigation, click My flows and then select a flow that must be turned off. Slide the button to Off, as shown in Figure 6-1.

Figure 6-1 Turn off a flow
Similarly, turn on the flow as shown in Figure 6-2.

Figure 6-2 Turn on a flow
Edit a Flow
Perform the following steps to edit a flow:
Navigate to the Flow site at https://flow.microsoft.com .
In the top navigation, click My flows and then select a flow that must be updated. Click the Edit icon shown in Figure 6-3.

Figure 6-3 Edit a flow
Once you’re done with the changes, click Update flow, as shown in Figure 6-4.

Figure 6-4 Update a flow
To close, click Done, as shown in Figure 6-5.

Figure 6-5 Flow updated
Create a Copy of a Flow
Perform the following steps to create a copy of a flow:
Navigate to the Flow site at https://flow.microsoft.com .
In the top navigation, click My flows and then select a flow that must be copied. Click the three dots (…) to see more options and then click Save as, as shown in Figure 6-6.

Figure 6-6 Copy the flow
If required, rename it first and then click Save, as shown in Figure 6-7.

Figure 6-7 Save the copy
A copy of the flow was created, as shown in Figure 6-8. By default, it will be turned off.

Figure 6-8 Save the copy
Delete a Flow
Perform the following steps to delete a flow:
Navigate to the Flow site at https://flow.microsoft.com .
In the top navigation, click My flows and then select a flow that must be deleted. Click the three dots (…) to see more options and then click Delete, as shown in Figure 6-9.

Figure 6-9 Delete a flow
Confirm that the flow must be deleted and then click Delete, as shown in Figure 6-10.

Figure 6-10 Confirm deletion
Create Team Flows
Perform the following steps to create team flows:
Navigate to the Flow site at https://flow.microsoft.com .
In the top navigation, click My flows and then select a flow that must be created as a team flow. Click the People icon shown in Figure 6-11.

Figure 6-11 Invite another owner
Enter names, email addresses, or user groups to add other owners, as shown in Figure 6-12. Adding other owners allows them to edit, update, and delete this flow. All owners can also access the run history and add or remove other owners.

Figure 6-12 Add other owners
Navigate to My flows, click Team flows, and you’ll see all of the team flows, as shown in Figure 6-13.

Figure 6-13 Team flows
Submit a Flow as a Template
Perform the following steps to submit a flow as a template:
Navigate to the Flow site at https://flow.microsoft.com .
In the top navigation, click My flows and then select a flow that you want published as a template. Click the three dots (…) to see more options and then click Submit as template, as shown in Figure 6-14.

Figure 6-14 Submit as a template
Fill in all of the required details and then click Submit, as shown in Figure 6-15. The Microsoft Flow team will verify; once the team approves your template, it will appear in the gallery of templates for Microsoft Flow.


Figure 6-15 The Submit as template page
Export a Flow
Perform the following steps to export a flow as a package (.zip) file:
Navigate to the Flow site at https://flow.microsoft.com .
In the top navigation, click My flows and then select a flow that has to be exported. Click the three dots (…) to see more options and then click Export ➤ Package (.zip), as shown in Figure 6-16.

Figure 6-16 Export as a package (.zip)
Enter the package details, as shown in Figure 6-17.
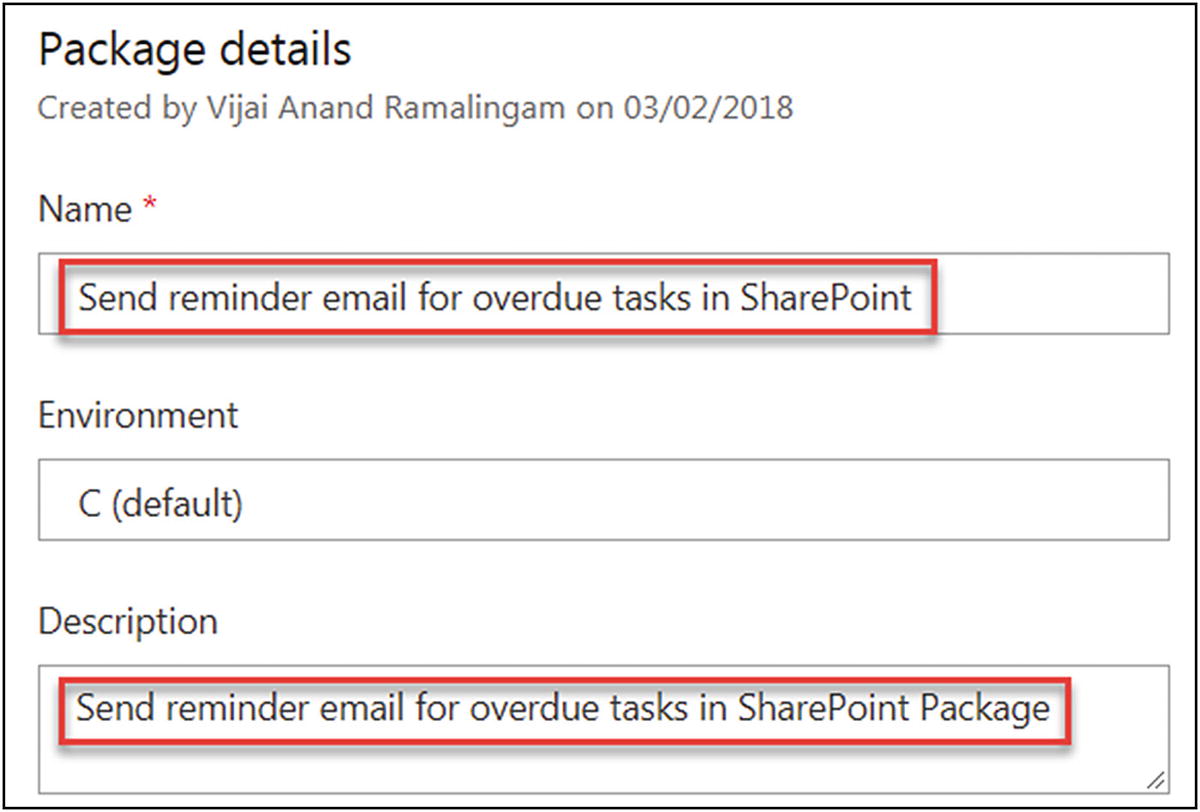
Figure 6-17 Package details
Go to the Import setup page. By default Update will be selected. Click Update and then select Create as new. Click Save, as shown in Figure 6-18.

Figure 6-18 Update the import setup
If required, add version notes and then click Export, as shown in Figure 6-19. Save the package (.zip) file in the local file system.

Figure 6-19 Export the flow
Import a Flow
Microsoft Flow allows you to import a flow as a package. This can be done when the flow must be copied or moved from one environment to another. Perform the following steps to import a flow:
Navigate to the Flow site at https://flow.microsoft.com .
Select the environment where the package should be imported, as shown in Figure 6-20.

Figure 6-20 Select the environment
In the top navigation, click My flows and then click Import, as shown in Figure 6-21.

Figure 6-21 Import
Select the package (.zip) from the local file system by clicking the Upload button. Go to Import Setup, click Select during import, and then select the connection that has to be imported for this package. Click Save, as shown in Figure 6-22.

Figure 6-22 Import setup
Click Import, as shown in Figure 6-23.
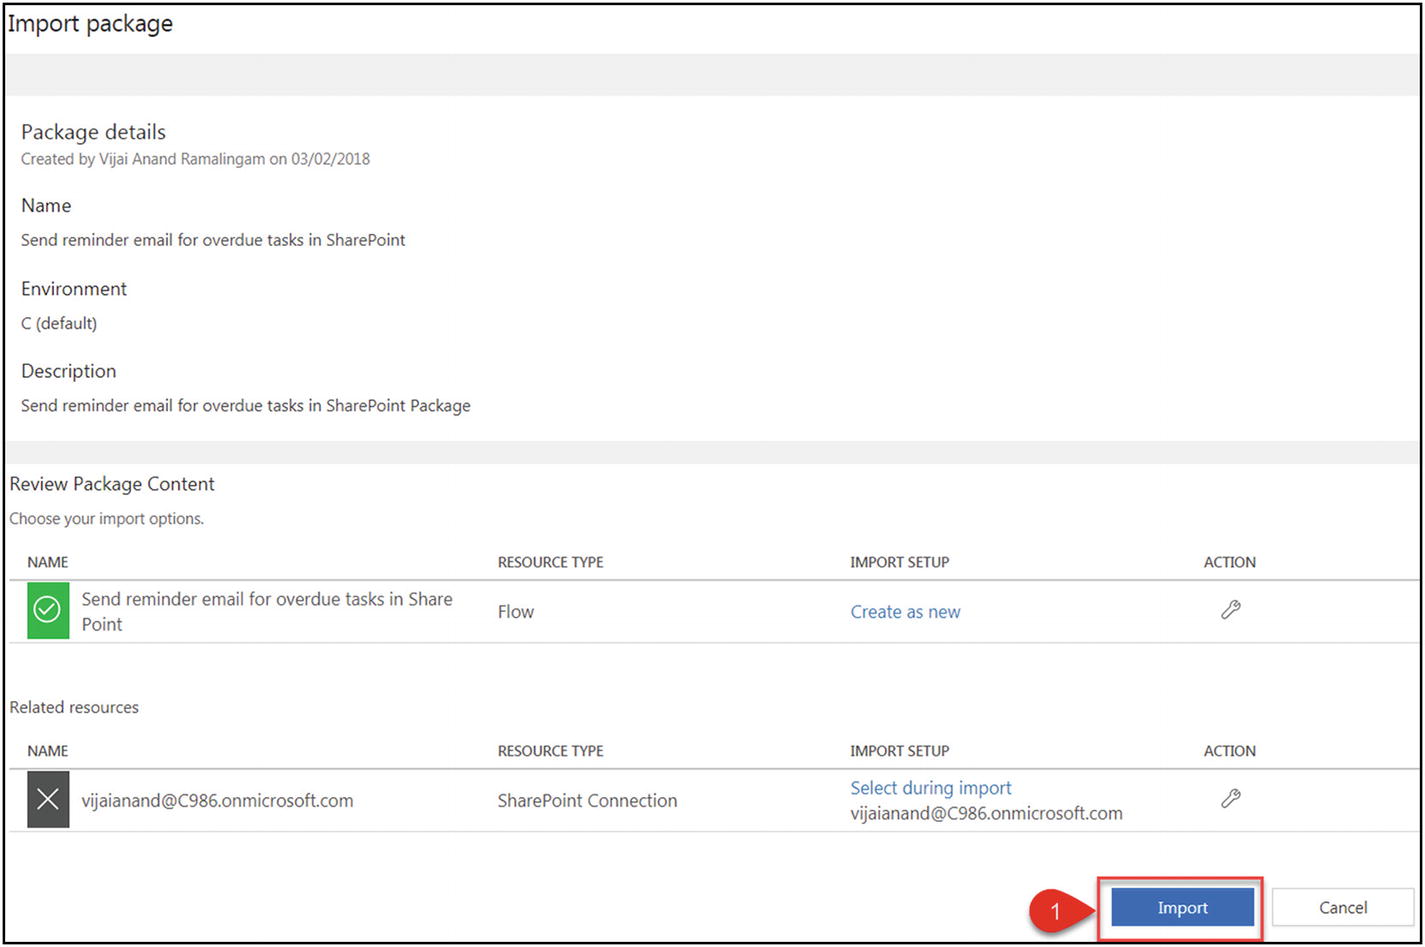
Figure 6-23 Import the package
All package resources were successfully imported, as shown in Figure 6-24.

Figure 6-24 The package was successfully imported
Navigate to My flows and you’ll see the imported flow, as shown in Figure 6-25.

Figure 6-25 Imported flow
Monitor a Flow
Perform the following steps to monitor or troubleshoot a flow:
Navigate to the Flow site at https://flow.microsoft.com .
In the top navigation, click My Flows and then click the flow, as shown in Figure 6-26.

Figure 6-26 Select the flow
You’ll see flow details such as run history, connections, owners, and more, as shown in Figure 6-27.

Figure 6-27 Flow details
Click one of the items (last run) in the run history, as shown in Figure 6-28.

Figure 6-28 Run history
Review the inputs and outputs for each step, as shown in Figure 6-29.

Figure 6-29 Inputs and outputs
Click the flow run that failed, as shown in Figure 6-30.

Figure 6-30 Failed run
You’ll see a failure summary, shown in Figure 6-31, which helps to troubleshoot the issue.

Figure 6-31 Failure summary
Manage Regional Settings
Perform the following steps to manage the language and regional format:
Navigate to the Flow site at https://flow.microsoft.com .
In the top navigation, click the Settings icon and then click Settings, as shown in Figure 6-32.

Figure 6-32 Settings
Choose the display language and regional format from the drop-down and then click Save, as shown in Figure 6-33.
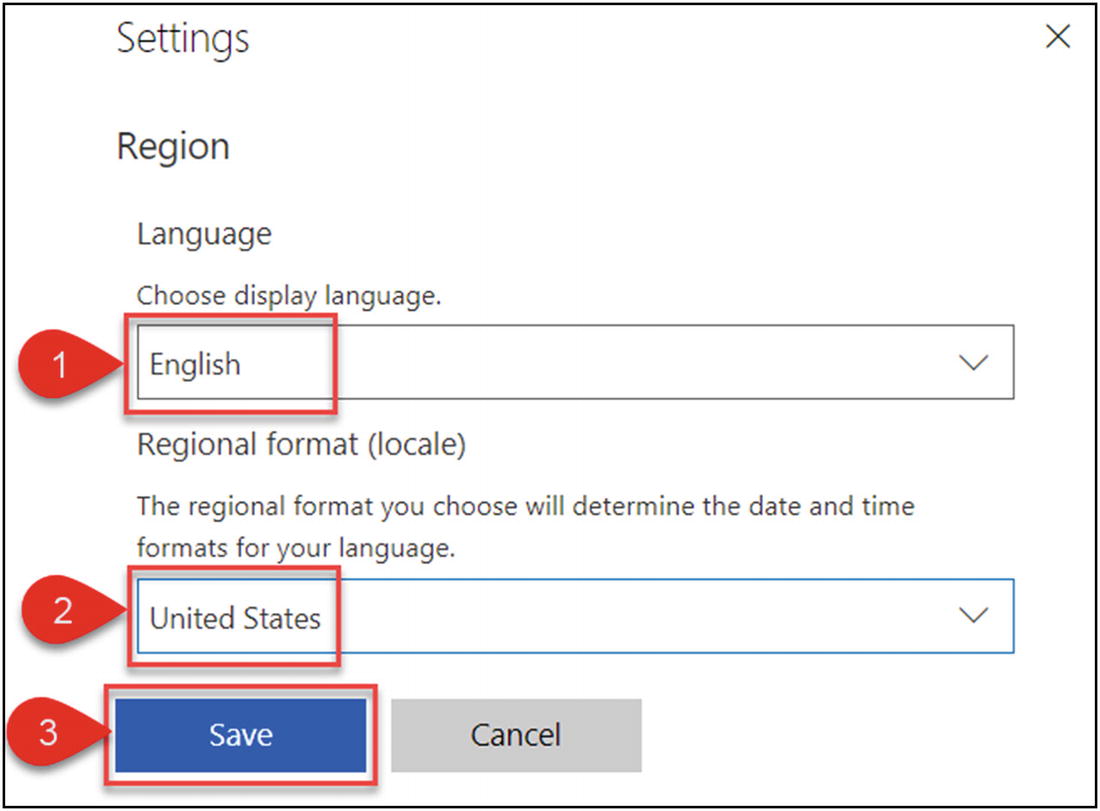
Figure 6-33 Update the settings
Admin Center Overview
The Admin Center allows the tenant and environment administrators to manage the environments and data policies.
Create a New Environment
Perform the following steps to create a new environment:
Navigate to the Flow site at https://flow.microsoft.com .
In the top navigation, click the Settings icon and then click Admin Center, as shown in Figure 6-34.

Figure 6-34 Admin Center
You’ll see a list of environments, as shown in Figure 6-35. Click New environment.

Figure 6-35 New environment
Enter the name, select a region, and then click Create environment, as shown in Figure 6-36.

Figure 6-36 Create environment
The new environment is shown in Figure 6-37.

Figure 6-37 New environment created
Manage Environments in the Admin Center
Perform the following steps to manage environments:
Navigate to the Flow site at https://flow.microsoft.com .
In the top navigation, click the Settings icon and then click Admin Center, as shown in Figure 6-38.

Figure 6-38 Admin Center
You’ll see a list of environments, as shown in Figure 6-39. Click any environment to view the details.

Figure 6-39 Select the environment
In order to add a new admin, click Environment Admin and search for name, email addresses, or user groups. Add the user and then click Save, as shown in Figure 6-42.

Figure 6-42 Add a new admin
Click Delete to delete the environment, as shown in Figure 6-45. Note that if you delete the environment, all flows within that environment will also be deleted. This applies to any items you created in that environment, including connections, gateways, and more.

Figure 6-45 Delete the environment


Create a New Data Loss Prevention Policy
Microsoft Flow allows you to create policies that define how data can be protected or shared. Perform the following steps to create a new data loss prevention policy:
Navigate to the Flow site at https://flow.microsoft.com .
In the top navigation, click the Settings icon and then click Admin Center, as shown in Figure 6-46.

Figure 6-46 Admin Center
In the left navigation, click Data policies. You’ll see a list of created data policies, as shown in Figure 6-47. Click New Policy.

Figure 6-47 Create a new policy
Choose the environments relevant to this data policy and click Continue, as shown in Figure 6-48.

Figure 6-48 Choose environments
Based on the requirements, add connectors to Business data only and No business data allowed, as shown in Figure 6-49. Users will be prevented from creating flows and apps that combine connectors from the Business data only and No business data allowed data groups.
Note If a user creates a flow that combines connectors, the flow will be suspended due to a conflict with the data loss prevention policy. For example, if a user creates a flow that shares data between SharePoint (which is in the Business data only data group) and Facebook (which is in the No business data allowed data group), the flow will be suspended.
Also, when you add a service to one group, it will automatically be removed from the other group. For example, if the Twitter service is added to the No business data allowed data group, then it will be automatically removed from the Business data only data group.

Figure 6-49 Data groups
Figure 6-50 shows the new data loss prevention policy.

Figure 6-50 New policy
Navigate to Data Policies and select the Edit icon to update the policy or the Delete icon to delete the policy, as shown in Figure 6-51.

Figure 6-51 Update or delete the policy
Try It Yourself
Create a new environment for HR and provide access to a few HR users.
Export any flow from the default environment and import the flow in the newly created environment for HR.
Add two or more administrators to the imported flow and turn on the flow.
Execute and monitor the imported flow.
Turn off the flow in the default environment.