
5. Windows and Frames
Keeping a Page out of a Frame 117
Loading Iframes with JavaScript 120
Sharing Functions between Documents 125
Loading Different Contents into a Window 131
The window is the most important interface element in a Web browser, and as you might expect, JavaScript provides you with many tools to manipulate windows.
JavaScript deals with windows similarly to the way it deals with frames. This makes perfect sense, since frames are just other document windows within the overall browser window.
However, frames have fallen out of favor over the past few years—to the point that (except for iframes) they’ve been removed from HTML5 entirely. Consequently, the frames portion of this chapter will focus on using JavaScript to make iframes even more useful.
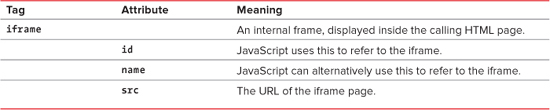
Table 5.1. Just Enough HTML—Frames
Keeping a Page out of a Frame
Other people can put one of your pages inside a frame on their site, making it appear that your page is part of their content. In JavaScript, windows appear in a hierarchy, with the parent window at the top of the heap. When someone hijacks your page, they are forcing it to be a child frame to their parent window. ![]() shows how the page would appear as part of someone else’s site. With the following script, you can prevent page-hijacking and force your page to always be in a browser window by itself. There are two files; Listing 5.1 is the HTML page that should always stand alone and has the
shows how the page would appear as part of someone else’s site. With the following script, you can prevent page-hijacking and force your page to always be in a browser window by itself. There are two files; Listing 5.1 is the HTML page that should always stand alone and has the <script> tag that calls the JavaScript; Listing 5.2 is the JavaScript document, which we’ll describe next.
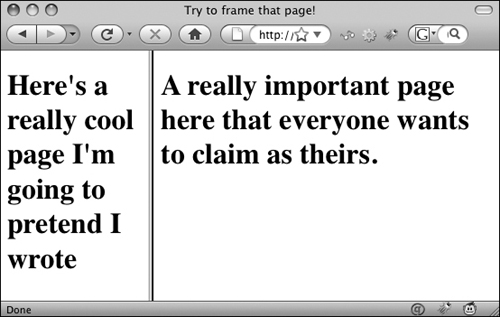
![]() Our page, buried in someone else’s frameset.
Our page, buried in someone else’s frameset.
Listing 5.1. Here is an HTML page that people want to hijack.
<!DOCTYPE html>
<html>
<head>
<title>Can't be in a frame</title>
<script src="script01.js"></script>
</head>
<body>
<h1>A really important page here that everyone wants to claim as theirs.</h1>
</body>
</html>
Listing 5.2. JavaScript provides a way to force our page to always appear on a separate page.
if (top.location != self.location) {
top.location.replace(self.location);
}
To isolate a page
1. if (top.location != self.location) {
First, check to see if the location of the current page (self) is the top-most in the browser window hierarchy. If it is, there’s no need to do anything.
2. top.location.replace(self.location);
If the current page isn’t at the top, replace the top page with the location of the current page. This forces the current window to be our page and our page only. ![]() shows our page as we designed it.
shows our page as we designed it.
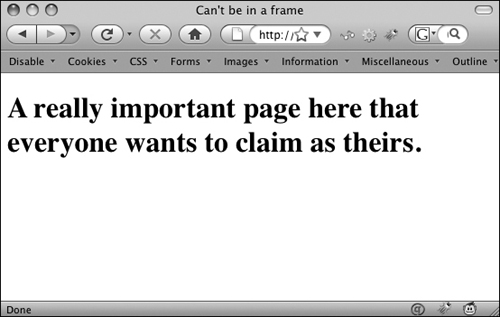
![]() Our page, after escaping from the evil hijacking frameset.
Our page, after escaping from the evil hijacking frameset.
We could just set top.location to self.location, but this has one nasty side effect: users can no longer use the browser’s back button. If they try to, going back to the previous page automatically jumps them back to the current page. Using the replace() method shown above replaces the current page in the history, which allows the back button to display the previous page.
Setting a Target
An iframe is an inline frame, that is, a frame that can be embedded within a regular HTML page instead of needing to be inside a frameset. Like a regular frame, an iframe is a separate HTML document. You can use an iframe as the target of a script, so you can create content on the fly under script control and display it in the page without having to use a frameset.
In this task, we have a regular HTML page with a small area that is an iframe. Links in the main content area can target the iframe. To load that iframe using HTML, you can use the target attribute of the <a> tag. However, many sites still use XHTML—and if you want to use iframes with XHTML Strict, JavaScript is the only way to set the target. That’s because XHTML Strict deprecated the target attribute, and you have to set the target in order to update an iframe.
The HTML page (Listing 5.3) allows you to load your choice of page into the iframe, just by clicking a link. The CSS is Listing 5.4; the initial page loaded into the iframe is Listing 5.5; and the JavaScript required to set the target is Listing 5.6 (detailed below). There are also three other simple HTML pages (not shown) that can be loaded into the iframe. The result is shown in ![]() .
.
![]() Clicking a link in the main window causes the iframe to update.
Clicking a link in the main window causes the iframe to update.
Listing 5.3. This page creates the iframe and calls the external JavaScript.
<!DOCTYPE html>
<html>
<head>
<title>iframes 1</title>
<script src="script02.js"></script>
<link rel="stylesheet" href="script01.css">
</head>
<body>
<iframe src="iframe01.html" name="icontent" id="icontent"></iframe>
<h1>Main Content Area</h1>
<h2>
<a href="page1.html">Link 1</a><br>
<a href="page2.html">Link 2</a><br>
<a href="page3.html">Link 3</a>
</h2>
</body>
</html>
Listing 5.4. This CSS styles the main page and positions the iframe.
body {
background-color: #FFF;
}
iframe#icontent {
float: right;
border: 1px solid black;
width: 350px;
height: 300px;
margin-top: 100px;
}
Listing 5.5. The initial page that goes in the iframe.
<!DOCTYPE html>
<html>
<head>
<title>Content frame</title>
</head>
<body>
Please load a page
</body>
</html>
Listing 5.6. There are a number of reasons why you might need JavaScript to set frame targets.
window.onload = initLinks;
function initLinks() {
for (var i=0; i<document.links.length; i++) {
  document.links[i].target = "icontent";
}
}
To set the target for a frame
1. window.onload = initLinks;
When the page loads, call the initLinks() function.
2. for (var i=0; i<document.links.length; i++) {
document.links[i].target = "icontent";
}
The initLinks() function loops through all of the links on the page. When the loop finds a link, it sets the target property to the string "icontent". And that’s all it takes.
If JavaScript is turned off, visitors will find that the first link that gets clicked loads into the main window, not the icontent iframe. Sorry, but that’s the way frames work.
While there’s much less reason to use XHTML than there once was, it can still be handy to set the target programmatically. Often, the people working on the main content area have no idea what the iframe workers want, and vice versa. Putting the name of the target into one line of JavaScript code allows for much more flexibility than hardcoding it into numerous <a> tags throughout a site.
Loading Iframes with JavaScript
Of course, you can do more with iframes than just setting the target, such as loading other HTML pages, and this example shows you how. Once again, we’ll have a main page that sets up the iframe and will be virtually identical to Listing 5.3, and a page with the initial content of the iframe, like Listing 5.5. The JavaScript required is shown in Listing 5.7.
Listing 5.7. This script loads HTML pages into the icontent iframe.
window.onload = initLinks;
function initLinks() {
for (var i=0; i<document.links.length; i++) {
  document.links[i].onclick = setContent;
}
}
function setContent() {
  document.getElementById("icontent").contentWindow.document.location.href = this.href;
return false;
}
To load an iframe with JavaScript
1. for (var i=0; i<document.links.length; i++) {
document.links[i].onclick = setContent;
}
As with Listing 5.6, the initLinks() function is called when the page loads. This time, though, we tell all the links on the page that, when they’re clicked, they’re to call the setContent() function.
2. function setContent() {
document.getElementById("icontent").contentWindow.document.location.href = this.href;
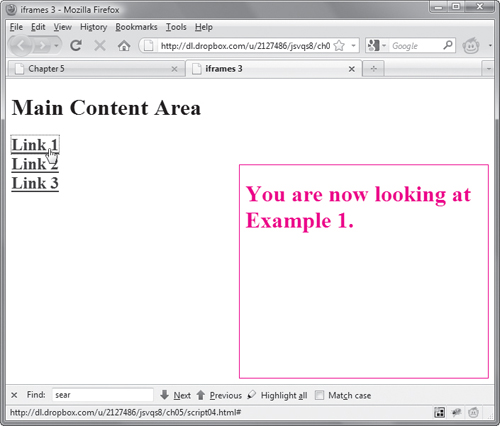
In this example, clicking any of the links triggers the setContent() function, which then loads the new page into the iframe ![]() .
.

![]() The
The icontent iframe gets loaded when you click a link in the main window.
3. return false;
Lastly, setContent() returns false, which tells the browser that it should not also load the hrefs into the main window. Otherwise, the browser would do both. We’ve handled everything within JavaScript, so the href doesn’t need to be loaded.
Working with Iframes
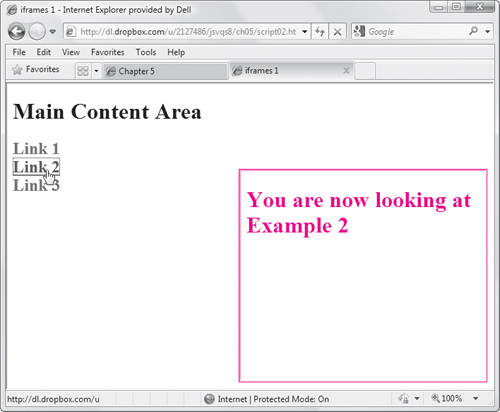
Because JavaScript can create page content on the fly, it’s useful for loading pages into iframes based on a user’s choice elsewhere. Listing 5.8 is an HTML page that loads our usual dummy iframe page. Listing 5.9, detailed next, creates a page and loads it into the icontent iframe. The result looks like ![]() .
.
![]() Here’s the result of Listing 5.9, an iframe written by JavaScript.
Here’s the result of Listing 5.9, an iframe written by JavaScript.
Listing 5.8. This page has an iframe on the right, along with instructions to click a link.
<!DOCTYPE html>
<html>
<head>
<title>iframes 3</title>
<script src="script04.js"></script>
<link rel="stylesheet" href="script01.css">
</head>
<body>
<iframe src="iframe01.html" name="icontent" id="icontent"></iframe>
<h1>Main Content Area</h1>
<h2>
<a href="#">Link 1</a><br>
<a href="#">Link 2</a><br>
<a href="#">Link 3</a>
</h2>
</body>
</html>
Listing 5.9. This script adds content to the icontent iframe.
window.onload = initLinks;
function initLinks() {
for (var i=0; i<document.links.length; i++) {
  document.links[i].onclick = writeContent;
  document.links[i].thisPage = i+1;
}
}
function writeContent() {
var newText = "<h1>You are now looking at Example " + this.thisPage + ".</h1>";

document.getElementById("icontent").contentWindow.document.body.innerHTML = newText;
return false;
}
To create the content for an iframe
1. for (var i=0; i<document.links.length; i++) {
document.links[i].onclick = writeContent;
document.links[i].thisPage = i+1;
}
The initLinks() function begins by looping through the links on the page. Then, for each link, two things are set: the onclick handler for that link, and a new property, thisPage. The latter contains the page number to be displayed when that link is clicked, i.e., link 0 is “page 1”, link 1 is “page 2”, and so on. The onclick handler in the loop sets every link to call the writeContent() function when they’re clicked.
2. var newText = "<h1>You are now looking at Example " + this.thisPage + ".</h1>";
document.getElementById("icontent").contentWindow.document.body.innerHTML = newText;
Here is the meat of the writeContent() function, which first declares and sets a variable, newText, and assigns it some text. Next, we find the icontent element on the page, and then we reset its contentWindow.document.body.innerHTML to newText. To explain this a bit further, we find an element with a given id (in this case, icontent) and then get that element’s contentWindow. Then we get the document it contains. Then we get the body of that document, and then we reset innerHTML, which is the HTML contained within that body tag.
Why is there a backslash (“”) before the slash (“/”) in step 2? According to the standards, the browser may interpret the beginning of a closing tag (“</”) as the end of the line. The backslash “escapes” the slash, allowing us to write out HTML without the chance of causing an error.
Creating Dynamic Iframes
Building on the previous example, we can use JavaScript to create content for our iframe that’s obviously dynamic. That content will be generated by Listing 5.10; when the user clicks one of the links, JavaScript writes out new code to the iframe. In this case, it’s displaying the name of the page and how many times the user has gone to that page in this session.
Listing 5.10. This script calculates the content of the iframe and writes it into the window.
var pageCount = new Array(0,0,0,0);
window.onload = initLinks;
function initLinks() {
for (var i=0; i<document.links.length; i++) {
document.links[i].onclick = writeContent;
document.links[i].thisPage = i+1;
}
}
function writeContent() {
pageCount[this.thisPage]++;
var newText = "<h1>You are now looking at Example " + this.thisPage;
newText += ".<br>You have been to this page ";
newText += pageCount[this.thisPage] + " times.</h1>";
document.getElementById("icontent").contentWindow.document.body.innerHTML = newText;
return false;
}
To load a dynamic iframe
1. var pageCount = new Array(0,0,0,0);
In order to show how many times we load a page, we have to somehow keep track of that information. The pageCount array is what we’ll use.
2. pageCount[this.thisPage]++;
This line increments the pageCount array, so that we can keep track of how many times we’ve visited this particular page.
3. var newText = "<h1>You are now looking at Example " + this.thisPage;
newText += ".<br>You have been to this page ";
newText += pageCount[this.thisPage] + " times.</h1>";
These lines create on the fly what will be the content of the iframe.
4. document.getElementById("icontent").contentWindow.document.body.innerHTML = newText;
return false;
As with previous examples, we get the icontent element and reset the innerHTML property of its body. Resetting innerHTML writes the two lines of text in the iframe, and the result is shown in ![]() . And because that’s everything, we end with a
. And because that’s everything, we end with a return false so that the browser doesn’t do things it shouldn’t.
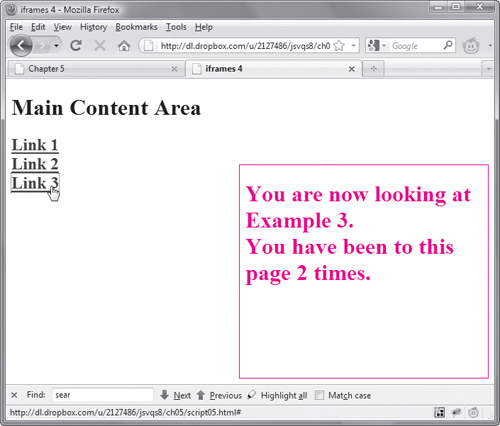
![]() Each time you click a link in the main window, the content in the iframe updates.
Each time you click a link in the main window, the content in the iframe updates.
Sharing Functions between Documents
So long as both your main window and your iframe are coming from the same domain, it can be handy for them to share a single external JavaScript file. Here, we’ll have the iframe load the external JavaScript file to demonstrate how it can be used by the main window ![]() . Listing 5.11 is the main HTML page, Listing 5.12 is the page loaded into the iframe, and Listing 5.13 is our JavaScript file.
. Listing 5.11 is the main HTML page, Listing 5.12 is the page loaded into the iframe, and Listing 5.13 is our JavaScript file.
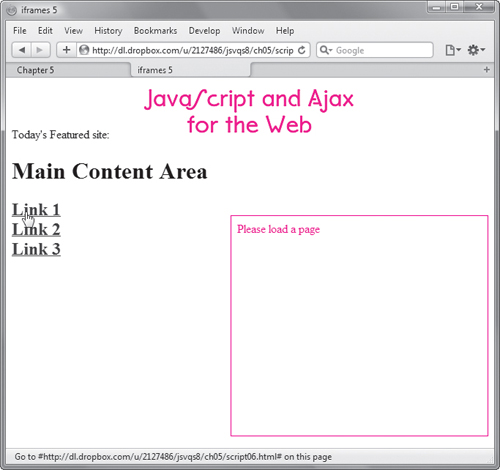
![]() The image on the main page is updated by code called from the iframe.
The image on the main page is updated by code called from the iframe.
Listing 5.11. This page has an image tag, but nothing to show in it.
<!DOCTYPE html>
<html>
<head>
<title>iframes 5</title>
<link rel="stylesheet" href="script01.css">
</head>
<body>
Today's Featured site:
<img src="images/spacer.gif" width="400" height="75" id="adBanner" alt="banner">
<iframe src="iframe02.html" name="icontent" id="icontent"></iframe>
<h1>Main Content Area</h1>
<h2>
<a href="#">Link 1</a><br>
<a href="#">Link 2</a><br>
<a href="#">Link 3</a>
</h2>
</body>
</html>
To use a function from another document
1. var bannerArray = new Array("images/redBanner.gif", "images/greenBanner.gif", "images/blueBanner.gif");
Start by creating a new array that contains all the possible banner image names, and assign the array to the bannerArray variable.
2. window.onload = initLinks;
When the iframe loads, call initLinks().
3. for (var i=0; i<parent.document.links.length; i++) {
parent.document.links[i].onclick = setBanner;
Now we start the code inside the initLinks() function. Because this function is being called from the iframe’s context, setting the main window’s links is slightly different than in previous examples. This time, we reset the onclick handler of the parent document for each link.
As the last initialization step, the setBanner() function is called.
Listing 5.12. Whereas this page loads an external JavaScript file that only refers to its parent.
<!DOCTYPE html>
<html>
<head>
<title>Content iframe</title>
<script src="script06.js"></script>
</head>
<body>
Please load a page
</body>
</html>
Listing 5.13. This script updates the parent page.
var bannerArray = new Array("images/redBanner.gif", "images/greenBanner.gif", "images/blueBanner.gif");
window.onload = initLinks;
function initLinks() {
for (var i=0; i<parent.document.links.length; i++) {
  parent.document.links[i].onclick = setBanner;
}
setBanner();
}
function setBanner() {
var randomNum = Math.floor(Math.random() * bannerArray.length);
parent.document.getElementById ("adBanner").src = bannerArray[randomNum];
return false;
}
5. var randomNum = Math.floor(Math.random() * bannerArray.length);
The setBanner() function starts off by calculating a random number. This line uses the Math.random() function multiplied by the number of elements in the bannerArray array to calculate a random number between 0 and the number of elements in the array. Then it places the result into the randomNum variable.
6. parent.document.getElementById("adBanner").src = bannerArray[randomNum];
The main window can refer to an iframe—its child document—just by using its id. But for an iframe to refer to the main window, it needs to explicitly refer to its parent. Here, we get that element (a window), the document in that window, and then the adBanner element itself. Then, we set the src for adBanner to the current item in the array. That’s the new image name, which will then be displayed on the page. Then, the ad banner in the main window is set to a random ad from the array.
Opening a New Window
You may want to create a new window to show users additional information without losing the information they’re reading. For example, you could open up an annotation window for a technical paper or for a news story. Although it’s possible to open a new browser window with HTML, using JavaScript gives you more control over the new window’s content and features. ![]() shows you a standard browser window with all the parts labeled. You can create windows that have any or all of these parts. Listing 5.14 shows the HTML, and Listing 5.15 shows the JavaScript that creates a window from a page
shows you a standard browser window with all the parts labeled. You can create windows that have any or all of these parts. Listing 5.14 shows the HTML, and Listing 5.15 shows the JavaScript that creates a window from a page ![]() where clicking a link brings up a new window (that contains an image of our cat, in this example).
where clicking a link brings up a new window (that contains an image of our cat, in this example).
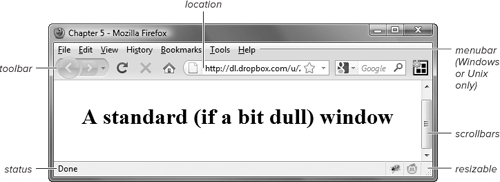
![]() The elements of a browser window. The names in this figure correspond to the parameters you can apply in the
The elements of a browser window. The names in this figure correspond to the parameters you can apply in the open() command.
![]() Opening a new window.
Opening a new window.
Listing 5.14. The HTML page that calls the external JavaScript that opens a new window.
<!DOCTYPE html>
<html>
<head>
<title>Opening a Window</title>
<script src="script07.js"></script>
</head>
<body>
<h1>The Master of the House</h1>
<h2>Click on His name to behold He Who Must Be Adored</h2>
<h2><a href="#" class="newWin">Pixel</a></h2>
</body>
</html>
You’ll note that there is no JavaScript in Listing 5.14, just a call to the external JavaScript file, and we also include an attribute to the link tag on the page: a class called newWin. As with the iframes examples, Listing 5.15 includes an onload event handler that calls a function, in this case called newWinLinks. The newWinLinks function cycles through the links on the page and looks to see if any of the links include a class of newWin. If so, when the link is clicked, the function calls the newWindow function.
Listing 5.15. Use this script to open a new window.
window.onload = newWinLinks;
function newWinLinks() {
for (var i=0; i<document.links.length; i++) {
if (document.links[i].className == "newWin") {
document.links[i].onclick = newWindow;
}
}
}
function newWindow() {
var catWindow = window.open("images/pixel1.jpg", "catWin", "resizable=no,width=350,height=260");
return false;
}
To open a new window
1. function newWindow() {
First, define a function called newWindow().
2. var catWindow = window.open("images/pixel1.jpg", "catWin", "resizable=no,width=350,height=260");
The variable catWindow contains a new window object, referencing the image file pixel1.jpg. The name of this new window is catWin. Names are required, because we might want to reference this window later in a link or in another script. The new window has a width of 350 pixels and a height of 260 pixels; these parameters are optional.
In step 2, you can’t have any spaces between the commas in the width and height parameters. If you do, your script may not work in some browsers. In general, when you get script errors and you need to debug your scripts, look for little problems like this. Syntax errors can be a major cause of frustration, especially when you’re new to coding.
Internet Explorer 6 and later does some funky and inconsistent window stuff for security reasons (scripting windows will work, or not; that sort of thing). If security is turned off, everything in this chapter works fine, but we don’t recommend turning off security or requiring your site visitors to turn off security. Additionally, some new windows in IE7 and later may open in new tabs instead, based on your tabbed browsing settings.
To add one or more of the parameters listed in ![]() (at the beginning of this section) to your windows, put them in the
(at the beginning of this section) to your windows, put them in the open() command enclosed in quotes, with =yes after the name of a feature you want and =no after one you don’t want (though =no is usually the default, so you can often skip even mentioning those features). For example, if you want a window of a specified size with a toolbar, a location box, and scrollbars, you would type "toolbar=yes,location=yes,scrollbars=yes,width=300,height=300" as part of the open() command. Note that the window created would not have a menu bar or a status bar, and it would not be resizable.
![]() shows the results of Listing 5.15 in Firefox 3 for Mac, Firefox 2 for Windows, IE8, and Safari for Mac. As you can see, no two browsers produce identical results. In fact, the only browser that did just what we wanted was Safari. You may get results that differ from ours; for example, Firefox gives the user ultimate control—if they have their options set to require the status bar to show, it always will, no matter what your script says to do.
shows the results of Listing 5.15 in Firefox 3 for Mac, Firefox 2 for Windows, IE8, and Safari for Mac. As you can see, no two browsers produce identical results. In fact, the only browser that did just what we wanted was Safari. You may get results that differ from ours; for example, Firefox gives the user ultimate control—if they have their options set to require the status bar to show, it always will, no matter what your script says to do.
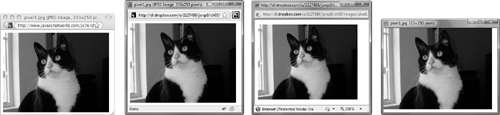
![]() Different browsers use different window defaults, so items like the location appear in Firefox even though you’ve told it not to.
Different browsers use different window defaults, so items like the location appear in Firefox even though you’ve told it not to.
Loading Different Contents into a Window
In the previous task, clicking a link created a new window filled with an image. But what if you have several links on a page, and you want them all to target a single new window? Listing 5.16 demonstrates this technique. The main window in ![]() has three links. Clicking any of the links opens a new window, filled with the corresponding image of our cat. If you switch back to the main window and click another link, the image in the smaller window is replaced.
has three links. Clicking any of the links opens a new window, filled with the corresponding image of our cat. If you switch back to the main window and click another link, the image in the smaller window is replaced.
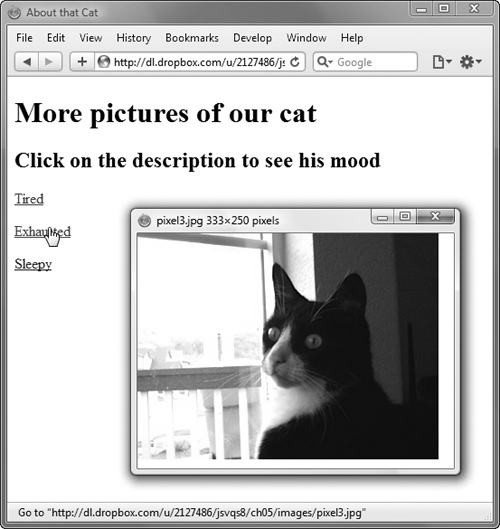
![]() Clicking any of the three links opens the smaller window and fills it with the appropriate image of our cat.
Clicking any of the three links opens the smaller window and fills it with the appropriate image of our cat.
Listing 5.16. With this script, you can open a new window and fill it with a variety of content, triggered by clicking different links.
window.onload = newWinLinks;
function newWinLinks() {
for (var i=0; i<document.links.length; i++) {
if (document.links[i].className == "newWin") {
document.links[i].onclick = newWindow;
}
}
}
function newWindow() {
var catWindow = window.open(this.href,"catWin","width=350,height=260");
catWindow.focus();
return false;
}
To load different contents into a window
1. document.links[i].onclick = newWindow;
In the newWinLinks() function, we’ve added the newWindow() function call as the onclick handler via JavaScript. When newWindow() is called, it uses this.href—that is, the href attribute value from HTML.
2. function newWindow() {
Here, we’re defining a new function called newWindow().
3. var catWindow = window.open(this.href,"catWin","width=350,height=260");
Here in the variable catWindow, we’re opening a new window object, followed by the window’s parameters. First, we pass it the value of this.href. The name of the new window is catWin, and the width and height parameters set the size of the window.
This line uses the focus() method to tell the window we just opened to come to the front. You can use focus() whenever you need to make a window visible; if there are several windows open, using focus() brings the window to the top.
5. return false;
The function needs to end with return false so that the HTML knows to not also load the href in.