
Chapter 12
Blogging, Podcasting, and YouTubing
IN THIS CHAPTER
![]() Understanding what content marketing is all about
Understanding what content marketing is all about
![]() Hosting a podcast to promote your brand
Hosting a podcast to promote your brand
![]() Blogging to boost brand recognition
Blogging to boost brand recognition
![]() Creating and posting branded video clips
Creating and posting branded video clips
![]() Using your content to generate additional revenue
Using your content to generate additional revenue
To build and launch a brand successfully, you practically need to create your own media production company, complete with the equivalent of online news, radio, and television. Fortunately, all the tools required to promote your brand in text, audio, and video are readily available online and mostly free. By using these tools effectively to deliver quality content, you can build brand recognition fast without spending a penny on advertising. Better yet, you may be able to monetize the content you produce by using it to sell advertising, merchandise, or both.
In this chapter, I bring you up to speed on the basics of podcasting, blogging, and creating and posting branded video, and I share several techniques and tips I’ve discovered when using these media to promote my own businesses and brands and monetize my content. But first, I introduce you to the concept of content marketing.
 Creating and posting valuable content regularly in any form is challenging and time-consuming, but it can be a fun way to build your brand while connecting with existing and prospective customers.
Appreciating the Value of Content Marketing
Content marketing is creating and sharing material (such as blog posts, social media posts, white papers, podcasts, and video) that doesn’t explicitly advertise a brand but stimulates interest in its products and services. With content marketing, you generate interest in your brand, engage your audience, and interact with them on an ongoing basis to transform prospects into customers and customers into brand ambassadors.
You can also use content marketing as a way to generate revenue streams. You’ll already be using the content to sell your products and services, of course, but you can also use it to generate additional revenue. You can use it to cash in on advertising opportunities; earn sales commissions as another company’s affiliate; and even sell merchandise, such as T-shirts, hats, and travel mugs. Near the end of this chapter, I dig a little deeper into the topic of monetizing content.
Your content should always be useful to your audience. When creating content, focus on delivering information that’s relevant, valuable, engaging, and entertaining for existing and prospective customers.
Promoting Your Brand Via Podcasting
A podcast is a series of digital spoken-word audio recordings distributed via the Internet. Listeners can download the recordings to their smartphones or other personal electronic devices and listen to them at their leisure or tune in to livestream podcasts.
In this section, I lead you through the process of getting set up to create podcasts, recording your podcasts, and making them available on the Internet. I also dip into related topics, such as recruiting guests for your podcast.
Podcasts are a popular medium for use in content marketing, but you can also build an entire business around a podcast — sort of like having your own talk-radio show. You can even join podcast networks to extend your reach to larger audiences. The advertising revenue space associated with podcasts has experienced explosive growth over the past couple of years, and podcast platforms are optioning exclusive deals with popular podcasters for big bucks.
 Before you even think about recording a single podcast episode, listen to popular podcasts to observe how successful podcasters ply their trade. For more detailed guidance than what I provide in this section, check out Podcasting For Dummies, 4th Edition, by Tee Morris and Chuck Tomasi (John Wiley & Sons, Inc.).
Naming your podcast
Every podcast needs a catchy name. For branding purposes, come up with a name that reflects your brand and the products or services you offer. If you own a bait-and-tackle shop called The Whopper Tail, that name would be a great name for your podcast. A key factor in successful branding is consistency. If The Whopper Tail is already taken, maybe you could call your podcast Something Fishy.
I like to work backward when selecting a name for a podcast. Write a description of what the show’s going to be about and then pick words out of your description. We came up with Girl Gang the Podcast after writing a mission statement for our brand that included “Support Your Local Girl Gang” as our slogan. We pulled Girl Gang from our copy and added the Podcast, and we were ready to roll.
If you are your brand, and you’re creating a variety show with no specific genre in mind, consider naming the show after yourself. Hey, if it works for Ellen and Oprah, it should work for you too.
Gearing up to podcast
One of the great aspects of podcasting is that you can do it on a shoestring budget. All you need are an Internet-enabled device with a microphone and speakers (or headphones) and a podcasting platform to record and host your podcast. If you have a smartphone with an app for recording and uploading podcasts, you have all you need to get started.
On the other hand, if you’re aiming to create professional-quality podcasts with multiple guests, the sky’s the limit. You can build your own recording studio with high-end mics, boom arms and shock mounts, studio headphones, audio mixers, and your own digital audio workstation.
In the following sections, I provide detailed guidance on choosing the basic podcasting equipment you’ll need.
Answering a few preliminary questions
Before you go shopping for podcasting equipment, answer the following questions:
- Are you flying solo, or do you plan to have guests? If you’re flying solo, you can get by with a smartphone or a computer with a single microphone. If you plan to have guests, you’ll want a microphone for each person on the podcast.
- What quality are you aiming for? Generally, as long as listeners can hear what you and your guests are saying, that’s good enough. Most people tune in for the quality of content, not the quality of the sound, although sound quality can be distracting if it’s really poor. If you want higher-quality audio, you need higher-quality equipment.
- What’s your budget? You can spend a lot on recording equipment and can even build your own recording studio, but you can start a podcast for less than $100 — much less if you already have a smartphone.
- How much of the work do you want to do yourself? Podcasting requires some time, effort, and expertise. At bare minimum, a podcast requires copywriting, recording, and editing. You can do everything yourself or outsource part or all of the work.
You can get started with whatever equipment you can afford and acquire better recording equipment as your podcast grows in popularity.
Choosing a microphone and accessories
A quality microphone goes a long way toward producing a quality recording. When choosing a microphone and accessories, I recommend the following:
- Dynamic (versus condenser) microphone: A dynamic microphone is best for most people and most situations in which you’ll be recording podcasts. These mics are more durable, versatile, and forgiving. They’re also less sensitive, so they don’t pick up as much background noise as condenser mics do.
- USB microphone for recording yourself or XLR for recording yourself and guests: The benefit of a USB microphone is that it plugs into a standard USB port on a computer. An XLR microphone plugs into a professional audio recording device or mixer, allowing you to scale your podcast to include guests.
- Cardioid microphone: A cardioid microphone is more sensitive to sound in front of the microphone and less sensitive to sound in back of it, so it’s less susceptible to picking up background noise.
- Pop filter: A pop filter is foam inside or outside the microphone that prevents the p sound from making annoying pops when you’re recording.
- Shock mount: A shock mount filters out low-frequency vibrations, such as the sound of a coffee mug sliding across the table on which the microphone sits.
- Switches or dials to customize the sound and mute the mic when someone else is talking: Being able to adjust the mic to improve sound quality or muffle noise is a plus.
Adding headphones to your setup
When creating a podcast, headphones are optional, but they’re an option you should seriously consider. When you’re doing a podcast, you should hear how you sound to others so that you can adjust how you’re talking on the fly. The only way to hear how you sound to others is to listen to yourself through headphones. Any guests you have on your podcast should wear headphones too.
When choosing headphones, look for the following characteristics:
- Flat frequency response to ensure that you’re hearing the audio accurately, without any filtering.
- Full-size headphones versus earbuds (over the ear versus in the ear) to filter out noise from the environment more effectively.
- Comfort ensures that you and your guests can wear the headphones for the duration of the podcast without having to adjust them constantly.
- Wired or wireless is a preference. I don’t like to deal with cables, but if you go with wireless headphones, be sure that your batteries are charged before starting a podcast.
Choosing and prepping a recording space
The space in which you record your podcast can make or break your sound quality. To improve sound quality, take the following steps:
-
Choose a quiet place.
You don’t want to hear dogs barking, neighbors partying, or planes flying over in the middle of your recording session. A basement may be best.
-
Choose a big room over a small room.
Generally, the bigger the room, the better, but successful podcasts have been recorded in even the tiniest of spaces.
-
Fill the space with soft objects.
Carpeting, blankets, mattresses, pillows, sofas, and stuffed animals can all help prevent echoes.
-
At the very least, stick some foam in the corners of the room.
The corners are the worst source of echoes. If you have the means to do so, stick some foam to the walls as well, or hang blankets on them.
Choosing recording software and a podcasting host
In addition to hardware (a recording space and gear), you need software to record and edit your podcast, as well as a podcasting host, where your podcast will live on the Internet. A couple of services provide a combination:
- Anchor (
https://anchor.fm) is an all-in-one podcasting platform from Spotify that enables you to create, distribute, and monetize podcasts for free. It includes free, unlimited hosting; automatic distribution to all major listening apps; analytics to find out who’s listening to your podcasts and which ones they like best; and various options for monetizing your podcasts. - Podbean (
https://www.podbean.com) is one of the best options for recording podcasts on a smartphone and uploading them to the Internet. It includes Podcast Studio for recording and editing, unlimited podcasting, performance analytics, the ability to interact with listeners, and PodAds to monetize podcasts with paid advertising.
Another option is to use software dedicated to recording and editing your podcasts and then upload your recordings to a podcast host or distributor. Here are a few podcast recording/editing programs:
- Adobe Audition (
https://www.adobe.com/products/audition.html) is a professional audio workstation for recording, editing, mixing, and exporting audio content to upload to any podcast hosting service. - Audacity (
https://www.audacityteam.org/download) is free open-source software for recording, editing, and exporting audio content. You can download a version for macOS, Windows, or Linux. - GarageBand (
https://www.apple.com/mac/garageband) is Apple’s full-featured music-creation studio that’s also a great solution for recording, editing, and exporting spoken word audio for podcasts. It comes preloaded on Macs, iPhones, and iPads. - Riverside.fm (
https://riverside.fm) is a subscription-based podcast recording platform that enables local audio recording of interviews conducted remotely. It’s a great tool if you plan to interview people who can’t make it in to your recording studio. - Logic Pro (
https://www.apple.com/logic-pro) is a high-end digital audio workstation application for macOS. Consider it to be a step up from GarageBand, but it may be overkill for recording podcasts. - TwistedWave (
https://twistedwave.com) is a simple yet powerful audio recording and editing program for Macs, iPhones, and iPads. A cloud-based version is also available; you can run it on any Internet-enabled device in a web browser.
After recording your podcast and saving it or exporting it as an audio file (either MP3, M4A, MP4, or WAV), you upload the file to a podcast host to make your podcast available to listeners and to promote your podcast and track its performance. Your host will also get your podcasts into all the directories where listeners look for podcasts, such as iTunes, Spotify, and Google Podcasts. Here are some popular podcast hosts:
- Buzzsprout (
https://www.buzzsprout.com) offers a free plan and features easy uploads, a podcast player that you can easily embed in your website, analytics to track podcast performance, and the ability to add episode chapter markers to your podcasts. - Libsyn (
https://libsyn.com) offers affordable podcast hosting, distribution, analytics, and monetization. - SoundCloud (
https://soundcloud.com) is the world’s largest free online audio distribution platform and music sharing platform. SoundCloud enables you to upload, promote, share, and monetize your podcasts; and engage with your listeners. - Simplecast (
https://simplecast.com) bills itself as “the first and last word in podcast management and analytics.” It features one-click podcast uploads, multiple web and podcast players, advanced analytics, collaboration tools, and the ability to Recast (schedule and share your podcasts on your social media accounts). - Spotify for Podcasters (
https://podcasters.spotify.com/) has about 300 million listeners in about 100 markets worldwide, so it’s one of the best platforms in terms of distribution. It also features a dashboard that provides insight into your podcast’s performance among listeners.
I use Adobe Audition to record and edit my podcast and Buzzsprout to host it.
Recording, editing, and uploading a podcast
The process for recording, editing, and uploading a podcast varies a great deal based on the tools and services you use; the number of people involved; and whether you plan to interview guests remotely. It can be as simple as running the Anchor app on your smartphone, tapping the Record button, speaking into your phone, and then choosing the option to upload your recording. Or it can be as complex as recording and editing separate tracks, mixing audio, fine-tuning the sound, and then uploading your recording to multiple podcasting platforms.
In this section, I guide you through the overall process, which will give you a good idea of what’s involved.
Outlining your podcast episode
To keep yourself and your guests from drifting off topic, outline your podcast episode or at least create a list of bullet points describing what you’re going to cover. If you plan to interview guests, include a brief introduction or biography of each guest and a list of questions. If you have a cohost or guests, share your notes and questions with them so they can prepare for the recording session.
You don’t need to write a detailed script, although that’s certainly an option. You just need a collection of notes to prevent yourself from rambling, which is a big turn-off to listeners.
Writing an intro and outro
Write and record an intro and outro to insert at the beginning and end of your podcast. You can use the same intro and outro for every episode or use something fresh for each episode. Using a unique intro and outro for each episode has the advantage of allowing you to showcase highlights of each episode at the beginning and add a teaser for the next episode at the end. Starting each episode with highlights provides listeners a preview, so they can decide whether a particular episode interests them before they make a commitment to listen to the whole thing.
Try to limit your intro and outro to 60 seconds or less combined; for example, 25 seconds for the intro and 35 seconds for the outro. Use the intro as an opportunity to introduce new listeners to your show and the outro to encourage listeners to come back for your next episode. You can include in both your intro and outro one or more calls to action — something to keep listeners connected to your brand outside the episode. For Girl Gang the Podcast, we let listeners know about our clothing brand and online magazine so that they can maintain engagement with the brand and we can monetize our podcast with the merchandise we offer.
Here’s our standard intro for our podcast:
Welcome to Girl Gang. I’m your host, Amy Will, the founder of Girl Gang. This podcast is brought to you by girlgangthelabel.com. Head to our website after the show to browse our directory of female-owned businesses and enjoy exclusive discounts from them. Read our online magazine, The Edit, for interviews with female creatives, plus tips, tools, and rituals to level up your own career. Shop our line of merchandise, including our signature “support your local girl gang” collection. For every item sold, we team up with a charity to support women’s education, health, and empowerment. Shop today and use code GIRLGANG to receive 20 percent off at girlgangthelabel.com. Show us you’re listening by tagging us on Instagram @girlgangthelabel.com. Thank you so much for tuning in!
If you don’t have your own online store, you can replace the discount code with an advertisement or promotion from a sponsor.
Here’s our outro for our podcast:
Thank you so much for tuning in. If you liked this episode, please take a moment to leave us a review. It helps us out so much. Remember to head to girlgangthelabel.com to redeem your 20 percent discount with code GIRLGANG. Take a moment to remind the females in your life that they inspire you, and support your local girl gang.
The outro provides an opportunity to highlight a product or service and leave a lasting impression about your organization’s or podcast’s mission. At its core, Girl Gang the Podcast is about empowering women; that’s why we end with a call to action to reach out to an inspirational female.
If you’d like to add music to your intro or outro (or both), you can find royalty-free music and other audio starting at $1 at sites such as Envato Market (https://audiojungle.net) and Storyblocks (https://www.storyblocks.com/audio).
Scheduling your podcasts
One of your goals as a podcaster is to build a following — to stay engaged with existing listeners while attracting new ones. To do that, you need to podcast regularly, usually at least once a week. Scheduling podcasts helps you achieve that goal and prepare for upcoming podcasts, especially if you need to line up guests ahead of time. Another benefit of a schedule is that it encourages you to add variety.
Use a calendar or a scheduling form, such as the one shown in Figure 12-1, to schedule your podcast. Specify the title of the podcast, the date, and any guests you plan to have (as discussed in the next section).

FIGURE 12-1: Create a schedule for your podcasts.
Featuring guests on your podcast
Interviewing interesting, well-known people on your podcast is a great way to lighten your workload, keep your podcast fresh, and build branding synergies with others in the same or ancillary markets. The challenge comes in persuading busy people to take the time to be guests on your show.
Prepare a simple, direct pitch to persuade others to participate as guests on your podcast. Explain how your show aligns with their interests and furthers their goals. Keep the pitch short (two brief paragraphs, max), and include the following details:
- Your podcast title and a blurb about it — think elevator pitch
- The name, title, and organization of any notable past guests
- Why your listeners would benefit from hearing what your guest has to say
Following is a sample guest pitch for my podcast:
- Hi,
- My name is Amy Will, and I am the host of Girl Gang the Podcast, a podcast focusing on highlighting female founders and creatives. I would love the opportunity to interview you about your career path and highlight your brand, Tattooed Chef. As your brand is focused on sustainable sourcing, quality products, and a unique business model, I know our guests would love your story.
- Past guests include an editor at British Vogue, the founder of Y7 Studios, and the executive director of video and social media at BuzzFeed. Our podcast was also featured as one of the best podcasts of 2020 by Marie Claire.
- If you’d like to continue the conversation about being a guest or have any available days coming up, feel free to reach out at
[email protected]. - Sincerely,
- Amy
Recording a podcast
Not much is involved in recording a podcast. You connect your microphones and headsets to your recording device, turn them on, make sure that they’re selected as the input and output devices in your recording software, tap the Record button, and start your show. When you’re done, tap the Stop button.
What requires some effort and expertise is using your microphone(s) the right way to get the highest-quality audio possible and, of course, talking like a professional. Here are a few suggestions that can help you sharpen your skills with a mic:
- If you have a cohost or guests, record each person on a separate track so that you can edit their audio individually. (Check your recording software’s help system to find out how to record on separate tracks.)
- Stay close to the mic when speaking — about the width of two to four fingers.
- Back off from the mic when others are speaking so you won’t record your breathing.
- Avoid extremes when speaking louder or softer.
- Experiment with the positioning your microphone on axis (pointing directly at your mouth) and off axis (positioned at an angle to your mouth). If your voice sounds too high-pitched, try angling the mic more (off axis) so it picks up less of the high frequencies. If your voice sounds too low, position the mic on axis so it picks up more of the high frequencies.
Practice makes perfect. Don’t worry if the audio doesn’t sound quite right. As you become accustomed to podcasting and to your equipment, you’ll naturally make adjustments that improve the audio quality.
Editing your podcast
You don’t necessarily need to edit a podcast before uploading it to your podcast host, but you can do some basic edits to improve its quality without getting too in the weeds. The editing process varies depending on the software you use, but general editing techniques remain the same across all software:
- Cut any audio you’re not going to use. Why edit what you’re not going to include in your podcast?
- Listen to your podcast once all the way through without editing anything, and create a punch list as you listen. A punch list is a complete record of everything you need to fix.
- Edit individual tracks. If you have multiple tracks (you and a cohost or guests, for example), edit them individually to tone down any loud bursts and raise the volume of any audio that’s too soft.
- Use fading to hide the blemishes. If you have an abrupt transition or noise that you can’t edit out, fade out the audio where the problem starts and fade in where it ends.
If you’re not comfortable editing your podcast, you can hire an editor on Fiverr.com or Upwork.com, or use a service such as Resonate (https://resonaterecordings.com) or We Edit Podcasts (https://www.weeditpodcasts.com). Before hiring an editor, conduct your own background check; look at ratings and testimonials, and listen to samples of their work.
Exporting and uploading your podcast
When you’re done editing your podcast, export it in the file format your podcast host recommends — usually MP3 (smaller files, lower quality) or WAV (larger files, higher quality). Check your host’s help system for any additional recommendations regarding the file format and audio quality. After exporting your recording to a file, you can log in to your podcast host and follow its procedure for uploading the file.
Consider uploading a batch of podcast episodes and then publishing them according to your schedule. Most podcast hosts provide options to publish your podcasts immediately, leave them unpublished, or schedule them for release at a later date. I prefer uploading several episodes at a time and scheduling them for release because it helps me deliver a steady flow of content to my listeners.
After you upload your audio file, your podcast host prompts you to enter a title and description, choose appropriate categories for indexing it, add tags, and select or upload art to serve as a visual for your podcast or a specific episode. You may have the option to add more information, such as guest names, your email or website address, and other details.
If you have a website (see Chapter 7), I strongly recommend that you embed your podcast in your site. Most podcast hosts have players that you can embed in web pages or blog posts.
Blogging to Promote Your Brand
A blog (short for web log) is like a publicly accessible online journal in that it contains regular entries — usually daily or weekly. Unlike a personal journal, however, blogs are often used as an informal and subtle way to promote brands, products, services, and causes. They’re great tools for individuals and businesses to establish themselves as thought leaders in their industry. They serve as an easy means to post fresh, relevant content, and they allow readers to post comments, which increases engagement. As a blog grows in popularity, it becomes very attractive to search engines, so it can be a great tool for drawing traffic to a site.
In this section, I introduce you to blogging basics.
Choosing a blogging platform
A blogging platform is software hosted online that simplifies the process of publishing content on the web and enables readers to comment on it. Several blogging platforms are available, including the following:
- WordPress (
https://wordpress.org) is the most popular platform for creating websites, blogs, or a combination of the two. It’s designed for simplicity, so you can focus on sharing your story, insights, products, and services. Because so many people use WordPress, you can find plenty of support for it online, along with lots of themes and plugins to enhance your site’s appearance and functionality. - Wix (
https://www.wix.com) is a drag-and-drop website and blog-creation suite for creating and managing professional-grade sites. It includes Ascend for connecting with customers and managing workflows, Wix Stores for selling products and getting paid online, Wix Logo Maker, Wix Blog, Wix Video Maker, and hundreds of other tools. - Squarespace (
https://www.squarespace.com) is a good option if you’re an online retailer and already have your store hosted on Squarespace. Your blog can serve as an extension of your store. Squarespace makes it easy to embed product listings in your blog posts. - Shopify (
https://www.shopify.com) is another e-commerce platform that can host both your online store and your blog. If you have a Shopify account, it includes a default blog named News. You can keep that blog or create your own with a custom name.
See Chapter 7 for more detailed guidance on setting up a website, online store, blog, or a combination of all three.
Naming your blog
As with your podcast, your blog needs a catchy name that reflects your brand and the products and services you offer. In fact, if you already have a podcast, you should strongly consider using the same or a similar name for your blog. (See the earlier section “Naming your podcast.”)
In the process of naming your blog, decide on its purpose and focus. If you’re using it to establish yourself as an expert in a certain field and build trust, you’ll want your entries to demonstrate your knowledge and expertise in your field. If you’re selling organic honey and related products, your posts may center on beekeeping, the health benefits of honey, the varieties of honey, and how honey is produced. If you’re promoting your own brand of clothing, you’ll want to blog about what’s hot and what’s not in the fashion biz.
Consistency is crucial to building a strong brand. Everything from the title of your blog to the content you post on it should reflect your brand and its mission.
Composing blog entries
Composing blog entries requires some creativity and writing talent. First, you must come up with ideas for topics to write about; then you need to write the post. (Doing research may also be necessary.) Which task is harder is a toss-up; coming up with topic ideas can sometimes be the bigger challenge.
In the following sections, I present two approaches for coming up with topic ideas and offer a little guidance on writing engaging, informative, and entertaining blog entries.
Building topics around keywords
If you’re to succeed as a blogger, search engines need to recognize your blog as being a leading source for content related to your blog’s subject area, so consider creating a list of keywords and developing topics around those keywords. See Chapter 8 for more about keywords and other ways to implement a search engine optimization (SEO) strategy.
After you have a list of relevant keywords, you’re ready to start composing blog entries around those keywords. On my Girl Gang blog, I use the keywords “female owned,” “small business,” and “women empowerment.” Using these keywords, I could construct a blog post titled “Best Female-Owned Small Businesses to Support in Los Angeles.” This title narrows the focus of my research and writing.
Using blog formats to come up with ideas
You may be able to find inspiration for topic ideas by looking at different blog formats, such as these:
- Narrative: You can simply tell a story about yourself or someone you know.
- Q&A: Think about questions customers often ask, and compose answers to those questions.
- Problem/solution: Consider a problem that needs to be solved, and present a solution for it. If a product or service you sell solves the problem, all the better!
- Survey: Ask your readers what they think, which is a great way to increase engagement on your blog. Plug-ins are available for most blogs to add a survey to a post quickly and easily.
-
Roundup: Showcase a selection of items. The roundup format would be perfect for my “Best Female-Owned Small Businesses to Support in Los Angeles” entry described earlier. I could choose five female-owned businesses to research and write about, allowing me to include my third keyword, “women empowerment,” in the post.
I actually wrote this post, which covered a store on Melrose called House of Intuition — a crystal shop that sells sage, tarot cards, intention candles, and other spiritual/magical merchandise. I showcased an item in the store that symbolized female empowerment, which provided a perfect opportunity for including that keyword in the post.
- Comparison and contrast: Compare and contrast two or more things, such as the way you do something versus the way your competition does it, and explain why your way is better.
Writing blog entries
Writing engaging, informative, and even transformational blog entries is more art than science. Although I can’t possibly provide all the guidance you need to become a great writer, I can offer the following suggestions:
- Write with your readers in mind. When writing, imagine you’re presenting your content to someone sitting right in front of you. Imagine how they’d respond to what you’re writing.
- Adhere to your brand style guidelines. See Chapters 6 and 8 for details.
- Keep it short. 1,000 words max. People are busy and tend to have short attention spans.
- State the main point of your entry in the first sentence. Use the rest of the post to support or develop your main point.
- Break up the text. Write short paragraphs, and use lists and headings to create plenty of white space. Long paragraphs don’t play well online.
- Be clear. Read and reread everything you write for clarity. If something isn’t crystal-clear to you, it won’t be clear to your readers.
- Get feedback before you publish your post. Have someone edit your post and provide feedback on content, organization, spelling, and grammar. Preferably recruit someone who’s good with spelling and grammar.
Posting blog entries
After composing a blog entry, posting it is as easy as typing a document in a word processor or desktop publishing program. In fact, you can type your post in a word processor or text editor and then copy and paste it into a post. In WordPress, the steps for posting a new blog entry go like this:
-
Log into your WordPress dashboard.
(Go to your blog’s login page, such as
girlgangthelabel.com/blog/wp-login.php, and enter your username or email address and password.) -
Select Posts and then select Add New in the navigation bar on the left side of the screen.
The Add a New Post page appears, as shown in Figure 12-2.
- Type a title for your new post in text box at the top of the page.
-
Click in the content area, and type your post.
Use the toolbar above the content area to format your text and add media, such as images.
- Select categories and add tags to help search engines index your post properly.
- Click the Publish button.

FIGURE 12-2: The Add a New Post page.
For details on posting entries with the blogging platform you use, consult its help system.
Engaging with your readers
One great thing about blogging is that you can get readers to write a lot of your content for you by encouraging them to comment on your posts and on the comments other readers post. If you can spark a lively discussion around a blog entry, its search-engine ranking will soar as search engines recognize the interest the post is generating.
Here are a few ways to increase engagement on your blog:
- Post great content. Include entries that may be somewhat controversial or thought-provoking.
- Ask readers to weigh in. At the end of an entry, you might write something like “I'd like to know what you think. Please post a comment below.”
- Pose a challenge. Ask readers to solve a problem or perform a difficult task and then post a comment about their experience.
- Monitor and respond to comments. Your blogging platform’s dashboard should have an option to view comments, which simplifies the process of reviewing and responding to comments. Responding to a comment is especially important if a reader specifically requests a response from you; responding shows that you’re listening and that you care.
Working with guest bloggers
Guest bloggers are people who post entries to your blog under their own names. They save you the time and trouble of producing content for your blog while sharing their unique knowledge and insights with your readers, thereby enriching your blog.
Pursue opportunities with guest bloggers who can add valuable and relevant content to your blog and are willing and eager to do so. You may be able to trade favors by guest-blogging on a partner’s blog to increase your brand’s reach while returning the favor. As you make connections in your market’s community, your brand’s profile and reputation grow.
Spreading the word about your blog
As you post valuable content to your blog, you increase the likelihood that it will be discovered by search engines and then readers who are interested in the content you’ve published. But why wait? You can speed this discovery process by spreading the word about your blog and encouraging your readers to share your blog entries with their friends, family members, and colleagues. Here are a few ways to spread the word about your blog:
- Blast an email message to all your contacts announcing your blog, providing a link to it, and asking them what they think of it.
- Add your blog address to all your social media profiles.
- Post about your blog on all your social media accounts.
- If you have a stand-alone website or online store, link from it to your blog.
- Register your blog on directories such as Blogarama (
https://www.blogarama.com), Blogging Fusion (https://bloggingfusion.com), and Blogville (https://blogville.us). - Add share buttons to your blog that enable readers to share your blog posts with others via email and their social media accounts quickly and easily. The process for adding share buttons to a blog varies by platform, but it’s usually as easy as installing a third-party plug-in or app. Check your blogging platform’s help system for details.
Building Brand Recognition with Online Videos
Creating and posting videos online is very similar to podcasting but with the addition of video. You can even create video podcasts and conduct webinars by using online videoconferencing and collaboration platforms, such as Zoom (https://zoom.us) and Skype (https://www.skype.com).
In this section, however, I focus on one tried-and-true method of using online video to build brand recognition: recording and uploading videos to YouTube, one of the most popular video sharing and social media platforms on the planet. YouTubers, who create and post video, upload more than 100 hours of video per minute, and users watch more than 1 billion hours of video every day.
As a YouTuber, you can upload your video to YouTube and then embed that video content in your social media posts, website, and blog. You can also quickly and easily monetize your content by allowing YouTube to include advertising with your video.
In this section, I bring you up to speed on using YouTube to promote your brand. To go beyond the basics and become a YouTube pro, check out YouTube Channels For Dummies, 2nd Edition, by Rob Ciampa, Theresa Go, Matt Ciampa, and Rich Murphy (John Wiley & Sons, Inc.).
Recognizing the different genres you can use to promote your brand
You can find all sorts of videos on YouTube, but to promote your brand, consider the following video content types:
- Announcements of special events, new products, and so on
- Anything really funny, even commercials
- Behind-the-scenes footage
- Case studies
- Competitions or contests
- Interviews with interesting people
- Livestreams from events
- Meet-the-team profiles
- Presentations or webinars
- Product or service demos
- Testimonials
- Tutorials
Recording a video
Recording videos for YouTube is very similar to recording audio content for podcasts. You can go low-end, using any device that can record digital video — your smartphone, a computer equipped with a digital video camera, or a GoPro, for example — or you can go high-end with fancy video production equipment, as though you’re filming a Hollywood movie.
At the low end, anyone can record a video. You open the camera app on your smartphone, switch to video mode, tap the Record button, and start filming, as shown in Figure 12-3. When you’re finished recording, tap the Stop button. You end up with a digital video file that you can upload to YouTube as is or edit with the help of video editing software, as explained in the next section.
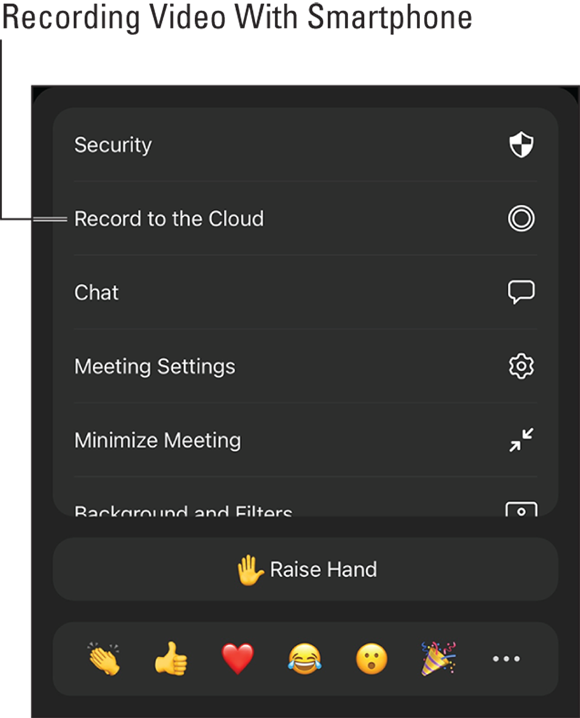
FIGURE 12-3: You can record video on your smartphone.
Here are a few tips for recording quality video:
- If your camera or app has a stabilization feature, turn it on.
- Use a tripod when possible, and when filming yourself speaking to your audience, position the camera at about eye level.
- If you’re using your smartphone’s camera, rotate your phone 90 degrees and film horizontally. On YouTube, video is shown in landscape mode.
- When filming yourself speaking to your audience, be sure to look at the camera.
Editing your video
Editing a video usually involves chopping excess footage from the beginning, end, or somewhere in the middle of the video, but you may also want to splice two or more videos together; adjust the brightness or contrast; stabilize a shaky video; add an audio track; or make other changes. You can edit your video before uploading it to YouTube or upload it first and use the video editor in YouTube Studio (https://studio.youtube.com).
If you record video on your smartphone, you can select the video on your smartphone and then select the edit option to access some basic editing tools, which may be all you need.
For more and better video editing tools, you can use Microsoft’s Video Editor, which is built into Windows; iMovie, which is included on macOS, iOS, and iPadOS devices; or a third-party video editor, such as Adobe Spark (https://www.adobe.com/express/feature/video/editor).
Video editing is beyond the scope of this book and differs among video editing applications. Check the help system of the application you’re using for details. For more guidance, check out Filmmaking For Dummies, 3rd Edition, by Bryan Michael Stoller (John Wiley & Sons, Inc.).
When you’re done editing your video, save it as an MPEG-2 or MPEG-4 file — the two video file formats YouTube prefers. YouTube has a long list of guidelines that cover file format, audiovisual duration, frame rate, aspect ratio, resolution, and more. Consult YouTube’s help system for details.
Uploading videos to YouTube
Uploading a video to YouTube is a snap, but the process varies depending on the device you’re using. If you’re using a smartphone, the process goes like this:
-
Select the video you want to upload, tap Share, and choose to share the video to the YouTube app.
The YouTube app opens the video.
- In the bar below the video, drag the vertical bars on the left and right ends to crop footage at the beginning or end of the video.
- Enter a title and description of the video in the designated fields.
- Select whether to make the video public (anyone can watch it), unlisted (anyone who has the link to it can watch it), or private (only people you specify can watch it).
- Tap the Next button.
- Choose the option to specify whether the video is suitable for kids, and specify any age restrictions for viewing the video.
-
Tap the Upload button.
Your phone uploads the video to your YouTube account.
If you’re uploading videos from a laptop, desktop, or tablet computer (as opposed to a smartphone) log into YouTube at https://www.youtube.com, click the Create icon (the video-camera icon with the plus sign in it in the top-right corner of the page), click Upload Video, and follow the onscreen prompts to complete the process.
After uploading a video to YouTube, you can embed it in a web page or blog post. Open the video in YouTube, click Share (below the video), click Embed, and click Copy to copy the embed code. Then paste the code into the HTML version of the page or post in which you want the video to appear.
Creating a branded thumbnail
After you upload a video, YouTube uses one of its frames to create a thumbnail — a snapshot that represents your video on YouTube. Thumbnails are the first things people see when they’re browsing for videos, and they often determine whether a person chooses to watch a video. Instead of letting YouTube choose your video’s thumbnail, create a custom, branded thumbnail of your own — something that pops!
You can use just about any graphics software to create a thumbnail. You can even find dedicated YouTube thumbnail creators online, such as Adobe Spark’s free YouTube thumbnail maker (https://www.adobe.com/express/create/thumbnail/youtube).
Here are a few guidelines for creating YouTube thumbnails:
- Create a thumbnail that accurately depicts the video’s content.
- Follow the recommended dimensions (1280 pixels wide by 720 pixels high).
- Use as high a resolution as possible, but keep the file size below 2 MB.
- Save your thumbnail as a JPG or PNG file.
- Make good use of your brand’s color scheme. (See Chapter 6 for more about brand guidelines.)
- Create an image that’ll look good large or small; many people will be viewing it on their smartphones.
- If you include text, keep it short, and make sure that it’s easy to read when viewed on a device of any size.
- Steer clear of any nudity, sexually provocative content, hate speech, violence, or potentially harmful or dangerous content.
Creating a branded YouTube channel
YouTube enables you, as an individual or business, to have your very own YouTube channel, so members of your audience can quickly and easily access all the videos you uploaded. Your personal channel is linked to your Google account and uses your YouTube user name as its name, though you can edit it. With a Google Business account, you can create custom branded channels.
Another advantage of a Google Business account is that you can grant others access to your account (so team members can manage it) without having to share your login information.
First, you need to create a Business account on Google. Go to Google (https://www.google.com), click the Sign In button in the top-right corner of the page, click Use Another Account, and then click Create Account. If you’re already signed in, click your profile picture in the top-right corner of the page, click Add Another Account, click Create Account, and select To Manage My Business. Follow the onscreen prompts to create your Google Business account. Now you’re ready to create a branded channel:
- Log in to YouTube, using the username and password for your Google Business account.
-
Click your profile picture or icon in the top-right corner of the page, and choose Create a Channel.
If you already created your first channel, instead click Settings, click Add or Manage Your Channel(s), then Create a New Channel. The Choose How to Create Your Channel box appears, prompting you to specify whether you want to use your name or a custom name for your channel.
-
Under Use a Custom Name, click the Select button.
YouTube prompts you to type a name for your channel. Make sure that the name reflects your brand and the video content you’ll be posting on your channel.
-
Select the check box next to the “I understand” legal statement, and click Create.
A confirmation box appears, congratulating you on creating a new channel.
-
Follow the onscreen prompts to complete the process by entering details about your channel.
During this process, you get to upload a profile picture, type a description of your channel, and add links to your sites and social media profiles.
-
Click Save and Continue.
You return to the YouTube home page, which prompts you to upload a video to get started, but hold off on that.
- Click your profile image in the top-right corner of the page, choose Settings, and click Channel Status and Features.
-
Click the Verify button (top left), and follow the onscreen prompts to verify your channel.
When your site is verified, you’re returned to the Status and Features page, where you can enable additional features for your channel.
- Enable all the channel features you want to use, such as Monetization and Custom Thumbnails.
-
Click Return to YouTube Studio in the top-right corner of the page, click your new channel’s icon in the top-left corner of the page, and click the Customize Channel button.
Your channel’s customization page appears.
-
Use the available options to customize your channel, including adding a branded banner.
As you make changes to your channel, they’re saved automatically.
-
When you’re done making changes, click the YouTube Studio button below the branded banner you added, and choose Settings in the menu bar on the left side of the screen.
The Settings dialog box appears.
- Enter additional information for your channel, including keywords, your geographical location, a branded watermark, and an indication of whether your channel is made for kids.
- When you’re done entering settings for your channel, click the Save button.
Monetizing Your Content
Podcasting, blogging, and video can be very effective in promoting your brand, which indirectly increases sales and revenue, but you can also use this content to generate revenue more directly. Here are a few ways to monetize your content:
- Sell advertising. When you upload podcasts or videos, you can enable an option to monetize your content or include advertising, and the company that hosts your content (such as YouTube) will automatically include advertisements with it and pay you for it. If you have your own blog or website, you can easily add advertising to it with the help of services such as Google AdSense (
https://www.google.com/adsense/start). You just create an AdSense account and then copy and paste one piece of code into your website or blog that shows ads on your site tailored to its layout. - Create and sell merchandise. Creating a strong brand via content marketing can drive demand for branded merchandise, such as T-shirts, hats, coffee mugs, stickers, keychains, and other clothing and accessories. Your merchandise may have your brand name and logo, a catchphrase, or a design that aligns with your content’s overall theme.
- Charge for livestream events. Livestream events are just what they sound like: live performances streamed over the Internet in real time to whoever happens to tune in. You can monetize livestream events by selling advertising space, requesting donations, charging a fee (like selling tickets to a concert), offering pay-per-view, or getting a sponsor.