
One of the most important phases of any software project is deployment or migration. Repository Manager provides a convenient way to migrate the code from one environment to another. As you are aware, we have three different environments for migration. Usually, we refer to them as DEV for the development environment, TEST for the testing environment, and PROD for production. DEV is the environment where you actually develop the code. You perform the unit testing, and then you migrate the code to the TEST environment, where the testing team performs the testing on the code to evaluate whether everything is running as per requirements. Once tested, the code is migrated to PROD, where it actually goes live. When we wish to migrate the code, we need to make sure that all the components along with their properties are migrated properly. We need to migrate all sources, targets, mappings, workflows, and session tasks used in the code. Transformations and tasks get migrated along with mappings and workflows. So, you need not migrate them separately. Also, if your code is using parameter files or Unix shell scripts, you need to migrate them though the parameter file and Unix scripts are migrated separately and not from the Informatica client tool.
To migrate the sources, targets, and mappings, you can use the PowerCenter Designer, and to migrate the session tasks and workflows, including other tasks, you can use PowerCenter Workflow Manager. Repository Manager can migrate all components in one go for you.
Informatica PowerCenter provides three ways to migrate the code from one environment to another, that is, Export/Import, Copy/Paste, and Drag/Drop.
Let's talk about all the options.
You can perform the Export/Import functionality from the PowerCenter Designer or the Workflow Manager screen. Whenever you export the components, Informatica creates the .XML file for those components. Similarly, you can import the components if they are available as .XML files. So, any export/import operation will happen in the .XML format.
You can view the file in the XML editor and, in fact, change the file before you import it. The code will be imported with the changes you made in the file. Ideally, you should not change the exported file to avoid consistency issues across different environments.
To complete the migration, you export the components from one repository and import in another repository. A similar approach can be used to migrate code from one folder to another folder in the same repository.
Before we proceed, note that we can migrate only those components that are present on the the PowerCenter Designer screen. To migrate the components, perform the following steps:
- Open the designer and from the navigator, select the component you wish to migrate and navigate to Repository | Export Objects. We selected a
m_UNIONmapping for our reference in this book, as shown in the following screenshot. When you export the mapping, corresponding sources, targets, and transformations get exported. Similarly, when you export the workflow from Workflow Manager, all the tasks present in the workflow gets exported. So, you need not export all components separately.We are exporting the components from the
learnwellfolder.
- A new pop-up window will ask you to browse the location to save the
.xmlfile. Specify the location and click on OK.Informatica will start the export process, and once done, you will get the description of the process. It will show you the details of the components exported. Also, if it encountered an error, the error will be mentioned. Refer to the following screenshot:

With this, the export process is complete and you will be able to see the components at the specified location.
Once you are done with the export process, you are all set to import the file to get the components in another repository or folder. We will be importing the mapping in the learn folder.
Perform the following steps to import mappings:
- Open the designer and connect to the repository or folder that you wish to import the code to. Navigate to Repository | Import Objects, as shown in the following screenshot:

- A new window will pop up asking you to browse the
.xmlfile, which you saved while exporting the code. Select the location where you saved the file and click on Next.
- In the next step, you need to add the components to the new repository by clicking on Add, as shown in the following screenshot, and then clicking on Next.

- In the next window, you will be able to see whether there are any conflicts with the new code being migrated. If any conflicts are there, check the conflicts, else click on Import to allow the import process to finish.

With this, the export and import process is complete for the designer components. Similar to this, perform the migration for Workflow Manager components. When you migrate components from the designer and Workflow Manager, you get two .xml files: one for the designer mapping and the other for the Workflow Manager workflow. You will need to import the XML file for mapping before you import the XML file for the workflow, as the mappings are associated in the session task. So, if your mapping is not available, importing the workflow with the session task will be invalid.
When you migrate the code from Repository Manger, you don't need to migrate the mapping and workflow separately. Repository Manager lets you migrate complete components at once. So, the advantage of migrating the code from Repository Manager is that it saves time and is an easier process. You get only one XML file instead of two files, as shown in the previous section. To export all the components from Repository Manager together, select the workflow related to your code in the navigator and navigate to Repository | Export Objects, as shown in the following screenshot. Selecting the workflow will allow all the components to be exported together.

Follow the process in a manner similar to that mentioned in the preceding section to complete the migration. You will get a file at the specified location with all the code components migrated in one go.
Use the same file to import the component. When you import the file, Informatica puts the mapping-related components under the designer and workflow-related components under Workflow Manager.
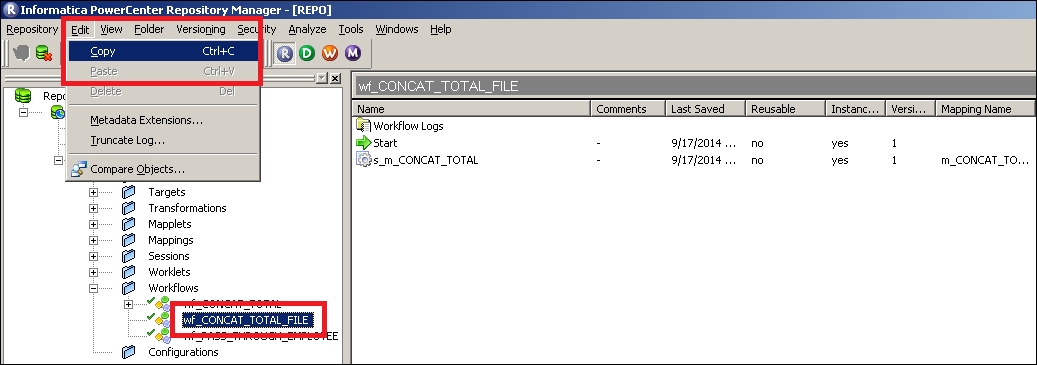
Another way to achieve the migration functionality is to Copy and Paste or drag-and-drop the components. This is another way in which you can achieve the migration.
To copy the code, select the required component in the navigator from the repository or folder and navigate to Edit | Copy in the toolbar—the components get copied. Open the repository or folder where you wish to paste the components and navigate to Edit | Paste. Informatica will paste the code, and this way, you can achieve the migration process.
Before we talk about this feature, let's take a look at the difference between Connect and Open. You must have noticed the Connect and Open option when you connected to your folder under Repository in the navigator, as shown in the upcoming screenshot.
The difference between Connect and Open is that Connect only connects you to the repository so that you can view the components present in the folder, but Open allows you to actually use those components in the workspace. When you click on Connect, you do not get the workspace. However, when you click on Open, Informatica performs the connect operation and also makes the workspace available to your folder, so any coding performed in workspace will now be performed inside the opened folder.
The folder that is open is shown in in the top-left corner of the screen, as shown in the following screenshot:
To migrate the code using the drag-and-drop features, perform the following steps:
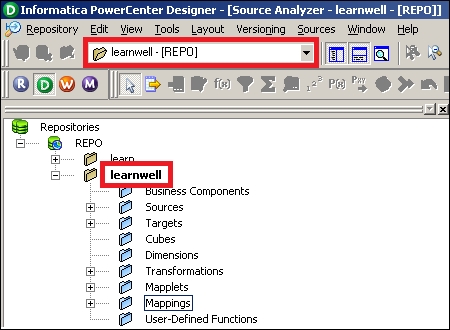
- Connect to the repository or folder from where you wish to migrate the code. We have connected to the
learnwellfolder. - Open the repository or folder where you wish to migrate the code. Click on Open to get the workspace assigned to the folder. We opened the
learnfolder. - Drag the required component from the connected folder to the opened folder. We are dragging components from the
learnwellfolder tolearnfolder. - A pop-up window will ask you to confirm whether you wish to copy the code, then click on OK.
With this simple method, your code will get copied from one folder to another. As mentioned previously, you can drag-and-drop the components across repositories as well. Now, we are done with the migration of the code. This simplicity in the processing is the beauty of the Informatica tool.
We have seen various options for migration, but the most recommended one is the export/import feature. When you use copy/paste or drag/drop feature, there are chances that some of the properties in the code might get missed. There are no known instances where the code missed the properties. Hence, it's always recommended that you use the export/import functionality using Repository Manager to complete the migration.