
Before we can deploy a composite that references the artifacts held in MDS, we must deploy those artifacts to MDS on the SOA infrastructure. To do this, we need to create a JAR file containing the shared artifacts and then deploy it as part of an SOA bundle.
In this recipe, we will show you how to do this via JDeveloper, though in practice we would recommend the use of deployment scripts used in conjunction with tools, such as Maven and Hudson.
Make sure you have created an XML library containing your XML artifacts (as described at the beginning of this chapter).
- Within JDeveloper, create a Generic Application (for example,
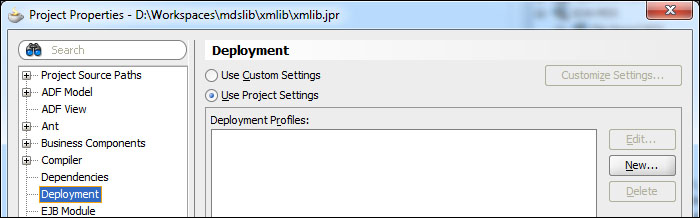
mdslib), and when prompted to, create a project and give it an appropriate name (for example,xmllib). In the application navigator, right-click on thexmllibproject and select Project Properties.This will launch the Project Properties window; select Deployment from the navigational tree, as shown in the following screenshot:
- Click on New; this will launch the Create Deployment Profile dialog. Specify an archive type of JAR File and specify an appropriate name for it (for example,
xmllib), and click on OK. This will launch the Edit JAR Deployment Profile Properties window where we can specify what goes in the JAR file. - Even though we are creating a JAR file, it's basically a ZIP file and not a real JAR file, so we need to remove the JAR file specific content; so deselect Include Manifest File.
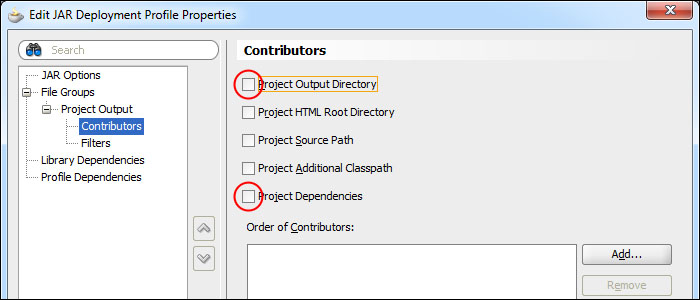
Then select File Groups | Project Output | Contributors from the navigational tree and deselect Project Output Directory and Project Dependencies.
- Next, specify the actual XML artifacts that we wish to add to the JAR file. Click on Add; this will launch the Add Contributor window.
- Click on the magnifying glass and browse to the apps directory for your XML artifacts (this should be the one in your source repository — see the method to create the XML library given at the start of this chapter), and click on OK.
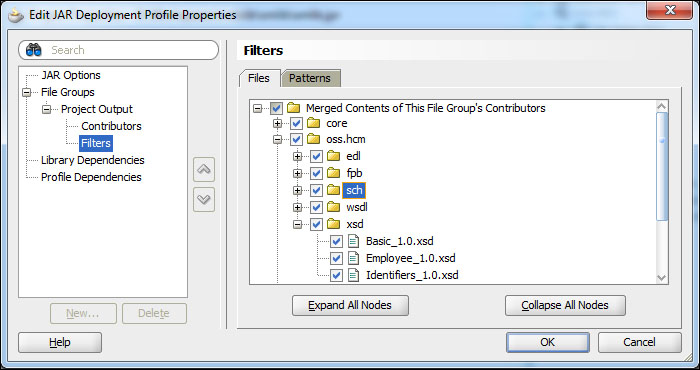
- Next, select File Groups | Project Output | Filters and check that only the files we want are included within the JAR file.
- Click on OK to confirm the content of the JAR file, and then click on OK one more time to complete the deployment profile; finally, from the main menu select Save All.
- The next step is to create an SOA bundle. From Application Menu, select Application Properties. This will launch the Application Properties window; from the navigational tree, select Deployment and then click on New. This will launch the Create Deployment Profile window, as shown in the following screenshot:
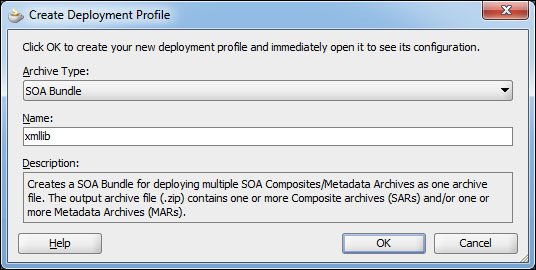
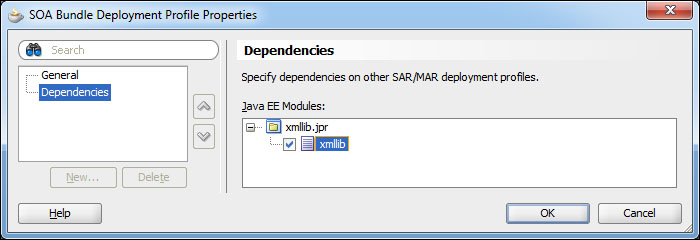
- Specify an archive type and appropriate name for the SOA bundle, and click on OK. This will launch the SOA Bundle Deployment Profile Properties window, creating the XML library.
- Select Dependencies from the navigational tree and ensure that xmllib is selected.
- Click on OK twice and then select Save All from the toolbar.
- We are now ready to deploy our XML schemas to the metadata repository. To do this, in Application Menu select Deploy | SOA Bundle Name; this will launch the Deployment Action dialog. Select Deploy to Application Server and follow the standard steps to deploy it to your target SOA infrastructure server(s).
In order to deploy our JAR file to the metadata repository, we need to place it within an SOA bundle and deploy that to our SOA infrastructure.
The schemas will then be made available to the SOA composites deployed on the same SOA infrastructure.
When you deploy an SOA bundle to MDS, it's a cumulative operation, in that new artifacts are added to MDS and artifacts that already exist in MDS are replaced by a new version. But if I don't deploy an artifact, then the previous one remains.
For example, if I deploy an SOA bundle containing A.xsd and B.xsd to MDS, and then deploy a new version of the SOA bundle containing A.xsd (an updated version) and C.xsd to MDS, I will have A.xsd (new version), B.xsd, and C.xsd deployed to MDS.