
In this recipe, we will configure Oracle Service Bus to consume messages published to JBoss Application Server (AS) 5.1.
This recipe assumes that you have access to your JBoss server, and that you have a working knowledge of JBoss Application Server and JBoss Messaging.
You need to ensure that Oracle Service Bus has access to the same Java client libraries as any normal JMS client would. For JBoss you need the following JAR files:
javassist.jarjboss-aop-client.jarjboss-common-core.jarjboss-logging-spi.jarjboss-mdr.jarjboss-messaging-client.jarjboss-remoting.jarjboss-serialization.jarjnp-client.jarlog4j.jarconcurrent.jartrove.jar
These are located in your JBoss installation home (JBOSS_HOME/client).
- First we need to create a JMS queue in JBoss and then connect to the JBoss admin console; the URL will be something like:
http://[hostname]:[port]/admin-console
The port normally defaults to
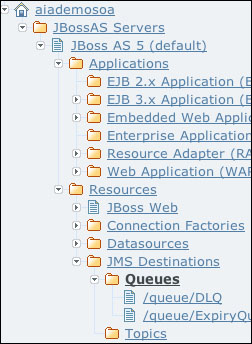
8080.Use the side menu to go to Resources | JMS Destinations | Queues, as shown in the following screenshot:
Click on Add New Resource on the right-hand side of the web page, and follow the wizard to create a queue with the following details:
Property
Value
Resource template
default (Queue)Name
Cookbook Test QueueJNDI name
/queue/cookbooktestLeave all the other fields blank or unset.
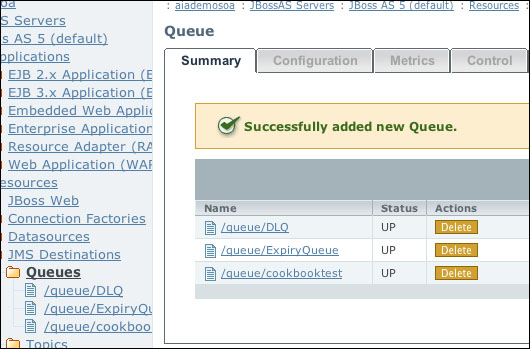
Once you have completed this, you should see your queue appear, as shown in the following screenshot:
- Copy the JBoss library files identified in the Getting Started section of this recipe to the
libdirectory of your OSB domain; it will be located here:[ORACLE_HOME]/user_projects/domains/[OSB DOMAIN]/lib
- You must update your classpath for the OSB Admin server and your OSB server (if you've split them out during your domain's creation). To do this, you must edit your
setDomainEnv.sh(or.cmdfor Windows) file that is in the following location:[ORACLE_HOME]/user_projects/domains/[OSB DOMAIN]/bin
- Add a line, like the following, to the end of your
setDomainEnv.shorsetDomainEnv.cmd(all in one line) file:export CLASSPATH=$CLASSPATH${CLASSPATHSEP}${DOMAIN_HOME}/lib/optic.jar${CLASSPATHSEP}${DOMAIN_HOME}/lib/oc4j-internal.jarFor Windows, edit
setDomainEnv.cmd, with a line like the following:set CLASSPATH=%CLASSPATH%%CLASSPATHSEP%%DOMAIN_HOME%/lib/optic.jar%CLASSPATHSEP%%DOMAIN_HOME%/lib/oc4j-internal.jar
- If your OSB domain is currently up, now would be a good time to restart; otherwise, start the domain up before continuing.
- From the Domain Structure in the WLS console, expand the Services menu and select Foreign JNDI Providers from the Administration console of your OSB domain.
Click on New and give it a descriptive name (for example,
JBoss), and click on Next where you should target this to the OSB server or cluster and then click on Finish. - Next, we need to configure our foreign JNDI provider to point it to the JMS queue on JBoss. To do this, click on the provider you just created.
This will take you to the JNDI configuration window; here we need to specify the JNDI client details of our JBoss JMS provider, as shown in the following table:
Property
Value
Initial Context Factory
org.jnp.interfaces.NamingContextFactory.Provider URL
jnp://[HOSTNAME]:[PORT].The port is normally
1099.User
The username of an account with privileges to access these JMS resources on your JBoss server.
Password/Confirm Password
The password for this user.
- Next, we need to configure a local JNDI link(s) for the JBoss queue that we wish to consume messages from.
Click on the Links tab of the foreign JNDI provider that you created previously, and click on New. Give the link a descriptive name for the queue or topic you're going to link into your OSB's JNDI tree (
CookBookQueuein the following example).For Local JNDI Name, enter a JNDI name for which this resource will appear as in OSB's JNDI tree. For Remote JNDI Name, enter the JNDI of the resource in your JMS provider's JNDI tree.
For our example, we'll use the value specified in the following table; once this is done, click on OK.
Property
Value
Name
CookBookQueueLocal JNDI Name
jms/jboss/cookbooktestRemote JNDI Name
/queue/cookbooktestRepeat this process to create a link for the connection factory of the queue, using the values specified in the following table:
Property
Value
Name
ConnectionFactoryLocal JNDI Name
jms/jboss/cookbookcfRemote JNDI Name
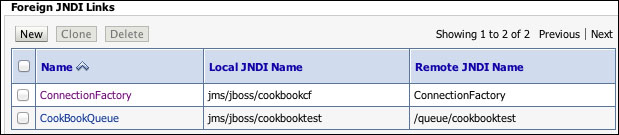
ConnectionFactoryOnce completed, our Foreign JNDI Links should look somewhat like the following screenshot:
- Create a proxy service in the OSB console or Eclipse, as you usually would, but from the Transport Configuration screen in the wizard, select JMS as your protocol, and the EndPoint URI should be something like:
jms://[OSBHOST]:[PORT]/[LINKCF]/[LINKQUEUE]
Where
LINKCFandLINKQUEUEare the local JNDI names of the connection factory and queue respectively, which you defined in the previous step. In our example the Endpoint URI for this proxy service would be:jms://[OSBHOST]:[PORT]/jms.jboss.cookbookcf/jms.jboss.cookbooktest
Ensure that the correct Destination Type is selected in the next screen and continue with the wizard as usual, making sure you add a step to the pipeline.
For testing purposes, a simple log or report action should suffice.
This solution essentially would work in exactly the same way, even if the JMS destination was a local resource. OSB "thinks" it's accessing the JMS destination as a local resource. The important thing to note is that you need to include the classes normally required by this remote JMS provider to Oracle Service Bus, because even though it's locating the JNDI reference locally, it is still acting as a remote client to JBoss. It will connect JMS servers directly to JBoss via the connection factory you looked up locally.
For those readers more experienced with the WebLogic server, you might note that we had to add the classes to the classpath and not just drop them into the domain's lib folder; this is because of the WebLogic server's (and Java's) class loading hierarchy. When the WebLogic server loads the JAR files in the lib directory, it loads them as a child to the system class loader for all J2EE applications. We need these classes loaded in the system class loader to be available for the server itself, and so we had to adjust the classpath.
You can easily extend this recipe to configure an OSB business service to publish messages to a JBoss queue, in a similar way as described in the Creating an OSB business service to publish messages to OC4J recipe in this chapter.
You might have realized that we used JBoss' default JMS connection factory. This was for simplicity, but it is recommended you create separate connection factories for JMS consumers or producers because this is a way of controlling JMS functionality without the need for code changes in remote clients.