This section covers the use of the vi (pronounced “vee-eye”) text editor. vi was the first real screen-based editor for Unix systems. It is also simple, small, and sleek. If you’re a system administrator, learning vi can be invaluable; in many cases, larger editors, such as (X)Emacs, won’t be available in emergency situations (for instance, when booting Linux from a maintenance disk).
vi is based on the same principles as many other Unix applications: that each program provides a small, specific function and is able to interact with other programs. For example, vi doesn’t include its own spell checker or paragraph filler, but those features are provided by other programs that are easy to fire off from within vi. Therefore, vi itself is a bit limited, but is able to interact with other applications to provide virtually any functionality you might want.
At first, vi may appear to be somewhat complex and unwieldy. However, its single-letter commands are fast and powerful once you’ve learned them. The next section describes Emacs, a more flexible editor (really an integrated work environment) with an easier learning curve. Do keep in mind that knowing vi may be essential to you if you are in a situation where (X)Emacs is not available, so we encourage you to learn the basics, as odd as they may seem. It should also be added that a number of vi clones are now available that are much more comfortable to use than the original vi, the most popular of which is vim (vi improved). Chances are that your distribution has things set up so that when starting vi, you actually start one of those. We stick to the basics here, though, so that you can use the information presented here no matter which version of vi you use. You can find coverage of the newer versions in the book Learning the vi Editor by Linda Lamb and Arnold Robbins (O’Reilly).
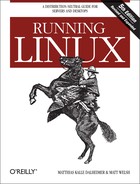
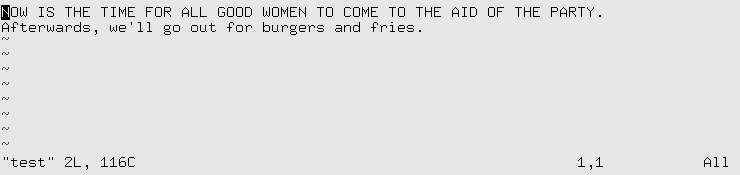
Let’s fire up vi and edit a file. The syntax for vi is:
vi filenameFor example:
eggplant$ vi testwill edit the file test. Your screen should look like Figure 19-1.

The column of ~ characters
indicates that you are at the end of the file.
While using vi, at any one time you are in one of two (or three, depending on how you look at it) modes of operation. These modes are known as command mode, edit mode, and ex mode.
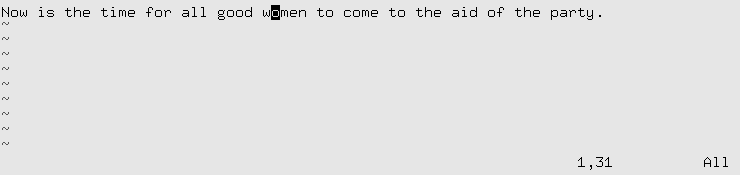
After starting vi, you are in command mode. This mode allows you to use a number of (usually single-letter) commands to modify text , as we’ll see soon. Text is actually inserted and modified within edit mode. To begin inserting text, press i (which will place you into edit mode) and begin typing. See Figure 19-2.

While inserting text, you may type as many lines as you wish (pressing the Enter key after each, of course), and you may correct mistakes using the Backspace key. To end edit mode and return to command mode, press the Esc key.
While in command mode, you can use the arrow keys to move around the file. Alternatively, or when the arrow keys don’t work, you may use h, j, k, and l, which move the cursor left, down, up, and right, respectively.
There are several ways to insert text other than using the
i command. The a command (for “append”) inserts text
after the current cursor position. For example,
use the left arrow key to move the cursor between the words good and men (Figure 19-3).

Press a, type wo, and then press Esc to return to command mode (Figure 19-4).
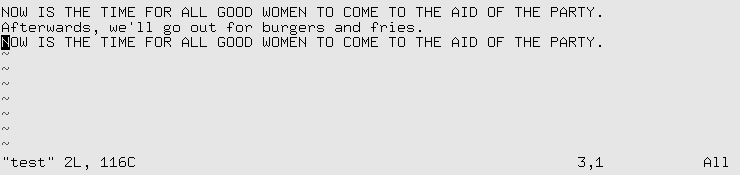
To open a line below the current one and begin inserting text, use the o command. Press o and type another line or two (Figure 19-5).

Remember that at any time you’re either in command mode (where commands such as i, a, or o are valid) or in edit mode (where you’re inserting text, followed by Esc to return to command mode). If you’re not sure which mode you’re in, press Esc. This takes you out of edit mode, if you are in it, and does nothing except beep if you’re already in command mode.
From command mode, the x command deletes the character under the cursor. If you press x five times in our example, you end up with the screen shown in Figure 19-6.

Now press a and insert some
text, followed by Esc (Figure
19-7).
You can delete entire lines using the command dd (that is, press d twice in a row). If your cursor is on
the second line in our example, dd will produce the screen shown in Figure 19-8.

Text that is deleted may be reinserted using the p command (for “put”). Pressing p now will return the deleted line to the buffer after the current line. Using P (uppercase) instead will insert the text before the current line. By default, p and P insert text from the “undo buffer”; you can also yank and replace text from other buffers, as we’ll see later.
The u command undoes the latest change (in this case, pressing u after dd is equivalent to p). If you inserted a large amount of text using the i command, pressing u immediately after returning to command mode would undo it.
To delete the word beneath the cursor, use the dw command. Place the cursor on the word
Diet and type dw (see Figure 19-9).

You can replace text using the R command, which overwrites the text
beginning at the cursor. Place the cursor on the first letter in
pizza, press R, and type (Figure 19-10).
The r command replaces the single character under the cursor. r does not place you in insert mode per se, so there is no reason to use Esc to return to command mode.
The ~ command changes the
case of the letter under the cursor from upper- to lowercase, and
vice versa. If you place the cursor on the o in Now in the previous example, and
repeatedly press ~, you end up
with the screen shown in Figure 19-11.
Another useful command for changing words is the cw command, which lets you simply type in the new word and—after pressing Esc—removes anything that might


be left over from the original word. If the new text is longer than the one being changed, the space is automatically expanded as needed.
You already know how to use the arrow keys to move around the
document. In addition, the w
command moves the cursor to the beginning of the next word, and
b moves it to the beginning of
the current word. The 0 (that’s a
zero) command moves the cursor to the beginning of the current line,
and the $ command moves it to the
end of the line.
When editing large files, you’ll want to move forward or backward through the file one screen at a time. Pressing Ctrl-F moves the cursor one screen forward, and Ctrl-B moves it one screen backward.
To move the cursor to the end of the file, type G. You can also move to an arbitrary line:
the command 10G would move the
cursor to line 10 in the file. To move to the beginning of the file,
use 1G.
Typing / followed by a
pattern and the Enter key causes you to jump to the first occurrence
of that pattern in the text following the cursor. For example,
placing the cursor on the first line of text in our example and
typing /burg moves the cursor to
the beginning of the word “burgers.” Using ? instead of / searches backward through the
file.
The pattern following a /
or ? command is actually a
regular expression. Regular expressions are a
powerful way to specify patterns for search and replace operations
and are used by many Unix utilities. You can find more information
about regular expressions in the section "Regular Expressions,”
later in this chapter. Using regular expressions, you could, for
example, search for the next uppercase letter, using the
command
/[A-Z]
Therefore, if the pattern you’re searching for is not a static string, regular expressions can be used to specify just what you want.
You can couple navigation commands with other commands, such
as deletion. For example, the command d$ will delete everything from the cursor
to the end of the line; dG will
delete everything from the cursor to the end of the file.
Most of the commands dealing with files within vi are invoked from ex mode. You enter ex mode when you press the : key from command mode. This places the cursor on the last line of the display, allowing you to enter various extended commands.
For example, to write the file being edited, use the command
:w. Typing : causes you to enter ex mode, and typing w followed by the Enter key completes the
command. The command :wq writes
the file and exits vi. (The command ZZ--from command mode, without the “:"--is
similar to :wq, but checks first
whether the file has been changed, and writes it only in this
case.)
To quit vi without saving changes to the file, use the command :q!. Using :q alone will quit
vi, but only if modifications to the file have
been saved. The ! in :q! means to quit
vi--and that you really mean it.
To edit another file, use the :e command. For example, to stop
editing test, and edit
the file foo instead, use the
command shown at the bottom of Figure 19-12.

If you use :e without
writing the file first, you’ll get the following error
message:
No write since last change (:edit! overrides)
At this point, you can use :w to save the original file, and then use
:e, or you can use the command
:e! foo, which tells
vi to edit the new file without saving changes
to the original. This can be useful if you edit a file and realize
that you have screwed up. You can then use the :e! command; if you don’t specify a
filename, vi discards the changes and re-edits
the current file.
If you use the :r command,
you can include the contents of another file in the
vi buffer. For example, the command
:r foo.txt
inserts the contents of the file foo.txt after the current line.
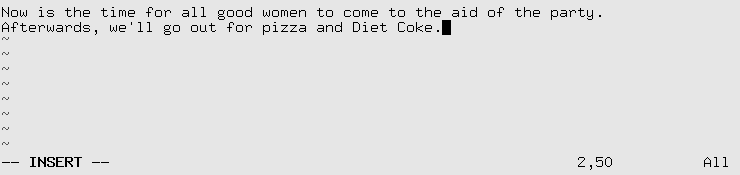
The :! command allows you
to enter the name of a shell command, which is executed within
vi. For example, the command
:!ls -F
executes the ls command and
displays the results on your screen.
The :r! command is similar
to :!, but includes the standard
output of the command in the buffer. The command:
:r!ls -F
produces the screen shown in Figure 19-13.
If you need to execute a series of shell commands , it’s often easier to use the suspend key (usually Ctrl-Z), provided you’re using a shell that supports job control, such as zsh or bash.
There are many more features of vi than are documented here; most of these features are implemented through combinations of the simple features we’ve seen. Here are one or two other tidbits most vi users find useful.
The command
:[x,y]s/pattern/replacement/flagssearches for pattern between lines
x and y in the
buffer, and replaces instances of pattern
with the replacement text . pattern is a regular
expression; replacement is literal text
but can contain several special characters to refer to elements in
the original pattern. The following
command replaces the first occurrence of weeble with wobble on lines 1 through 10,
inclusive:
:1,10s/weeble/wobble
Instead of giving line-number specification, you can use the
% symbol to refer to the entire
file. Other special symbols can be used in place of x and y. $
refers to the last line of the file. Leave x or y
blank to refer to the current line.
Among the flags you can use are g to replace all instances of
pattern on each line, and c to ask for confirmation for each
replacement. In most instances, you will want to use the g flag, unless you want to replace only
the first occurrence of pattern on each
line.
You can also use marks to refer to lines. Marks are just single-letter names
that are given to cursor locations within the document. Moving the
cursor to a location in the file and typing ma will set the mark a at that point. (Marks may be named any
of the letters a-z or A-Z.) You can move the cursor directly to the
mark a with the command `a (with a backquote). Using a regular
single quote (as in 'a) will move
the cursor to the beginning of the line that the mark a is on.
Marks allow you to “remember” cursor locations that denote a region of text. For example, if you want to search and replace a block of text, you can move the cursor to the beginning of the text, set a mark, move the cursor to the end of the text, and use the command:
:'a,.s/weeble/wobble/
where 'a refers to the line
containing mark a, and . refers
to the current line.
One way to copy and move text is to delete it (using the
d or dd commands) and then replace it with the
P command, as described earlier.
For example, if you want to delete 10 lines, starting with the line
that contains your cursor, and paste them somewhere else, just use
the command 10dd (to delete 10
lines), move the cursor to the new location for the text, and type
p. You can copy text in this way
as well: typing 10dd followed by
P (at the same cursor location)
deletes the text and immediately replaces it. You can then paste the
text elsewhere by moving the cursor and using p multiple times.
Similar to dd is the
yy command, which “yanks” text
without deleting it. You use p to
paste the yanked text as with dd.
But note that each yank operation will delete the previously yanked
text from the clipboard.
The deletion and yank commands can be used on more general
regions than lines. Recall that the d command deletes text through a move
command; for example, d$ deletes
text from the cursor to the end of the line. Similarly, y$ yanks text from the cursor to the end
of the line.
Let’s say you want to yank (or delete) a region of text. This
can be done with marks as well. Move the cursor to the beginning of
the text to be yanked and set a mark, such as ma. Move the cursor to the end of the text
to be yanked and use the command y`a. This yanks text from the cursor
position to the mark a. (Remember
that the command `a moves the
cursor to the mark a.) Using
d instead of y deletes the text from the cursor to the
mark.
The most convenient way to cut, copy, and paste portions of text within vi is to use registers. A register is just a named temporary storage space for text you wish to copy between locations, cut and paste within the document, and so forth.
Registers are given single-letter names; any of the characters
a to z or A
to Z are valid. The " command (a quotation mark) specifies a
register; it is followed by the name of the register, as in "a for register a. The lowercase letters and their
uppercase counterparts refer to the same registers: using the
lowercase letter overwrites the previous contents of the register,
and using the uppercase letter appends to it.
For instance, if we move the cursor to the first line, as in
Figure 19-14, and use
the command "ayy, the current
line is yanked into the register a. We can then move the cursor to the
second line, and use the command "ap to paste the text from register
a after the current line (see
Figure 19-15).
Similarly, the command "ay`a yanks text from the cursor to mark
a into register a. Note that there is no correspondence
between mark and register names!
Using registers allows you to copy text between files. Just
copy the text to a register, use the :e command to edit a new file, and paste
the text from the register.
vi is extensible in many ways. Most of
the commands we’ve introduced can be generalized to arbitrary
regions of text. As we’ve already seen, commands such as d and y
operate on the text from the cursor to a move operation, such as
$ or G. (dG
deletes text from the cursor to the end of the file.) Many other
commands operate on text through a move command in the same way.
Using marks, you can operate on any region of text.
As we mentioned before, vi is just a text editor; it doesn’t have facilities for spell checking text, compiling programs, and other such features. However, vi executes other programs that you can use to extend the editor. The command:
:x,y!command
executes the named command with the
text on lines x through
y as standard input, and replaces the
lines with the standard output of the command. As with the s (search and replace) command, other
specifications, such as % and
$, can be used for the line
numbers.
For example, let’s say you want to prepend a quote character to all the lines in a region of text. One way to do this is to write a short shell or Perl script (see "Programming Languages and Utilities" in Chapter 1) that reads lines of input and outputs those same lines with the quote character prepended. (Or use a sed command — there are many alternatives.) You can then send lines of text through this filter, which replaces them with the quoted text within vi. If the script is called quote, just use a command such as:
:`a,.!quote
which quotes the region of text between the cursor location
and the mark a.
Be familiar with the various ex-mode
commands that are available. The :set command allows you to set various
options; for example, :set ai
turns on auto indentation of text. (:set
noai turns it off.)
You can specify ex-mode commands (such as
:set) to execute when starting up
vi in the file .exrc in your home directory. (The name
of this file can be changed with the EXINIT environment variable.) For example,
your .exrc file might
contain:
set ai
to turn on auto indentation. You don’t need the : before ex commands in this file.
A number of good tutorials and references for
vi are available—both online as well as in
print. Learning the vi Editor is a good place
to look for more information. One popular web site for vi information is The vi Lovers Home Page, http://thomer.com/vi/vi.html. The home of
vim on the Web is http://www.vim.org.