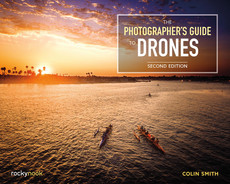

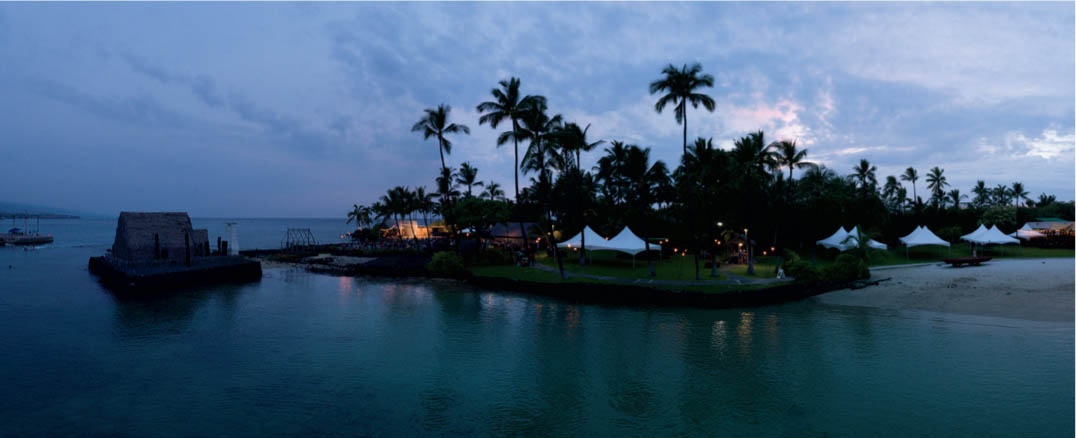
KAILUA-KONA, BIG ISLAND, HAWAII MAVIC PRO
This HDR Panorama was shot just before sunset as a Luau on the shores of King Kam Beach.
CHAPTER 7ADVANCED PHOTO EDITING
IN THIS CHAPTER, we are going to apply a lot of the techniques used in the previous chapter. However, we are going to expand on these techniques and step it up a level. If you haven’t read the previous chapter yet, I encourage you to do so before reading this one.
We’re going to move into some more advanced techniques that involve working with multiple photographs and combining them. We will make panoramas and HDR images and even combine the two into HDR panoramas. We will also be covering multiple advanced techniques and lots of tips to help you get the very best results from your aerial photographs.
PANORAMAS
ONE OF THE MOST BREATHTAKING PHOTOS you can create with your drone is an aerial panorama. A panorama is when you capture multiple images while panning around a scene, then stitch them all together in software.
I have received more positive feedback on these types of images than any other. While they may appear difficult to make, it’s actually quite easy to make an aerial panorama if you follow the upcoming steps carefully. Don’t be discouraged if your first few panoramas don’t look great. With practice, you will learn what works and what doesn’t.
I’m going to show you how to create a panorama in both Lightroom and Photoshop. I prefer the Lightroom method because it’s quicker. The Photoshop method works well for images that have a lot of distortion. The ultimate is to combine Lightroom and Photoshop in the workflow.
Panoramas in Lightroom
Adobe Lightroom Classic is a great choice for creating panoramas. Here is the Lightroom panorama workflow.
I discussed how to shoot panoramas in chapter 4, so I won’t repeat that information. Let’s begin with four images that we have captured for a panorama. Select all the images to be used in the panorama by Ctrl-/Command-clicking the thumbnails (Figure 7.1).

7.1
We need to prepare these images for stitching. We can perform some preliminary corrections by applying a lens profile. This step will dramatically increase the reliability of your merges.
Choose the Develop module and scroll down to the Lens Correction panel (Figure 7.2A). Apply a profile, as I described in the previous chapter:
- Click Profile.
- Select Enable Profile Corrections.
- Choose the make (the manufacturer) of your camera.
- Choose the model of your camera. Many of the newer DJI drones use a built-in profile. If this is the case, you will see Built-in as shown in (Figure 7.2B). This means the corrections are applied in-camera. In this case, skip the profile step as it isn’t needed.
If you don’t see your camera, choose something similar and experiment with the Distortion slider to remove the majority of the lens barreling.

7.2A

7.2B
Now that the majority of the lens distortion is removed from your photo, you want to pass these settings on to the rest of the images in the panorama (Figure 7.3):
- Make sure the images are all selected in the filmstrip.
- Either click the Sync button on the lower left of the right panel in the Develop module or choose Settings > Sync Settings from the top menus.
- You will see the Synchronize Settings dialog. Click the Check None button to turn off all settings.
- Select the Lens Corrections checkbox to only sync the lens profiles and nothing else. If you adjusted anything else in the single image, then make sure to sync those settings, too, or just click the Check All button in that case.
- Click Synchronize, and all the selected photos will now have the same settings applied to them to match the profile.
- It’s time to make the panorama.Right-click and choose Photo Merge > Panorama. You will see three projection options. For most panoramas, Spherical will work best.

7.3

7.4
If you are shooting vertical panoramas or shooting directly down and flying in a grid to create a mapping style panorama, then use Perspective. These are the only times when Perspective might look good.
Note that if the camera was not level during shooting, you will see a wavy horizon or stair stepping no matter what you do. Either reshoot the panorama or use the Photoshop method in the next section.
Fixing the edges
You will notice a white boundary around the panorama. These are transparent areas. You will need to get your panorama into a rectangle, and there are two options for this: fill the white area, or crop it out. There are some useful tools for this.
AUTO CROP
You can choose to hide the transparent areas by automatically cropping the panorama. Turn on the Auto Crop option. The image will be cropped automatically to hide all the transparent pixels. The drawback of this method is you might lose a lot of your image. If nothing important is cropped out, it’s a viable option.
This isn’t a non-reversible decision because you can also turn off cropping in the Crop tool in Lightroom after merging and undo this.
BOUNDARY WARP
A fantastic feature is Boundary Warp. Once the white areas are cropped, you can lose some important information. The Boundary Warp will stretch the pixels to fill the rectangle, sort of like printing on silly putty and stretching it. Slide the Boundary Warp slider to the right and notice how Lightroom warps the image to recover the white space and unwrap the photo (Figure 7.5). You can push it all the way to the right and recover every pixel. However, at full strength, it could result in unnatural-looking warping in the image or a wavy horizon line. Find that balance of a straight horizon and recovered information.

7.5
FILL EDGES
There is a third tool available, the Fill Edges (Figure 7.6) tool. Fill edges does content aware fill on the white edges. It automatically clones and stamps from the surrounding image to fill the hole. This tool works quite well in skies, foliage and areas lacking specific structures and other more random textures. Sometimes, you can see doubling of objects near the edges. Most of the time, it does a good-enough job that you can crop out the artifacts on the corners and get a good result without having to crop your images too tightly.
My favorite approach is a combination of all these three tools to get the best compromise. You can see that here in Figure 7.7.
You can choose to crop at any time; however, Boundary Warp and Fill Edges can only be applied in the initial merge preview window.
Click Merge and Lightroom will merge the photos together and create a merged panorama. The resulting image is a DNG file that still contains the full dynamic range of the image.

7.6

7.7
Note that if you shot your panorama as a grid and encompassed more than a single row, you don’t do anything different. Simply select all the images that you want to use in the panorama and merge it just as we did here.
Here is the same panorama with the corrections from the previous chapter applied (Figure 7.10).
If you are curious, here are the settings I used in Figure 7.9. I also applied the Gradient filter to the sky and slightly turned down the exposure and the color balance. This is covered in the previous chapter.

7.8

7.9

7.10
Panoramas in Photoshop
There are a number of other applications that can merge panoramas, including PT GUI. I don’t have space to cover them all here, so I’m sticking to Lightroom and Photoshop, which is what I use anyway. Photoshop is great if the image is too distorted in Lightroom, if you don’t have Lightroom, or if you just prefer doing it in Photoshop. Here are instructions for making Panoramas in Adobe Photoshop.
Open the Images in Lightroom or Adobe Bridge (it comes free with Photoshop). If you are doing it in Bridge, here are a couple of steps to follow (Figure 7.11).
Select all the photos that you want to include in the panorama. Right-click a thumbnail and choose Open in Camera Raw.
In Camera Raw, we are going to apply the lens profile to reduce distortion (Figure 7.12).
- In the Filmstrip, select all the images by pressing Ctrl/ Command+A, or right-click a thumbnail and choose Select All. Whatever adjustments you make to an individual image are now going to affect them all.
- Click the Optics panel.
- Apply the lens profile.
- Check that it’s using the correct profile. If not, choose your camera from the options. If it says built-in, don’t worry about this step, as the profile is applied in camera.
- Click Done to apply the settings and return to Bridge.

7.11
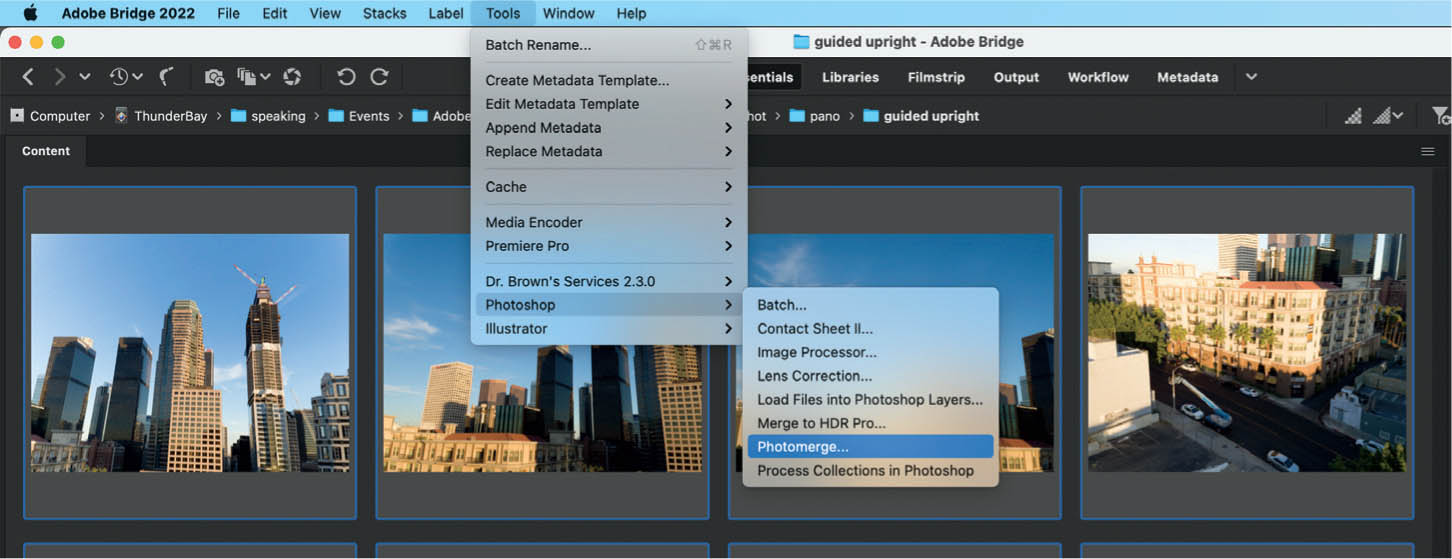
Time to pass the images off to Photoshop. From Bridge, choose Tools > Photoshop > Photomerge (Figure 7.13).

7.12
7.13
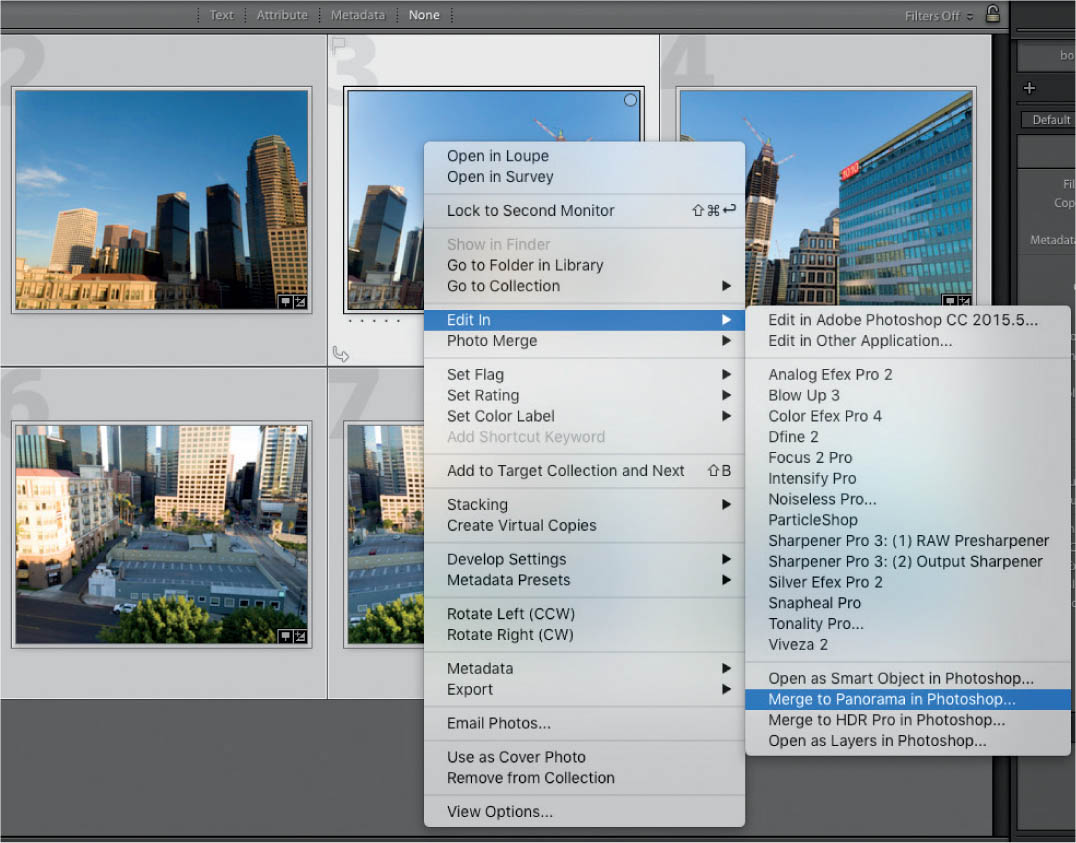
A great way to work is to start in Lightroom and hand off the photos to Photoshop to do the merging. Apply the lens corrections first in Lightroom, like we did in the previous tutorial. Then right-click and choose Edit In > Merge to Panorama in Photoshop (Figure 7.14).
7.14
It doesn’t matter if you start from either Lightroom or Bridge, the result is the same and they both open in the same tool in Photoshop.
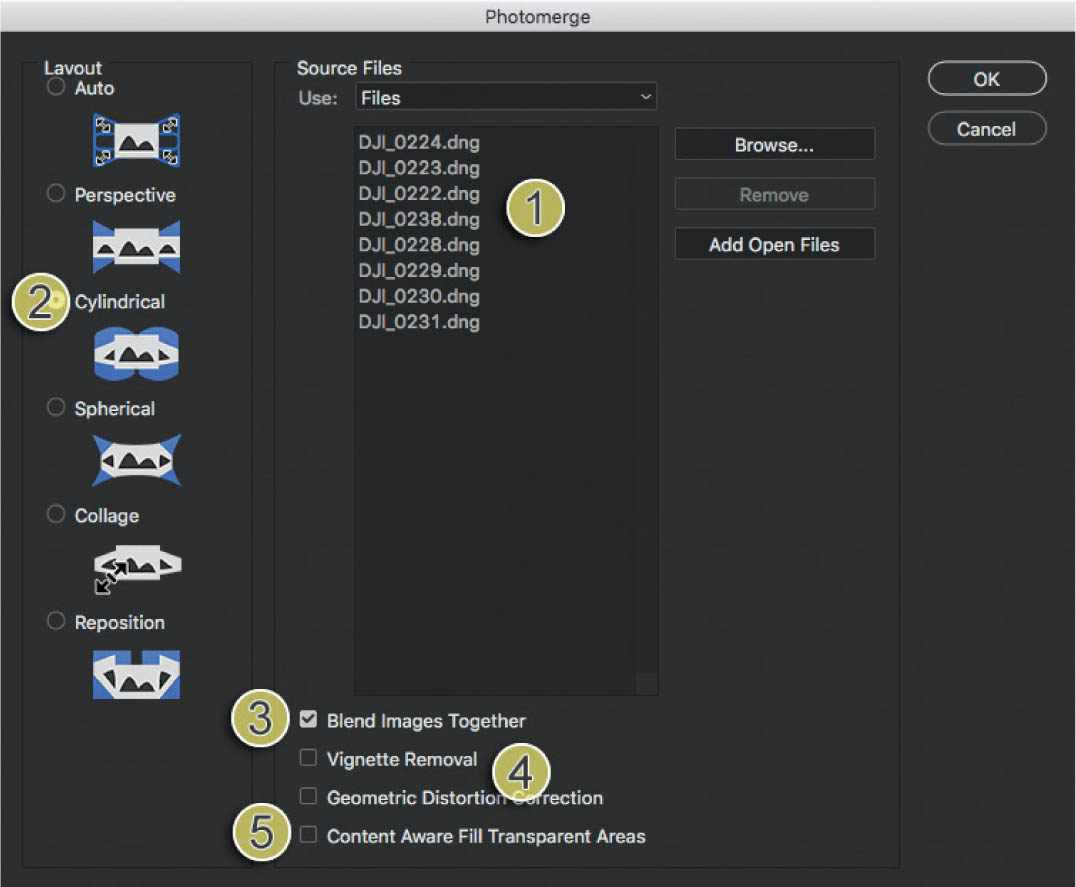
You will now see the Photomerge dialog in Photoshop (Figure 7.15).
- Source files show the images that will be included. Notice support for RAW files.
- Choose a projection method (layout). Cylindrical works best for the majority of stitches, or try Auto.
- You will see a few options. Blend Images Together is turned on; otherwise, the images will only be aligned and not masked together.
- To save time, Vignette Removal and Geometric Distortion Correction are turned off, because they were already done when we applied the Camera Lens profile. It won’t harm the image to turn these options on; it will just take longer to complete the stitch.
- Content Aware Fill Transparent Areas is a nice option to save you time, and we used it in the Lightroom Panorama previously. However, we are going to be doing some manual corrections, so we will leave it off because it’s pointless applying it at this stage of our workflow. Click OK to finish.
7.15
After a bit of a wait, Photoshop will complete the merging of all the different photos and you will see something that looks like a caveman rug with your panorama on it (Figure 7.16).

7.16
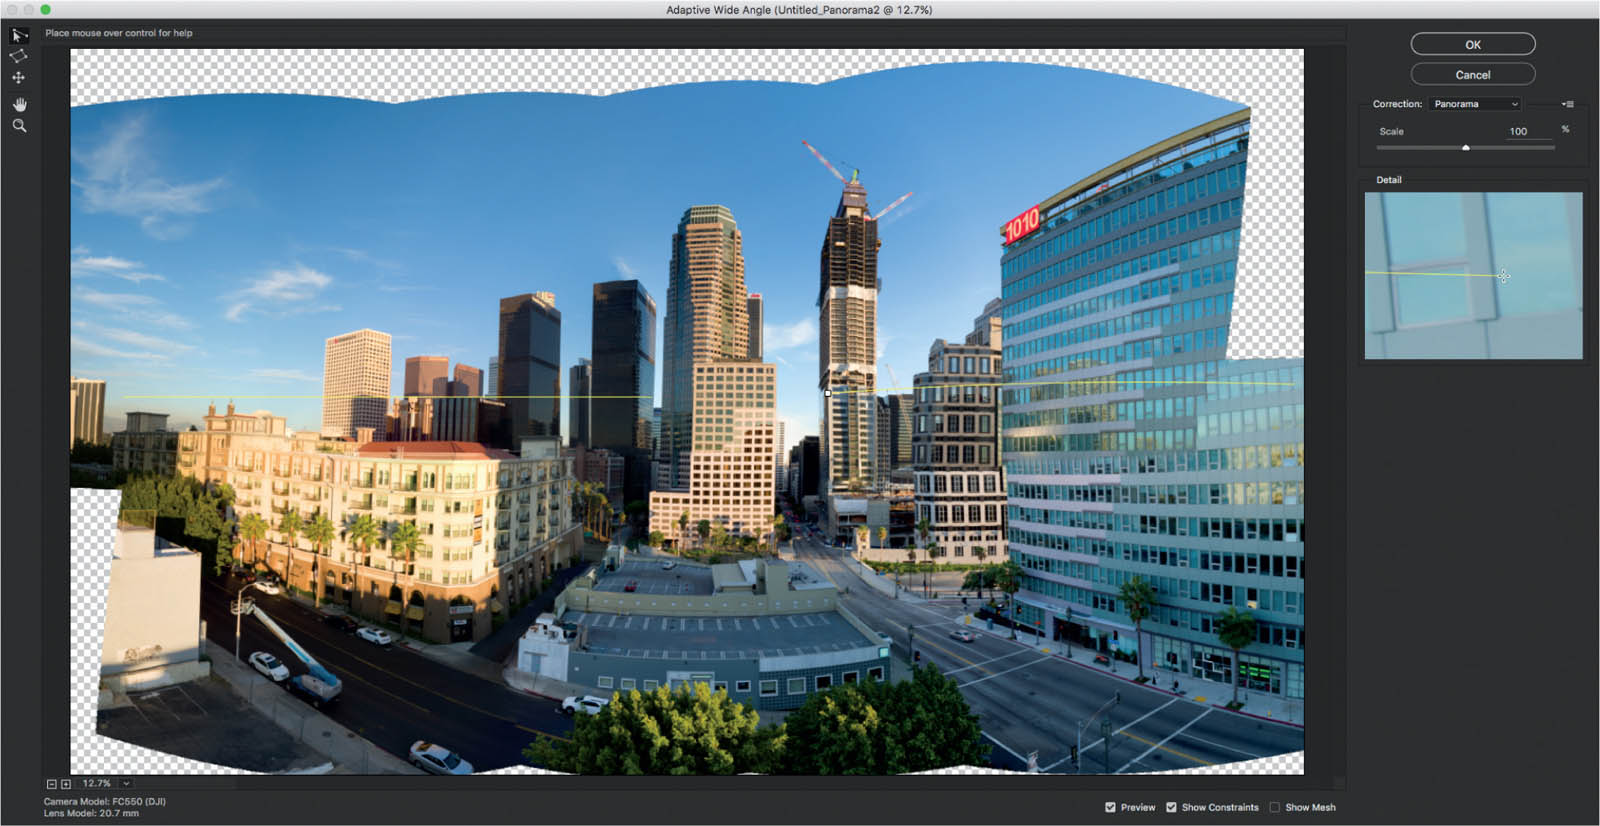
FIXING DISTORTION IN PHOTOSHOP
We are going to stretch our image around a bit and clean up the edges.
With all the layers selected, press Ctrl/Command+E to merge all the layers into a single layer (Figure 7.17).
Choose Filter > Adaptive Wide Angle to enter a tool that we can use to repair distortion and bending. It will automatically choose the Panorama option in the top right. (If you are bringing in a finished panorama from Lightroom for correction, try changing to the Fisheye option.)

7.17
To use this tool, drag the Constraint tool across bent areas to straighten them. It’s a bit of a balancing act, like multiple people jumping on a trampoline at once. Sometimes an adjustment will look good, and other times it will ruin the rest of the image; be prepared to frequently press Ctrl/Command+Z to undo. Here is how I like to approach the Adaptive Wide Angle tool to straighten images.
The first thing we need to do is create a level horizon (often, this is the only correction I do to a panorama) (Figure 7.18). On the left side, drag the Constraint tool across what should be the horizon line. Hold down the Shift key and the line will turn yellow. This means that it will force the pixels underneath to a perfectly horizontal line and the rest of the image will be rotated and warped to fit.
Repeat for the right side of the image. This will level the entire image. You can’t do it all in a single line; you have to approach it from the left and the right separately.
Now we can straighten key elements in the photograph. Be careful that you don’t overdo it, but take your time and have fun. Notice that the building at the bottom is bent. Drag the line out and you will see that it curves with the distortion (Figure 7.19).
7.18

7.19
I decided not to hold down Shift on this because I didn’t want to rotate the slope of the hill, just remove the bending. See the result in Figure 7.20.
- Notice that the horizontal lines display in yellow while the angled ones display in blue.
- Vertical lines can be set to a perfect 90 degrees by holding down Shift. Notice I straightened some of the buildings on this.
- I also straightened the top of the building on the right with another adjustment.
When you are satisfied with the result, click OK to apply. Try to get all your work done at once; going back into the Adaptive Wide Angle more than once doesn’t produce the best results.
To finish up the panorama we need to crop the final image (Figure 7.21). Choose the Crop tool and decide on the size of the final image. It’s OK to leave a few gaps on the sides and maybe the corners because we can fill these back up later. When you are happy with the crop, press the Enter key.

7.20

7.21
We need to fill up the gaps. Ctrl-/Command-click the thumbnail in the Layers panel to select all the transparent parts of the image (Figure 7.22).

7.22
Press Ctrl+Alt+I (Command+Option+I on Mac) to invert the selection.
We also need to expand the selection so that there is some overlap. Choose Select > Modify > Expand. Choose about 10 pixels (Figure 7.23).

7.23
Now, fill with the Content-Aware Fill. Choose Edit > Fill, and choose Content-Aware from the option (Figure 7.24).

7.24
All the edges should now be filled with a similar pattern and texture. If not, select those areas and re-apply Content-Aware Fill (Figure 7.25).

7.25
HIGH DYNAMIC RANGE (HDR) IMAGES
THERE IS A LIMITATION IN PHOTOGRAPHY—the dynamic range of the sensor. Dynamic range refers to how much of the visible spectrum can be captured on the sensor at once. Most of the time, this isn’t a huge issue. However, when you are shooting a high-contrast scene, such as a sunset, this becomes a problem. Just think of images that you have seen that look great but have a white blob in the sky where the sun should be. Figure 7.26 is one of my earlier images, and you can see that the sensor wasn’t able to capture enough information in the sky for there to be any visible details in the reflections on the left. Although this might have been acceptable a few years ago when aerial photography was rarer, it’s not as forgivable today.

7.26
This is particularly challenging for aerial photography, because you are often capturing a bright sky against a darker foreground, clothed in shadow. Here is the solution: Capture more than one photo, with each one having a different exposure to capture the highlights and shadows separately. Then, blend them together into a single photo. This single photo is called HDR, or high dynamic range, because it has more dynamic range than can be captured in a single photograph. I talk about this more and provide instructions on how to capture these images in chapter 4.
Typically, we would choose a correct exposure for either the ground or the sky for these types of exposures and then compromise in the rest of the photo. (A graduated ND filter can help with this issue, too.)
Figure 7.27 shows a correct exposure for the sky. There are lots of details in the clouds. But if you look at the foreground, almost all the detail is lost in the dark.
We make another exposure to capture all the details in the foreground (Figure 7.28), but the sky is now completely blown out, because the sensor can’t capture enough highlight detail at the same time.

7.27
The solution is to do AEB (auto exposure bracketing) and capture a series of images with different exposures. You can change the camera settings manually between shots to capture the full dynamic range of a scene on cameras that can’t do it automatically. Typically on my terrestrial camera, I do three exposures for an HDR capture: normal exposure, an exposure over by two stops, and an exposure under by two stops. The DJI app is preset to .7 stop brackets, so I usually go for the highest spread and capture AEB in five images.

7.28
Here in Lightroom, I have selected all five images in the Library module; this is the first step to making an HDR image (Figure 7.29). We can do the same thing in ACR after opening all five images from Bridge.
Right-click and choose Photo Merge > HDR (Figure 7.30).
You will see a preview and some options. If you didn’t achieve the expected result, turn on the Auto Tone option (Figure 7.31).

7.29

7.30

7.31
This last step is completely optional: You can turn off Auto Tone before merging. Even though it doesn’t do anything that isn’t reversible (it moves the sliders to what Lightroom considers the best starting point for image adjustments), if you prefer to do all the adjustments yourself, then turn it off (Figure 7.34).
Click Merge, and Lightroom will merge the photographs together to make a single DNG file with the information for all the photos together. You will see a progress bar at the top left (Figure 7.35).
The next step is to make some more adjustments. To avoid having to hunt for your newly merged HDR images, change the sorting in Lightroom to Added Order (Figure 7.36). You can scroll to the bottom and they will be the last images there.
And here is the unedited merged image (Figure 7.37).
You will now edit this image just like you would any other photo. The difference is that you will have a lot more detail to play with in the exposure, highlights, and shadows.
Move the Highlights slider all the way to the left to see the impressive amount of highlight detail in the clouds (Figure 7.38).
Here are some basic adjustments made to the image in Lightroom. As usual, you can see the settings in the Adjustments panel (Figure 7.39).

7.34

7.35

7.36

7.37

7.38

7.39
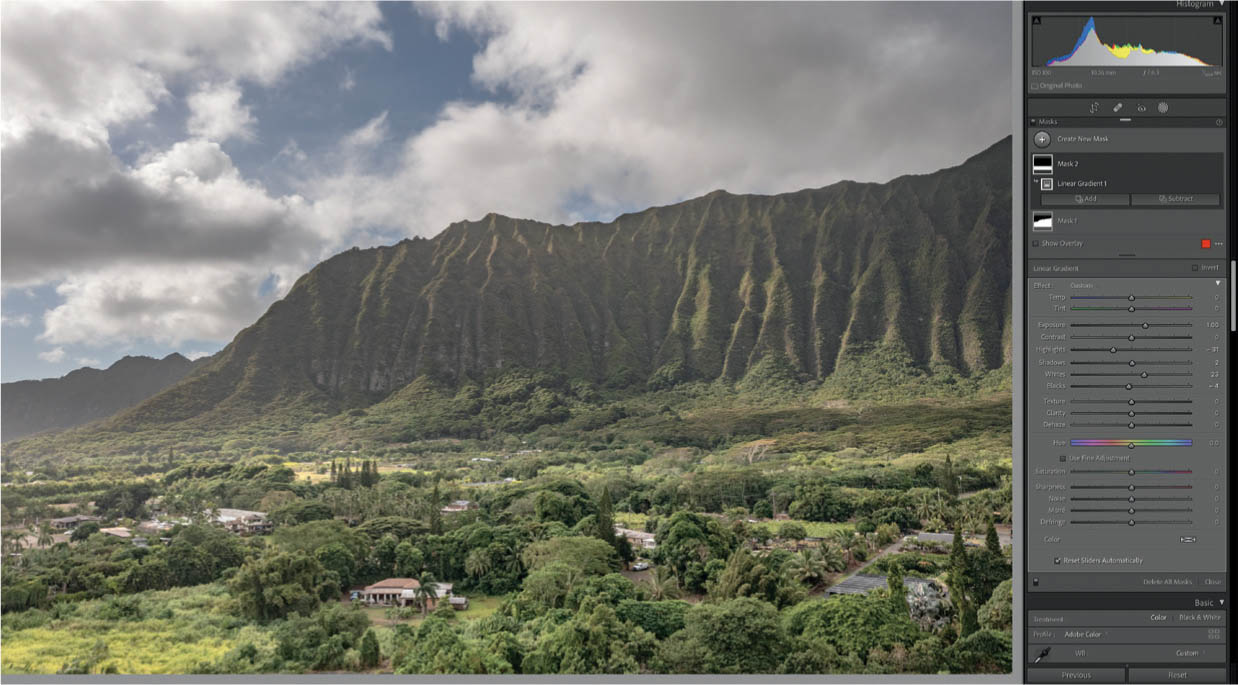
It would look nice if we could lighten up the foreground a bit more without lightening the sky. Because we are using HDR, we have lots of detail in the highlights and shadows to play with.
Let’s mask the foreground so we can adjust it separately.
Click the Mask button on the tool bar and choose Select Sky (Figure 7.40).
Notice the sky is selected (Figure 7.41) But we want the opposite.

7.40

7.41
See the three dots to the right of the sky mask? Click the dots and choose invert from the pop-up menu (Figure 7.42). You will see the foreground is now selected (Figure 7.43).
Make adjustments to make the cliffs pop more as shown in (Figure 7.44).
Just to show you can have even more control, such as lightening the foreground and not altering the cliffs anymore, click Create New mask and choose a gradient. Drag the gradient up to the edge of the cliffs (Figure 7.45).

7.42

7.43

7.44

7.45
And a few more adjustments to brighten the foreground (Figure 7.46). The final image is Figure 7.47.
7.46

7.47
HDR PANORAMA
ONE THING I GET A TON OF QUESTIONS ABOUT is how I do my HDR panoramas, which are a combination of HDR and panorama in the same image. This gives you a nice wide Panorama, with the dynamic Range of an HDR. These images can be quite stunning. I’m going to walk you through the entire process of producing these images. In chapter 4, I discuss how to shoot these images, and now I’ll show you how to put them together.
For this example, we will create a 24-Image HDR panorama (Figure 7.48). This is an 8-Panel Stacked Panorama. It consists of two rows of four panels each. The first four are covering the top half of the image and the additional are covering the bottom half of the image. Each Panel is a three-shot bracketed HDR capture. I have color coded each bracketed capture to make it easier to visualize. We are going to follow the process through and address potential issues along the way.
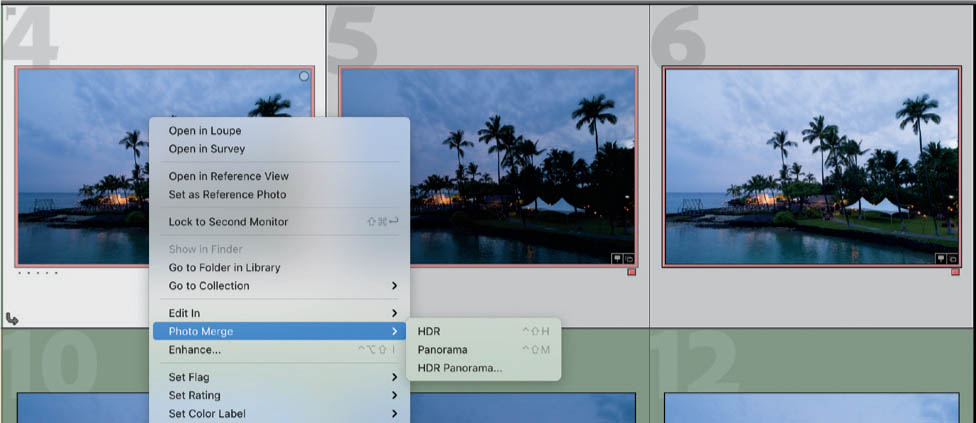
In Lightroom Classic (or Adobe Camera Raw) Select all 24 images. Right-click and choose Photo Merge>HDR Panorama.

7.48
Lightroom will open up the merge window and attempt to merge them together. This may take a little time, because it’s a complex process.
After some time, you will see the preview if all went well (Figure 7.49).
If you look closely, you can see some strange marbling in the sky (Figure 7.50). Most of the time, this won’t happen. Click Merge and Lightroom will create a new HDR Panorama.

7.49
7.50
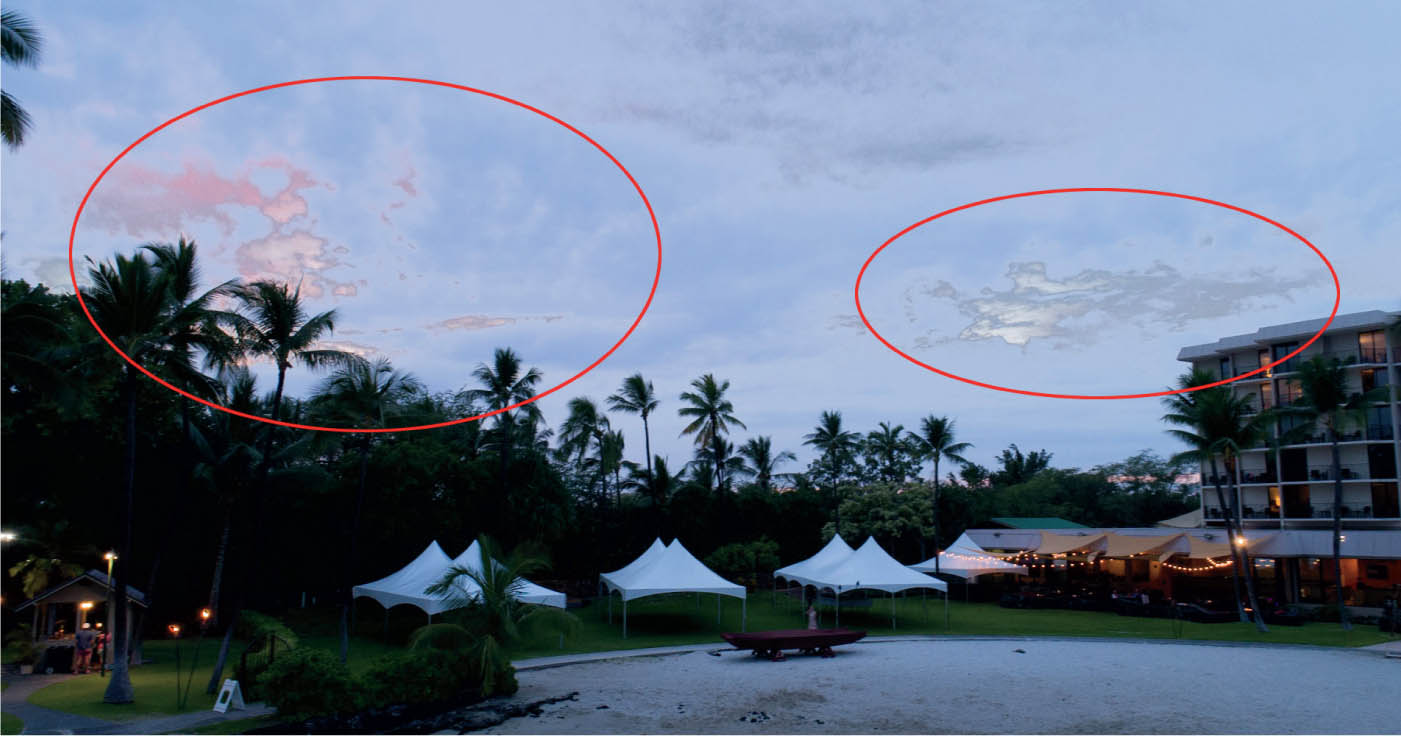
If we finish the process, you can see that the marbling in the sky isn’t the only issue. Look closely at the middle palm tree. Can you see a bright halo around it? These artifacts are caused by ghosting (Figure 7.51).
Because the HDR is a bracket of multiple images (three in this case, but could be five, or even two) they are blended into one. If there is any movement between the shots—blowing branches, fast moving clouds, waves, vehicles, or people moving though the frame—they won’t appear in the same position in all the frames. When they are merged, this position change may appear in only one frame. This creates a faint impression (like a double exposure) or some other artifact known as ghosting. Most of the time, you won’t have too much trouble with ghosting, but in this case, it’s causing an issue.
If you have an issue with ghosting, or the merge failed, it’s OK. Take heart, here is how to do the process in a way where we have more control.
The process is actually quite simple. The first thing you need to do is merge all the HDR images together in Lightroom/ACR. Then when you have the new HDR images, you just treat them like regular photographs and stitch them into a panorama. The trick is to do HDR first, and then panorama. Lightroom/ACR will enable you to merge together HDR images. It won’t work the other way around. This is a combination of the things we have already learned.
The first step is to merge each set of pictures into individual HDR images.

7.51
Select the first bracket of three images. Right-click and choose Photo Merge>HDR (Figure 7.52).
In the preview window, you can see the marbling problem (Figure 7.53).
Under Deghost Amount, change it from None to Low. Notice (Figure 7.54) that Lightroom fixes the ghosting and the image looks great now. Sometimes, you might need medium or even high, but always use the lowest amount you can.
7.52

7.53

7.54
Click Merge and the images will be merged and a new merged HDR image will be added to the group of images. Its name is appended with HDR and you can see a badge on the thumbnail indicating this image has been processed.
Now, we need to also merge each of the remaining brackets.
Here is a tip to speed things up when dealing with multiple HDR sets: Select the next three images to merge to HDR. Instead of going through all the steps we did in the previous HDR tutorial, use the keyboard shortcut Control+Shift+H (on Mac and Windows). This will put Lightroom into “headless” mode. It will merge the HDR images and skip the dialog. It will apply whatever settings were used the last time you used Merge to HDR. I suggest merging the first one the normal way (thus getting the settings that you want). In this case, we are using a low amount of Deghosting, Unfortunately, at the time of this writing you can’t assign deghosting to the full auto HDR Panorama, which is why we are doing it this way now.
Without waiting for the merge to complete, immediately select the next five images and press Control+Shift+H. (For a bigger image, continue doing this for each set.)
You will notice that at the top left of Lightroom, there will be a progress bar that shows you the multiple processes going on at once (Figure 7.55).

7.55
When Lightroom is done, the merged HDR images will appear in the grids. Rather than trying to cherry pick the HDR images, change the sorting order to Added Order to push the newly merged files to the end of the grid.

7.56

7.57
Select all the HDR images that you wish to merge into a panorama. Do this the same way you would select normal images if you were doing a regular panorama. Select the images, right-click and choose Photo Merge>Panorama.

7.58
Notice that Lightroom/ACR merges these HDR images with no problem. Also note that there are no issues with ghosting anymore, just a nice clean merge.

7.59
Crop, Fill Edges, or Boundary warp to remove the white edges (see the beginning of this chapter under Panoramas for an explanation of this). In this case, we chose to fill edges.

7.60
Merge and crop the ends for a nice composition.
7.61
To finish off the image, apply some basic adjustments to make the details pop. Figure 7.62 shows the settings and Figure 7.63 shows our final HDR Panorama. These images can be very large and look fantastic when printed as large panoramas and hung on a wall.

7.62

7.63
EXPOSURE BLENDING
ANOTHER WAY OF BRINGING BACK MORE DETAIL to your photos is to use Photoshop for layer masking. This method provides a lot of flexibility in editing.
Take two photos. The first one should be bright to show the shadow details; in this case, the rocks. Take a second photo to show all the details in the highlights, such as in the sky (Figure 7.64)
In Lightroom or Camera RAW, lighten up the bright image to see the details in the shadows. It doesn’t matter if the sky is getting too bright (Figure 7.65)

7.64
Select both photos, right-click, and choose Edit In > Open as Layers in Photoshop. In Bridge, choose Tools > Photoshop > Load Files into Photoshop Layers (Figure 7.66).

7.65

7.66
You will now see a new document in Photoshop with two layers. Make sure the brighter layer is on top. If there is a misalignment between the two layers, you can automatically have Photoshop Align them. Choose Edit>Auto Align and choose Auto (Figure 7.67).
Choose the top layer. Click the New Layer Mask icon in the Layers panel. This will create a layer mask (Figure 7.68). The goal is to paint into the layer mask with black. This will reveal the areas of the underlaying, darker layer that are currently hidden.
This allows us to paint back the brighter areas of the second photograph, thus blending the photos together (Figure 7.69).
Choose a soft-edged brush. Select black for the foreground color. Set your Opacity to about 50, Flow to 10.
If you are using a pressure-sensitive stylus such as a Wacom or Surface Pro, set pen pressure to opacity and flow.
Paint the sky and around the edges to darken the image and allow the cloud and water details to show through (Figure 7.70).
Figure 7.71 shows what the mask looks like after painting. Alt/ Option and click on the mask to view it by itself.

7.67

7.68

7.69

7.70

7.71
NOTE You can use a paintbrush and paint in the area by hand for a softer, more painterly look. You can mask the edges to help achieve a tighter look. Here, I used the Object Selection tool to isolate the rocks.
Make sure you select the actual Layer in the Layers panel and not the mask when making a selection. Don’t forget to choose the mask again when painting.

7.72

7.73
When you are satisfied with the masking, here is a way to unify the layers even more.
Choose the two layers in the Layers panel and press Ctrl+Alt+Shift+E (Command+Option+Shift+E on Mac). This will preserve the layers and create a new merged layer on top of the Layers panel (Figure 7.74). This is called a composite layer, or sometimes a stamp visible layer.
Choose Filter>Camera Raw to open the layer into Camera Raw and make some adjustments. Because both layers are now being adjusted as a single layer, it tends to smooth out the differences between the layers and create a more balanced, natural-looking result.

7.74

7.75
Dodge and Burn, Painting with Light and Shadow
One of the last things I like to do, right before sharpening, is dodge and burn. Dodging and burning come from the photographic darkroom, where light is selectively increased or blocked from the enlarger during the process of printing from a negative. Burning is when extra light is applied to certain areas of the image. This can be done by cupping the hand or cutting out a stencil. This will darken the area that receives the extra light (remember they are working from a negative).
Dodging is achieved by blocking light from part of the photograph with a card or shape on a wire. This area receives less light on the image and is therefore lightened or “dodged.” Although we are employing this technique to a certain degree, I am also using shading techniques from traditional painting and digital art to create a hybrid technique that I call painting with light and shadow.
When you look at an image, the darker areas seem to go away from the viewer, while the lighter areas seem to come forward. This adds a lot of dept to an image and makes it appear almost 3D.
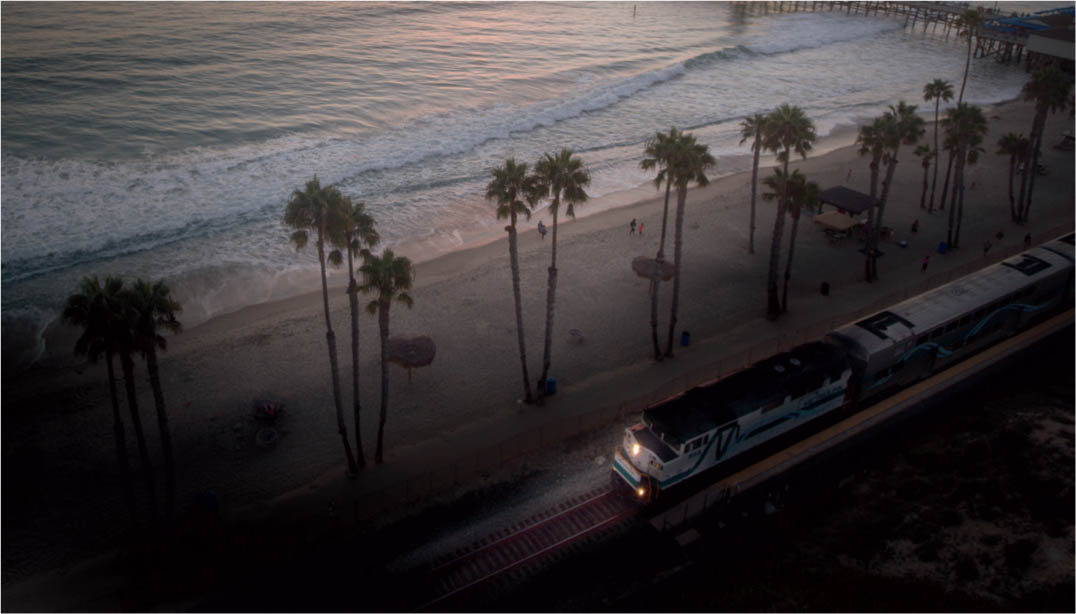
Let’s begin with an HDR image from a Mavic 2 Pro that is processed and ready (Figure 7.76).
While Holding down the Alt/Option key, click the New Layer icon. The Alt/Option key will invoke the dialog box, rather than just create a new layer.
Change the blend mode to Overlay. You will see the Fill with 50% gray option is available. Click the box to fill with 50% gray, which will be invisible because of the overlay blending mode. I have named this layer “Big.” We are going to do two passes. The “Big” is a traditional dodge and burn; the second pass will be to add dimension. You will see both approaches applied.

7.76

7.77

7.78

7.79
The last step in the setup is to prepare the brushes. Choose the brush tool.
Press the D key to reset the foreground and background colors to black and white.
Make sure you are in Normal blending mode. Change the Flow to 10% so the effect happens more slowly, so we can build it up. Turn Brush smoothing to 0 or you will find your brushes lag when painting.
If you are using a Wacom, Surface, or other pressure sensitive pen tablet, choose the Window>Brush Settings. Turn on transfer and set Flow and Opacity jitter to Pen Pressure (Figure 7.80).
This will allow you to shade the effect by varying how hard you press, like you would with a pencil.
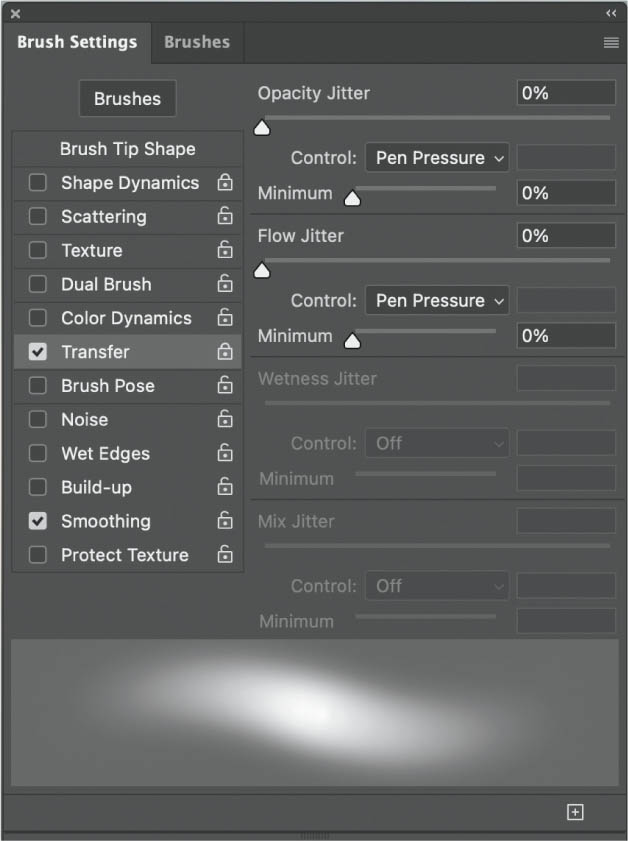
7.80

7.81
Set the foreground color to black and we will start by painting around the edges of the image to darken it (Figure 7.81).
Press the X key to choose white and paint gently over the subject area to lighten it slightly. We are directing the viewer’s eye into the image with this hand-painted vignette effect (Figure 7.82).

7.82
OK, let’s get into the good stuff. Create another layer in Overlay mode (as we did before) and name it small S for shadow (Figure 7.83).
This time paint with black to darken the areas surrounding the train.

7.83
Change to white and paint some light coming out of the headlight. I would normally use different layers for lightening and darkening, but I want the light to replace shadows, so it works on the same layer in this case (Figure 7.84).
If you look at the layer in normal blending mode, you can see where we have painted. The gray will be invisible; the darker and lighter areas affect the image (Figure 7.85).
7.84
7.85
Let’s add some highlight area that will add the depth (painting with light). Create a new layer as before in Overlay mode and name it small h for highlights (Figure 7.86).

7.86
Set white as the foreground color and paint your highlights. See how it adds so much to the image? (Figure 7.87)
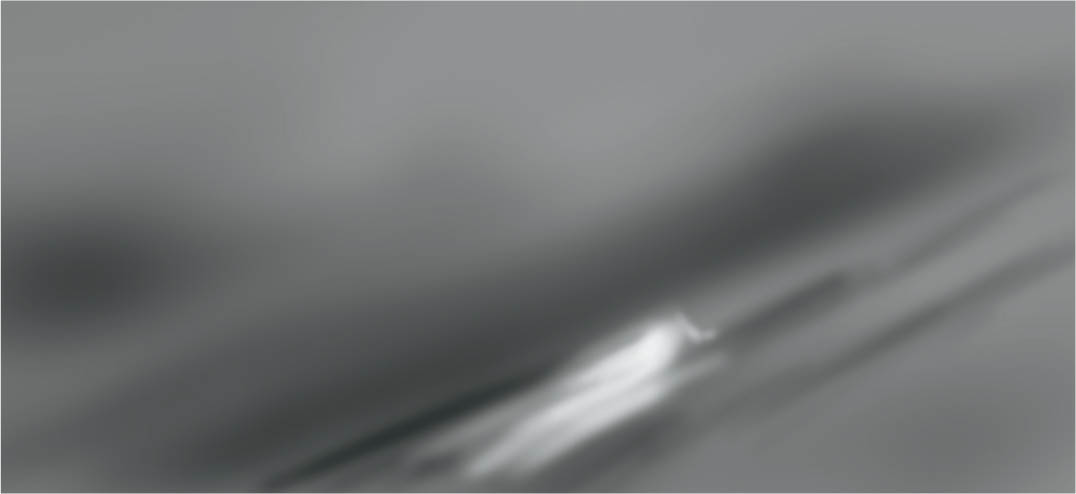
Just for reference Figure 7.88 shows where we have painted with white. If you overlay it over the image in Figure 7.89, you can see where I painted.

7.87
7.88

7.89
Removing Distractions
Let’s do some distraction removal. A number of tools are capable of performing this task, such as the Clone Stamp tool or the Content Aware Fill. In this case, we are going to use the Patch tool. The Content Aware Patch tool works like the Content Aware Fill tool, but it will work with a Smart Object, so you don’t have to rasterize your layer to work on it. This makes it easier to make changes and also preserves the quality of the image.
Here is an image (Figure 7.90) that is being cropped. Notice the transparent areas in the corners, as well as the distractions such as the flare. All manner of objects can be removed and areas patched using the following tools.

7.90
You will notice that this image is a Smart Object. Look in the Layers panel and you will see a badge. Here is how to apply nondestructive Content Aware Fill to a Smart Object (Figure 7.91).

7.91
- Create a new, blank layer above the Smart Object.
- Choose the Patch tool.
- Select Content Aware as the method.
- Turn on the Sample All Layers option.
- With the Patch tool, make a selection around the blemish or area to remove.
- Drag the selection to a similar area that you would like to fill.
When you release your cursor, the area will be healed. The patch is on a separate layer, so you didn’t have to rasterize your Smart Object.
Use the Patch tool to fill in the transparent areas left over when we cropped this image. Also use it to remove the lens flare in the bottom left of the image. Continue to use the same blank layer to patch the image. If you hide the bottom layer and look at the patch layer by itself, you will see that all the repairs are on a separate layer (Figure 7.92).

7.92
If you look at the image with both layers on, you will see how nicely the patch tool hid all the blemishes and areas of transparency (Figure 7.93).
One thing you have to be careful about is making adjustments to the Smart Object layer. If you make adjustments to that and not to the patches, they won’t match anymore. What we need to do is combine them.

7.93
High Pass Sharpening
Let’s sharpen this image, but only sharpen the areas closest to the viewer to really make it pop. High Pass Sharpening is powerful because it’s on a separate layer, so it can be turned on or off, or masked. Also, the intensity of this effect can be adjusted with the layer opacity.
If the top layer is a composite layer, duplicate this layer. If not, create a composite layer on top (Ctrl+Alt+Shift+E on Windows or Cmd+Option+Shift+E on Mac).

7.94
Change the blend mode to Overlay (Figure 7.94). The image will look a bit strange for a moment, but it’s just a transitional appearance.
Choose Filter > Other > High Pass (Figure 7.95). Notice the image looks normal again.

7.95

7.96

7.97
Adjust the Radius to create the sharpening effect—usually between 1 and 4 works best (Figure 7.96). Look at your image to see how much sharpening looks right. You want the details to pop, but you don’t want halos or for the photo to look unnatural. The amount of sharpening will depend on the resolution of the image and the intended medium. For online, you will choose a little less sharpening than you would use for print work.
Here is the resulting image with sharpening on the top layer (Figure 7.97). One of the powerful things about High Pass Sharpening is the ability to sharpen selectively using layer masks. You can see the mask on the top layer in Figure 7.98 that the areas painted black do not receive sharpening. This allows you to sharpen the foreground while keeping the background soft. This adds more depth to the image.

7.98
SPECIAL EFFECTS
SOMETIMES YOU WANT TO DO THINGS that are just fun and create something a bit different. These are special effects. Let’s a have a look at some of my favorite effects.
Sky Replacement
Sometimes you get to the location at the right time: the light is doing exactly what you want and you capture what is almost the dream shot. Maybe everything is spot on except the sky. Either you have a gray marine layer, or perhaps there are no clouds at all and the sky is bland. When I’m local, I look up at the sky before heading to my location to see if it’s going to be any good. When you are traveling or on a deadline, you can’t always wait for the right conditions. Photoshop has a great tool to replace the sky in photos and it works quite well.
First let me show you how it works, then we will dig into the options a bit deeper.
Begin with your image (Figure 7.99). It’s a good shot, the sun is even setting perfectly, but the sky is really boring.

7.99
Choose Edit > Sky Replacement (Figure 7.100). Choose a Sky from the thumbnails, or add your own (we will cover that in a moment). You will see a preview of the new sky. Click OK to apply and you have changed the sky, as easy as that.
Let’s look at the options available to us.
You will see all the different layers in the layers panel. All of these settings can be adjusted in the Sky Replacement dialog box. Once the adjustments are applied then you can change any of the settings in the layers.
The settings are broken into three areas: the sky, the foreground, and the transition (Figure 7.101).

7.100

7.101
TRANSITION
Shift Edge: move the edge up or down so your horizon blends where it should.
Fade Edge: adjust the haze on the horizon.

7.102
SKY ADJUSTMENTS
Brightness and Temperature: make the color and lightness match the original image.
Scale and Flip: match the lighting direction and scale.
FOREGROUND ADJUSTMENTS
Color Adjustment: match the color with the color of the sky.
Lightness Adjustment: change the brightness of the foreground.
Lighting Mode: either lightens or darkens the transition.

7.103
In this chart (Figure 7.104), I have mapped the settings in Sky Replacement to the results in the Layers panel, so you can see what each adjustment does. You won’t be able to see the layers and the Sky Replacement at the same time while working in Photoshop. I broke it all out so you can see under the hood and understand exactly how it works. I hope this is useful for you.

7.104

7.105
Tilt Shift
The tilt shift effect is a lot of fun. This can be used in a practical way to bring the viewer’s eye into a portion of a photo and provide some of depth of field. Usually you end up with a very large depth of field with wide-angle lenses, and everything is in focus. It’s useful to cut through the clutter with some simulated depth-of-field blur. Let’s apply the effect to this image. This image is a vertical panorama at Balboa Peninsula at Newport Beach, California (Figure 7.105).
Right-click the image thumbnail and choose Convert to Smart Object. (The filter can be applied directly to a layer if you choose; we are using a Smart Object because that will make it re-editable.) (Figure 7.106)

7.106
Choose Filter > Blur Gallery > Tilt Shift, and you will see the blur gallery at its default state, as you see here (Figure 7.107).

7.107
You can create a tilt shift lens effect by dragging the different lines. You will get a strip of focus with blur on the edges; this can also be used to make a photograph look like a miniature model.
- The Blur slider controls the amount of blur outside the lines.
- The focus area is between these two lines and can be dragged wherever you like. It can also be rotated.
- Fall off. The blur will be blended between these dashed lines and the solid lines. Everything outside the dashed lines has a uniform blur of the amount that you set in step 1.
When you are happy with the result, click OK to apply to your Smart Object (Figure 7.108).

7.108
And the result looks like Figure 7.109.

7.109
Because we are using a Smart Object, we can double-click the name of the filter in the Layers panel to open the settings. You can now change the settings.
In this next example, we are going to bring the lines closer together for more of a miniaturization effect (Figure 7.110).

7.110
If you look at the ferry, it now looks a little like a toy. This works because the blur looks like something you would see from a macro lens; it’s much quicker than something you would see on a life-sized photo and thus fools the eye into thinking it’s looking at a small-scale model (Figure 7.111).

7.111
Figure 7.112 is another example.

7.112
360-Degree Tiny Planet
Another one of my favorites is the tiny planet. I remember doing this effect before I was using drones. As soon as I started flying a drone, I knew this would work really well. I’m seeing quite a few people trying this effect now. Here is how to get it.
Start with a wide panorama. Technically, you should be shooting 360 degrees, all the way around. However, if there is ocean on one side, you can skip a few panels and no one will be the wiser; actually, it will be a more interesting planet. Make sure to fly lower so that some of the features stick up above the horizon, or your planet will look flat and boring (Figure 7.113).
Although we could eagerly jump in and make our tiny planet right now, there is a little trick we should do first; this will ensure we don’t get an unsightly seam in our planet that will take a long time to fix.
Make a selection on the side that shows a horizon. Use the Rectangular Marquee tool for this (Figure 7.114).
Press Ctrl/Command+J to copy this selected area to a new layer. We will call this our “strip” for clarification.

7.113
Holding down Shift (to keep it aligned), drag the copied strip all the way to the other side of the image. Zoom in nice and close, so that you can align it perfectly with the edge (Figure 7.115).
We now need to flip this layer horizontally, so that the edges will match later. Press Ctrl/Command+T for Free Transform. Right-click and choose Flip Horizontal (Figure 7.116).
Create a layer mask on the strip by clicking the Add a Layer Mask icon in the Layers panel (Figure 7.117).
Choose the Gradient tool and a black-to-white linear gradient. Make sure the blend mode is set to Normal and that Opacity is all the way up to 100. Drag the gradient in the strip from left to right; the copied strip should now seamlessly blend into the main image (Figure 7.118).
Now flatten the layers.

7.114

7.115

7.116

7.117

7.118
Now it’s time to make the tiny planet! Choose Image > Image Size. The goal here is to transform the image into a square. Make sure that you are reducing size, and not increasing it, or the image will look soft and pixelated. I made this one 3000 x 3000 pixels (Figure 7.119).

7.119
Now you have a square image; it looks weird at this point, but that’s OK. Make sure to rotate this 180 degrees so that it’s upside down. Choose Image > Image Rotation > 180 (Figure 7.120).

7.120
Choose Filter > Distort > Polar Coordinates. Choose the Rectangular to Polar option (Figure 7.121).
Figure 7.122 shows your tiny planet effect. Pretty neat, huh?

7.121

7.122

7.123
Perform some cleanup work. In this case, I rotated the planet around. I also chose to crop out the extra stuff on the edges. Sometimes, you can use the Clone Stamp and Content Aware Fill tools to fill up the edges with more of the outside texture. It’s entirely up to you.
Phew! That was a lot of information to get through in one chapter. This chapter and the preceding one provide a great jumping-off point for you to get started making amazing aerial images. There are a ton of techniques in these pages. This book isn’t intended to be a guide to using Photoshop and Lightroom, and there are already plenty of good books and videos on basic Photoshop and Lightroom by Rocky Nook and at PhotoshopCAFE.com. This book is a survival guide for aerial photography, and I included the workflows and techniques that I use every single day on my aerial photographs.
Next up, we will take a brief look at working with aerial videos.