
CHAPTER 4
Your Cider Room

For the home cidermaker, the equipment and ingredients you need to stock your cider room to produce that first—or fiftieth—batch of cider are simple, inexpensive, easy-to-find, and don’t take up much room at all.
At Poverty Lane Orchards, the cider room is an enormous barn with a concrete floor. It is home to a cider press, 275-gallon (1,041 L) plastic tanks of fresh apple juice, towering stainless-steel tanks, and old oak barrels. A table in the middle of the room is piled high with cider bottles, both full and empty, and notebooks filled with handwritten tasting notes. In a closet just big enough for two, is a chemistry lab’s worth of glass beakers and tools to measure the characteristics too subtle or important to be left to taste alone. A forklift might rumble by.
Don’t worry: Your cider room doesn’t need a forklift.
WHERE TO MAKE CIDER
You can make cider almost anywhere—but your decisions about where to make your first batch of cider can affect the final product.
Small-scale cidermaking doesn’t require a lot of space. A five- or six-gallon jug (19 or 23 L) typically takes up less than one square foot (929 cm2) of space (you will be using two) and the other cidermaking equipment you will need for your first batch is minimal. Serious cidermakers dedicate a “cider room”—perhaps just a portion of the garage—to their batches. Storing all your cidermaking supplies together like that is convenient, but not necessary.
The most important thing to consider when choosing a place to make cider is temperature.
Temperature
The yeast you will use to ferment your juice and produce cider is temperature sensitive. When the yeast is first introduced into the juice—a process called “pitching”—and for the first several days of the fermentation process, the batch is best stored some place with a consistent temperature of 65°F to 70°F (18°C to 21°C). The yeast will multiply quickly and grow strong at this temperature.
After a few days, when the mixture is bubbling steadily, you will move the batch to the coolest spot you can find for the rest of the fermentation. The cooler temperatures slow the fermentation process, which preserves more of the fruity aromas and flavors of the juice. The fermentation will continue, slowly, at temperatures as low as 35°F (2°C), but most yeast prefers a home that is 40°F to 60°F (4°C to 16°C).
Sometimes this is as simple as starting the batch near your furnace and then moving it to a distant corner of the basement.
Once you have moved the batch to a cool location, it’s best to leave it undisturbed until the final steps of the cidermaking process. If, however, the temperature of this cider room suddenly changes—if for instance, your cider room is the rarely heated spare bedroom but you suddenly have houseguests—relocating to another cool space is preferable to overheating the batch.
If you can’t find any cool place to store the batch as it ferments, it might be time to reconsider your home cidermaking plans: Would you have more options at a different time of year? Do you want to share the project with a friend who has a better spot for a cider room?
EQUIPMENT
Whether experienced or novice, the cidermaker doesn’t need a lot of expensive equipment to make great cider. Buy the following basics from a local or online winemaking or home brewing supplier.
Containers
For your first batch of cider, you will need two containers. The first container is for fermentation. The second (slightly smaller) container is for storing the cider for aging or drinking.
The best choice for the home cidermaker is a glass carboy. A carboy is simply a jug with rigid sides and a narrow neck and mouth. They are available from any home brewing supplier in a variety of sizes, in either plastic or glass. Both materials are suitable for home cidermaking, but a glass carboy is often preferable because it is easier to clean. All carboys are transparent, and will allow the cidermaker to observe the fermentation process better than an opaque vessel.
Some home cidermakers choose to ferment cider in a bucket, also available from a home brewing supplier. Great cider can be made in a bucket, but the process is more prone to error.
The shape of the carboy is its advantage. You’ll fill the first carboy almost completely with juice. Because the neck of the carboy is narrow, only a limited amount of juice is exposed to air. In the wide bucket, a much larger amount of juice is exposed. During the fermentation process, the carbon dioxide produced by the yeast forms a protective layer over the developing cider, preventing the cider from coming in contact with oxygen, but when fermentation is complete, the carbon dioxide dissipates, leaving the exposed cider vulnerable to oxidation. The cider in the bucket, with its large surface area, is more at risk.
This same principal explains why you want a smaller, second carboy for storing the cider. When you transfer the cider from the first carboy to the second, you will leave behind the lees—the remnants of the yeast and fruit solids. That means that the volume of cider produced will be less than the volume of the original juice; plus, you will want to taste and evaluate your cider at this point in the process. Because you always want to fill the carboy to the neck when storing finished cider, the second carboy must be smaller than the first.
Glass versus Plastic
Most home cidermaking equipment is available in both plastic and glass versions. It’s the cidermaker’s choice. Plastic equipment can be more durable, but glass has the advantage of being easier to clean and often higher quality.
When choosing between plastic and glass, consider the tool’s use. Plastic is perfect for easily broken tools such as a graduated cylinder, while a glass container is often preferable for fermentation. A glass container allows you to observe the batch throughout the process.
It’s important to note that there are many different types of plastic. Some, such as the low-density plastic you find sweet cider packaged in, are not good for storing cider. Others, such as the high-density plastic used to make food-grade buckets, are suitable.
 CIDERMAKING TIP
First-Batch Shopping List
• One 6-gallon (23 L) glass carboy
• One 5-gallon (19 L) glass carboy
• Two carboy bungs, one solid and one bored
• Airlock
• Plastic tubing
• Thermometer
• Narrow-range litmus paper
• Hydrometer, measuring specific gravity
• 100-milliliter graduated cylinder
• Plastic crate
• Empty plastic jug
• Bottles and seals, for bottling
• 6 gallons (23 L) of the best apple juice you can find
• Campden tablets
• Red Star Pasteur Champagne yeast or Lalvin DV10 yeast
• Yeast nutrients, optional
• Carboy brush

All the equipment you will need to make cider: 6-gallon (23 L) and 5-gallon (19 L) glass carboys (A), Carboy brush (B), Empty plastic container (C), Carboy bungs (D), Airlock (E), Plastic tubing (F), Hydrometer (G), Thermometer (H), Litmus paper (I), Campden tablets (J), Graduated cylinder (K), Bottles and seals (L), Yeast (M), High-quality apple juice (N), Plastic crate (O)
Carboy Bung
A bung seals the juice in the carboy. You will need two bungs, one solid one and one bored with a hole through the middle for the addition of an airlock. A bung can be made of rubber, silicon, or cork. The only real requirement is a tight fit in the mouth of the carboy.
Airlock
An airlock is used during the fermentation process to let carbon dioxide produced by the yeast escape from the carboy while preventing air from entering. There are two main types of airlocks: an s-shaped airlock and a three-piece airlock. Both function similarly, with water added to the airlock, allowing the carbon dioxide to bubble out, but sealing the carboy against oxidation.
Plastic Tubing
Basic flexible food-grade tubing, available from any wine or home brewing supplier or your local hardware store, is needed to transfer the fermented cider—and not the lees—from the first carboy to the second carboy.
Thermometer
All you need is an inexpensive glass lab thermometer. You need an accurate temperature reading at several steps in the cidermaking process, but there’s no need to measure the temperature to the decimal place, so you don’t need a fancy electronic thermometer.
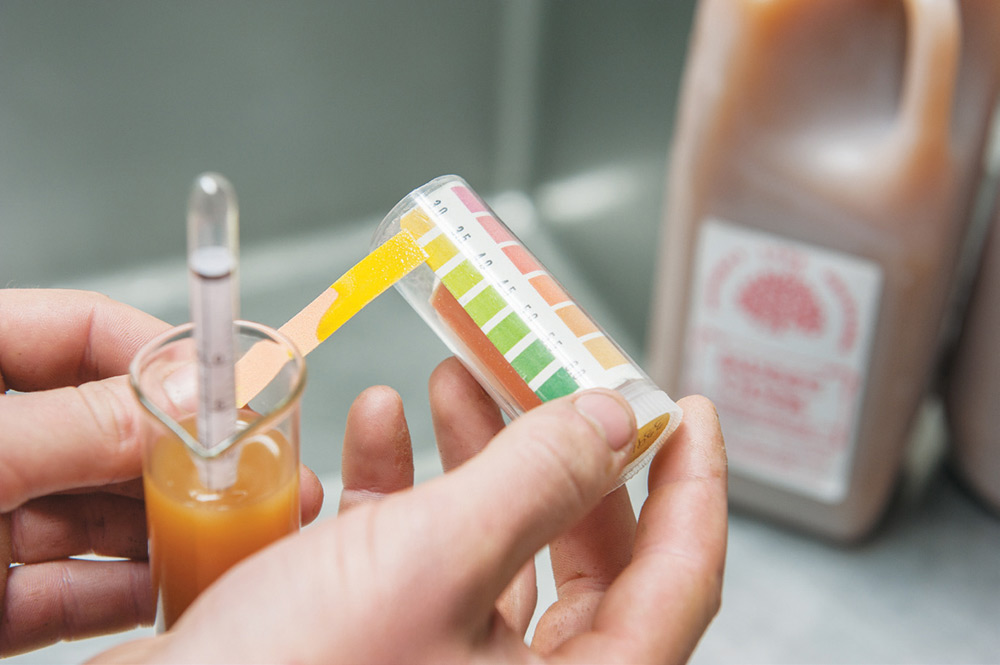
Narrow-Range Litmus Paper
Measuring the pH—or acidity—of your juice is an important part of the cidermaking process, but you don’t need to buy a pH meter. A pH meter can be expensive and require maintenance and calibration. Simple, inexpensive, narrow-range litmus paper will measure the pH effectively. Look for litmus paper that focuses as closely as possible on pH between 3 and 4.5. Litmus paper that measures a large range won’t be sensitive enough to allow for an accurate reading.
Hydrometer and Cylinder
A hydrometer and a graduated cylinder are essential to measuring the amount of fermentable sugar in the juice. The best source for an inexpensive hydrometer and cylinder is a home winemaking supplier. When selecting a hydrometer, you want to look at the measurement scale. Some will measure specific gravity, others will measure brix, and still others will measure both. These are just different scales—like Fahrenheit versus Celsius—for measuring the same thing. If your hydrometer measures in one scale and your cider books explain the process in another, you have some math to do. In this book we use specific gravity.
Other Equipment
There are some simple household items that will make the cidermaking process easier for you: a plastic milk crate and a clear plastic jug. A milk crate is typically the right size to hold a glass carboy. Place the carboy in the crate to make it easier to carry and to prevent it from banging against anything, such as a concrete cellar floor. A clear plastic or glass jug will be helpful when transferring the juice and cider between containers.
When you are ready to bottle your cider, you will also need bottles—this can be anything from beer or wine bottles to growlers—and something to seal them with.

INGREDIENTS
Apples are the most important ingredient in your cider (see chapter 3)—but sulfur dioxide, yeast and, optionally, yeast nutrients, will improve the final product.
Sulfur Dioxide
Sulfur dioxide, also known by its chemical formula SO2, is used in cidermaking as an antimicrobial agent and an antioxidant. It is typically added twice in the cidermaking process: first, before the yeast is added to discourage the development of undesirable yeast or other organisms, and later, when the fermentation is complete to prevent oxidation and malolactic fermentation.
The practice of using sulfur dates back centuries, when sulfur was burned in cider barrels. Today, Campden tablets, which are made of potassium metabisulfite, are used by home cidermakers to add sulfur dioxide to the cider. They can be purchased from a home winemaking supplier.
Yeast
Yeast is essential to the fermentation process. Without it, your juice will never become cider. Although some cidermakers rely on natural fermentation—utilizing the yeasts on the apple skins or in the air and on the surfaces of the cider room—it can be an unreliable method, especially for the novice cidermaker. Most cidermakers choose to treat their juice with sulfur dioxide to eliminate the natural yeast, and then inoculate with a yeast specifically designed for making cider or wine. The best yeasts for cidermaking are tolerant of sulfur dioxide, forgiving of minor temperature changes, and proven to be strong enough to ferment the cider to full dryness.
There are numerous options when it comes to yeast. Each experienced cidermaker swears by a different strain or brand—or several yeasts combined—an allegiance that comes after much experimentation. Some yeasts impart specific flavors or other characteristics to the cider, but for the purposes of your first batch of cider, choose a strong yeast that ferments cleanly, allowing the flavors of the apples to shape the cider. Farnum Hill Ciders are made using Lalvin DV10 and Red Star Pasteur Champagne yeast (which, despite its name, is not for making sparkling wines). Both are known for strong fermentations, even in less-than-ideal circumstances, and they have neutral effects on the flavor and aroma of the finished cider. These yeasts are available from winemaking suppliers.
Yeast Nutrients
It is not essential to add yeast nutrients, but they can contribute to a healthy, strong fermentation, which is the best defense against the development of unpleasant aromas and flavors. The yeast is gobbling up the sugar in the juice and converting it to alcohol and carbon dioxide, but yeast needs other nutrients, such as nitrogen and thiamine, to remain healthy. You can use any brand of yeast nutrient you find at winemaking and home brewing suppliers.
BEST PRACTICES FOR SANITATION
Cleanliness is important, but maintaining your cidermaking equipment isn’t difficult. Hot water is the number one option for cleaning your tools. (Don’t use scented detergents.) There are other solvents available, but they are rarely necessary. If you do choose to clean with something such as sodium percarbonate, soda ash, or caustic soda, follow the package directions and safety precautions carefully. The best rule of thumb is to do the best cleaning job you can without going overboard. Sight and smell will typically tell you if you’ve done a thorough job or not.
Cleaning a Carboy
A carboy, with its narrow mouth, can be the most difficult piece of cidermaking equipment to clean. A glass carboy makes your job easier because smooth glass is easier to clean and because you can see the inside surfaces of the container. As with all of your cidermaking tools, hot water is typically sufficient for cleaning, unless your inspection of the container reveals something especially gross.
A flexible carboy brush can be helpful in cleaning every surface of the carboy with hot water. A bottle-washing attachment for your sink is another option. Often sold by home brewing suppliers, this tool directs a jet of hot water into the bottle or carboy.

 NOTES FROM THE CIDERY, STEVE WOOD
A Commercial Cider Room
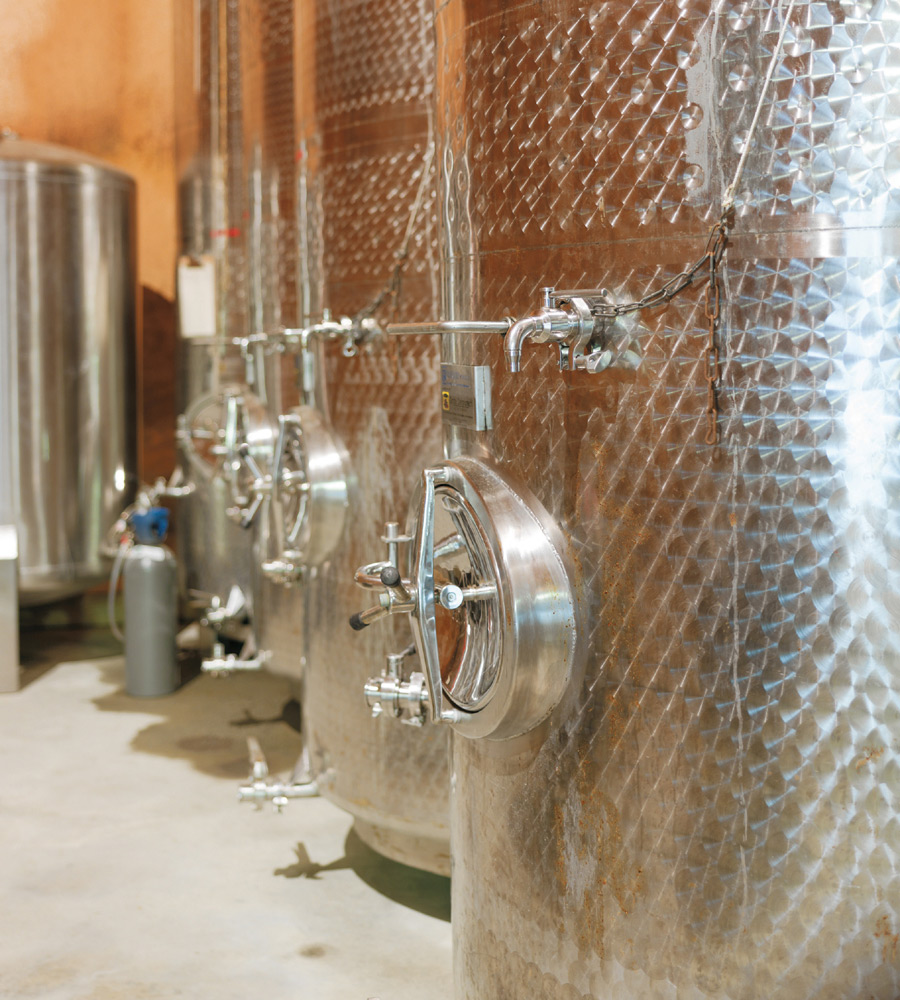
We store and pack apples and make cider in barns that were originally built for cows and milk. The first of them was built in the late-eighteenth century. In the early 1980s, after years of adapting our work to the buildings, we began to adapt the buildings to accommodate our work. We poured concrete, raised ceilings, moved buildings, all in the effort to pack and store apples and make a little sweet cider on the side. Oops.
By the mid-’90s, we had begun to get more serious about real cider and less hopeful about packing apples. The buildings we’d rejiggered for handling apples were all wrong again when it came to cidermaking—small floor drains, perfectly flat floors, high ceilings (for stacking apple bins 22 feet [6.7 m] high), and no provision for warming or cooling large volumes of liquid or getting water quickly to an indoor drain. We became squeegee masters.
Every cidermaker deals with some version of our problems: temperature, space, and water.
The other day it was 18 degrees below zero (–28°C) here in northern New Hampshire. We couldn’t clean barrels on the loading dock or do anything else with liquid out of doors. The heated area of our barns is too crowded with tanks and barrels to wash indoors, and we’d never get the rinse water across our flat floors to our tiny drains anyway. We had to wait for a warmer day to work with the barrels.
It’s a good thing we like the results of slow, cool fermentations, because I’m not sure what we’d do if we didn’t. We use yeast that ferments reliably to dryness regardless of the cold. We work around the frigid days, and choose warmer (above freezing) days to do our outdoor winter cider work. In the summer, we scramble in the other direction, keeping the cider cool in our apple storages and only working outside when it’s not brutally hot.
I guess it works out—we’re usually pleased by our ciders.
We’re thinking of putting up a building designed for cidermaking, but in the meanwhile, we’ll work with what we have.