
10
Case Management Application
In this chapter, we’ll focus on creating the functionality of a case management application. A case management application is an application that allows you to manage a case for a customer, such as an insurance company or law firm, among many other use cases. A case holds information about a specific case, where you can track the status of the case and save notes related to it. This should further familiarize you with all the basics that you’ve been taught in the previous chapters. The application will make use of a data model, the page builder, actions, and interactions for our logic. We will also be using authentication in this application.
This chapter is divided into the following parts:
- Using the login template
- Creating our data model
- Setting up the Back Office
After this chapter, you will have a better understanding of the process of creating an application, setting up authentication, creating advanced pages with actions, and tracking data changes in your application.
Using the login template
By using a login template, we can easily set up the basics of our application before developing them further later. Let’s create our new application in My Betty Blocks (https://my.bettyblocks.com) by clicking on the applications button, represented by the nine dots in the sidebar (see Figure 10.1).

Figure 10.1 – Selecting the applications button in My Betty Blocks
In the top bar, you will see a Create application button, which we select to create a new application.

Figure 10.2 – The button for creating a new application
Now, search for the login template and select this item:

Figure 10.3 – The login template in My Betty Blocks
In our new application, the basics for our login process have already been made for us. This is done by using an authentication profile. An authentication profile defines which model or models your application will use to validate any users attempting to access a protected (authenticated) page. In the majority of cases, the user or web user model is used as it contains information unique to individual users, but this can be customized when configuring a new authentication profile.
Our app already has a login page and a configured authentication profile. Web users attempting to log in will be checked to ensure their unique identifiers (generally an email address and password) match your authentication model and that a user record exists with matching credentials.
You can find your current authentication profile by clicking on the Authentication profiles option in the builder bar:

Figure 10.4 – The menu option for authentication profiles
From this overview, you can configure new authentication profiles or change the settings of an existing profile.
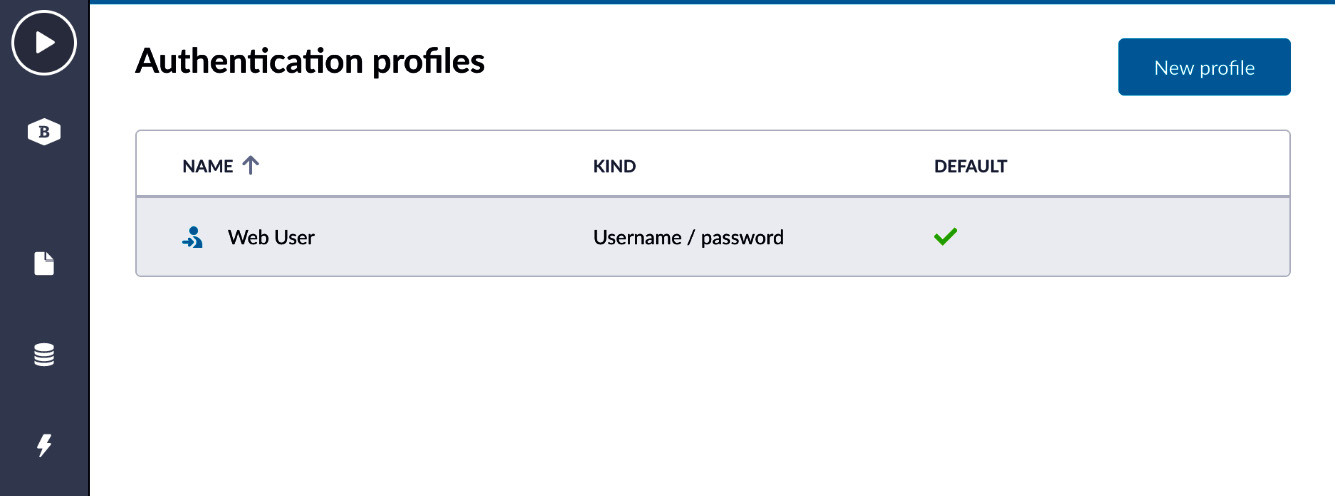
Figure 10.5 – The overview of our current authentication profiles
Also, extra pages are created for us. Let’s take a look at them:
- Home: This is our starting point in the application
- My account: Here you can change settings for your account
- Create account: Here we can create a new account
- Login: This is our actual login page
- Password reset request: Here we can make a password reset request
- Password reset: This is the page where we actually reset the password
- Web user management: This is a Back Office page where you can manage the current web users in your application
Make sure to check that the live versions of your pages work. If by chance they don’t work, please recompile the page by clicking on the play button. Whenever your page doesn’t work or doesn’t look the way you expected, always try to recompile it first by opening the page and pressing the play button.
Now that we’ve created this application, we need to create a web user and test the login flow. In order to do this, we will first open our application on the /login page. When opening the page, you might encounter an error saying no login page is yet set for the current authentication profile. When opening the authentication profile, you can set this with the following dropdown:

Figure 10.6 – Setting the login page for your authentication profile
After opening the login page, we need to select the REGISTER option:

Figure 10.7 – Registering a new web user
Now fill in all the fields and click on the Create account button. Your new user is now created and you can test the login flow. Let’s click on the Login button and fill in your newly generated user account.

Figure 10.8 – Filling in your login credentials
After filling in the credential data and logging in, you should be redirected to the home page, which for now is just a simple empty page.

Figure 10.9 – A simple home page
Now let’s open the Web user management page. Your new account should be shown here.

Figure 10.10 – Overview of current web users
Now we’ve created our first user and are able to log in, it’s time to get started on the data model to allow us to insert some data into our application.
Setting up the data model
Now that we have our login functionality set up for us, we can start building our data model straight away. So, why do we build our data model first, instead of building our pages first and adding our data model later, you might ask yourself? Both are valid ways of doing it, but if you’re building a more complex application, you want to get your data model right from the start. That’s why I prefer to create my initial data model first, so I have everything ready from the start. In the data model you also have the option to directly configure all your settings, such as required or default value which you don’t have when you’re quickly adding your properties from the page builder. You can always do that later, of course, but I find the risk of forgetting something and creating a bug in your application is too high. So that’s why, in this book, we always start with the data model first: it’s a preference, not mandatory.
This data model will be larger than our previous ones since this application will have a lot more functionality. Often, you might only make a part of your data model first because you only want to build the first part of your application, but since this application isn’t that large, we can do everything in one go. So let’s get started!
Click on the data model icon in your builder menu – it’s the database icon that should light up in purple when you hover over it. When the sliding pane opens, click on the plus button to add a new model (see Figure 10.11).

Figure 10.11 – The Data models pane open
The case model
The first model we’ll add is the case model. This will be the main model for our application since it will contain all information related to the case. You should have the Create new model dialog open right now – let’s enter the name Case here and click on the Create model button to create a new model. This should take you to the Properties overview page for your model (see Figure 10.12).

Figure 10.12 – The properties overview for your case model
Now we can create new models in two ways: using the Quick add properties option or the New property button. Since we also want to set some options for our properties, we’ll use the New property button. So let’s add our first Name property, setting it to the Text (single line) type with the IS REQUIRED option toggled on, so the user always has to fill in this field before they can save their record in the model. Then, hit the Save button. Your page should look like Figure 10.13.

Figure 10.13 – The Name property added to your model
This is our first property. We’ll now add some more properties, going over the details of unfamiliar new ones and the specific options that we’ll use for each.
Next, we’ll add a Description property of the Text (multiline) type. This type of property is similar to Text (single line) with the difference that the single-line type only accepts a maximum of 255 characters and can’t save any additional lines of text, while the multiline type accepts a huge amount of characters and can also handle new lines. You can use multiline for large bodies of text, but also to save HTML, for example. Don’t forget to press the New property button first to allow you to add the Description property and note that we won’t set any options for this one.
Next, we’ll add the Status property. This will be of the List type, and as you may remember from before, we need to set some values for list properties. This is because a list property offers the user some predefined values to choose from, and only those. So let’s add the following values:
- New
- In Progress
- Completed
These should suffice for us to set and update the status for our cases. The default value is important here because we want every case to start off with the status of New by default. To do this, select the Static value option and then select the New value. Let’s also toggle the Validations IS REQUIRED setting to on, so it will always have a value.
At the time of writing this chapter, the color options for list values only worked in the classic Back Office, so we will not set these here. This might have changed by the time you are reading this, so you can always set them and see whether they appear later on in the page builder. Your list property settings should look like Figure 10.14.

Figure 10.14 – The Status property set up
The last property we’ll add is a completely new one that we haven’t seen before. It’s the Auto Increment property. This property automatically increases in value every time you create a new record. That makes this property quite powerful and means you don’t have to worry about manually incrementing a value to keep track of record creation, which, while possible, is very error-prone, so I’d recommend doing this instead by creating this property. At the time of writing, there was only one Auto Increment property, but there will soon be a new one since the old one isn’t compatible with the newer versions of the platform. The old one should have the name Classic beside it, while the new one should have the usual Auto Increment name. Since there are no expressions (they’re like formulas) available anymore like there used to be in the classic version of the platform, the new one that will be released has some specific features, which we mostly used when people created this property in the past.
Choose the Auto Increment type and name it Case number. As you can see, the format for our number has already been set. We’ll stick with the default format for now, which gives us the year number with a number beside it that automatically increases every time we create a new record. We also have the options to set the starting value and the fill character, which is the character that will be used, for example, if you set the counter width (which is the next option) to four: the first number will be 0001 then, with 0s being used as fill characters. If you changed the fill character to N, for example, the first iteration will be displayed as NNN1, which won’t make much sense. We’ll use 1 as our starting number, 0 for the fill character, and a counter width of 4. Under the format you see a link to an explanation of how you can change the format, which you can read if you are interested.
So that’s our case model. Let’s move on to the next one.
Setting up the customer model
Our next model is the customer model. Since we just set up the case model, I won’t go into too much detail on each property here to avoid repeating myself, but I will highlight anything new.
The customer model will hold all the information about the customer on which the given case is based. Click on the data model icon in the builder bar and then click on the create new model icon there. Let’s name the model Customer and create it.
We’re going to add the following properties to the customer model, providing the property name, type, and options to set:
- First name – Text (single line) – Is required
- Last name – Text (single line) – Is required
- Street – Text (single line) – Is required
- House number – Text (single line) – Is required
- Postcode – Text (single line) – Is required
- City – Text (single line) – Is required
We’ve set the house number property to single-line text instead of a number. You might be wondering why, since house numbers are numbers. This is true, but in a lot of countries there are letter additions to the numbers (if that’s not the case for you, then you can of course change it to the number type, but text gives you more flexibility as the number type won’t allow anything other than numbers).
We still need to add two more, namely the email address and phone number properties. Let’s start with the email address. We’ll use the email address property type for this one. It’s a specific property type for email addresses, that’s basically a number, but it validates that the input value is an email address by checking for an @ symbol and a dot in it. It also checks that the extension at the end is correct as well, so users will always enter a valid email address. We’ll name it Email address and set Is required to on, and we’ll also set the has to be unique option to on. This makes sure that we don’t have any customers in our model with duplicate email addresses.
Next up is the phone number property. This property doesn’t do any validation checks that phone numbers have been entered properly since different countries have different ways of writing phone numbers. It’s possible to set this up in the phone number property itself, but we are not going to do that now. The main reason is that we also have a phone number input in the page builder, which works very well together with this one, so it will be easier to set it up later in the page builder instead. So, let’s create this one and make it required like the previous ones.
Now that we have all of the properties set up for our customer model, our data model should look like Figure 10.15.

Figure 10.15 – The customer model properties
Now let’s set up our next model, the case note model.
Setting up the case note model
This is a small model since it will only be holding the notes added by the user for a specific case. Let’s go to the builder bar, click on the data model icon, and then click on the new model icon. Let’s name this model CaseNote (you could also name it Case Note if you prefer – the first is a bit more in line with the traditional programmer style using a format called camel case, but both are correct). After you’ve saved it, let’s add the properties. It will only have two properties:
- Title – Text (single line) – Is required
- Description – Text (multiline) – Is required
So, that’s it for the properties. Are we done now? No, not really – in our work on models so far, we haven’t yet gone into relationships between models, so let’s add some relationships to this model now. There are two ways of adding relationships to your model: one is from the model itself by going to the Relations tab there. The other is in the schema view, which is a graphical representation of the models. We’ll use the latter here since the visual element will make it a bit easier. Both will have exactly the same outcome.
In order to get to the model overview, we’ll need to click on the data model in the builder bar and then under the New model button, you’ll see two buttons. We need to click on the left one that looks like a flow chart. This will send you to the schema view, where you should see the following models: User, Role, Case, Customer, and CaseNote. If you don’t see these, click on one of the models, hold down your mouse button, and drag it away a bit from where it was initially placed. Do this for all the models until you see all of them. You should end up with something like Figure 10.16 – it doesn’t have to look exactly the same, as long as all the models are present.

Figure 10.16 – The models shown in the schema view
So we’ll need two relationships for our CaseNote model. The first one is a relationship with the user, so we can store the user who created the note. The second one is a relationship between CaseNote and Case so we can see for which case the note was made.
In order to create a relationship in the schema view, we need to drag an arrow from one model to another. Let’s start with CaseNote and User. Hover over the CaseNote model with your mouse and then you’ll see an arrow appear (Figure 10.17).

Figure 10.17 – The arrow next to the CaseNote model
Click and drag from the arrow to the web user model. A dialog box will appear (Figure 10.18). Here you’ll see three options as follows:

Figure 10.18 – The Select relation type dialog box
These three options each create a very specific relationship between the models. At first, I can imagine that these might be a bit overwhelming. You’ll understand them better once you’ve used them a few times. The descriptions under each of them should help a bit with understanding what they do.
Belongs to (Many CaseNotes belong to one User) is used if your user might create more than one note in your application belonging to them. This makes sense, because it wouldn’t be helpful if a user could only write one case note for a case. It specifically means that a case note can only have one user on it, which is also what we want because that way we can track exactly which user has written each note.
Has many (One CaseNote has many Users) is basically the opposite of Belongs to. This is not what we want because our case notes should only have one user, and it will also mean that a user can only have one case note.
Has and belongs to many (One CaseNote has and belongs to many Users) means that you can have many case notes belonging to many users. So a case note might have multiple users, and a user might have multiple case notes. This might make sense in some cases, but it will also make it a lot more complicated, so it’s not what we want for this use case.
We’ll go with Belongs to so we can track which user has written which note, and also allow a user to write more than one note. So let’s click the Belongs to option now. You’ll see that a line is drawn between the two models and is clickable, so you can view it and delete it. Note that you can’t change relationships; you can only delete them and create a new one. Furthermore, you can create multiple relationships between models if needed.
Alright, so now we still have to create a relationship between the CaseNote and Case models. Let’s do the same again as before: hover over the CaseNote model, then click and drag the arrow to the Case model. The same three options should appear again.
In this case, a case note will belong to one case, while a case can have multiple case notes. So which relationship do you think we’ll need there?
If you’ve chosen the has belongs to relationship, you are correct. It’s the same as with the user: a case can have multiple notes, but a case note can only belong to one case. Your data model should now look something like Figure 10.19.

Figure 10.19 – CaseNote with its relationships
So now we have our first relationships set up. Let’s continue our work in the next section by adding the last two models and their relationships.
The last two models
In this section, we’ll add the last two models. Both are small models and, like CaseNote, mostly support the case model. The CaseHistory model will allow you to store previous status changes for a case, so you have a simple history of what the previous status was and when it was changed. The CaseFile model will allow you to upload files to the case, but instead of allowing only one file to be uploaded, this model will allow the user to add multiple files to a case. In the following list, you’ll see the name of the models with their properties: go ahead and create them as outlined in the previous sections. After that, we’ll add some relationships between them and the other models:
- CaseHistory:
- Old value – Text (multiline)
- New value – Text (multiline)
- CaseFile:
- File – File – Is required
- File name – Text (single line) – Is required
Now that you’ve created all the models, let’s add the relationships. Since those might still be hard to understand for citizen developers, we’ll go through them.
The CaseHistory model has two relationships. The first is a relationship with the Case model, which allows you to track the changes in this model and see them in your case. Since the case will have multiple histories, the relationship will be the case model has many case histories. So, the easiest way to create the correct relationship is to drag an arrow from the Case model to the CaseHistory model. Do this just like we did before, hovering over the Case model, grabbing the arrow, and dragging it to the CaseHistory model. You’ll get three options again – the second option reads One Case has many CaseHistories, which is exactly what we want, so choose that one.
Then we also want to track which specific users have made what changes to the case and track this in the history. For that, we’ll need a relationship between the CaseHistory model and the Web User model. A case history will have one user, so drag the arrow from the CaseHistory model to the Web User model and choose the Belongs to relationship.
We still need to add relationships to the CaseFile model. We will have just one relationship between the Case model and the CaseFile model. Drag the arrow from the Case model to the CaseFile model. Each case will have many case files. This is exactly what’s written under the second option, Has many, so let’s choose that one. Your data model should now look something like Figure 10.20.

Figure 10.20 – The data model with relationships
Now the only thing left to do is add the last relationships between the customer and the case. A case always has one customer, while a customer can have multiple cases, so let’s drag an arrow from the Case model to the Customer model. Which model will you choose?
Belongs to is the correct one. Many cases belong to one customer. And that’s it for now. We’ve got our data model set up and we can get started on creating our Back Office, so we can interact with some parts of our data model.
Setting up the Back Office
We want to make data management as straightforward as possible, and that’s where the Back Office comes into play. This part of your application is only accessible to you and your fellow employees, but not external web users.
It’s very simple to create a Back Office application by using the Back Office page template. Let’s create this for our user management in the page builder, so that we can manage our users easily from the Back Office.
A small note here: at the time of writing this chapter, the Back Office template is being rebuilt, so it might look different and have more options by the time you read this book, but the basics should remain the same.
Setting up the user management
We’ll start with creating a new page by going to the builder bar and clicking on the page builder icon, and then we’ll click on the create a new page icon, and we’ll select the Back office page template in order to create our first Back Office page.

Figure 10.21 – The Back office page template
We’ll name the page User management. Next, we need to choose a type for our page – we want to set it to Authenticated and then choose the Betty Blocks account profile. This is the default profile that comes with the platform and uses internal authentication. This means that it uses the same users as those that you can add and manage through My Betty Blocks.
Now click on the Create page button. Next, we’ll get a page where we have to select our partials (we’ll cover partials in more detail later in this chapter). Most likely, you will already have a footer partial but not a menu partial. If this is not the case, click on the Auto generate button to create the partial. Once that is done, click on the Next button to go to the next step.

Figure 10.22 – Both partials have been generated for you here
The last step is to choose which model we want to use for our Back Office. This will be our WebUser model, which holds all the models for the frontend part of the application. Click on the Select model button and chose the WebUser model. Next, we’ll need to select the properties that we want to add. Add the following properties by clicking on the plus button:
- First Name
- Last Name
- Email Address
- Active
These models will show up in our data table in the Back Office. The others will be added automatically to the create, update, and view parts of our Back Office. Lastly, let’s hit the Save button to create our Back Office page.

Figure 10.23 – Selecting the WebUser model while creating the Back Office page
After clicking this button, our Back Office page will be generated. Now let’s click on the play button on top of the builder bar to compile the page, and when complete, we can now open it. Click around a little to get more familiar with it.

Figure 10.24 – Our newly created user management Back Office page
Next, we’ll create the same page for our cases. Why? Because you might want to edit or delete some cases as an admin with the ability to override your users in some specific cases. Follow the exact same steps as previously to create a Back Office page for your Case model. Don’t forget to compile the page by clicking on the play button in the builder menu.
Now we need to add these pages to the menu. Open either of the Back Office pages we created before. Now click on the menu in the page builder – there should be a green border around the menu component. The reason it is green is that the component you just clicked is a partial. We’ve mentioned these before, but now we’re going to edit this one, so let’s go over what a partial exactly is.
Changing your partial
A partial is a component just like the others, but with one big difference: this component stays the same across every page you add it to. So, if you make a change to this partial, that change will apply on all pages. You will notice that if you try to drag a component inside the partial you won’t succeed, because the part itself needs to be edited in the partial editor to make it look the same on all pages.
You’ll notice on the left side that there is a button called Edit partial. With this button, we can edit our partial, so let’s click on it. Some changes might have been made here by the time you read this – there might be a button that says add a new menu item or something along those lines. You can use that as well, but if you follow along with me for the first change, you’ll learn how to make changes manually as well.
You might see a huge menu now that covers the whole page. This is only because there is no specific column formatting applied to make it smaller – don’t worry about this, it will look normal again when it’s on the page. Click on First list item and on the left side in the options, change the primary text to Web Users. Then below that, click on the blue Select page icon and choose the web user Back Office page. If you like, you can even select a nice icon that will fit the purpose of the page.
Then click on Second list item and rename it to Cases. Change the page and icon as well. Now, at the top, you’ll see an arrow to click on that will bring you back to your page. After clicking it, your menu should look like Figure 10.25.

Figure 10.25 – The changed menu
Click on the play button in the builder menu and try out your page with the new menu. Now that you have a working Back Office, it’s time to build the rest of your application. We’ll continue with this in the next chapter, building the remaining pages.
Summary
In this chapter, we started on our case management application. We first learned about how to set up and use the login template. After that, we set up our data model. We covered some new properties and their options, including email address, auto increment, and phone number. We also set up some relationships between the models so we can use data from other models later in our application, such as to set notes on a case or a user on our note changes. Once our data model was set up, we created a Back Office that allowed us to make quick changes to records in our data model, or create entirely new records. The Back Office is specifically designed for admins to enable them to make these changes.
In the next chapter, we’ll finish the application by creating the pages and diving deeper into the actions for the first time.
Questions
- What do you need to create a login?
- Which type of property do you use to create a status?
- Which three types of relationships does Betty Blocks support?
- Which page template is used for creating a page to manage your data easily?
Answers
- You’ll need an authentication profile, which helps you to set up a login profile.
- You use a list property. This property has multiple preset values that a user can choose from.
- Belongs to, Has many, and Has and belongs to many.
- The Back Office template. This template offers out-of-the-box functionality to make an administrator environment for properties.