Chapter 7. Phase 3: Converge
It’s now the middle of your design sprint: you’ve generated many ideas and it’s time to start narrowing down the choices. The Converge phase does exactly that: it’s about making hard decisions and selecting which to prototype and test with users.
You’ll focus on having the right (and sometimes difficult) conversations about how you can solve your chosen problem, in order to design an effective solution. You will find yourselves debating frequently and perhaps heatedly. If everyone consistently agrees with everything, something is wrong.
At this point, you should have plenty of ideas to choose from so as much as you can, you’ll want to winnow down what you already have rather than adding to an already large pile of broad possibilities.
Including all the voices in the room will give you the best possible insights from your team. Designers, developers, executives, customer service, and marketing folks will all bring different perspectives and solutions. Keep the conversation inclusive and open.
It’s important that the key stakeholders are in attendance when the most important decisions are made. If they’re not able to attend the entire design sprint, have them attend this day. If they can’t attend the entire day, have them present when you converge on the storyboard and wireframes. Ask that they not duck out for emails, calls, or meetings during these sessions. This way, they’ll be part of the decisions. If they need to change anything for business reasons, they can provide that information right away while there’s still time to make adjustments before the end of the design sprint, so they’ll be less likely to require changes afterward.
What Happens During the Converge Phase?
Get Started | ~30 minutes |
Scrutinize Your Work | ~3.5 hours |
Sketch Final Wireframe | ~3 hours |
Recommended Agenda
Scrutinize Your Work
Recap Background | ~10 minutes |
Review Assumptions | ~45 minutes |
$100 Test/Risks | ~15 minutes |
Identify Alternatives | ~45 minutes |
2x2 Matrix | ~30 minutes (optional) |
Wireframe the Prototype
Team Sketching | ~25 minutes |
Ritual Dissent | ~5 minutes |
Team Sketching | ~25 minutes |
Ritual Dissent | ~5 minutes |
Final Sketch | ~2 hours |
Wrap-up
Daily Retrospective | ~15 minutes |
As always, keep the flexibility of the design sprint process in mind. These exercises have worked well for us, but feel free to add, subtract, or replace exercises that you have experience with to help you meet your particular design sprint’s goal.
Get Started
Dan Ramsden, Director of User Experience at the BBC, said it best in terms of a Darwinian theory:
“You’ve got to accept that some of your babies might be ugly. And you’ve got to kill them off so that you can concentrate on the nice ones. I suppose that discipline in a sprint is what makes it a really effective process because you haven’t got the time to come up with excuses as to why this idea could work. It’s like natural Darwinian design really. It’s just like the fittest survive because you’ve only got a short amount of time. [When] we tried to cheat Darwin out of his theory, it didn’t really work very effectively.”
Robust debate is healthy for the design sprint process. If you have very divergent viewpoints, you’ll get a better outcome. Let these viewpoints compete and don’t seek too many compromises, and the results tend to be better.
At the same time, it’s easy for shy or quiet people to be ignored or railroaded in these group activities. It’s the role of the facilitator to be sensitive to the entire group’s needs and include all opinions. Ask for individuals’ contributions and beware of strong personalities that dominate conversations. We’ve seen this happen in almost all of the facilitated design sprints we’ve run. Don’t let it happen to you.
Seth Godin, the prolific author and marketing guru, talks about embracing the generous skeptic who isn’t shutting ideas out of fear, but is providing insight about something other people don’t see yet.[27] He says,
“When the generous skeptic speaks up, she’s taking a risk. If you respond to her generosity by arguing, by shutting down, by avoiding eye contact or becoming defensive, you’ve blown it. You’ve taken a gift and wasted it, and disrespected the gift giver at the same time...’Tell me more about that,’ is the useful and productive response, not, ‘no, you’re wrong, you don’t understand.’”
Similarly, Brian Colcord, Senior Director, UX and Product Design at LogMeIn, talks about being critical in design, saying:
“Critiquing is an art form. People think that feedback or, ‘Hey, change this to this’ is critiquing. That’s not really what it’s about. I’m not going to go to a business analyst and be like, ‘Hey, I know this stuff better than you. Why are you not doing this?’ This is where design sprints and design studios come in really nicely, to involve everybody in the process so that you’re on the same page. You’re understanding the direction, you’re understanding the work that goes into what needs to get done.”
He continues,
“I think in a critique it is important to be able to articulate what the problem is that you’re seeing, based on something that’s not your opinions. It’s like I see a problem for this persona or this user or this particular principle that we have. Not saying, ‘I think we should do this, because I think we should do this.’ It’s all about, ‘Well this might not work here. Why did you make that decision?’”
As you have these discussions, it’s important that the key stakeholders are in attendance when the most important decisions are made. If they’re not able to attend the entire design sprint, have them attend this day. If they can’t attend the entire day, have them present when you converge on the storyboard and wireframes. Ask that they not duck out for emails, calls, or meetings during these sessions. This way, they’ll be part of the decisions. If they need to change anything for business reasons, they can provide that information right away while there’s still time to make adjustments before the end of the design sprint, so they’ll be less likely to require changes afterward.
Scrutinize Your Work
Today you’ll seek to select, integrate, and expand your best ideas, and to do so you’ll need them fresh in your mind. You’ll start with a review of the problem you’re solving, who you’re solving it for, and the most important artifacts you’ve created.
You’ll begin this like you did when starting the Diverge phase, by going over your materials for the background phase again: facts and assumptions, questions, problem statement, personas, and the user journey map. You can do that quicker this time.
Then you’ll look over and reengage with the slew of materials you generated in the Diverge phase.
Then, once you’ve reviewed all your work, it’s now time to pick it apart so you can assemble the best parts back together. Much of this work will happen with a larger group.
While you’re making sure you let everyone get a chance to speak, don’t design by committee. As such, respectfully acknowledge the perspective of each person who speaks, but don’t be afraid to disagree completely and say so. Don’t be too nice.
Encourage people to “take the boxing gloves off” and argue with one another. As Jake Knapp from Google Ventures says in his blog post about Day 3 of a design sprint, “You don’t want design by committee. If there’s a good argument going, don’t try to find middle ground or make people agree. Help the team place a bet on one of the opposing solutions and keep the other in your back pocket if it fails.” He mentions that you can call on the key decision maker to weigh in and make the decision if people don’t agree.
We mentioned Alex Britez from MacMillan in Chapter 3, and he stressed the importance of getting stakeholder buy-in at this stage, so he brought it to others from around his company to offer feedback during the Converge phase. “..We invited another group of stakeholders to help with discussing the next iteration of the ideas. This included some technical and research folks. With their help, we decided what pieces of each idea we wanted to test, and how we should prioritize them.”
The Converge phase is key for aligning stakeholders to get behind the design sprint’s outcomes. This feedback cycle is crucial for your design sprint success.
$100 Test/Risks
As you reengage with the wealth of materials you generated in the Diverge phase, there’s too much to review all together in a group. With that in mind, you’ll review them using an exercise that will get everyone looking at everything individually, engaging with it, and with some constraints to kickstart the converging process. A great way to do this is for everyone to indicate their top picks for where to invest your time, interest, and effort.
We’ll do this by giving everyone $100 worth of fake money. If only building the actual product could be done for $100!
The team can then use the fake money to “invest” in their top picks like the super vote from the Diverge phase, but this time you’ll be voting on everything that was created in all the rounds: all the storyboards and wireframes, even the 8-Ups!
Also like the super vote, you can choose to give perhaps an extra $50 worth of the fake money to key decision makers should that be needed. We don’t want to give out too much of this extra fake money, or the non-decision makers might shut down and not offer up their input if their votes don’t count enough.
While you’re reviewing all your ideas to identify the best, it can also be a good time to flag ideas that might have associated risk. Alex Britez, Director of Digital Innovation at Macmillan Education, describes how he did this:
“We armed each participant with some colored dots, red meaning risk, and the others [of a different color] meaning value. The idea for this was to quickly identify any risks that the original group might have not considered. Everyone also had access to Post-its to write some feedback. The general rule was if your feedback is not on a Post-it, it does not exist.”
Sometimes we’ve done a similar risks exercise simultaneously with our votes, and sometimes we haven’t. As always, the design sprint process is flexible and there’s a diverse set of possibilities for the exercises you can use whenever it makes sense. Do whatever will work best for you and your team.
How
Distribute small Post-its to the team. Make sure these look very different from the dots you used before—at least a different color.
Stress the nature of not voting by popularity and to be independent with votes.
Have everyone walk around the room, review all the ideas, and place Post-its as bets on the ideas they consider important. On these Post-its, write the amount of money you’re investing in that idea.
Make sure the total you’ve invested equals $100 or the agreed upon amount. Don’t cheat!
You can invest more than $10 on a given idea. The entire $100 might be a bit much, but $30–$40 is common.
Optionally, also distribute red dots or Post-its, and have the team place those on ideas they consider risky. They can write more detail about the risk on another Post-it.
Walk around the room individually and see what people consider important.
Difficulty: Easy
Size: Individually
Materials: All the materials from the Diverge phase, and dots or small Post-it notes
Approximate time: 10–15 minutes
Credit: Evolved from dot voting. The origins of dot voting are unclear. Professional facilitators have been using it since the 1980s.
Identify Alternatives
Throughout the Diverge phase there should have been times when there were multiple solutions for the same problem. These show up where there are two or more storyboards that show designs solving for the same job-to-be-done but in different ways. This means you actually diverged. Hooray! Now we have to resolve these different alternatives to determine which to proceed with.
The places you’ll need to converge most are the places where your ideas differ. For example, square 2 of storyboard A and square 3 of storyboard B might show two ways to accomplish the same job-to-be-done. You might choose one or the other. Or perhaps you’ll take elements of each of those storyboards and combine them into a new storyboard. Either way, some aspects will be edited out and voilà, you’ll have converged.
If two conflicting alternatives both seem promising, instead of choosing one or the other, you could find a way to test both. Be careful, as this will increase your scope, but you may be surprised at which one resonates more with users. This difference gives you the opportunity to consider ideas that might have otherwise been overlooked as you ran with a single path. Different or conflicting approaches are helpful because they illuminate possible choices for your product.
How
Affix the user journey map up on the wall, whiteboard, or giant easel-sized Post-it. If the user journey map has too many Post-its stuck to it already, take a photo of it and remove the Post-its, or redraw a clean version of the user journey map.
Have people remove Post-its from anyone’s individual storyboards and wireframes, and stick them next to the relevant part of the user journey. Take a picture of the storyboard first so you’ve preserved the drawing next to the written details.
Place different solutions to the same problem next to each other so you can see them together at the same time for ease of comparison.
Alternatively, people can write the idea down in a couple words on a new Post-it and attach that to the relevant area of the user journey map.
As a group, review the alternatives you’ve posted, and discuss the relative merits of each alternative.
Brainstorm and discuss any other important conflicting alternatives that hadn’t been posted yet. Write those up too as you discuss them.
Difficulty: Moderate
Size: Individually, then as a group
Materials: The user journey map, Post-its
Approximate time: 30–60 minutes
Don’t go down a “rathole” by narrowing yourself into too small an area without considering what happens before and after.
Credit: Andrew Cohen, Corwin Harrell, Trace Wax from thoughtbot, and C. Todd Lombardo from Constant Contact
2x2 Matrix (optional)
Sometimes dot voting doesn’t contextualize the implementation of the possible solutions and the matrix will help define the ideas relative to one another in the context of particular criteria.
A good way to do that is to categorize alternative solutions according to criteria that will tease out their relative value. This can lead you to the solutions most likely to validate or invalidate your hypotheses.
How
Draw a Cartesian coordinate “+” on a board.
Define your x and y axes: these could be “value to user” or “cost of implementation.”
Place all of the solutions on the matrix based on where the solution would fall.
The teams will discuss and debate where exactly each should fall. Having a cross-functional representation in the room will help the process. It may not go smoothly, but you’ll have greater alignment.
Select the quadrant that encompasses the desired traits.
Should there still be too many solutions to pursue, consider repeating this process with another matrix and change at least one of the axes.
Difficulty: Difficult
Size: Team
Materials: Small Post-its and a wall or whiteboard to draw the axes
Don’t place the items on top of each other (you need to be able to read them).
Approximate time: 15–45 minutes
Credit: The 2x2 Matrix was first used by Boston Consulting Group as the “Boston Matrix” or growth share matrix. It has evolved to many variants since.

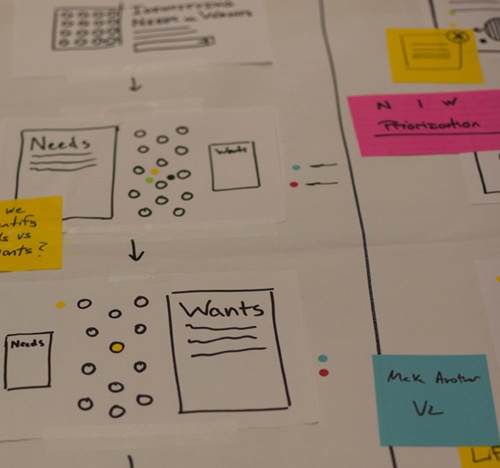
Review Assumptions
You’ve now sorted through the ideas and some of the best ones have risen to the top, but there still will be too many to pursue. Some of them will be obvious and won’t have much risk, but others imply underlying risky assumptions. These will be where you get the most benefit from testing.
When you get to your converged wireframe, your prototype, and your test plan, you’ll want to get the highest risk assumptions out of the way first. If you have the time and talent to prototype and validate everything you came up with, go right ahead. The reality is you won’t be able to create a prototype to validate all your assumptions.
Why prioritize your assumptions? Because you’ll likely have a ton of them and won’t be able to validate every single one. And if you don’t have too many, you haven’t yet pushed your brain to come up with the full list. You’ll need to prioritize them according to confidence and risk. How confident are you they are true and how risky are they?
How
On a large whiteboard, start with your list of assumptions from the Facts and Assumptions exercise from the first day.
To the right of each assumption, add columns for “test with” and “success criteria.”
Have each person take five minutes to generate any additional assumptions that are not already listed, and write them on Post-its.
Add those assumptions to the board. You can brainstorm a few others as a group if you wish.
Fill in the “Test With” and “Success Criteria” fields. For “Test With,” many of those will be just “prototype” but other things could be “survey,” “interviews,” or things like “A/B tests” that will take place outside the scope of the sprint.
Prioritize them with the $100 test described earlier. If there are too many assumptions, you can prioritize them before filling in how you’ll test them and what the success criteria would be.
Difficulty: Moderate
Size: Individually, then as a group
Materials: Assumptions from the Facts and Assumptions exercise, a large whiteboard, ability to admit what you don’t know
Approximate time: 30–45 minutes
Don’t think you have all the assumptions identified.
Credit: Trevor Owens from Javelin Software, based on Eric Ries’ Lean Startup methodology, adding in inspiration from Craig Launcher from Assumption Storming
Wireframe the Prototype
This is where it all comes together. You’ve got your assumptions prioritized. You’ve got your user story. You’ve got your jobs-to-be-done. You’ve even got a set of the storyboard frames that seem the most promising ones this side of the Mississippi has ever seen.
Now it’s time to assemble them into the storyboard of wireframes that show how the user will interact with your prototype, click by click, tap by tap, or swipe by swipe.
At this point, there are usually still just a few too many storyboard frames and screens to know which to use. You’re in the home stretch for narrowing them down, and this is where the rubber meets the road and you can make some hard decisions. You’ll converge your ideas first in teams, then with the whole group.

Team Sketching
With the best concepts fresh in your mind, you now need to organize them. You’ve done that mostly individually thus far, and you’re at a point where you can converge into proposed user interactions that can pass the scrutiny of the group.
You’ll divide into teams, and each team will choose one person as a scribe. But this isn’t just their show. The group will be discussing each frame as you go along, and the scribe will put large pen to large paper to reflect that input, based on all the sketches that came before.
This works best in bursts of about 30 minutes. You don’t want the scope to be too large, so as before, divide the user journey map into at least two chunks. Each of these will get a team sketch. There may be parts of the user journey map that aren’t in the scope of what you want to prototype and test. If so, leave those parts aside.
Know that each sketch will get strong critiques in the ritual dissent to follow, but don’t worry about that yet. You’ll also criticize others’ ideas in kind, and that’s part of the deal. Confidently put your best ideas out there, and trust that the process will take care of surfacing the right ideas that will get to move forward.
There usually isn’t time to do multiple cycles of team sketching on the same part of the user journey map, so have one team focus on one part and another team focus on the other part. That way, the other team(s) can incorporate the feedback.
As always with these converging exercises, be very frank and vocal with your comments. Expect a good amount of debate as your drawings come together.
How
Divide into two teams. If any team has more than three or four people, divide into more teams.
Divide the user journey map into two or more parts. Give a different part to each team. Note that you’ll need a team sketching/ritual dissent cycle for each of these sections of the user journey map.
Set a timer for 30 minutes.
Have each team choose a scribe.
On large 25″ × 30″ easel-sized Post-its, have each group create a hybrid storyboard/wireframe to illustrate the user’s interaction with their part of the user journey map. This can still include human-human interaction in storyboard frames, but mostly will be wireframes for how users will interact with your product.
Even though only one team member is drawing, make sure each team member contributes. If someone isn’t talking much, give them the pen and ask them to draw!
Keep your sketch moving at a good clip, so you don’t run out of time.
Pro Tip: If you think you’ll want to change your sketch (and you will want to change your sketch!) draw in pencil first with an eraser handy, then spend the last couple minutes tracing over it with a Sharpie. Or instead, you could represent each frame on large Post-its stuck to the sheet from the large easel pad.
Difficulty: Easy
Size: Individually
Materials: All the materials from the Diverge phase, and dots or small Post-it notes
Approximate time: 30 minutes
Don’t lose track of time. Don’t let anyone dominate the conversation about what gets drawn.
Credit: Evolved from Will Evans’ Design Studio methodology[28] and the 3-12-3 exercise from Gamestorming[29] as adapted by Kyle Fiedler, Chief Design Officer at thoughtbot
Ritual Dissent
You’ve got your first group sketches suggesting how your product can address the needs of your users, now it’s time to tear them apart. Some of these solutions will be solid, but others might have gaps, holes, and reasons they might not work. Another team will also be proposing a solution, so you’ll need to criticize each other so the best ideas bubble to the top.
In a ritual dissent, each group chooses a spokesperson to present their idea. After presenting it, the spokesperson should turn around and face the wall. That way, people won’t be looking directly at the presenter while they give their critiques. That will help them be more honest as the presenter won’t be looking them in the eye for approval.
The goal of this exercise is to shoot as many holes in ideas as possible, to see which solutions can survive these attacks. So this is the time where the gloves really come off. There’s only a 5-minute window to give this feedback, so it will be especially blunt. The exercise won’t work if people soften or temper their feedback so it may come off as harsh, but don’t take it personally.
You’ll have time for two ritual dissent sessions. If you have two groups, do the ritual dissent with the entire group. If you have more than two groups, do the ritual dissent in smaller groups.
How
Select a spokesperson for each group.
If you have two groups, have each spokesperson present to everyone there. If you have more than two groups, have each spokesperson bring their drawing to another group, and the ritual dissents can happen in parallel.
Set a timer for 5 minutes. In that time, the spokesperson presents the wireframe/storyboard as if it was being presented to a group of investors.
The group listens in silence and takes notes as they think of problems with the idea.
The spokesperson faces the wall, away from those critiquing. If she’s presenting to the entire room, her group should turn around as well.
The team members offers their critiques, candidly attacking everything wrong with the idea. They should be as direct as possible. Don’t hold back.
The spokesperson (and her group) listens in silence and takes notes. In this exercise, they can’t respond to comments or defend their ideas.
Difficulty: Moderate
Size: Entire group if there are two groups in the team sketches, or subgroups if there were more than two
Materials: For presenters, drawings, pen and paper to take notes, an open mind, and a thick skin; for everyone else, bring your harshest criticism and your most outgoing mood
Approximate time: 20 minutes
Credit: Will Evans and Jacklyn Burgan[30]
Repeat the Converge Cycle
If you broke the user journey map into more than two parts, you’ll need multiple cycles. Repeat the team sketch and ritual dissent exercises as described earlier.
You’ll be going over the same ground that another group presented and that you then criticized. As such, you can now address the problems raised by your own critiques. For each part of your drawing, you want to propose the best solution possible. If the previous solution was the most solid one presented, you don’t need to change it, but you also don’t have to keep it the same. Whenever you can think of a better solution, go with that!
These choices aren’t final. You’ll have an opportunity to pick the best options in your final group wireframe, and you can also expect things to change a lot after you receive user feedback and proceed beyond the design sprint.
Final Sketch
With just a few options bubbling to the top, you’ve now converged enough to create your final wireframe. This will be similar to the group sketches you just did, but with the entire group present this time.
As before, choose a scribe with good drawing skills. And as before, it’s not just up to them. The whole group needs to contribute, and the person with the pen is just the one who’s writing it all down.
This will take a lot of room, so if you don’t have two whiteboards or walls with a lot of IdeaPaint and open space, you might do better with big easel-sized 25″ × 30″ Post-its. Use as many as you need.
This ends up looking like a giant comic book drawing, with a whole bunch of little frames, starring your product and users as the superheroes. Keep your user journey map handy so you can tell the entire story, or at least the part of it you know you want to prototype and test.
You’ll go frame by frame, screen by screen, drawing heavily from the group sketches you just did, and also from the best sketches and ideas from the rest of the sprint. If you can’t decide between multiple options, feel free to ask the user experience designer or the main stakeholder.
How
Draw a big grid on the whiteboard or on several easel-sized Post-its (each frame should be about the size of two sheets of paper).
For each frame, discuss and draw a single screen of the user interacting with your product. Refer to your previous group and individual sketches. Ensure everyone speaks up.
Keep drawing frames until you’ve covered the parts of the user journey map that you’ve chosen to prototype and test.
If you notice that the scope is too large, feel free to hone in just on the most important areas to test.
Difficulty: Difficult
Size: Entire group
Materials: Multiple whiteboards (or easel-sized Post-its)
Approximate time: 1–2 hours
Don’t sit in silence without giving feedback while the scribe draws the entire wireframe alone.
Credit: Wireframing with a group has been popular for a while. Jake Knapp at Google Ventures documented the process in his blog posts about the product design sprint.
Takeaways:
There won’t be time to test all ideas, so you’ll need to prioritize and choose.
Lay out a storyboard for the interaction you decide on, and convert that into wireframes.
Ensure shy people have their say.
Ensure key stakeholders are present.
There are several fun and proven ways to include all team members. Use these methods to get the best results.
[28] Will Evans, “Introduction to Design Studio Methodology,” August 5, 2014, http://www.uie.com/articles/design_studio_methodology.
[29] Dave Gray, “3-12-3 Brainstorm,” October 27, 2010, http://bit.ly/3-12-3-storm.
[30] Jacklyn Burgan, “Intro to Agile and Lean UX,” October 23, 2013, http://www.slideshare.net/jacklynburgan/intro-leanux-turnerfinal.