
THE BASICS OF LINE
Here’s an overview of the basic use and characteristics of drawing lines for anime and manga.
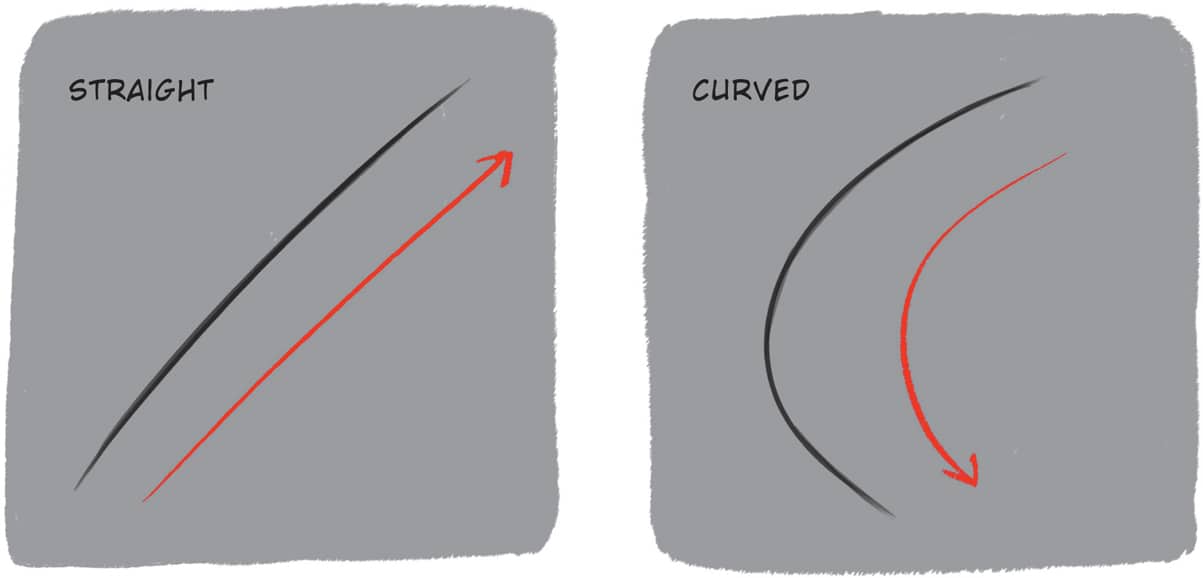
The two types of line can vary in width, rhythm, and direction.
Follow along and practice these examples.

Compared with nondynamic lines (A), varied lines (B) are more three-dimensional and better at conveying information.

Imprecise, jagged lines (A) aren’t recommended for beginners. Instead, clean up the lines as you work (B). The longer and fewer lines there are, the easier they are to modify and complete.

HUMAN SKELETON
When drawing human figures, the skeleton is important because, besides flesh and muscles, bones are also noticeable in some parts of the body.

Remember these key parts!

MUSCLES
Human muscles are complex. If you’re just learning to draw, focus on the shape of the body and the larger muscles.

These drawings show a layer of human skin over the muscles. The muscles you can see on the opposite page aren’t all visible under the skin because our bodies can be divided into visible and invisible muscles.

SIMPLIFICATION AND GEOMETRIZATION

Since the form shown on this page may be too complex, here’s a simpler form.

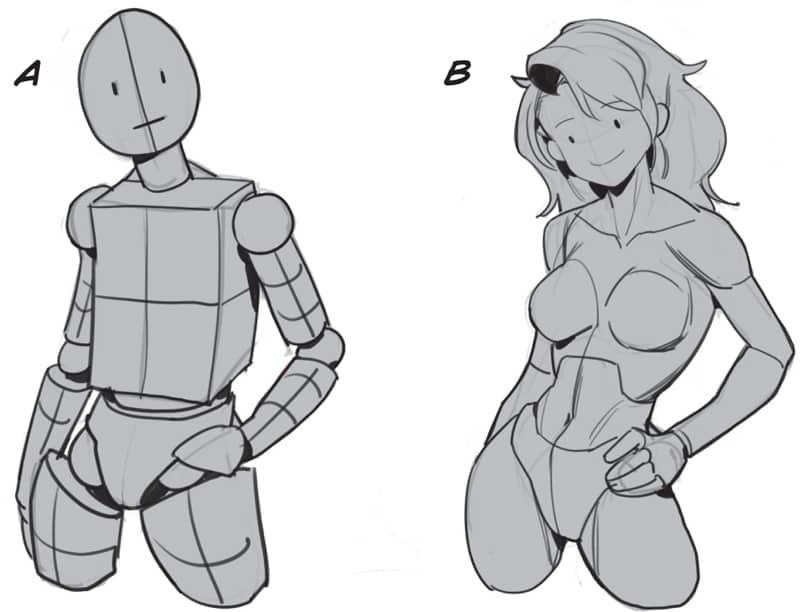
Except for the gestures and joints, it might be hard to connect the process of going from A to B.
If you’ve just begun your drawing journey, know that one day you’ll be drawing the complex muscles seen on the previous spread. Starting with figures that are more efficient for drawing characters will make it easier for the future.

This is a model with a simplified skeleton and muscles. It’s a model that I also use for my work. Even when adding more details and anatomical elements, you can easily add or subtract from this form.
This form will be used frequently throughout this book. Please draw along.
BONE AND FAT
In people with less fat and muscle, bone shapes are more pronounced. The areas marked in light blue have pronounced bones.

In people with excess fat and fewer muscles, bone shapes may not be as pronounced. The parts where bones aren’t pronounced are marked in pink.

BASIC HUMAN PROPORTIONS

If you have difficulty with human proportion, you can use the reference above. But only use it as a general guide, since not everyone has the same proportions.
FEMALE AND MALE
The biggest difference between females and males is the proportions of the pelvis.

The proportions may vary, depending on the individual. Always draw from observation, regardless of gender, in order to build more diverse character shapes.
SKULL
The face is one of the parts of the body that’s most affected by the skeleton.

Starting with a simplified form makes it easier to draw multiple angles.

- 1. Draw a sphere.

- 2. Divide along the crown.
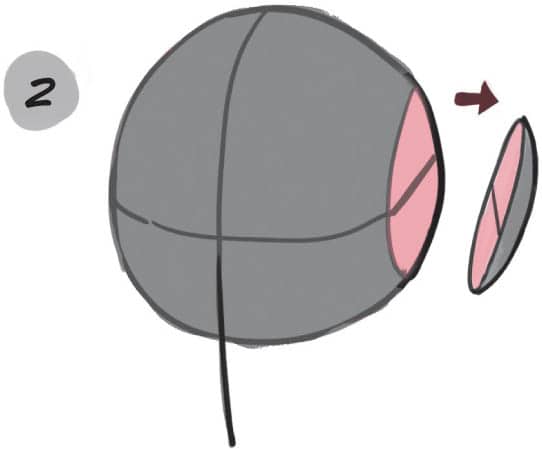
- 3. Draw the chin.

- 4. Finish the overall skull and facial skeleton.

When drawing the head from different angles, think of the shape of the front of the face as a curved sheet of paper.

LANDMARKS OF THE SKULL

NECK MUSCLES: STERNOCLEIDOMASTOIDS

 CLAVICLE
 STERNOCLEIDOMASTOID MUSCLE
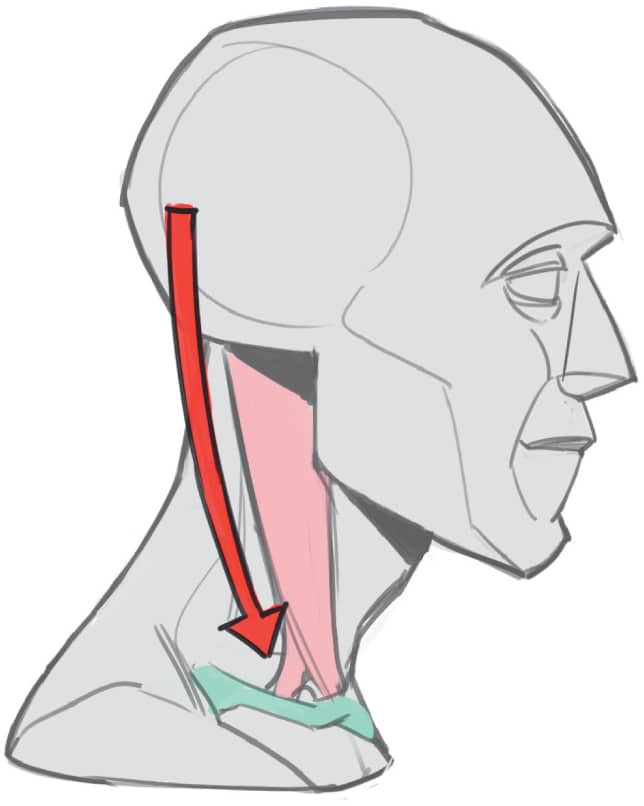
Each sternocleidomastoid muscle stretches from behind the ear to the middle of the clavicle.


Facial skeleton and sternocleidomastoid muscle

Blocked from view by the face in this angle

Knowing where the sternocleidomastoid muscle begins and ends allows you to draw the shape of the neck when it’s turned.
MOUTH


The structure of the mouth should be well-defined whether clenched or open.

When you alter the angle of a character’s face, always consider the shape of the mouth.


It is easier if you start by sketching the mouth as a silhouette of a simple figure.
EYES
Even with stylized eyes, it’s advisable to accentuate their dimensionality.
Draw the structure of the eye so it has dimension.


At some angles, you can’t see one of the corners of the eyes or the surface of the eyeball.


When drawing the eyes, consider that not only the eyes themselves but also the areas of the face around them should move naturally.
EARS
The shape of the ears doesn’t vary much, so it’s convenient to simply memorize it from different angles.
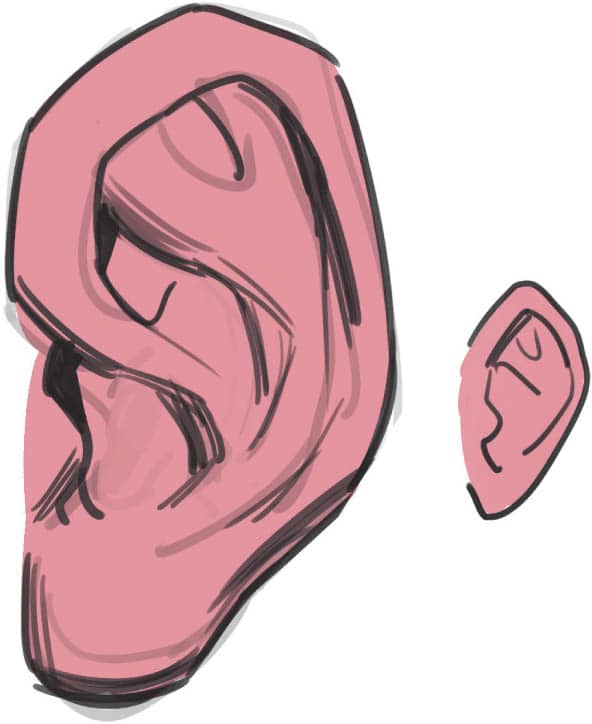
SIDE

FRONT

BACK

Note the position of the ears varies with the angle of view.

NOSE

FRONT

SIDE
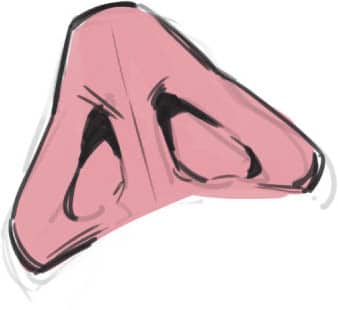
BOTTOM

With the nose, start with the overall shape and angle and go into the details later.

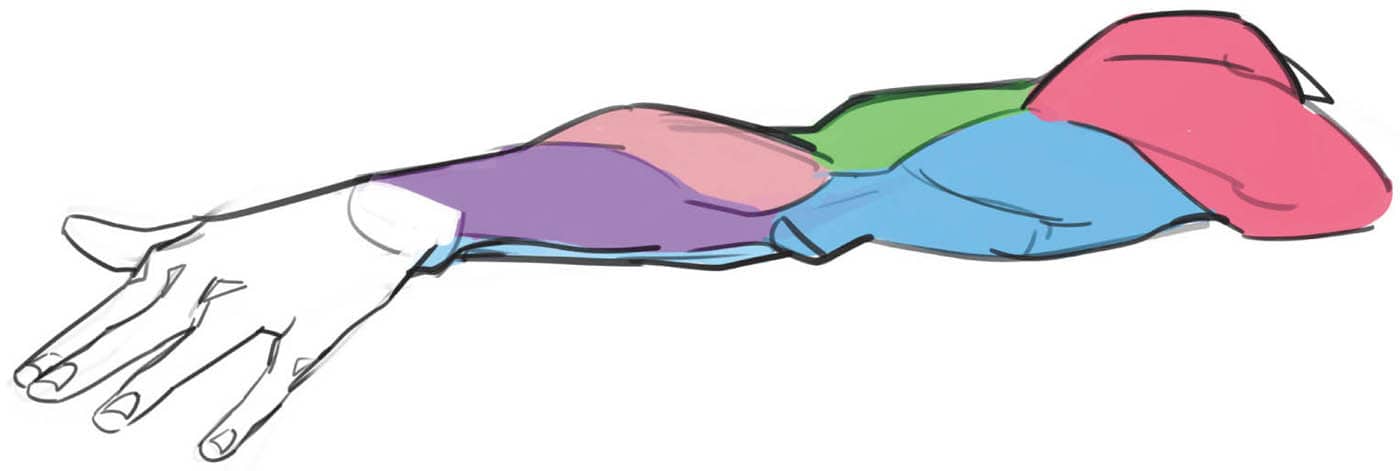
ARMS
Though the actual structure of the muscles is complex (A), it’s important to learn their simple three-dimensional shapes (B).
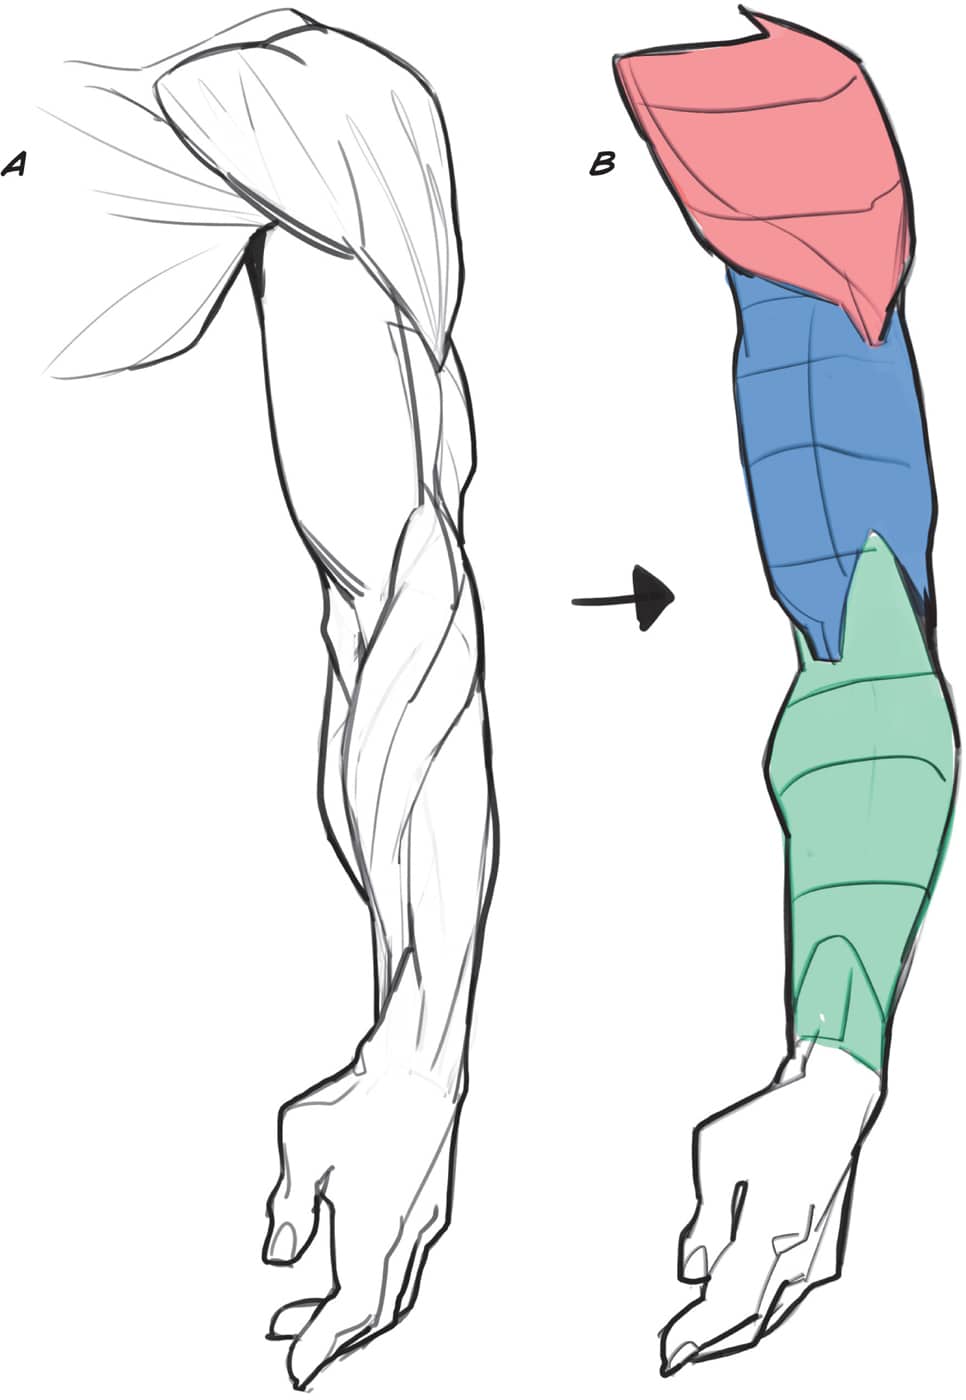
The arm is not only one of the most complex structures of the human body, it also has a lot of flexibility.
Rather than memorizing all the muscles, I’ll show you useful forms that can be applied later.
BASIC MUSCLE GROUPS OF THE ARM AND SHOULDER


 SHOULDER MUSCLES
 UPPER FOREARM MUSCLE (PIT OF THE ELBOW)
 UPPER BACK ARM MUSCLE (ELBOW)
 OUTER ARM MUSCLE (BACK OF THE HAND)
 LOWER ARM THUMB MUSCLE (THUMB)
 INNER ARM MUSCLE (PALM)


The ulna is clearly visible in a crossed-arm pose.

UPPER ARM
 RED
RED
 BLUE
BLUE
 GREEN
GREEN

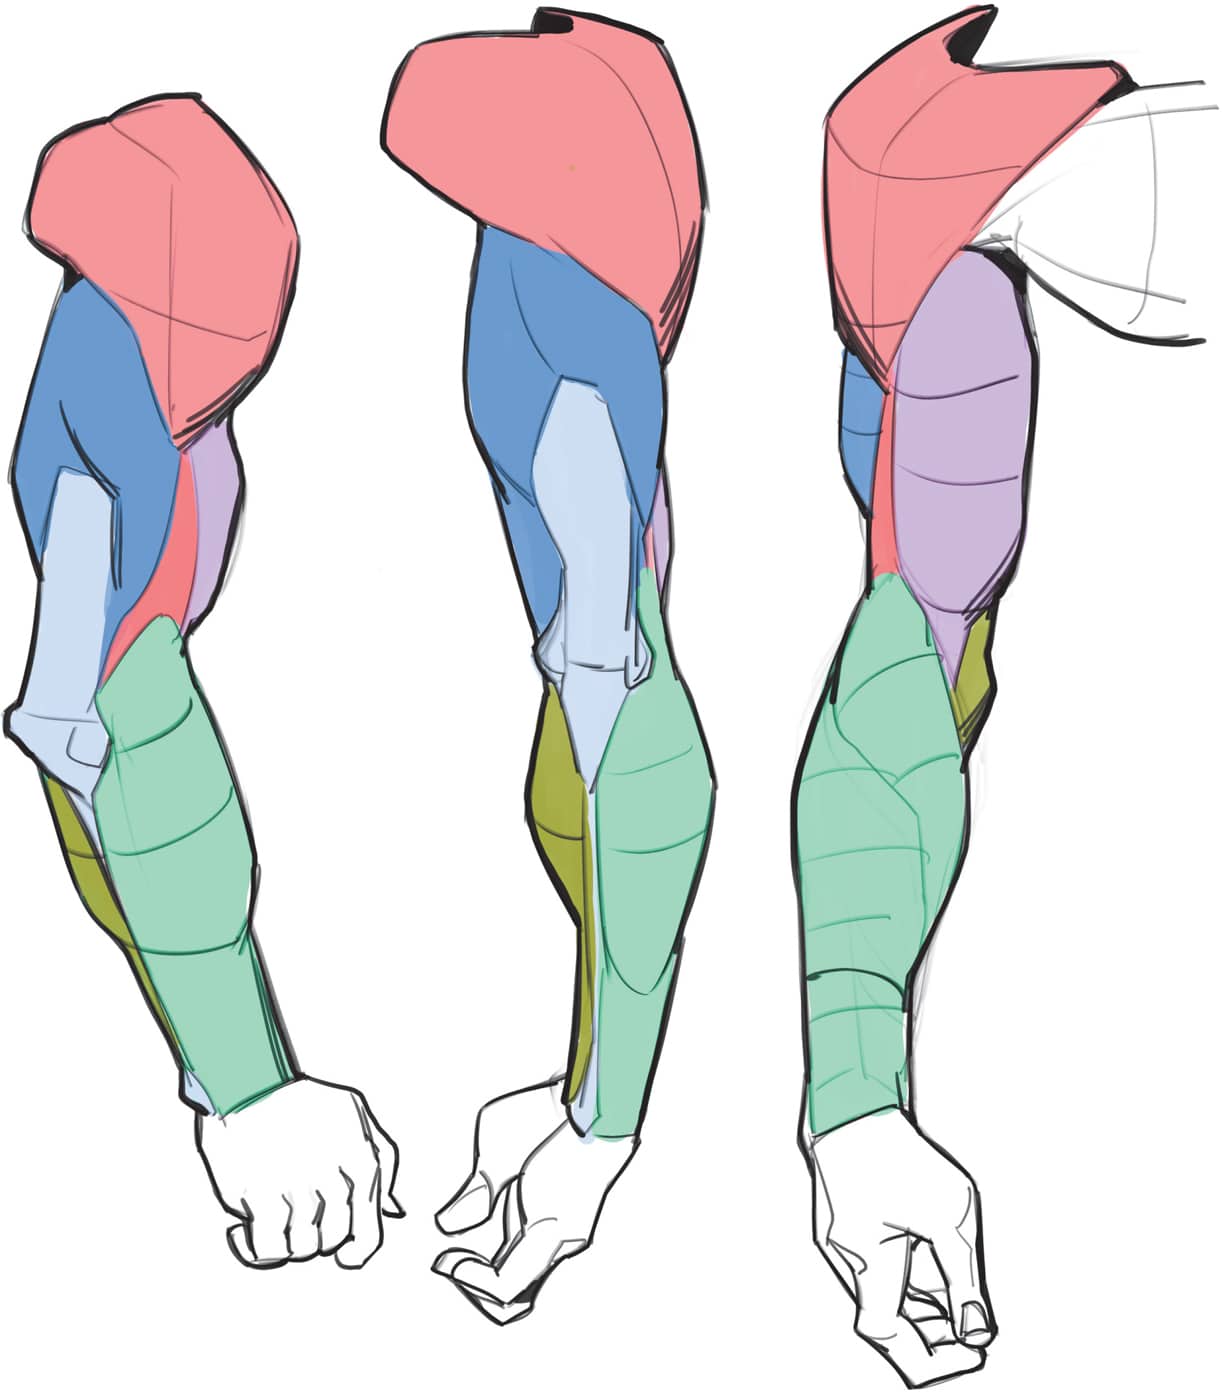
LOWER ARM
 PINK
PINK
 YELLOW
 PURPLE
There are more subparts to the muscles of the arm, but these basic shapes and their volumes are the most important.
This is the part of the arm drawn with the muscles as shown on the previous page. When the muscles are developed, they become larger and more defined, as shown in C.


It’s easy to draw the arm from various angles, as long as you draw each of its muscle shapes to reflect the position of the elbow, wrist, and shoulder.

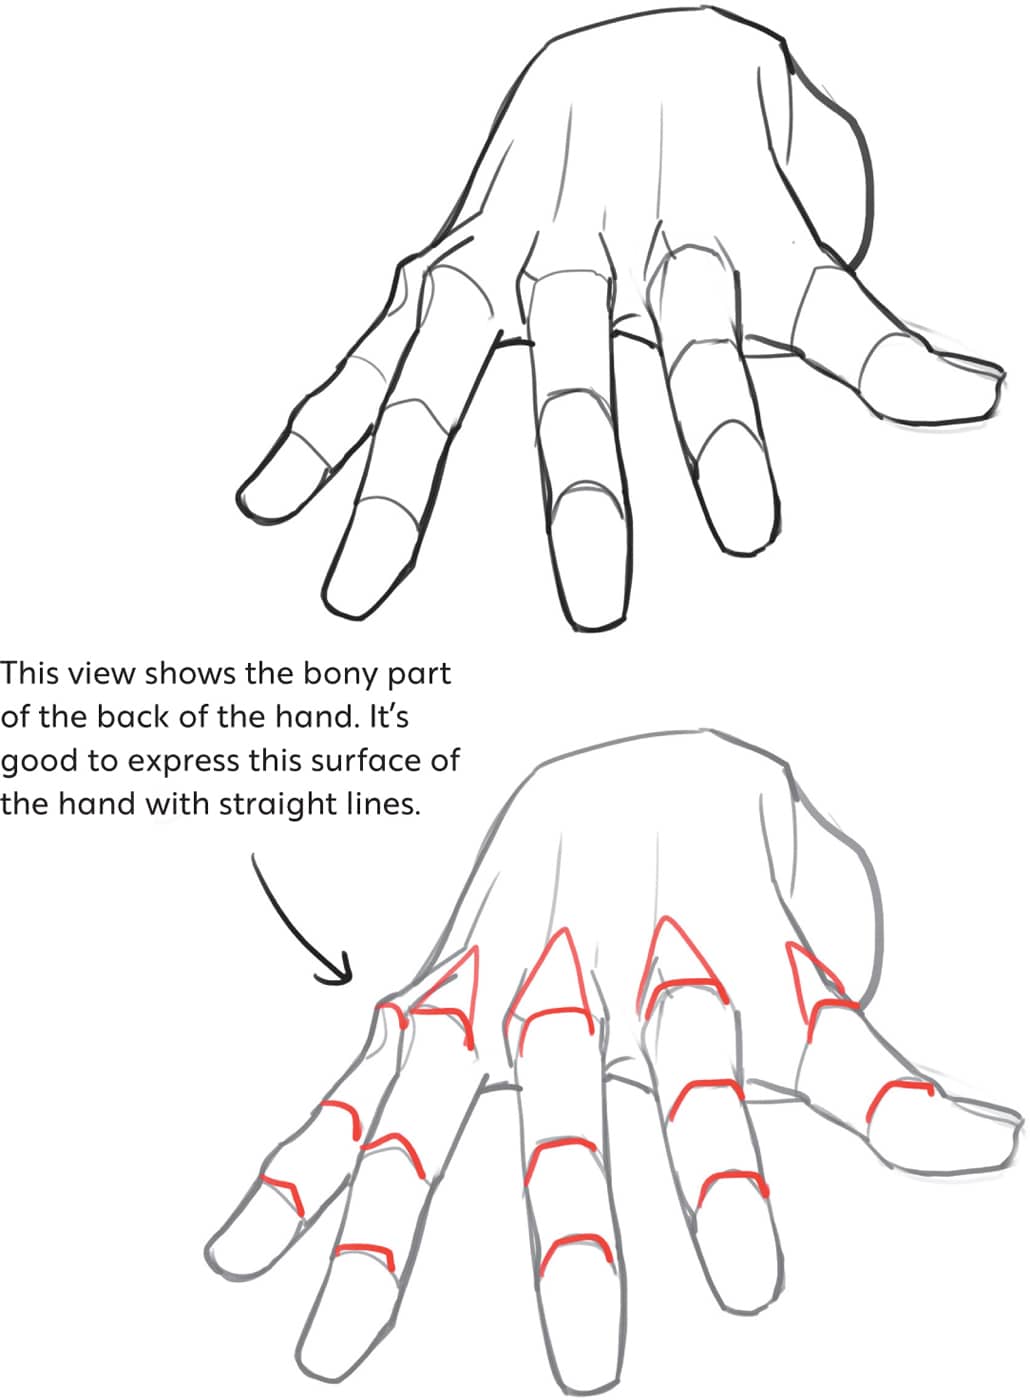
HANDS
The hand is easier to draw if the form is understood by dividing it into fingers, palm, thumb palm, and pinky palm.


The relative length of each finger joint is shown, from shortest (3) to longest (1).

The bones of the fingers are very pronounced.
Since the finger’s underside is made of fat, draw it to look soft.


Let’s simplify our hands.

Even if you memorize drawing a hand from a particular point of view, you’ll still need to draw a lot of different angles and poses because the hands have so much fluidity.

Let’s practice drawing hands in three dimensions using the same easy technique.
- 1. Decide what gesture to draw.

- 2. Draw the palm, thumb, and fingers.

- 3. Draw the wrist.

The back of the hand when clenched in a fist is arc-shaped, with the arc descending toward the little finger.


If capturing the three-dimensional shape of the hand is difficult, approach it by drawing a folded flat form first, similar to a piece of paper.
Then change the flattened paper form into a three-dimensional tube.
LEGS
This muscular system diagram has been included to illustrate the shape of the leg. Let’s practice moving from simplified form to complexity.

SIMPLIFIED FORM OF THE LEG

Draw along the above form, memorizing the flow of shapes marked in red.
Observe the flow of the red lines along the leg to help improve your leg drawings.


When making a drawing, consider whether the shape would work if you sliced into it visually.
Draw the legs dimensionally from various angles.

FEET
Drawings of a foot from multiple views. Unlike hands, feet aren’t very fluid, so you can memorize the three-dimensional form as it is.


