
by Richard S. Wright, Jr.
WHAT YOU'LL LEARN IN THIS CHAPTER:
How To | Functions You'll Use |
|---|---|
Request and select an OpenGL pixel format |
|
Create and use OpenGL rendering contexts |
|
Respond to window messages |
|
Use double buffering in Windows |
|
OpenGL is purely a graphics API, with user interaction and the screen or window handled by the host environment. To facilitate this partnership, each environment usually has some extensions that “glue” OpenGL to its own window management and user interface functions. This glue is code that associates OpenGL drawing commands to a particular window. It is also necessary to provide functions for setting buffer modes, color depths, and other drawing characteristics.
For Microsoft Windows, this glue code is embodied in a set of new functions added to the Windows API. They are called the wiggle functions because they are prefixed with wgl rather than gl. These gluing functions are explained in this chapter, where we dispense with using the GLUT library for our OpenGL framework and build full-fledged Windows applications that can take advantage of all the operating system's features. You will see what characteristics a Windows window must have to support OpenGL graphics. You will learn which messages a well-behaved OpenGL window should handle and how. The concepts of this chapter are introduced gradually, as we build a model OpenGL program that provides a framework for Windows-specific OpenGL support.
So far in this book, you've needed no prior knowledge of 3D graphics and only a rudimentary knowledge of C programming. For this chapter, however, we assume you have at least an entry-level knowledge of Windows programming. Otherwise, we would have wound up writing a book twice the size of this one, and we would have spent more time on the details of Windows programming and less on OpenGL programming. If you are new to Windows, or if you cut your teeth on one of the application frameworks and aren't all that familiar with Windows procedures, message routing, and so forth, you might want to check out some of the recommended reading in Appendix A, “Further Reading,” before going too much further in this chapter.
OpenGL became available for the Win32 platform with the release of Windows NT version 3.5. It was later released as an add-on for Windows 95 and then became a shipping part of the Windows 95 operating system (OSR2). OpenGL is now a native API on any Win32 platform (Windows 95/98/ME, Windows NT/2000/XP/2003), with its functions exported from opengl32.dll. You need to be aware of four flavors of OpenGL on Windows: Generic, ICD, MCD, and the Extended. Each has its pros and cons from both the user and developer point of view. You should at least have a high-level understanding of how these implementations work and what their drawbacks might be.
A generic implementation of OpenGL is simply a software implementation that does not use specific 3D hardware. The Microsoft implementation bundled with Windows is a generic implementation. The Silicon Graphics Incorporated (SGI) OpenGL for Windows implementation (no longer widely available) optionally made use of MMX instructions, but it was not considered dedicated 3D hardware, so it was still considered a generic software implementation. Another implementation called MESA (www.mesa3d.org) is not strictly a “real” OpenGL implementation—it's a “work-a-like”—but for most purposes, you can consider it to be so. MESA can also be hooked to hardware, but this should be considered a special case of the mini-driver (discussed shortly).
Although the MESA implementation has kept up with OpenGL's advancing feature set over the years, the Microsoft generic implementation has not been updated since OpenGL version 1.1. Not to worry, we will soon show you how to get to all the OpenGL functionality your graphics card supports.
The Installable Client Driver (ICD) was the original hardware driver interface provided for Windows NT. The ICD must implement the entire OpenGL pipeline using a combination of software and the specific hardware for which it was written. Creating an ICD from scratch is a considerable amount of work for a vendor to undertake.
The ICD drops in and works with Microsoft's OpenGL implementation. Applications linked to opengl32.dll are automatically dispatched to the ICD driver code for OpenGL calls. This mechanism is ideal because applications do not have to be recompiled to take advantage of OpenGL hardware should it become available. The ICD is actually a part of the display driver and does not affect the existing openGL32.dll system DLL. This driver model provides the vendor with the most opportunities to optimize its driver and hardware combination.
The Mini-Client Driver (MCD) was a compromise between a software and hardware implementation. Most early PC 3D hardware provided hardware-accelerated rasterization only. (See “The “Pipeline” section in Chapter 2, “Using OpenGL.”) The MCD driver model allowed applications to use Microsoft's generic implementation for features that were not available in hardware. For example, transform and lighting could come from Microsoft's OpenGL software, but the actual rendering of lit shaded triangles would be handled by the hardware.
The MCD driver implementation made it easy for hardware vendors to create OpenGL drivers for their hardware. Most of the work was done by Microsoft, and whatever features the vendors did not implement in hardware was handed back to the Microsoft generic implementation.
The MCD driver model showed great promise for bringing OpenGL to the PC mass market. Initially available for Windows NT, a software development kit (SDK) was provided to hardware vendors to create MCD drivers for Windows 95. After many hardware vendors had completed their MCD drivers, Microsoft decided not to license the code for public release. This gave their own proprietary 3D API a temporary advantage in the consumer marketplace.
The MCD driver model today is largely obsolete, but a few implementations are still in use. One reason for its demise is that the MCD driver model cannot support Intel's Accelerated Graphics Port (AGP) texturing efficiently. Another is that SGI began providing an optimized ICD driver kit to vendors that made writing ICDs almost as easy as writing MCDs. (This move was a response to Microsoft's temporary withdrawal of support for OpenGL on Windows 95.) This driver kit and model has now replaced the MCD model and SDK.
A mini-driver is not a real display driver. Instead, it is a drop-in replacement for opengl32.dll that makes calls to a hardware vendor's proprietary 3D hardware driver. Typically, these mini-drivers convert OpenGL calls to roughly equivalent calls in a vendor's proprietary 3D API. The first mini-driver was written by 3Dfx for its Voodoo graphics card. This DLL drop-in converted OpenGL calls into the Voodoo's native Glide (the 3Dfx 3D API) programming interface.
Id software first wrote a version of its popular game Quake that used OpenGL and ran with this 3Dfx mini-driver. For this reason, as mini-drivers were developed for other graphics cards, they were sometimes called “Quake drivers.” Many of the higher-end OpenGL hardware vendors would sarcastically refer to the consumer boards as “Quake accelerators,” not worthy of comparison to their hardware. Many other game hardware vendors hopped on the bandwagon and began supplying mini-drivers for their hardware, too. Although they popularized OpenGL for games, mini-drivers often had missing OpenGL functions or features. Any application that used OpenGL did not necessarily work with a mini-driver. Typically, these drivers provided only the barest functionality needed to run a popular game.
Fortunately, the widespread popularity of OpenGL has made the mini-driver obsolete on newer commodity PCs. You may still come across this beast, however, in older PCs or installations using older graphics hardware. One persisting incarnation of the mini-driver is the wrapper DLL that takes OpenGL function calls and converts them to Direct 3D functionality.
If you are developing software for any version of Microsoft Windows, you are most likely making use of header files and an import library that works with Microsoft's opengl32.dll. This DLL is designed to provide a generic (software-rendered) fallback if 3D hardware is not installed, and as a dispatch mechanism that works with the official OpenGL driver model for hardware-based OpenGL implementations. Using this header and import library alone gives you access only to functions and capabilities present in OpenGL 1.1.
In the introduction, we outlined for you the features that have been added to OpenGL since 1.1 up until OpenGL 2.0 with a fully integrated shading language. Take note, however, that OpenGL 1.1 is still a very capable and full-featured graphics API and is suitable for a wide range of graphical applications, including games or business graphics. Even without the additional features of OpenGL 1.2 and beyond, graphics hardware performance has increased exponentially, and most PC graphics cards have the entire OpenGL pipeline implemented in special-purpose hardware. OpenGL 1.1 can still produce screaming fast and highly complex 3D renderings!
Many applications still will require or at least be significantly enhanced by making use of the newer OpenGL innovations. To get to the newer OpenGL features (which are widely supported), you need to use the same OpenGL extension mechanism that you use to get to vendor-specific OpenGL enhancements. OpenGL extensions were introduced in Chapter 2, and the specifics of using this extension mechanism on Windows are covered later in this chapter in the section “OpenGL and WGL Extensions.”
This may sound like a bewildering environment in which to develop 3D graphics—especially if you plan to port your applications to say, the Macintosh platform, where OpenGL features are updated more consistently with each OS release. Some strategies, however, can make such development more manageable. First, you can call the following function so your application can tell at runtime which OpenGL version the hardware driver supports:
glGetString(GL_VERSION);
This way, you can gracefully decide whether the application is going to be able to run at all on the user's system. Because OpenGL and its extensions are dynamically loaded, there is no reason your programs should not at least start and present the user with a friendly and informative error or diagnostic message.
You also need to think carefully about what OpenGL features your application must have. Can the application be written to use only OpenGL 1.1 features? Will the application be usable at all if no hardware is present and the user must use the built-in software renderer? If the answer to either of these questions is yes, you should first write your application's rendering code using only the import library for OpenGL 1.1. This gives you the widest possible audience for your application.
When you have the basic rendering code in place, you can go back and consider performance optimizations or special visual effects available with newer OpenGL features that you want to make available in your program. By checking the OpenGL version early in your program, you can introduce different rendering paths or functions that will optionally perform better or provide additional visual effects to your rendering. For example, static texture maps could be replaced with fragment programs, or standard fog replaced with volumetric fog made possible through vertex programs. Using the latest and greatest features allows you to really show off your program, but if you rely on them exclusively, you may be severely limiting your audience…and sales.
Sometimes, however, your application really must have some newer OpenGL feature. For example, a medical visualization package may require that 3D texturing or the imaging subset be available. In these types of more specialized or vertical markets, your application will simply have to require some minimal OpenGL support to run. The OpenGL version required in these cases will be listed among any other minimum system requirements that you specify are needed for your software. Again, your application can check for these details at startup.
The GLUT library provided only one window, and OpenGL function calls always produced output in that window. (Where else would they go?) Your own real-world Windows applications, however, will often have more than one window. In fact, dialog boxes, controls, and even menus are actually windows at a fundamental level; having a useful program that contains only one window is nearly impossible. How does OpenGL know where to draw when you execute your rendering code? Before we answer this question, let's first review how we normally draw in a window without using OpenGL.
Normally, when you draw in a window without using OpenGL, you use the Windows Graphics Device Interface (GDI) functions. Each window has a device context that actually receives the graphics output, and each GDI function takes a device context as an argument to indicate which window you want the function to affect. You can have multiple device contexts, but only one for each window.
The sample program WINRECT on the companion CD draws an ordinary window with a blue background and a red square in the center. The output from this program, shown in Figure 13.1, should look familiar to you. This is nearly the same image produced by the second OpenGL program in Chapter 2, GLRECT. Unlike that earlier example, however, the WINRECT program does not use GLUT; we wrote it entirely with the Windows API. This code is relatively generic as far as Windows programming goes. A WinMain function gets things started and keeps the message pump going, and a WndProc function handles messages for the main window.
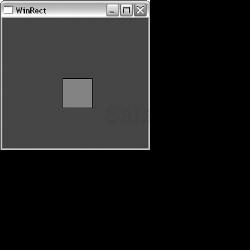
Your familiarity with Windows programming should extend to the details of creating and displaying a window, so we cover only the code from this example that is responsible for drawing the background and square, and won't list the entire program here.
First, you must create a blue and a red brush for filling and painting. The handles for these brushes are declared globally:
// Handles to GDI brushes we will use for drawing
HBRUSH hBlueBrush,hRedBrush;
Then you create the brushes in the WinMain function, using the RGB macro to create solid red and blue brushes:
// Create a blue and red brush for drawing and filling
// operations.              //       Red,  green,  blue
hBlueBrush = CreateSolidBrush(RGB(   0,      0,    255));
hRedBrush = CreateSolidBrush(RGB(  255,      0,    0));
When you specify the window style, you set the background to use the blue brush in the window class structure:
wc.hbrBackground = hBlueBrush; // Use blue brush for background
Window size and position (previously set with glutPositionWindow and glutReshapeWindow) are set when the window is created:
// Create the main application window
hWnd = CreateWindow(
            lpszAppName,
            lpszAppName,
            WS_OVERLAPPEDWINDOW,
            100, 100,        // Size and dimensions of window
            250, 250,
            NULL,
            NULL,
            hInstance,
            NULL);
Finally, the actual painting of the window interior is handled by the WM_PAINT message handler in the WndProc function:
case WM_PAINT:
    {
    PAINTSTRUCT ps;
    HBRUSH hOldBrush;

    // Start painting
    BeginPaint(hWnd,&ps);

    // Select and use the red brush
    hOldBrush = SelectObject(ps.hdc,hRedBrush);

    // Draw a rectangle filled with the currently
    // selected brush
    Rectangle(ps.hdc,100,100,150,150);

    // Deselect the brush
    SelectObject(ps.hdc,hOldBrush);

    // End painting
    EndPaint(hWnd,&ps);
    }
    break;
The call to BeginPaint prepares the window for painting and sets the hdc member of the PAINTSTRUCT structure to the device context to be used for drawing in this window. This handle to the device context is used as the first parameter to all GDI functions, identifying which window they should operate on. This code then selects the red brush for painting operations and draws a filled rectangle at the coordinates (100,100,150,150). Then the brush is deselected, and EndPaint cleans up the painting operation for you.
Before you jump to the conclusion that OpenGL should work in a similar way, remember that the GDI is Windows specific. Other environments do not have device contexts, window handles, and the like. Although the ideas may be similar, they are certainly not called the same thing and might work and behave differently. OpenGL, on the other hand, was designed to be completely portable among environments and hardware platforms (and it didn't start on Windows anyway!). Adding a device context parameter to the OpenGL functions would render your OpenGL code useless in any environment other than Windows.
OpenGL does have a context identifier, however, and it is called the rendering context. The rendering context is similar in many respects to the GDI device context because it is the rendering context that remembers current colors, state settings, and so on, much like the device context holds onto the current brush or pen color.
The Windows concept of the device context is limited for 3D graphics because it was designed for 2D graphics applications. In Windows, you request a device context identifier for a given window. The nature of the device context depends on the nature of the device. If your desktop is set to 16-bit color, the device context Windows gives you knows about and understands 16-bit color only. You cannot tell Windows, for example, that one window is to be a 16-bit color window and another is to be an 8-bit color window.
Although Windows lets you create a memory device context, you still have to give it an existing window device context to emulate. Even if you pass in NULL for the window parameter, Windows uses the device context of your desktop. You, the programmer, have no control over the intrinsic characteristics of a windows device context.
Any window or device that will be rendering 3D graphics has far more characteristics to it than simply color depth, especially if you are using a hardware rendering device (3D graphics card). Up until now, GLUT has taken care of these details for you. When you initialized GLUT, you told it what buffers you needed (double or single color buffer, depth buffer, stencil, and alpha).
Before OpenGL can render into a window, you must first configure that window according to your rendering needs. Do you want hardware or software rendering? Will the rendering be single or double buffered? Do you need a depth buffer? How about stencil, destination alpha, or an accumulation buffer? After you set these parameters for a window, you cannot change them later. To switch from a window with only a depth and color buffer to a window with only a stencil and color buffer, you have to destroy the first window and re-create a new window with the characteristics you need.
The 3D characteristics of the window are set one time, usually just after window creation. The collective name for these settings is the pixel format. Windows provides a structure named PIXELFORMATDESCRIPTOR that describes the pixel format. This structure is defined as follows:
typedef struct tagPIXELFORMATDESCRIPTOR {
WORD nSize;            // Size of this structure
WORD nVersion;         // Version of structure (should be 1)
DWORD dwFlags;         // Pixel buffer properties
BYTE  iPixelType;      // Type of pixel data (RGBA or Color Index)
BYTE  cColorBits;      // Number of color bit planes in color buffer
BYTE  cRedBits;        // How many bits for red
BYTE  cRedShift;       // Shift count for red bits
BYTE  cGreenBits;      // How many bits for green
BYTE  cGreenShift;     // Shift count for green bits
BYTE  cBlueBits;       // How many bits for blue
BYTE  cBlueShift;      // Shift count for blue
BYTE  cAlphaBits;      // How many bits for destination alpha
BYTE  cAlphaShift;     // Shift count for destination alpha
BYTE  cAccumBits;      // How many bits for accumulation buffer
BYTE  cAccumRedBits;   // How many red bits for accumulation buffer
BYTE  cAccumGreenBits; // How many green bits for accumulation buffer
BYTE  cAccumBlueBits;  // How many blue bits for accumulation buffer
BYTE  cAccumAlphaBits; // How many alpha bits for accumulation buffer
BYTE  cDepthBits;      // How many bits for depth buffer
BYTE  cStencilBits;    // How many bits for stencil buffer
BYTE  cAuxBuffers;     // How many auxiliary buffers
BYTE  iLayerType;      // Obsolete - ignored
BYTE  bReserved;       // Number of overlay and underlay planes
DWORD dwLayerMask;     // Obsolete - ignored
DWORD dwVisibleMask;   // Transparent color of underlay plane
DWORD dwDamageMask;    // Obsolete - ignored
} PIXELFORMATDESCRIPTOR;
For a given OpenGL device (hardware or software), the values of these members are not arbitrary. Only a limited number of pixel formats is available for a given window. Pixel formats are said to be exported by the OpenGL driver or software renderer. Most of these structure members are self-explanatory, but a few require some additional explanation:
| The size of the structure; set to |
| Set to 1. |
| A set of bit flags that specify properties of the pixel buffer. Most of these flags are not mutually exclusive, but a few are used only when requesting or describing the pixel format. Table 13.1 lists the valid flags for this member. |
| The type of color buffer. Only two values are valid: |
| The number of bits of color depth in the color buffer. Typical values are 8, 16, 24, and 32. The 32-bit color buffers may or may not be used to store destination alpha values. Only Microsoft's generic implementation on Windows 2000, Windows XP, and later supports destination alpha. |
| The number of bits in the color buffer dedicated for the red color component. |
| The number of bits in the color buffer dedicated for the green color component. |
| The number of bits in the color buffer dedicated for the blue color component. |
| The number of bits used for the alpha buffer. Destination alpha is not supported by Microsoft's generic implementation, but many hardware implementations are beginning to support it. |
| The number of bits used for the accumulation buffer. |
| The number of bits used for the depth buffer. Typical values are 0, 16, 24, and 32. The more bits dedicated to the depth buffer, the more accurate depth testing will be. |
| The number of bits used for the stencil buffer. |
| The number of auxiliary buffers. In implementations that support auxiliary buffers, rendering can be redirected to an auxiliary buffer from the color buffer and swapped to the screen at a later time. |
iLayerType | Obsolete (ignored). |
| The number of overlay and underlay planes supported by the implementation. Bits 0 through 3 specify the number of overlay planes (up to 15), and bits 4 through 7 specify the number of underlay planes (also up to 15). |
| Obsolete (ignored). |
| The transparent color of an underlay plane. |
|
Table 13.1. Valid Flags to Describe the Pixel Rendering Buffer
The pixel format for a window is identified by a one-based integer index number. An implementation exports a number of pixel formats from which to choose. To set a pixel format for a window, you must select one of the available formats exported by the driver. You can use the DescribePixelFormat function to determine the characteristics of a given pixel format. You can also use this function to find out how many pixel formats are exported by the driver. The following code shows how to enumerate all the pixel formats available for a window:
PIXELFORMATDESCRIPTOR pfd;        // Pixel format descriptor
int nFormatCount;            // How many pixel formats exported
. . .

// Get the number of pixel formats
// Will need a device context
pfd.nSize = sizeof(PIXELFORMATDESCRIPTOR);
nFormatCount = DescribePixelFormat(hDC, 1, 0, NULL);

// Retrieve each pixel format
for(int i = 1; i <= nFormatCount; i++)
    {
    // Get description of pixel format
    DescribePixelFormat(hDC, i, pfd.nSize, &pfd);

. . .
. . .
}
The DescribePixelFormat function returns the maximum pixel format index. You can use an initial call to this function as shown to determine how many are available. The CD includes an interesting utility program called GLView for this chapter. This program enumerates all pixel formats available for your display driver for the given resolution and color depths. Figure 13.2 shows the output from this program when a double-buffered pixel format is selected. (A single-buffered pixel format would contain a blinking block animation.)

The Microsoft Foundation Classes (MFC) source code is included on the CD for GLView. This is a bit more complex than your typical sample program, and GLView is provided more as a tool for your use than as a programming example. The important code for enumerating pixel formats was presented earlier and is less than a dozen lines long. If you are familiar with MFC already, examination of this source code will show you how to integrate OpenGL rendering into any CWnd derived window class.
The list box lists all the available pixel formats and displays their characteristics (driver type, color depth, and so on). A sample window in the lower-right corner displays a rotating cube using a window created with the highlighted pixel format. The glGetString function enables you to find out the name of the vendor for the OpenGL driver, as well as other version information. Finally, a list box displays all the OpenGL and WGL extensions exported by the driver (WGL extensions are covered later in this chapter).
If you experiment with this program, you'll discover that not all pixel formats can be used to create an OpenGL window, as shown in Figure 13.3. Even though the driver exports these pixel formats, it does not mean that you can create an OpenGL-enabled window with one of them. The most important criterion is that the pixel format color depth must match the color depth of your desktop. That is, you can't create a 16-bit color pixel format for a 32-bit color desktop, or vice versa.

Make special note of the fact that at least 24 pixel formats are always enumerated, sometimes more. If you are running the Microsoft generic implementation, you will see exactly 24 pixel formats listed (all belonging to Microsoft). If you have a hardware accelerator (either an MCD or ICD), you'll note that the accelerated pixel formats are listed first, followed by the 24 generic pixel formats belonging to Microsoft. This means that when hardware acceleration is present, you actually can choose from two implementations of OpenGL. The first are the hardware-accelerated pixel formats belonging to the hardware accelerator. The second are the pixel formats for Microsoft's software implementation.
Knowing this bit of information can be useful. For one thing, it means that a software implementation is always available for rendering to bitmaps or printer devices. It also means that if you so desire (for debugging purposes, perhaps), you can force software rendering, even when an application might typically select hardware acceleration.
Enumerating all the available pixel formats and examining each one to find one that meets your needs could turn out to be quite tedious. Windows provides a shortcut function that makes this process somewhat simpler. The ChoosePixelFormat function allows you to create a pixel format structure containing the desired attributes of your 3D window. The ChoosePixelFormat function then finds the closest match possible (with preference for hardware-accelerated pixel formats) and returns the most appropriate index. The pixel format is then set with a call to another new Windows function, SetPixelFormat. The following code segment shows the use of these two functions:
int nPixelFormat;
. . .

static PIXELFORMATDESCRIPTOR pfd = {
    sizeof(PIXELFORMATDESCRIPTOR), // Size of this structure
    1,                             // Version of this structure
    PFD_DRAW_TO_WINDOW |           // Draw to window (not to bitmap)
    PFD_SUPPORT_OPENGL |           // Support OpenGL calls in window
    PFD_DOUBLEBUFFER,              // Double buffered mode
    PFD_TYPE_RGBA,                 // RGBA color mode
    32,                            // Want 32-bit color
    0,0,0,0,0,0,                   // Not used to select mode
    0,0,                           // Not used to select mode
    0,0,0,0,0,                     // Not used to select mode
    16,                            // Size of depth buffer
    0,                             // No stencil
    0,                             // No auxiliary buffers
    0,                             // Obsolete or reserved
    0,                             // No overlay and underlay planes
    0,                             // Obsolete or reserved layer mask
    0,                             // No transparent color for underlay plane
    0};                            // Obsolete

// Choose a pixel format that best matches that described in pfd
// for the given device context
nPixelFormat = ChoosePixelFormat(hDC, &pfd);

// Set the pixel format for the device context
SetPixelFormat(hDC, nPixelFormat, &pfd);
Initially, the PIXELFORMATDESCRIPTOR structure is filled with the desired characteristics of the 3D-enabled window. In this case, you want a double-buffered pixel format that renders into a window, so you request 32-bit color and a 16-bit depth buffer. If the current implementation supports 24-bit color at best, the returned pixel format will be a valid 24-bit color format. Depth buffer resolution is also subject to change. An implementation might support only a 24-bit or 32-bit depth buffer. In any case, ChoosePixelFormat always returns a valid pixel format, and if at all possible, it returns a hardware-accelerated pixel format.
Some programmers and programming needs might require more sophisticated selection of a pixel format. In these cases, you need to enumerate and inspect all available pixel formats or use the WGL extension presented later in this chapter. For most uses, however, the preceding code is sufficient to prime your window to receive OpenGL rendering commands.
A typical Windows application can consist of many windows. You can even set a pixel format for each one (using that windows device context) if you want! But SetPixelFormat can be called only once per window. When you call an OpenGL command, how does it know which window to send its output to? In the previous chapters, we used the GLUT framework, which provided a single window to display OpenGL output. Recall that with normal Windows GDI-based drawing, each window has its own device context.
To accomplish the portability of the core OpenGL functions, each environment must implement some means of specifying a current rendering window before executing any OpenGL commands. Just as the Windows GDI functions use the windows device contexts, the OpenGL environment is embodied in what is known as the rendering context. Just as a device context remembers settings about drawing modes and commands for the GDI, the rendering context remembers OpenGL settings and commands.
You create an OpenGL rendering context by calling the wglCreateContext function. This function takes one parameter: the device context of a window with a valid pixel format. The data type of an OpenGL rendering context is HGLRC. The following code shows the creation of an OpenGL rendering context:
HGLRC hRC;    // OpenGL rendering context
HDC hDC;    // Windows device context
. . .
// Select and set a pixel format
. . .
hRC = wglCreateContext(hDC);
A rendering context is created that is compatible with the window for which it was created. You can have more than one rendering context in your application—for instance, two windows that are using different drawing modes, perspectives, and so on. However, for OpenGL commands to know which window they are operating on, only one rendering context can be active at any one time per thread. When a rendering context is made active, it is said to be current.
When made current, a rendering context is also associated with a device context and thus with a particular window. Now, OpenGL knows which window into which to render. You can even move an OpenGL rendering context from window to window, but each window must have the same pixel format. To make a rendering context current and associate it with a particular window, you call the wglMakeCurrent function. This function takes two parameters, the device context of the window and the OpenGL rendering context:
void wglMakeCurrent(HDC hDC, HGLRC hRC);
We've covered a lot of ground over the past several pages. We've described each piece of the puzzle individually, but now let's look at all the pieces put together. In addition to seeing all the OpenGL-related code, we should examine some of the minimum requirements for any Windows program to support OpenGL. Our sample program for this section is GLRECT. It should look somewhat familiar because it is also the first GLUT-based sample program from Chapter 2. Now, however, the program is a full-fledged Windows program written with nothing but C and the Win32 API. Figure 13.4 shows the output of the new program, complete with bouncing square.
The starting place for any Windows-based GUI program is the WinMain function. In this function, you register the window type, create the window, and start the message pump. Listing 13.1 shows the WinMain function for the first sample.
Example 13.1. The WinMain Function of the GLRECT Sample Program
// Entry point of all Windows programs
int APIENTRY WinMain(    HINSTANCE     hInstance,
                         HINSTANCE     hPrevInstance,
                         LPSTR         lpCmdLine,
                         int           nCmdShow)
    {
    MSG        msg;       // Windows message structure
    WNDCLASS   wc;        // Windows class structure
    HWND       hWnd;      // Storage for window handle


    // Register window style
    wc.style        = CS_HREDRAW | CS_VREDRAW | CS_OWNDC;
    wc.lpfnWndProc  = (WNDPROC) WndProc;
    wc.cbClsExtra   = 0;
    wc.cbWndExtra   = 0;
    wc.hInstance    = hInstance;
    wc.hIcon        = NULL;
    wc.hCursor      = LoadCursor(NULL, IDC_ARROW);

    // No need for background brush for OpenGL window
    wc.hbrBackground  = NULL;

    wc.lpszMenuName   = NULL;
    wc.lpszClassName  = lpszAppName;

    // Register the window class
    if(RegisterClass(&wc) == 0)
        return FALSE;


    // Create the main application window
    hWnd = CreateWindow(
                lpszAppName,
                lpszAppName,

                // OpenGL requires WS_CLIPCHILDREN and WS_CLIPSIBLINGS
                WS_OVERLAPPEDWINDOW | WS_CLIPCHILDREN | WS_CLIPSIBLINGS,

                // Window position and size
                100, 100,
                250, 250,
                NULL,
                NULL,
                hInstance,
                NULL);

    // If window was not created, quit
    if(hWnd == NULL)
        return FALSE;


    // Display the window
    ShowWindow(hWnd,SW_SHOW);
    UpdateWindow(hWnd);

    // Process application messages until the application closes
    while( GetMessage(&msg, NULL, 0, 0))
        {
        TranslateMessage(&msg);
        DispatchMessage(&msg);
        }

    return msg.wParam;
    }
This listing pretty much contains your standard Windows GUI startup code. Only two points really bear mentioning here. The first is the choice of window styles set in CreateWindow. You can generally use whatever window styles you like, but you do need to set the WS_CLIPCHILDREN and WS_CLIPSIBLINGS styles. These styles were required in earlier versions of Windows, but later versions have dropped them as a strict requirement. The purpose of these styles is to keep the OpenGL rendering context from rendering into other windows, which can happen in GDI. However, an OpenGL rendering context must be associated with only one window at a time.
The second note you should make about this startup code is the use of CS_OWNDC for the window style. Why you need this innocent-looking flag requires a bit more explanation. You need a device context for both GDI rendering and for OpenGL double-buffered page flipping. To understand what CS_OWNDC has to do with this, you first need to take a step back and review the purpose and use of a windows device context.
Before you can draw anything in a window, you first need a windows device context. You need it whether you're doing OpenGL, GDI, or even DirectX programming. Any drawing or painting operation in Windows (even if you're drawing on a bitmap in memory) requires a device context that identifies the specific object being drawn on. You retrieve the device context to a window with a simple function call:
HDC hDC = GetDC(hWnd);
The hDC variable is your handle to the device context of the window identified by the window handle hWnd. You use the device context for all GDI functions that draw in the window. You also need the device context for creating an OpenGL rendering context, making it current, and performing the buffer swap. You tell Windows that you don't need the device context for the window any longer with another simple function call, using the same two values:
The standard Windows programming wisdom is that you retrieve a device context, use it for drawing, and then release it again as soon as possible. This advice dates back to the pre-Win32 days; under Windows 3.1 and earlier, you had a small pool of memory allocated for system resources, such as the windows device context. What happened when Windows ran out of system resources? If you were lucky, you got an error message. If you were working on something really important, the operating system could somehow tell, and it would instead crash and take all your work with it. Well, at least it seemed that way!
The best way to spare your users this catastrophe was to make sure that the GetDC function succeeded. If you did get a device context, you did all your work as quickly as possible (typically within one message handler) and then released the device context so that other programs could use it. The same advice applied to other system resources such as pens, fonts, brushes, and so on.
Windows NT and the subsequent Win32-based operating systems were a tremendous blessing for Windows programmers, in more ways than can be recounted here. Among their many benefits was that you could have all the system resources you needed until you exhausted available memory or your application crashed. (At least it wouldn't crash the OS!) It turns out that the GetDC function is, in computer time, quite an expensive function call to make. If you got the device context when the window was created and hung on to it until the window was destroyed, you could speed up your window painting considerably. You could hang on to brushes, fonts, and other resources that would have to be created or retrieved and potentially reinitialized each time the window was invalidated.
One popular example of this Win32 benefit was a program that created random rectangles and put them in random locations in the window. (This was a GDI sample.) The difference between code written the old way and code written the new way was astonishingly obvious. Wow! Win32 was great!
Windows 95, 98, and ME brought Win32 programming to the mainstream, but still had a few of the old 16-bit limitations deep down in the plumbing. The situation with losing system resources was considerably improved, but it was not eliminated entirely. The operating system could still run out of resources, but (according to Microsoft) it was unlikely. Alas, life is not so simple. Under Windows NT, when an application terminates, all allocated system resources are automatically returned to the operating system. Under Windows 95, 98, or ME, you have a resource leak if the program crashes or the application fails to release the resources it allocated. Eventually, you will start to stress the system, and you can run out of system resources (or device contexts).
What happens when Windows doesn't have enough device contexts to go around? Well, it just takes one from someone who is being a hog with them. This means that if you call GetDC and don't call ReleaseDC, Windows 95, 98, or ME might just appropriate your device context when it becomes stressed. The next time you call wglMakeCurrent or SwapBuffers, your device context handle might not be valid. Your application might crash or mysteriously stop rendering. Ask someone in customer support how well it goes over when you try to explain to a customer that his or her problem with your application is really Microsoft's fault!
You actually have a way to tell Windows to create a device context just for your window's use. This feature is useful because every time you call GetDC, you have to reselect your fonts, the mapping mode, and so on. If you have your own device context, you can do this sort of initialization only once. Plus, you don't have to worry about your device context handle being yanked out from under you. Doing this is simple: You simply specify CS_OWNDC as one of your class styles when you register the window. A common error is to use CS_OWNDC as a window style when you call Create. There are window styles and there are class styles, but you can't mix and match.
Code to register your window style generally looks something like this:
WNDCLASS wc; // Windows class structure
...
...
// Register window style
wc.style = CS_HREDRAW | CS_VREDRAW | CS_OWNDC;
wc.lpfnWndProc = (WNDPROC) WndProc;
...
...
wc.lpszClassName = lpszAppName;
// Register the window class
if(RegisterClass(&wc) == 0)
return FALSE;
You then specify the class name when you create the window:
hWnd = CreateWindow( wc.lpszClassName, szWindowName, ...
Graphics programmers should always use CS_OWNDC in the window class registration. This ensures that you have the most robust code possible on any Windows platform. Another consideration is that many older OpenGL hardware drivers have bugs because they expect CS_OWNDC to be specified. They might have been originally written for NT, so the drivers do not account for the possibility that the device context might become invalid. The driver might also trip up if the device context does not retain its configuration (as is the case in the GetDC/ReleaseDC scenario).
Regardless of the specifics, some drivers are not very stable unless you specify the CS_OWNDC flag. Many, if not most, vendors are addressing this well-known issue as their drivers mature. Still, the other reasons outlined here provide plenty of incentive to make what is basically a minor code adjustment.
The real meat of the GLRECT sample program is in the window procedure, WndProc. The window procedure receives window messages from the operating system and responds appropriately. This model of programming, called message or event-driven programming, is the foundation of the modern Windows GUI.
When a window is created, it first receives a WM_CREATE message from the operating system. This is the ideal location to create and set up the OpenGL rendering context. A window also receives a WM_DESTROY message when it is being destroyed. Naturally, this is the ideal place to put cleanup code. Listing 13.2 shows the SetDCPixelFormat format, which is used to select and set the pixel format, along with the window procedure for the application. This function contains the same basic functionality that we have been using with the GLUT framework.
Example 13.2. Setting the Pixel Format and Handling the Creation and Deletion of the OpenGL Rendering Context
///////////////////////////////////////
// Select the pixel format for a given device context
void SetDCPixelFormat(HDC hDC)
    {
    int nPixelFormat;

    static PIXELFORMATDESCRIPTOR pfd = {
        sizeof(PIXELFORMATDESCRIPTOR), // Size of this structure
        1,                             // Version of this structure
        PFD_DRAW_TO_WINDOW |           // Draw to window (not to bitmap)
        PFD_SUPPORT_OPENGL |           // Support OpenGL calls in window
        PFD_DOUBLEBUFFER,              // Double-buffered mode
        PFD_TYPE_RGBA,                 // RGBA color mode
        32,                            // Want 32-bit color
        0,0,0,0,0,0,                   // Not used to select mode
        0,0,                           // Not used to select mode
        0,0,0,0,0,                     // Not used to select mode
        16,                            // Size of depth buffer
        0,                             // Not used here
        0,                             // Not used here
        0,                             // Not used here
        0,                             // Not used here
        0,0,0 };                       // Not used here

    // Choose a pixel format that best matches that described in pfd
    nPixelFormat = ChoosePixelFormat(hDC, &pfd);

    // Set the pixel format for the device context
    SetPixelFormat(hDC, nPixelFormat, &pfd);
    }

///////////////////////////////////////////////////////////////////////
// Window procedure, handles all messages for this program
LRESULT CALLBACK WndProc(HWND    hWnd,
            UINT    message,
            WPARAM    wParam,
            LPARAM    lParam)
    {
    static HGLRC hRC = NULL;    // Permanent rendering context
    static HDC hDC = NULL;      // Private GDI device context

    switch (message)
           {
        // Window creation, set up for OpenGL
    case WM_CREATE:
            // Store the device context
            hDC = GetDC(hWnd);

            // Select the pixel format
            SetDCPixelFormat(hDC);

            // Create the rendering context and make it current
            hRC = wglCreateContext(hDC);
            wglMakeCurrent(hDC, hRC);

            // Create a timer that fires 30 times a second
            SetTimer(hWnd,33,1,NULL);
            break;

        // Window is being destroyed, clean up
        case WM_DESTROY:
            // Kill the timer that we created
            KillTimer(hWnd,101);

            // Deselect the current rendering context and delete it
            wglMakeCurrent(hDC,NULL);
            wglDeleteContext(hRC);

            // Tell the application to terminate after the window
            // is gone.
            PostQuitMessage(0);
            break;

        // Window is resized.
        case WM_SIZE:
            // Call our function which modifies the clipping
            // volume and viewport
            ChangeSize(LOWORD(lParam), HIWORD(lParam));
            break;

        // Timer moves and bounces the rectangle, simply calls
        // our previous OnIdle function, then invalidates the
        // window so it will be redrawn.
        case WM_TIMER:
            {
            IdleFunction();

            InvalidateRect(hWnd,NULL,FALSE);
            }
            break;

        // The painting function. This message is sent by Windows
        // whenever the screen needs updating.
        case WM_PAINT:
            {
            // Call OpenGL drawing code
            RenderScene();

            // Call function to swap the buffers
            SwapBuffers(hDC);

            // Validate the newly painted client area
            ValidateRect(hWnd,NULL);
            }
            break;
.  . .

        default:   // Passes it on if unprocessed
            return (DefWindowProc(hWnd, message, wParam, lParam));
        }

    return (0L);
    }
The first thing you do when the window is being created is retrieve the device context (remember, you hang on to it) and set the pixel format:
// Store the device context
hDC = GetDC(hWnd);

// Select the pixel format
SetDCPixelFormat(hDC);
Then you create the OpenGL rendering context and make it current:
// Create the rendering context and make it current
hRC = wglCreateContext(hDC);
wglMakeCurrent(hDC, hRC);
The last task you handle while processing the WM_CREATE message is creating a Windows timer for the window. You will use this shortly to affect the animation loop:
// Create a timer that fires 30 times a second
SetTimer(hWnd,33,1,NULL);
break;
At this point, the OpenGL rendering context has been created and associated with a window with a valid pixel format. From this point forward, all OpenGL rendering commands will be routed to this context and window.
When the window procedure receives the WM_DESTROY message, the OpenGL rendering context must be deleted. Before you delete the rendering context with the wglDeleteContext function, you must first call wglMakeCurrent again, but this time with NULL as the parameter for the OpenGL rendering context:
// Deselect the current rendering context and delete it
wglMakeCurrent(hDC,NULL);
wglDeleteContext(hRC);
Before deleting the rendering context, you should delete any display lists, texture objects, or other OpenGL-allocated memory.
All that is required to enable OpenGL to render into a window is creating and destroying the OpenGL rendering context. However, to make your application well behaved, you need to follow some conventions with respect to message handling. For example, you need to set the viewport when the window changes size, by handling the WM_SIZE message:
// Window is resized.
case WM_SIZE:
    // Call our function which modifies the clipping
    // volume and viewport
    ChangeSize(LOWORD(lParam), HIWORD(lParam));
    break;
The processing that happens in response to the WM_SIZE message is the same as in the function you handed off to glutReshapeFunc in GLUT-based programs. The window procedure also receives two parameters: lParam and wParam. The low word of lParam is the new width of the window, and the high word is the height.
This example uses the WM_TIMER message handler to do the idle processing. The process is not really idle, but the previous call to SetTimer causes the WM_TIMER message to be received on a fairly regular basis (fairly because the exact interval is not guaranteed).
Other Windows messages handle things such as keyboard activity (WM_CHAR, WM_KEYDOWN), mouse movements (WM_MOUSEMOVE), and palette management. (We discuss these messages shortly.)
The WM_PAINT message bears a closer examination. This message is sent to a window whenever Windows needs to draw or redraw its contents. To tell Windows to redraw a window anyway, you invalidate the window with one function call in the WM_TIMER message handler:
    IdleFunction();
InvalidateRect(hWnd,NULL,FALSE);
Here, IdleFunction updates the position of the square, and InvalidateRect tells Windows to redraw the window (now that the square has moved).
Most Windows programming books show you a WM_PAINT message handler with the well-known BeginPaint/EndPaint function pairing. BeginPaint retrieves the device context so it can be used for GDI drawing, and EndPaint releases the context and validates the window. In our previous discussion of why you need the CS_OWNDC class style, we pointed out that using this function pairing is generally a bad idea for high-performance graphics applications. The following code shows roughly the equivalent functionality, without quite so much overhead:
// The painting function. This message is sent by Windows
// whenever the screen needs updating.
case WM_PAINT:
    {
    // Call OpenGL drawing code
    RenderScene();


    // Call function to swap the buffers
    SwapBuffers(hDC);

    // Validate the newly painted client area
    ValidateRect(hWnd,NULL);
    }
    break;
Because this example has a device context (hDC), you don't need to continually get and release it. We've mentioned the SwapBuffers function previously but not fully explained it. This function takes the device context as an argument and performs the buffer swap for double-buffered rendering. This is why you need the device context readily available when rendering.
Notice that you must manually validate the window with the call to ValidateRect after rendering. Without the BeginPaint/EndPaint functionality in place, there is no way to tell Windows that you have finished drawing the window contents. One alternative to using WM_TIMER to invalidate the window (thus forcing a redraw) is to simply not validate the window. If the window procedure returns from a WM_PAINT message and the window is not validated, the operating system generates another WM_PAINT message. This chain reaction causes an endless stream of repaint messages. One problem with this approach to animation is that it can leave little opportunity for other window messages to be processed. Although rendering might occur very quickly, the user might find it difficult or impossible to resize the window or use the menu, for example.
In Chapter 5, “Color, Materials, and Lighting: The Basics,” we discussed the various color modes available on the modern PC running Windows. Hardware-accelerated 3D graphics cards for the PC support 16-bit or higher color resolutions. If you drop down to 8-bit color (256 colors), you most likely are running Microsoft's generic software implementation. Although this graphics mode is becoming less common, your application could still find itself running in such an environment. Not all 3D applications require hardware acceleration, and many users might not even care about hardware versus software rendering.
What happens when you try to draw a pixel of a particular color using the RGB values in glColor? If the PC graphics card is in 24-bit color mode, each pixel is displayed precisely in the color specified by the 24-bit value (three 8-bit intensities). In the 15- and 16-bit color modes, Windows passes the 24-bit color value to the display driver, which reduces the color to a 15- or 16-bit color value before displaying it. Internal color calculations due to lighting and texturing are usually (depending on the implementation) done at full precision. Reducing a color's precision from 24-bit to 16-bit results in some loss of visual fidelity but can be acceptable for many applications.
On a Windows display with only 8 bits of color resolution (256 colors), Windows creates a palette of colors for the display device. A palette is a list of color values specified at full color. When an application needs to specify one of these colors, it does so by index rather than by specifying the exact color. In practice, the color entries in a palette can be arbitrary and are often chosen to match a particular application's needs.
When Windows is running in a color mode that supports 256 colors, it would make sense if those colors were evenly distributed across RGB colorspace. (See the color cube example in Chapter 5.) Then all applications would have a relatively wide choice of colors, and when a color was selected, the nearest available color would be used. This is exactly the type of palette that OpenGL requires when running in a paletted color mode. Unfortunately, this arrangement is not always practical for other applications.
Because the 256 colors in the palette for the device can be selected from more than 16 million different colors, an application can substantially improve the quality of its graphics by carefully selecting those colors—and many do. For example, to produce a seascape, additional shades of blue might be needed. CAD and modeling applications can modify the palette to produce smooth shading of a surface of a particular single color. For example, the scene might require as many as 200 shades of gray to accurately render the image of a pipe's cross-section. Thus, applications for the PC typically change the palette to meet their needs, resulting in near-photographic quality for many images and scenes. For 256-color bitmaps, the Windows .BMP format even has an array that's 256 entries long, containing 24-bit RGB values specifying the palette for the stored image.
An application can create a palette with the Windows CreatePalette function, identifying the palette by a handle of type HPALETTE. This function takes a logical palette structure (LOGPALETTE) that contains 256 entries, each specifying 8-bit values for red, green, and blue components. Before we examine palette creation, let's look at how multitasked applications can share the single system palette in 8-bit color mode.
Windows multitasking allows many applications to be onscreen at once. If the hardware supports only 256 colors onscreen at once, all applications must share the same system palette. If one application changes the system palette, images in the other windows might have scrambled colors, producing some undesired psychedelic effects. To arbitrate palette usage among applications, Windows sends a set of messages. Applications are notified when another application has changed the system palette, and they are notified when their window has received focus and palette modification is allowed.
When an application receives keyboard or mouse input focus, Windows sends a WM_QUERYNEWPALETTE message to the main window of the application. This message asks the application whether it wants to realize a new palette. Realizing a palette means the application copies the palette entries from its private palette to the system palette. To do this, the application must first select the palette into the device context for the window being updated and then call RealizePalette.
Another message sent by Windows for palette realization is WM_PALETTECHANGED. This message is sent to windows that can realize their palette but might not have the current focus. When this message is sent, you must also check the value of wParam. If wParam contains the handle to the current window receiving the message, then WM_QUERYNEWPALETTE has already been processed, and the palette does not need to be realized again. Listing 13.3 shows the message handler for these two messages.
Example 13.3. Message Handlers for Windows Palette Management
////////////////////////////////////////////////////////
// Windows is telling the application that it may modify
// the system palette. This message in essence asks the
// application for a new palette.
case WM_QUERYNEWPALETTE:
    // If the palette was created.
    if(hPalette)
        {
        int nRet;

        // Selects the palette into the current device context
        SelectPalette(hDC, hPalette, FALSE);

        // Map entries from the currently selected palette to
        // the system palette. The return value is the number
        // of palette entries modified.
        nRet = RealizePalette(hDC);

        // Repaint, forces remap of palette in current window
        InvalidateRect(hWnd,NULL,FALSE);

        return nRet;
        }
    break;


////////////////////////////////////////////////////////
// This window may set the palette, even though it is not the
// currently active window.
case WM_PALETTECHANGED:
    // Don't do anything if the palette does not exist or if
    // this is the window that changed the palette.
    if((hPalette != NULL) && ((HWND)wParam != hWnd))
        {
        // Select the palette into the device context
        SelectPalette(hDC,hPalette,FALSE);

        // Map entries to system palette
        RealizePalette(hDC);

        // Remap the current colors to the newly realized palette
        UpdateColors(hDC);
        return 0;
        }
    break;
A Windows palette is identified by a handle of type HPALETTE. The hPalette variable shown in Listing 13.3 is this type. Note that the value of hPalette is checked against NULL before either of these palette-realization messages is processed to check for a potential error. If the application is not running in 8-bit color mode, these messages are not posted to your application.
Unfortunately, palette considerations are a necessary evil if your application is to run on the 8-bit hardware that's still widely in use. What do you do if your code is executing on a machine that supports only 256 colors?
For an application such as image reproduction, we recommend selecting a range of colors that closely match the original colors. Selecting the best reduced palette for a given full-color image has been the subject of much study over the years and is well beyond the scope of this book. For OpenGL rendering under most circumstances, you want the widest possible range of colors for general-purpose use. The trick is to select the palette colors so that they're evenly distributed throughout the color cube. Then, whenever a color not already in the palette is specified, Windows will select the nearest color in the color cube. As mentioned earlier, this arrangement is not ideal for some applications, but for OpenGL-rendered scenes, it is the best you can do. Unless the scene has substantial texture mapping with a wide variety of colors, the results are usually acceptable.
The sample program GLPALETTE, shown in Figure 13.5, demonstrates the results. This program creates a spinning cube textured on each side with a familiar face. Run this program on your PC in both full-color (16-bit or higher) and 256-color mode. The effect can't be accurately reproduced as a grayscale image in this book, but you can see that even in 8-bit color mode, OpenGL is able to reproduce the image quite well, despite the limited range of colors available.

To determine whether your application needs a palette, you examine PIXELFORMATDESCRIPTOR returned by a call to DescribePixelFormat. Test the dwFlags member of the PIXELFORMATDESCRIPTOR structure, and if the bit value PFD_NEED_PALETTE is set, you need to create a palette for your application:
To create a palette, you must first allocate memory for a Windows LOGPALETTE structure. This structure is filled with the information that describes the palette and then is passed to the Win32 function CreatePalette. The LOGPALETTE structure is defined as follows:
typedef struct tagLOGPALETTE { // lgpl
    WORD         palVersion;
    WORD         palNumEntries;
    PALETTEENTRY palPalEntry[1];
} LOGPALETTE;
The first two members are the palette header and contain the palette version (always set to 0x300) and number of color entries (256 for 8-bit modes). Each entry is then defined as a PALETTEENTRY structure that contains the RGB components of the color entry. Additional entries are located at the end of the structure in memory.
The following code allocates space for the logical palette:
LOGPALETTE *pPal;        // Pointer to memory for logical palette
 ...
 ...
// Allocate space for a logical palette structure plus all the palette
// entries
pPal = (LOGPALETTE*)malloc(sizeof(LOGPALETTE) + nColors*sizeof(PALETTEENTRY));
Here, nColors specifies the number of colors to place in the palette, which for our purposes is always 256.
Each entry in the palette, then, is a PALETTEENTRY structure, which is defined as follows:
typedef struct tagPALETTEENTRY { // pe
    BYTE peRed;
    BYTE peGreen;
    BYTE peBlue;
    BYTE peFlags;
} PALETTEENTRY;
The peRed, peGreen, and peBlue members specify an 8-bit value that represents the relative intensities of each color component. In this way, each of the 256 palette entries contains a 24-color definition. The peFlags member describes advanced use of the palette entries. For OpenGL purposes, you can just set it to NULL.
Now comes the tricky part: Not only must the 256 palette entries be spread evenly throughout the RGB color cube, but also they must be in a certain order. It is this order that enables OpenGL to find the color it needs or the closest available color in the palette. In 8-bit color mode, you have 3 bits each for red and green color components and 2 bits for the blue component. This is commonly referred to as a 3-3-2 palette. So the RGB color cube measures 8×8×3 along the red, green, and blue axes, respectively.
To find the color needed in the palette, an 8-8-8 color reference (the 24-bit color mode setup) is scaled to a 3-3-2 color value. This 8-bit value is then the index into the palette array. The red intensities of 0 to 7 in the 3-3-2 palette must correspond to the intensities 0 to 255 in the 8-8-8 palette. Figure 13.6 illustrates how the red, green, and blue components are combined to make the palette index.

When you build the palette, you loop through all values from 0 to 255. You then decompose the index into the red, green, and blue intensities represented by these values (in terms of the 3-3-2 palette). Each component is multiplied by 255 and divided by the maximum value represented, which has the effect of smoothly stepping the intensities from 0 to 7 for red and green and from 0 to 3 for the blue. Table 13.2 shows some sample palette entries to demonstrate component calculation.
The 3-3-2 palette is actually specified by PIXELFORMATDESCRIPTOR returned by DescribePixelFormat. The members cRedBits, cGreenBits, and cBlueBits specify 3, 3, and 2, respectively, for the number of bits that can represent each component. Furthermore, the cRedShift, cGreenShift, and cBlueShift values specify how much to shift the respective component value to the left (in this case, 0, 3, and 6 for red, green, and blue shifts). These sets of values compose the palette index (see Figure 13.6).
The code in Listing 13.4 creates a palette if needed and returns its handle. This function makes use of the component bit counts and shift information in PIXELFORMATDESCRIPTOR to accommodate any subsequent palette requirements, such as a 2-2-2 palette.
Example 13.4. Function to Create a Palette for OpenGL
// If necessary, creates a 3-3-2 palette for the device context listed.
HPALETTE GetOpenGLPalette(HDC hDC)
    {
    HPALETTE hRetPal = NULL;    // Handle to palette to be created
    PIXELFORMATDESCRIPTOR pfd;  // Pixel format descriptor
    LOGPALETTE *pPal;           // Pointer to memory for logical palette
    int nPixelFormat;           // Pixel format index
    int nColors;                // Number of entries in palette
    int i;                      // Counting variable
    BYTE RedRange,GreenRange,BlueRange;
                                // Range for each color entry (7,7,and 3)

    // Get the pixel format index and retrieve the pixel format description
    nPixelFormat = GetPixelFormat(hDC);
    DescribePixelFormat(hDC, nPixelFormat,
                                     sizeof(PIXELFORMATDESCRIPTOR), &pfd);

    // Does this pixel format require a palette?  If not, do not create a
    // palette and just return NULL
    if(!(pfd.dwFlags & PFD_NEED_PALETTE))
        return NULL;

    // Number of entries in palette. 8 bits yields 256 entries
    nColors = 1 << pfd.cColorBits;

// Allocate space for a logical palette structure plus all the palette
// entries
    pPal = (LOGPALETTE*)malloc(sizeof(LOGPALETTE) +
                                 nColors*sizeof(PALETTEENTRY));

    // Fill in palette header
    pPal->palVersion = 0x300;          // Windows 3.0
    pPal->palNumEntries = nColors;     // table size

    // Build mask of all 1s. This creates a number represented by having
    // the low order x bits set, where x = pfd.cRedBits, pfd.cGreenBits, and
    // pfd.cBlueBits.
    RedRange = (1 << pfd.cRedBits) -1;        // 7 for 3-3-2 palettes
    GreenRange = (1 << pfd.cGreenBits) - 1;   // 7 for 3-3-2 palettes
    BlueRange = (1 << pfd.cBlueBits) -1;      // 3 for 3-3-2 palettes

    // Loop through all the palette entries
    for(i = 0; i < nColors; i++)
        {
        // Fill in the 8-bit equivalents for each component
        pPal->palPalEntry[i].peRed = (i >> pfd.cRedShift) & RedRange;
        pPal->palPalEntry[i].peRed = (unsigned char)(
            (double) pPal->palPalEntry[i].peRed * 255.0 / RedRange);

        pPal->palPalEntry[i].peGreen = (i >> pfd.cGreenShift) & GreenRange;
        pPal->palPalEntry[i].peGreen = (unsigned char)(
            (double)pPal->palPalEntry[i].peGreen * 255.0 /GreenRange);

        pPal->palPalEntry[i].peBlue = (i >> pfd.cBlueShift) & BlueRange;
        pPal->palPalEntry[i].peBlue = (unsigned char)(
            (double)pPal->palPalEntry[i].peBlue * 255.0 / BlueRange);

        pPal->palPalEntry[i].peFlags = (unsigned char) NULL;
        }

    // Create the palette
    hRetPal = CreatePalette(pPal);

    // Go ahead and select and realize the palette for this device context
    SelectPalette(hDC,hRetPal,FALSE);
    RealizePalette(hDC);

    // Free the memory used for the logical palette structure
    free(pPal);

    // Return the handle to the new palette
    return hRetPal;
    }
The Windows palette should be created and realized before the OpenGL rendering context is created or made current. The function in Listing 13.4 requires only the device context after the pixel format has been set. It then returns a handle to a palette if one is needed. Listing 13.5 shows the sequence of operations when the window is created and destroyed. This listing is similar to code presented previously for the creation and destruction of the rendering context, but now it also takes into account the possible existence of a palette.
Example 13.5. Creating and Destroying a Palette
// Window creation, set up for OpenGL
case WM_CREATE:
    // Store the device context
    hDC = GetDC(hWnd);

    // Select the pixel format
    SetDCPixelFormat(hDC);

    // Create the palette if needed
    hPalette = GetOpenGLPalette(hDC);

    // Create the rendering context and make it current
    hRC = wglCreateContext(hDC);
    wglMakeCurrent(hDC, hRC);
    break;


// Window is being destroyed, clean up
case WM_DESTROY:
    // Deselect the current rendering context and delete it
    wglMakeCurrent(hDC,NULL);
    wglDeleteContext(hRC);

    // If a palette was created, destroy it here
    if(hPalette != NULL)
        DeleteObject(hPalette);

    // Tell the application to terminate after the window
    // is gone.
    PostQuitMessage(0);
    break;
Not all your 256 palette entries are actually mapped to the system palette. Windows reserves 20 entries for static system colors that include the standard 16 VGA/EGA colors. This protects the standard Windows components (title bars, buttons, and so on) from alteration whenever an application changes the system palette. When your application realizes its palette, these 20 colors are not overwritten. Fortunately, some of these colors already exist or are closely matched in the 3-3-2 palette. Those that don't are matched closely enough that you shouldn't be able to tell the difference for most purposes.
We need to add one last important note about paletted rendering with OpenGL. The methods presented here enable you to specify colors as full RGBA components, and only at the point of rasterization are they converted to the nearest available palette entry. OpenGL does have an older and obsolete rendering mode called color index mode in which you can specify colors as actual palette entry indexes. Color index mode does not support modern features such as texture mapping and is not hardware accelerated on the PC (or the Mac, or Linux…). For these reasons, color index mode should be considered dead and is not covered by this text.
One of the nicer features of Windows is its support for TrueType fonts. These fonts have been native to Windows since before Windows became a 32-bit operating system. TrueType fonts enhance text appearance because they are device independent and can be easily scaled while still keeping a smooth shape. TrueType fonts are vector fonts, not bitmap fonts. What this means is that the character definitions consist of a series of point and curve definitions. When a character is scaled, the overall shape and appearance remain smooth.
Textual output is a part of nearly any Windows application, and 3D applications are no exception. Microsoft provided support for TrueType fonts in OpenGL with two new wiggle functions. You can use the first, wglUseFontOutlines, to create 3D font models that can be used to create 3D text effects. The second, wglUseFontBitmaps, creates a series of font character bitmaps that can be used for 2D text output in a double-buffered OpenGL window.
The wglUseFontOutlines function takes a handle to a device context. It uses the TrueType font currently selected into that device context to create a set of display lists for that font. Each display list renders just one character from the font. Listing 13.6 shows the SetupRC function from the sample program TEXT3D, where you can see the entire process of creating a font, selecting it into the device context, creating the display lists, and finally, deleting the (Windows) font.
Example 13.6. Creating a Set of 3D Characters
void SetupRC(HDC hDC)
    {
    // Set up the font characteristics
    HFONT hFont;
    GLYPHMETRICSFLOAT agmf[128]; // Throw away
    LOGFONT logfont;

    logfont.lfHeight = -10;
    logfont.lfWidth = 0;
    logfont.lfEscapement = 0;
    logfont.lfOrientation = 0;
    logfont.lfWeight = FW_BOLD;
    logfont.lfItalic = FALSE;
    logfont.lfUnderline = FALSE;
    logfont.lfStrikeOut = FALSE;
    logfont.lfCharSet = ANSI_CHARSET;
    logfont.lfOutPrecision = OUT_DEFAULT_PRECIS;
    logfont.lfClipPrecision = CLIP_DEFAULT_PRECIS;
    logfont.lfQuality = DEFAULT_QUALITY;
    logfont.lfPitchAndFamily = DEFAULT_PITCH;
    strcpy(logfont.lfFaceName,"Arial");

    // Create the font and display list
    hFont = CreateFontIndirect(&logfont);
    SelectObject (hDC, hFont);


    // Create display lists for glyphs 0 through 128 with 0.1 extrusion
    // and default deviation. The display list numbering starts at 1000
    // (it could be any number).
    nFontList = glGenLists(128);
    wglUseFontOutlines(hDC, 0, 128, nFontList, 0.0f, 0.5f,
                WGL_FONT_POLYGONS, agmf);

    DeleteObject(hFont);

    . . .
    . . .
    }
The function call to wglUseFontOutlines is the key function call to create your 3D character set:
wglUseFontOutlines(hDC, 0, 128, nFontList, 0.0f, 0.5f,
            WGL_FONT_POLYGONS, agmf);
The first parameter is the handle to the device context where the desired font has been selected. The next two parameters specify the range of characters (called glyphs) in the font to use. In this case, you use the 1st through 127th character. (The indexes are zero based.) The third parameter, nFontList, is the beginning of the range of display lists created previously. It is important to allocate your display list space before using either of the WGL font functions. The next parameter is the chordal deviation. Think of it as specifying how smooth you want the font to appear, with 0.0 being the most smooth.
The 0.5f is the extrusion of the character set. The 3D characters are defined to lay in the xy plane. The extrusion determines how far along the z-axis the characters extend. WGL_FONT_POLYGONS tells OpenGL to create the characters out of triangles and quads so that they are solid. When this information is specified, normals are also calculated and supplied for each letter. Only one other value is valid for this parameter: WGL_FONT_LINES. It produces a wireframe version of the character set and does not generate normals.
The last argument is an array of type GLYPHMETRICSFLOAT, which is defined as follows:
typedef struct _GLYPHMETRICSFLOAT {
    FLOAT        gmfBlackBoxX;      // Extent of character cell in x direction
    FLOAT        gmfBlackBoxY;      // Extent of character cell in y direction
    POINTFLOAT   gmfptGlyphOrigin;  // Origin of character cell
    FLOAT        gmfCellIncX;       // Horizontal distance to origin of next cell
    FLOAT        gmfCellIncY;       // Vertical distance to origin of next cell
}; GLYPHMETRICSFLOAT
Windows fills in this array according to the selected font's characteristics. These values can be useful when you want to determine the size of a string rendered with 3D characters.
When the display list for each character is called, it renders the character and advances the current position to the right (positive x direction) by the width of the character cell. This is like calling glTranslate after each character, with the translation in the positive x direction. You can use the glCallLists function in conjunction with glListBase to treat a character array (a string) as an array of offsets from the first display list in the font. A simple text output method is shown in Listing 13.7. The output from the TEXT3D program appears in Figure 13.7.

The wglUseFontBitmaps function is similar to its 3D counterpart. This function does not extrude the bitmaps into 3D, however, but instead creates a set of bitmap images of the glyphs in the font. You output images to the screen using the bitmap functions discussed in Chapter 7, “Imaging with OpenGL.” Each character rendered advances the raster position to the right in a similar manner to the 3D text.
Listing 3.8 shows the code to set up the coordinate system for the window (ChangeSize function), create the bitmap font (SetupRC function), and finally render some text (RenderScene function). The output from the TEXT2D sample program is shown in Figure 13.8.
Example 3.8. Creating and Using a 2D Font
//////////////////////////////////////////////////////////////
// Window has changed size. Reset to match window coordinates
void ChangeSize(GLsizei w, GLsizei h)
    {
    GLfloat nRange = 100.0f;
    GLfloat fAspect;

    // Prevent a divide by zero
    if(h == 0)
        h = 1;

    fAspect = (GLfloat)w/(GLfloat)h;

    // Set Viewport to window dimensions
    glViewport(0, 0, w, h);

    glMatrixMode(GL_PROJECTION);
    glLoadIdentity();

    gluOrtho2D(0,400, 400, 0);

    // Viewing transformation
    glMatrixMode(GL_MODELVIEW);
    glLoadIdentity();
    }

///////////////////////////////////////////////////
// Setup. Use a Windows font to create the bitmaps
void SetupRC(HDC hDC)
    {
    // Setup the Font characteristics
    HFONT hFont;
    LOGFONT logfont;

    logfont.lfHeight = -20;
    logfont.lfWidth = 0;
    logfont.lfEscapement = 0;
    logfont.lfOrientation = 0;
    logfont.lfWeight = FW_BOLD;
    logfont.lfItalic = FALSE;
    logfont.lfUnderline = FALSE;
    logfont.lfStrikeOut = FALSE;
    logfont.lfCharSet = ANSI_CHARSET;
    logfont.lfOutPrecision = OUT_DEFAULT_PRECIS;
    logfont.lfClipPrecision = CLIP_DEFAULT_PRECIS;
    logfont.lfQuality = DEFAULT_QUALITY;
    logfont.lfPitchAndFamily = DEFAULT_PITCH;
    strcpy(logfont.lfFaceName,"Arial");

    // Create the font and display list
    hFont = CreateFontIndirect(&logfont);
    SelectObject (hDC, hFont);

    //Create display lists for glyphs 0 through 128
    nFontList = glGenLists(128);
    wglUseFontBitmaps(hDC, 0, 128, nFontList);

    DeleteObject(hFont);   // Don't need original font anymore

    // Black Background
    glClearColor(0.0f, 0.0f, 0.0f, 1.0f );
    }

//////////////////////////////////////////////////
// Draw everything (just the text)
void RenderScene(void)
    {
    glClear(GL_COLOR_BUFFER_BIT);

    // Blue 3D Text - Note color is set before the raster position
    glColor3f(1.0f, 1.0f, 1.0f);
    glRasterPos2i(0, 200);
    glListBase(nFontList);
    glCallLists (13, GL_UNSIGNED_BYTE, "OpenGL Rocks!");
    }

Note that wglUseFontBitmaps is a much simpler function. It requires only the device context handle, the beginning and last characters, and the first display list name to be used:
wglUseFontBitmaps(hDC, 0, 128, nFontList);
Because bitmap fonts are created based on the actual font and map directly to pixels on the screen, the lfHeight member of the LOGFONT structure is used exactly in the same way it is for GDI font rasterization.
With OpenGL becoming popular among PC game developers, a common question is “How do I do full-screen rendering with OpenGL?” The truth is, if you've read this chapter, you already know how to do full-screen rendering with OpenGL—it's just like rendering into any other window! The real question is “How do I create a window that takes up the entire screen and has no borders?” Once you do this, rendering into this window is no different from rendering into any other window in any other sample in this book.
Even though this issue isn't strictly related to OpenGL, it is of enough interest to a wide number of our readers that we give this topic some coverage here.
The first task is to create a window that has no border or caption. This procedure is quite simple. Following is the window creation code from the GLRECT sample program. We've made one small change by making the window style WS_POPUP instead of WS_OVERLAPPEDWINDOW:
// Create the main application window
hWnd = CreateWindow(lpszAppName,
                    lpszAppName,

                    // OpenGL requires WS_CLIPCHILDREN and WS_CLIPSIBLINGS
                    WS_POPUP | WS_CLIPCHILDREN | WS_CLIPSIBLINGS,

                    // Window position and size
                    100, 100,
                    250, 250,
                    NULL,
                    NULL,
                    hInstance,
                    NULL);
The result of this change is shown in Figure 13.9.

As you can see, without the proper style settings, the window has neither a caption nor a border of any kind. Don't forget to take into account that now the window no longer has a close button on it. The user will have to press Alt+F4 to close the window and exit the program. Most user-friendly programs watch for a keystroke such as the Esc key or Q to terminate the program.
Creating a window the size of the screen is almost as trivial as creating a window with no caption or border. The parameters of the CreateWindow function allow you to specify where onscreen the upper-left corner of the window will be positioned and the width and height of the window. To create a full-screen window, you always use (0,0) as the upper-left corner. The only trick would be determining what size the desktop is so you know how wide and high to make the window. You can easily determine this information by using the Windows function GetDeviceCaps.
Listing 13.9 shows the new WinMain function from GLRECT, which is now the new sample FSCREEN. To use GetDeviceCaps, you need a device context handle. Because you are in the process of creating the main window, you need to use the device context from the desktop window.
Example 13.9. Creating a Full-Screen Window
// Entry point of all Windows programs
int APIENTRY WinMain( HINSTANCE     hInstance,
                      HINSTANCE     hPrevInstance,
                      LPSTR         lpCmdLine,
                      int           nCmdShow)
    {
    MSG         msg;         // Windows message structure
    WNDCLASS    wc;          // Windows class structure
    HWND        hWnd;        // Storage for window handle
    HWND        hDesktopWnd; // Storage for desktop window handle
    HDC         hDesktopDC;  // Storage for desktop window device context
    int         nScreenX, nScreenY; // Screen Dimensions

    // Register Window style
    wc.style                  = CS_HREDRAW | CS_VREDRAW | CS_OWNDC;
    wc.lpfnWndProc            = (WNDPROC) WndProc;
    wc.cbClsExtra             = 0;
    wc.cbWndExtra             = 0;
    wc.hInstance              = hInstance;
    wc.hIcon                  = NULL;
    wc.hCursor                = LoadCursor(NULL, IDC_ARROW);

    // No need for background brush for OpenGL window
    wc.hbrBackground    = NULL;
    wc.lpszMenuName     = NULL;
    wc.lpszClassName    = lpszAppName;

    // Register the window class
    if(RegisterClass(&wc) == 0)
        return FALSE;

    // Get the Window handle and Device context to the desktop
    hDesktopWnd = GetDesktopWindow();
    hDesktopDC = GetDC(hDesktopWnd);

    // Get the screen size
    nScreenX = GetDeviceCaps(hDesktopDC, HORZRES);
    nScreenY = GetDeviceCaps(hDesktopDC, VERTRES);

    // Release the desktop device context
    ReleaseDC(hDesktopWnd, hDesktopDC);

    // Create the main application window
    hWnd = CreateWindow(lpszAppName,
                        lpszAppName,
              // OpenGL requires WS_CLIPCHILDREN and WS_CLIPSIBLINGS
               WS_POPUP | WS_CLIPCHILDREN | WS_CLIPSIBLINGS,
                       // Window position and size
                       0, 0,
                       nScreenX, nScreenY,
                       NULL,
                       NULL,
                       hInstance,
                       NULL);


    // If window was not created, quit
    if(hWnd == NULL)
        return FALSE;

    // Display the window
    ShowWindow(hWnd,SW_SHOW);
    UpdateWindow(hWnd);

    // Process application messages until the application closes
    while( GetMessage(&msg, NULL, 0, 0))
        {
        TranslateMessage(&msg);
        DispatchMessage(&msg);
        }

    return msg.wParam;
    }
The key code here is the lines that get the desktop window handle and device context. The device context can then be used to obtain the screen's horizontal and vertical resolution:
hDesktopWnd = GetDesktopWindow();
hDesktopDC = GetDC(hDesktopWnd);

// Get the screen size
nScreenX = GetDeviceCaps(hDesktopDC, HORZRES);
nScreenY = GetDeviceCaps(hDesktopDC, VERTRES);

// Release the desktop device context
ReleaseDC(hDesktopWnd, hDesktopDC);
If your system has multiple monitors, you should note that the values returned here would be for the primary display device. You might also be tempted to force the window to be a topmost window (using the WS_EX_TOPMOST window style). However, doing so makes it possible for your window to lose focus but remain on top of other active windows. This may confuse the user when the program stops responding to keyboard strokes.
You may also want to take a look at the Win32 function ChangeDisplaySettings in your Windows SDK documentation. This function allows you to dynamically change the desktop size at runtime and restore it when your application terminates. This capability may be desirable if you want to have a full-screen window but at a lower or higher display resolution than the default. If you do change the desktop settings, you must not create the rendering window or set the pixelformat until after the desktop settings have changed. OpenGL rendering contexts created under one environment (desktop settings) are not likely to be valid in another.
A powerful feature of the Win32 API is multithreading. The topic of threading is beyond the scope of a book on computer graphics. Basically, a thread is the unit of execution for an application. Most programs execute instructions sequentially from the start of the program until the program terminates. A thread of execution is the path through the machine code that the CPU traverses as it fetches and executes instructions. By creating multiple threads using the Win32 API, you can create multiple paths through your source code that are followed simultaneously.
Think of multithreading as being able to call two functions at the same time and then having them executed simultaneously. Of course, the CPU cannot actually execute two code paths simultaneously, so it switches between threads during normal program flow much the same way a multitasking operating system switches between tasks.
A program carefully designed for multithreaded execution can outperform a single-threaded application in many circumstances. On a single processor machine, one thread can service I/O requests, for example, while another handles the GUI. On a multiprocessor machine employing Symmetric Multi-Processing (SMP), more than one CPU can actually execute your program simultaneously. Note, however, that SMP processing is not supported by older versions of Windows (95/98/ME).
Multithreading requires careful planning and usually causes applications to run more slowly or inefficiently when used improperly on a single CPU system. In addition, if a program is not thoroughly tested, it might never fail on a single CPU machine but have new bugs manifest on a machine with multiple processors.
Some OpenGL implementations take advantage of a multiprocessor system. If, for example, the transformation and lighting units of the OpenGL pipeline are not hardware accelerated, a driver can create another thread so that these calculations are performed by one CPU while another CPU feeds the transformed data to the rasterizer.
You might think that using two threads to do your OpenGL rendering would speed up your rendering as well. You could perhaps have one thread draw the background objects in a scene while another thread draws the more dynamic elements. This configuration is almost always a bad idea. Although you can create two OpenGL rendering contexts for two different threads, most drivers fail if you try to render with both of them in the same window. Technically, this multithreading should be possible, and the Microsoft generic implementation will succeed if you try it, as might many hardware implementations. In the real world, the extra work you place on the driver with two contexts trying to share the same framebuffer will most likely outweigh any performance benefit you hope to gain from using multiple threads.
Multithreading can benefit your OpenGL rendering on a multiprocessor system or even on a single processor system in at least two ways. In the first scenario, you have two different windows, each with its own rendering context and thread of execution. This case could still stress some drivers (some of the low-end game boards are stressed just by two applications using OpenGL simultaneously!), but many professional OpenGL implementations can handle it quite well.
The second example is if you are writing a game or a real-time simulation. You can have a worker thread perform physics calculations or artificial intelligence or handle player interaction while another thread does the OpenGL rendering. This scenario requires careful sharing of data between threads but can provide a substantial performance boost on a dual-processor machine, and even a single-processor machine can improve the responsiveness of your program. Although we've made the disclaimer that multithreaded programming is outside the scope of this book, we present for your use the sample program RTHREAD included on the CD for your examination, which creates and uses a rendering thread. This program also demonstrates the use of the OpenGL WGL extensions.
On the Windows platform, you do not have direct access to the OpenGL driver. All OpenGL function calls are routed through the opengl32.dll system file. Because this DLL understands only OpenGL 1.1 entrypoints (function names), you must have a mechanism to get a pointer to an OpenGL function supported directly by the driver. Fortunately, the Windows OpenGL implementation has a function named wglGetProcAddress that allows you to retrieve a pointer to an OpenGL function supported by the driver, but not necessarily natively supported by opengl32.dll:
PROC wglGetProcAddress(LPSTR lpszProc);
This function takes the name of an OpenGL function or extension and returns a function pointer that you can use to call that function directly. For this to work, you must know the function prototype for the function so you can create a pointer to it and subsequently call the function.
OpenGL extensions (and post-version 1.1 features) come in two flavors. Some are simply new constants and enumerants recognized by a vendor's hardware driver. Others require that you call new functions added to the API. The number of extensions is extensive, especially when you add in the newer OpenGL core functionality and vendor-specific extensions. Complete coverage of all OpenGL extensions would require an entire book in itself (if not an encyclopedia!). You can find a registry of extensions on the Internet and among the Web sites listed in Appendix A, “Further Reading.”
Fortunately, the following two header files give you programmatic access to most OpenGL extensions:
#include <wglext.h>
#include <glext.h>
These files can be found at the OpenGL extension registry Web site, but they are also maintained by most graphics card vendors (see their developer support Web sites), and the latest version as of this book's printing is included in the common source code directory on the CD. The wglext.h header contains a number of extensions that are Windows specific, and the glext.h header contains both standard OpenGL extensions and many vendor-specific OpenGL extensions.
Because this book covers known OpenGL features up to version 2.0, you may have already discovered that many of the sample programs in this book use these extensions for Windows builds of the sample code found in previous chapters. For example, in Chapter 9, “Texture Mapping: Beyond the Basics,” we showed you how to add specular highlights to textured geometry using OpenGL's separate specular color with the following function call:
glLightModeli(GL_LIGHT_MODEL_COLOR_CONTROL, GL_SEPARATE_SPECULAR_COLOR);
However, this capability is not present in OpenGL 1.1, and neither the GL_LIGHT_MODEL_COLOR_CONTROL or GL_SEPARATE_SPECULAR_COLOR constants are defined in the Windows version of gl.h. They are, however, found in glext.h, and this file is already included automatically in all the samples in this book via the OpenGLSB.h header file. The glLightModeli function, on the other hand, has been around since OpenGL 1.0. These kinds of simple extensions simply pass new tokens to existing entrypoints (functions) and require only that you have the constants defined and know that the extension or feature is supported by the hardware.
Even if the OpenGL version is still reported as 1.1, this capability may still be included in the driver. This feature was originally an extension that was later promoted to the OpenGL core functionality. You can check for this and other easy-to-access extensions (no function pointers needed) quickly by using the following GlTools function:
bool gltIsExtSupported(const char *szExtension);
In the case of separate specular color, you might just code something like this:
if(gltIsExtSupported(GL_EXT_separate_specular_color))
    RenderOnce();
else
    UseMultiPassTechnique();
Here, you call the RenderOnce function if the extension (or feature) is supported and the UserMultiPassTechnique function to render an alternate (drawn twice and blended together) and slower way to achieve the same effect.
A more complex extension example comes from the IMAGING sample program in Chapter 7. In this case, the optional imaging subset is not only missing from the Windows version of gl.h, but is optional in all subsequent versions of OpenGL as well. This is an example of the type of feature that either has to be there, or there is no point in continuing. Thus, you first check for the presence of the imaging subset by checking for its extension string:
// Check for imaging subset, must be done after window
// is created or there won't be an OpenGL context to query
if(gltIsExtSupported("GL_ARB_imaging") == 0)
  {
  printf("Imaging subset not supported
");
  return 0;
  }
The function prototype typedefs for the functions used are found in glext.h, and you use them to create function pointers to each of the functions you want to call. On the Macintosh platform, the standard system headers already contain these functions:
#ifndef __APPLE__
// These typdefs are found in glext.h
PFNGLHISTOGRAMPROC              glHistogram = NULL;
PFNGLGETHISTOGRAMPROC           glGetHistogram = NULL;
PFNGLCOLORTABLEPROC             glColorTable = NULL;
PFNGLCONVOLUTIONFILTER2DPROC    glConvolutionFilter2D = NULL;
#endif
Now you use the glTools function gltGetExtensionPointer to retrieve the function pointer to the function in question. This function is simply a portability wrapper for wglGetProcAddress on Windows and an admittedly more complex method on the Apple of getting the function pointers:
#ifndef __APPLE__
glHistogram = gltGetExtensionPointer("glHistogram");
glGetHistogram = gltGetExtensionPointer("glGetHistogram");
glColorTable = gltGetExtensionPointer("glColorTable");
glConvolutionFilter2D = gltGetExtensionPointer("glConvolutionFilter2D");
#endif
Then you simply use the extension as if it were a normally supported part of the API:
// Start collecting histogram data, 256 luminance values
glHistogram(GL_HISTOGRAM, 256, GL_LUMINANCE, GL_FALSE);
glEnable(GL_HISTOGRAM);
Several Windows-specific WGL extensions are also available—for example, the swap interval extension introduced in Chapter 2. You access the WGL extensions' entrypoints in the same manner as the other extensions—using the wglGetProcAddress function. There is, however, an important exception. Typically, among the many WGL extensions, only two are advertised by using glGetString(GL_EXTENSIONS). They are the previously mentioned swap interval extension and the WGL_ARB_extensions_string extension. This extension provides yet another entrypoint that is used exclusively to query for the WGL extensions. The ARB extensions string function is prototyped as follows:
const char *wglGetExtensionsStringARB(HDC hdc);
This function retrieves the list of WGL extensions in the same manner you previously would have used glGetString. Using the wglext.h header file, you can retrieve a pointer to this function like this:
PFNWGLGETEXTENSIONSSTRINGARBPROC *wglGetExtensionsStringARB;
wglGetExtensionsStringARB = (PFNWGLGETEXTENSIONSSTRINGARBPROC)
                             wglGetProcAddress("wglGetExtensionsStringARB");
glGetString returns the WGL_ARB_extensions_string identifier, but often developers skip this check and simply look for the entrypoint, as shown in the preceding code fragment. This approach is generally safe with most OpenGL extensions, but you should realize that this is, strictly speaking, “coloring outside the lines.” Some vendors export extensions on an “experimental” basis, and these extensions may not be officially supported, or the functions may not function properly if you skip the extension string check. Also, more than one extension may use the same function or functions. Testing only for function availability provides no information on the availability of the specific extension or extensions that are supported.
Perhaps one of the most important WGL extensions available for Windows is the WGL_ARB_pixel_format extension. This extension provides a mechanism that allows you to check for and select pixelformat features that did not exist when PIXELFORMATDESCRIPTOR was first created. For example, if your driver supports multisampled rendering (for full-scene antialiasing, for example), there is no way to select a pixelformat with this support using the old PIXELFORMATDESCRIPTOR fields. If this extension is supported, the driver exports the following functions:
BOOL wglGetPixelFormatAttribivARB(HDC hdc, GLint iPixelFormat,
                              GLint iLayerPlane, GLuint nAttributes,
                              const GLint *piAttributes, GLint *piValues);

BOOL wglGetPixelFormatAttribfvARB(HDC hdc, GLint iPixelFormat,
                              GLint iLayerPlane, GLuint nAttributes,
                              const GLint *piAttributes, GLfloat *pfValues);
These two variations of the same function allow you to query a particular pixelformat index and retrieve an array containing the attribute data for that pixelformat. The first argument, hdc, is the device context of the window that the pixelformat will be used for, followed by the pixelformat index. The iLayerPlane argument specifies which layer plane to query (0 if your implementation does not support layer planes). Next, nAttributes specifies how many attributes are being queried for this pixelformat, and the array piAttributes contains the list of attribute names to be queried. The attributes that can be specified are listed in Table 13.3. The final argument is an array that will be filled with the corresponding pixelformat attributes.
Table 13.3. Pixelformat Attributes
Constant | Description |
|---|---|
The number of pixelformats for this device. | |
Nonzero if the pixelformat can be used with a window. | |
Nonzero if the pixelformat can be used with a memory Device Independent Bitmap (DIB). | |
The number of bits in the depth buffer. | |
The number of bits in the stencil buffer. | |
One of the values in Table 13.4 that specifies which, if any, hardware driver is used. | |
Nonzero if a palette is required. | |
Nonzero if the hardware supports one palette only in 256-color mode. | |
Nonzero if the hardware supports swapping layer planes. | |
The method by which the buffer swap is accomplished for double-buffered pixelformats. It is one of the values listed in Table 13.5. | |
The number of overlay planes. | |
The number of underlay planes. | |
Nonzero if transparency is supported. | |
Transparent red color. | |
Transparent green color. | |
Transparent blue color. | |
Transparent alpha color. | |
Nonzero if layer planes share a depth buffer with the main plane. | |
Nonzero if layer planes share a stencil buffer with the main plane. | |
Nonzero if layer planes share an accumulation buffer with the main plane. | |
Nonzero if OpenGL is supported. | |
Nonzero if double buffered. | |
Nonzero if left and right buffers are supported. | |
| |
Number of bit planes in the color buffer. | |
Number of red bit planes in the color buffer. | |
Shift count for red bit planes. | |
Number of green bit planes in the color buffer. | |
Shift count for green bit planes. | |
Number of blue bit planes in the color buffer. | |
Shift count for blue bit planes. | |
Number of alpha bit planes in the color buffer. | |
Shift count for alpha bit planes. | |
Number of bit planes in the accumulation buffer. | |
Number of red bit planes in the accumulation buffer. | |
Number of green bit planes in the accumulation buffer. | |
Number of blue bit planes in the accumulation buffer. | |
Number of alpha bit planes in the accumulation buffer. | |
The number of auxiliary buffers. |
If you want to call the wglGetPixelFormatAttrib function, however, just like any other extension, the OpenGL rendering context must be current. This means that you must first create a temporary window, set up a pixelformat using PIXELFORMATDESCRIPTOR, and then retrieve and use a function pointer to one of the wglGetPixelFormatAttribARB functions. A convenient place to do this might be the splash screen or perhaps an initial Options dialog box that is presented to the user. You should not, however, try to use the Windows desktop because your application does not own it!
The following simple example queries for a single attribute—the number of pixelformats supported—so that you know how many you may need to look at:
int attrib[] = { WGL_NUMBER_PIXEL_FORMATS_ARB };
int nResults[0];
wglGetPixelFormatAttributeivARB(hDC, 1, 0, 1, attrib, nResults);
// nResults[0] now contains the number of exported pixelformats
For a more detailed example showing how to look for a specific pixelformat (including a multisampled pixelformat), see the SPHEREWORLD32 sample program coming up next.
SPHEREWORLD32 is a Win32-specific version of the Sphere World example we have returned to again and again throughout this book. SPHEREWORLD32 allows you to select windowed or full-screen mode, changes the display settings if necessary, and detects and allows you to select a multisampled pixelformat. Finally, you use the Windows-specific font features to display the frame rate and other information onscreen. When in full-screen mode, you can even Alt+Tab away from the program, and the window will be minimized until reselected.
The complete source to this “ultimate” Win32 sample program, provided in Listing 3.10, contains extensive comments to explain every aspect of the program. In the initial dialog box that is displayed (see Figure 3.10), you can select full-screen or windowed mode, multisampled rendering (if available), and whether you want to enable the swap interval extension. A sample screen of the running program is shown in Figure 3.11.


Example 13.10. SPHEREWORLD32 Source Code
// SphereWorld32.c
// OpenGL SuperBible
// Program by Richard S. Wright Jr.
// This program demonstrates a full featured robust Win32
// OpenGL framework
///////////////////////////////////////////////////////////////////////////////
// Include Files
#include <windows.h> // Win32 Framework (No MFC)
#include <glgl.h> // OpenGL
#include <glglu.h> // GLU Library
#include <stdio.h> // Standard IO (sprintf)
#include "....commonwglext.h" // WGL Extension Header
#include "....commonglext.h" // OpenGL Extension Header
#include "....commongltools.h" // GLTools library
#include "resource.h" // Dialog resources
// Initial rendering options specified by the user.
struct STARTUPOPTIONS {
DEVMODE devMode; // Display mode to use
int nPixelFormat; // Pixel format to use
int nPixelFormatMS; // Multisampled pixel format
BOOL bFullScreen; // Full screen?
BOOL bFSAA;
BOOL bVerticalSync;
};
///////////////////////////////////////////////////////////////////////////////
// Module globals
static HPALETTE hPalette = NULL; // Palette Handle
static HINSTANCE ghInstance = NULL; // Module Instance Handle
static LPCTSTR lpszAppName = "SphereWorld32"; // Name of App
static GLint nFontList; // Base display list for font
static struct STARTUPOPTIONS startupOptions; // Startup options info
static LARGE_INTEGER CounterFrequency;
static LARGE_INTEGER FPSCount;
static LARGE_INTEGER CameraTimer;
#define NUM_SPHERES 30 // Number of Spheres
GLTFrame spheres[NUM_SPHERES]; // Location of spheres
GLTFrame frameCamera; // Location and orientation of camera
// Light and material Data
GLfloat fLightPos[4] = { -100.0f, 100.0f, 50.0f, 1.0f }; // Point source
GLfloat fNoLight[] = { 0.0f, 0.0f, 0.0f, 0.0f };
GLfloat fLowLight[] = { 0.25f, 0.25f, 0.25f, 1.0f };
GLfloat fBrightLight[] = { 1.0f, 1.0f, 1.0f, 1.0f };
// Shadow matrix
GLTMatrix mShadowMatrix;
// Textures identifiers
#define GROUND_TEXTURE 0
#define TORUS_TEXTURE 1
#define SPHERE_TEXTURE 2
#define NUM_TEXTURES 3
GLuint textureObjects[NUM_TEXTURES];
const char *szTextureFiles[] = {"grass.tga", "wood.tga", "orb.tga"};
// Sphere and torus display lists
GLuint lTorusList, lSphereList;
///////////////////////////////////////////////////////////////////////////////
// Forward Declarations
// Declaration for Window procedure
LRESULT CALLBACK WndProc(HWND hWnd, UINT message,
WPARAM wParam, LPARAM lParam);
// Startup Dialog Procedure
BOOL APIENTRY StartupDlgProc (HWND hDlg, UINT message,
UINT wParam, LONG lParam);
// Find the best available pixelformat, including if Multisample is available
void FindBestPF(HDC hDC, int *nRegularFormat, int *nMSFormat);
BOOL ShowStartupOptions(void); // Initial startup dialog
void ChangeSize(GLsizei w, GLsizei h); // Change projection and viewport
void RenderScene(void); // Draw everything
void SetupRC(HDC hDC); // Set up the rendering context
void ShutdownRC(void); // Shutdown the rendering context
HPALETTE GetOpenGLPalette(HDC hDC); // Create a 3-3-2 palette
void DrawInhabitants(GLint nShadow); // Draw inhabitants of the world
void DrawGround(void); // Draw the ground
///////////////////////////////////////////////////////////////////////////////
// Extension function pointers
PFNWGLGETPIXELFORMATATTRIBIVARBPROC wglGetPixelFormatAttribivARB = NULL;
PFNGLWINDOWPOS2IPROC glWindowPos2i = NULL;
PFNWGLSWAPINTERVALEXTPROC wglSwapIntervalEXT = NULL;
//////////////////////////////////////////////////////////////
// Window has changed size. Reset to match window coordinates
void ChangeSize(GLsizei w, GLsizei h)
{
GLfloat fAspect;
// Prevent a divide by zero, when window is too short
// (you can't make a window of zero width).
if(h == 0)
h = 1;
glViewport(0, 0, w, h);
fAspect = (GLfloat)w / (GLfloat)h;
// Reset the coordinate system before modifying
glMatrixMode(GL_PROJECTION);
glLoadIdentity();
// Set the clipping volume
gluPerspective(35.0f, fAspect, 1.0f, 50.0f);
glMatrixMode(GL_MODELVIEW);
glLoadIdentity();
}
///////////////////////////////////////////////////////////
// Draw the ground as a series of triangle strips
void DrawGround(void)
{
GLfloat fExtent = 20.0f;
GLfloat fStep = 1.0f;
GLfloat y = -0.4f;
GLfloat iStrip, iRun;
GLfloat s = 0.0f;
GLfloat t = 0.0f;
GLfloat texStep = 1.0f / (fExtent * .075f);
// Ground is a tiling texture
glBindTexture(GL_TEXTURE_2D, textureObjects[GROUND_TEXTURE]);
glTexParameterf(GL_TEXTURE_2D, GL_TEXTURE_WRAP_S, GL_REPEAT);
glTexParameterf(GL_TEXTURE_2D, GL_TEXTURE_WRAP_T, GL_REPEAT);
// Lay out strips and repeat textures coordinates
for(iStrip = -fExtent; iStrip <= fExtent; iStrip += fStep)
{
t = 0.0f;
glBegin(GL_TRIANGLE_STRIP);
for(iRun = fExtent; iRun >= -fExtent; iRun -= fStep)
{
glTexCoord2f(s, t);
glNormal3f(0.0f, 1.0f, 0.0f); // All Point up
glVertex3f(iStrip, y, iRun);
glTexCoord2f(s + texStep, t);
glNormal3f(0.0f, 1.0f, 0.0f); // All Point up
glVertex3f(iStrip + fStep, y, iRun);
t += texStep;
}
glEnd();
s += texStep;
}
}
///////////////////////////////////////////////////////////////////////
// Draw random inhabitants and the rotating torus/sphere duo
void DrawInhabitants(GLint nShadow)
{
static GLfloat yRot = 0.0f; // Rotation angle for animation
GLint i;
if(nShadow == 0)
{
yRot += 0.5f;
glColor4f(1.0f, 1.0f, 1.0f, 1.0f);
}
else
glColor4f(0.0f, 0.0f, .0f, .75f); // Shadow color
// Draw the randomly located spheres
glBindTexture(GL_TEXTURE_2D, textureObjects[SPHERE_TEXTURE]);
for(i = 0; i < NUM_SPHERES; i++)
{
glPushMatrix();
gltApplyActorTransform(&spheres[i]);
glCallList(lSphereList);
glPopMatrix();
}
glPushMatrix();
glTranslatef(0.0f, 0.1f, -2.5f);
glPushMatrix();
glRotatef(-yRot * 2.0f, 0.0f, 1.0f, 0.0f);
glTranslatef(1.0f, 0.0f, 0.0f);
glCallList(lSphereList);
glPopMatrix();
if(nShadow == 0)
{
// Torus alone will be specular
glMaterialfv(GL_FRONT, GL_SPECULAR, fBrightLight);
}
glRotatef(yRot, 0.0f, 1.0f, 0.0f);
glBindTexture(GL_TEXTURE_2D, textureObjects[TORUS_TEXTURE]);
glCallList(lTorusList);
glMaterialfv(GL_FRONT, GL_SPECULAR, fNoLight);
glPopMatrix();
}
//////////////////////////////////////////////////
// Draw everything
void RenderScene(void)
{
static int iFrames = 0; // Count frames to calculate fps every 100 frames
static float fps = 0.0f; // Calculated fps
// Clear the window
glClear(GL_COLOR_BUFFER_BIT | GL_DEPTH_BUFFER_BIT | GL_STENCIL_BUFFER_BIT);
glPushMatrix();
gltApplyCameraTransform(&frameCamera); // Move camera/world
// Position light before any other transformations
glLightfv(GL_LIGHT0, GL_POSITION, fLightPos);
// Draw the ground
glColor3f(1.0f, 1.0f, 1.0f);
DrawGround();
// Draw shadows first
glDisable(GL_DEPTH_TEST);
glDisable(GL_LIGHTING);
glDisable(GL_TEXTURE_2D);
glEnable(GL_BLEND);
glBlendFunc(GL_SRC_ALPHA, GL_ONE_MINUS_SRC_ALPHA);
glEnable(GL_STENCIL_TEST);
glPushMatrix();
glMultMatrixf(mShadowMatrix);
DrawInhabitants(1);
glPopMatrix();
glDisable(GL_STENCIL_TEST);
glDisable(GL_BLEND);
glEnable(GL_LIGHTING);
glEnable(GL_TEXTURE_2D);
glEnable(GL_DEPTH_TEST);
// Draw inhabitants normally
DrawInhabitants(0);
glPopMatrix();
// Calculate Frame Rate, once every 100 frames
iFrames++;
if(iFrames == 100)
{
float fTime;
// Get the current count
LARGE_INTEGER lCurrent;
QueryPerformanceCounter(&lCurrent);
fTime = (float)(lCurrent.QuadPart - FPSCount.QuadPart) /
(float)CounterFrequency.QuadPart;
fps = (float)iFrames / fTime;
// Reset frame count and timer
iFrames = 0;
QueryPerformanceCounter(&FPSCount);
}
// If we have the window position extension, display
// the frame rate, and tell if multisampling was enabled
// and if the VSync is turned on.
if(glWindowPos2i != NULL)
{
int iRow = 10;
char cBuffer[64];
// Turn off depth test, lighting, and texture mapping
glDisable(GL_DEPTH_TEST);
glDisable(GL_LIGHTING);
glDisable(GL_TEXTURE_2D);
glColor3f(1.0f, 1.0f, 1.0f);
// Set position and display message
glWindowPos2i(0, iRow);
glListBase(nFontList);
glCallLists (13, GL_UNSIGNED_BYTE, "OpenGL Rocks!");
iRow+= 20;
// Display the frame rate
sprintf(cBuffer,"FPS: %.1f", fps);
glWindowPos2i(0, iRow);
glCallLists(strlen(cBuffer), GL_UNSIGNED_BYTE, cBuffer);
iRow += 20;
// MultiSampled?
if(startupOptions.bFSAA == TRUE && startupOptions.nPixelFormatMS != 0)
{
glWindowPos2i(0, iRow);
glCallLists(25 ,GL_UNSIGNED_BYTE,"Multisampled Frame Buffer");
iRow += 20;
}
// VSync?
if(wglSwapIntervalEXT != NULL && startupOptions.bVerticalSync == TRUE)
{
glWindowPos2i(0, iRow);
glCallLists(9 ,GL_UNSIGNED_BYTE, "VSync On");
iRow += 20;
}
// Put everything back
glEnable(GL_DEPTH_TEST);
glEnable(GL_LIGHTING);
glEnable(GL_TEXTURE_2D);
}
}
///////////////////////////////////////////////////////////////////////////////
// Setup. Create font/bitmaps, load textures, create display lists
void SetupRC(HDC hDC)
{
GLTVector3 vPoints[3] = {{ 0.0f, -0.4f, 0.0f },
{ 10.0f, -0.4f, 0.0f },
{ 5.0f, -0.4f, -5.0f }};
int iSphere;
int i;
// Setup the Font characteristics
HFONT hFont;
LOGFONT logfont;
logfont.lfHeight = -20;
logfont.lfWidth = 0;
logfont.lfEscapement = 0;
logfont.lfOrientation = 0;
logfont.lfWeight = FW_BOLD;
logfont.lfItalic = FALSE;
logfont.lfUnderline = FALSE;
logfont.lfStrikeOut = FALSE;
logfont.lfCharSet = ANSI_CHARSET;
logfont.lfOutPrecision = OUT_DEFAULT_PRECIS;
logfont.lfClipPrecision = CLIP_DEFAULT_PRECIS;
logfont.lfQuality = DEFAULT_QUALITY;
logfont.lfPitchAndFamily = DEFAULT_PITCH;
strcpy(logfont.lfFaceName,"Arial");
// Create the font and display list
hFont = CreateFontIndirect(&logfont);
SelectObject (hDC, hFont);
//Create display lists for glyphs 0 through 128
nFontList = glGenLists(128);
wglUseFontBitmaps(hDC, 0, 128, nFontList);
DeleteObject(hFont); // Don't need original font anymore
// Grayish background
glClearColor(fLowLight[0], fLowLight[1], fLowLight[2], fLowLight[3]);
// Clear stencil buffer with zero, increment by one whenever anybody
// draws into it. When stencil function is enabled, only write where
// stencil value is zero. This prevents the transparent shadow from drawing
// over itself
glStencilOp(GL_INCR, GL_INCR, GL_INCR);
glClearStencil(0);
glStencilFunc(GL_EQUAL, 0x0, 0x01);
// Cull backs of polygons
glCullFace(GL_BACK);
glFrontFace(GL_CCW);
glEnable(GL_CULL_FACE);
glEnable(GL_DEPTH_TEST);
// Setup light parameters
glLightModelfv(GL_LIGHT_MODEL_AMBIENT, fNoLight);
glLightfv(GL_LIGHT0, GL_AMBIENT, fLowLight);
glLightfv(GL_LIGHT0, GL_DIFFUSE, fBrightLight);
glLightfv(GL_LIGHT0, GL_SPECULAR, fBrightLight);
glEnable(GL_LIGHTING);
glEnable(GL_LIGHT0);
// Calculate shadow matrix
gltMakeShadowMatrix(vPoints, fLightPos, mShadowMatrix);
// Mostly use material tracking
glEnable(GL_COLOR_MATERIAL);
glColorMaterial(GL_FRONT, GL_AMBIENT_AND_DIFFUSE);
glMateriali(GL_FRONT, GL_SHININESS, 128);
gltInitFrame(&frameCamera); // Initialize the camera
// Randomly place the sphere inhabitants
for(iSphere = 0; iSphere < NUM_SPHERES; iSphere++)
{
gltInitFrame(&spheres[iSphere]); // Initialize the frame
// Pick a random location between -20 and 20 at .1 increments
spheres[iSphere].vLocation[0] = (float)((rand() % 400) - 200) * 0.1f;
spheres[iSphere].vLocation[1] = 0.0f;
spheres[iSphere].vLocation[2] = (float)((rand() % 400) - 200) * 0.1f;
}
// Set up texture maps
glEnable(GL_TEXTURE_2D);
glGenTextures(NUM_TEXTURES, textureObjects);
glTexEnvi(GL_TEXTURE_ENV, GL_TEXTURE_ENV_MODE, GL_MODULATE);
// Load teach texture
for(i = 0; i < NUM_TEXTURES; i++)
{
GLubyte *pBytes;
GLint iWidth, iHeight, iComponents;
GLenum eFormat;
glBindTexture(GL_TEXTURE_2D, textureObjects[i]);
// Load this texture map
pBytes = gltLoadTGA(szTextureFiles[i], &iWidth, &iHeight,
&iComponents, &eFormat);
gluBuild2DMipmaps(GL_TEXTURE_2D, iComponents, iWidth,
iHeight, eFormat, GL_UNSIGNED_BYTE, pBytes);
free(pBytes);
// Trilinear mipmapping
glTexParameteri(GL_TEXTURE_2D, GL_TEXTURE_MAG_FILTER, GL_LINEAR);
glTexParameteri(GL_TEXTURE_2D, GL_TEXTURE_MIN_FILTER,
GL_LINEAR_MIPMAP_LINEAR);
glTexParameteri(GL_TEXTURE_2D, GL_TEXTURE_WRAP_S, GL_CLAMP_TO_EDGE);
glTexParameteri(GL_TEXTURE_2D, GL_TEXTURE_WRAP_T, GL_CLAMP_TO_EDGE);
}
// Get window position function pointer if it exists
glWindowPos2i = (PFNGLWINDOWPOS2IPROC)wglGetProcAddress("glWindowPos2i");
// Get swap interval function pointer if it exists
wglSwapIntervalEXT = (PFNWGLSWAPINTERVALEXTPROC)
wglGetProcAddress("wglSwapIntervalEXT");
if(wglSwapIntervalEXT != NULL && startupOptions.bVerticalSync == TRUE)
wglSwapIntervalEXT(1);
// If multisampling was available and was selected, enable
if(startupOptions.bFSAA == TRUE && startupOptions.nPixelFormatMS != 0)
glEnable(GL_MULTISAMPLE_ARB);
// If separate specular color is available, make torus shiny
if(gltIsExtSupported("GL_EXT_separate_specular_color"))
glLightModeli(GL_LIGHT_MODEL_COLOR_CONTROL, GL_SEPARATE_SPECULAR_COLOR);
// Initialize the timers
QueryPerformanceFrequency(&CounterFrequency);
QueryPerformanceCounter(&FPSCount);
CameraTimer = FPSCount;
// Build display lists for the torus and spheres
// (You could do one for the ground as well)
lTorusList = glGenLists(2);
lSphereList = lTorusList + 1;
glNewList(lTorusList, GL_COMPILE);
gltDrawTorus(0.35f, 0.15f, 61, 37);
glEndList();
glNewList(lSphereList, GL_COMPILE);
gltDrawSphere(0.3f, 31, 16);
glEndList();
}
///////////////////////////////////////////////////////////////////////////////
// Shutdown the rendering context
void ShutdownRC(void)
{
glDeleteLists(nFontList, 128); // Delete font display list
glDeleteLists(lTorusList, 2); // Delete object display lists
glDeleteTextures(NUM_TEXTURES, textureObjects); // Release textures
}
///////////////////////////////////////////////////////////////////////
// If necessary, creates a 3-3-2 palette for the device context listed.
HPALETTE GetOpenGLPalette(HDC hDC)
{
HPALETTE hRetPal = NULL; // Handle to palette to be created
PIXELFORMATDESCRIPTOR pfd; // Pixel Format Descriptor
LOGPALETTE *pPal; // Pointer to memory for logical palette
int nPixelFormat; // Pixel format index
int nColors; // Number of entries in palette
int i; // Counting variable
BYTE RedRange,GreenRange,BlueRange;
// Range for each color entry (7,7,and 3)
// Get the pixel format index and retrieve the pixel format description
nPixelFormat = GetPixelFormat(hDC);
DescribePixelFormat(hDC, nPixelFormat, sizeof(PIXELFORMATDESCRIPTOR),&pfd);
// Does this pixel format require a palette? If not, do not create a
// palette and just return NULL
if(!(pfd.dwFlags & PFD_NEED_PALETTE))
return NULL;
// Number of entries in palette. 8 bits yields 256 entries
nColors = 1 << pfd.cColorBits;
// Allocate space for a logical palette structure plus all palette entries
pPal = (LOGPALETTE*)malloc(sizeof(LOGPALETTE)+nColors*sizeof(PALETTEENTRY));
// Fill in palette header
pPal->palVersion = 0x300; // Windows 3.0
pPal->palNumEntries = nColors; // table size
// Build mask of all 1's. This creates a number represented by having
// the low order x bits set, where x = pfd.cRedBits, pfd.cGreenBits, and
// pfd.cBlueBits.
RedRange = (1 << pfd.cRedBits) -1;
GreenRange = (1 << pfd.cGreenBits) - 1;
BlueRange = (1 << pfd.cBlueBits) -1;
// Loop through all the palette entries
for(i = 0; i < nColors; i++)
{
// Fill in the 8-bit equivalents for each component
pPal->palPalEntry[i].peRed = (i >> pfd.cRedShift) & RedRange;
pPal->palPalEntry[i].peRed = (unsigned char)(
(double) pPal->palPalEntry[i].peRed * 255.0 / RedRange);
pPal->palPalEntry[i].peGreen = (i >> pfd.cGreenShift) & GreenRange;
pPal->palPalEntry[i].peGreen = (unsigned char)(
(double)pPal->palPalEntry[i].peGreen * 255.0 / GreenRange);
pPal->palPalEntry[i].peBlue = (i >> pfd.cBlueShift) & BlueRange;
pPal->palPalEntry[i].peBlue = (unsigned char)(
(double)pPal->palPalEntry[i].peBlue * 255.0 / BlueRange);
pPal->palPalEntry[i].peFlags = (unsigned char) NULL;
}
// Create the palette
hRetPal = CreatePalette(pPal);
// Go ahead and select and realize the palette for this device context
SelectPalette(hDC,hRetPal,FALSE);
RealizePalette(hDC);
// Free the memory used for the logical palette structure
free(pPal);
// Return the handle to the new palette
return hRetPal;
}
///////////////////////////////////////////////////////////////////
// Entry point of all Windows programs
int APIENTRY WinMain( HINSTANCE hInstance,
HINSTANCE hPrevInstance,
LPSTR lpCmdLine,
int nCmdShow)
{
MSG msg; // Windows message structure
WNDCLASS wc; // Windows class structure
HWND hWnd; // Storage for window handle
UINT uiStyle,uiStyleX;
ghInstance = hInstance; // Save instance handle
// Get startup options, or shutdown
if(ShowStartupOptions() == FALSE)
return 0;
if(startupOptions.bFullScreen == TRUE)
if(ChangeDisplaySettings(&startupOptions.devMode, CDS_FULLSCREEN)
!= DISP_CHANGE_SUCCESSFUL)
{
// Replace with string resource, and actual width and height
MessageBox(NULL, TEXT("Cannot change to selected desktop resolution."),
NULL, MB_OK | MB_ICONSTOP);
return -1;
}
// Register Window style
wc.style = CS_HREDRAW | CS_VREDRAW | CS_OWNDC;
wc.lpfnWndProc = (WNDPROC) WndProc;
wc.cbClsExtra = 0;
wc.cbWndExtra = 0;
wc.hInstance = hInstance;
wc.hIcon = NULL;
wc.hCursor = LoadCursor(NULL, IDC_ARROW);
// No need for background brush for OpenGL window
wc.hbrBackground = NULL;
wc.lpszMenuName = NULL;
wc.lpszClassName = lpszAppName;
// Register the window class
if(RegisterClass(&wc) == 0)
return FALSE;
// Select window styles
if(startupOptions.bFullScreen == TRUE)
{
uiStyle = WS_POPUP;
uiStyleX = WS_EX_TOPMOST;
}
else
{
uiStyle = WS_OVERLAPPEDWINDOW;
uiStyleX = 0;
}
// Create the main 3D window
hWnd = CreateWindowEx(uiStyleX, wc.lpszClassName, lpszAppName, uiStyle,
0, 0, startupOptions.devMode.dmPelsWidth,
startupOptions.devMode.dmPelsHeight, NULL, NULL, hInstance, NULL);
// If window was not created, quit
if(hWnd == NULL)
return FALSE;
// Make sure window manager stays hidden
ShowWindow(hWnd,SW_SHOW);
UpdateWindow(hWnd);
// Process application messages until the application closes
while( GetMessage(&msg, NULL, 0, 0))
{
TranslateMessage(&msg);
DispatchMessage(&msg);
}
// Restore Display Settings
if(startupOptions.bFullScreen == TRUE)
ChangeDisplaySettings(NULL, 0);
return msg.wParam;
}
/////////////////////////////////////////////////////////////////
// Window procedure, handles all messages for this program
LRESULT CALLBACK WndProc(HWND hWnd, UINT message, WPARAM wParam, LPARAM lParam)
{
static HGLRC hRC; // Permanent Rendering context
static HDC hDC; // Private GDI Device context
switch (message)
{
// Window creation, setup for OpenGL
case WM_CREATE:
// Store the device context
hDC = GetDC(hWnd);
// The screen and desktop may have changed, so do this again
FindBestPF(hDC, &startupOptions.nPixelFormat,
&startupOptions.nPixelFormatMS);
// Set pixelformat
if(startupOptions.bFSAA == TRUE &&
(startupOptions.nPixelFormatMS != 0))
SetPixelFormat(hDC, startupOptions.nPixelFormatMS, NULL);
else
SetPixelFormat(hDC, startupOptions.nPixelFormat, NULL);
// Create the rendering context and make it current
hRC = wglCreateContext(hDC);
wglMakeCurrent(hDC, hRC);
// Create the palette
hPalette = GetOpenGLPalette(hDC);
SetupRC(hDC);
break;
// Check for ESC key
case WM_CHAR:
if(wParam == 27)
DestroyWindow(hWnd);
break;
// Window is either full screen, or not visible
case WM_ACTIVATE:
{
// Ignore this altogether unless we are in full screen mode
if(startupOptions.bFullScreen == TRUE)
{
// Construct windowplacement structure
WINDOWPLACEMENT wndPlacement;
wndPlacement.length = sizeof(WINDOWPLACEMENT);
wndPlacement.flags = WPF_RESTORETOMAXIMIZED;
wndPlacement.ptMaxPosition.x = 0;
wndPlacement.ptMaxPosition.y = 0;
wndPlacement.ptMinPosition.x = 0;
wndPlacement.ptMinPosition.y = 0;
wndPlacement.rcNormalPosition.bottom =
startupOptions.devMode.dmPelsHeight;
wndPlacement.rcNormalPosition.left = 0;
wndPlacement.rcNormalPosition.top = 0;
wndPlacement.rcNormalPosition.right =
startupOptions.devMode.dmPelsWidth;
// Switching away from window
if(LOWORD(wParam) == WA_INACTIVE)
{
wndPlacement.showCmd = SW_SHOWMINNOACTIVE;
SetWindowPlacement(hWnd, &wndPlacement);
ShowCursor(TRUE);
}
else // Switching back to window
{
wndPlacement.showCmd = SW_RESTORE;
SetWindowPlacement(hWnd, &wndPlacement);
ShowCursor(FALSE);
}
}
}
break;
// Window is being destroyed, cleanup
case WM_DESTROY:
ShutdownRC();
// Deselect the current rendering context and delete it
wglMakeCurrent(hDC,NULL);
wglDeleteContext(hRC);
// Delete the palette
if(hPalette != NULL)
DeleteObject(hPalette);
// Tell the application to terminate after the window
// is gone.
PostQuitMessage(0);
break;
// Window is resized.
case WM_SIZE:
// Call our function which modifies the clipping
// volume and viewport
ChangeSize(LOWORD(lParam), HIWORD(lParam));
break;
// The painting function. This message sent by Windows
// whenever the screen needs updating.
case WM_PAINT:
{
// Only poll keyboard when this window has focus
if(GetFocus() == hWnd)
{
float fTime;
float fLinear, fAngular;
// Get the time since the last time we rendered a frame
LARGE_INTEGER lCurrent;
QueryPerformanceCounter(&lCurrent);
fTime = (float)(lCurrent.QuadPart - CameraTimer.QuadPart) /
(float)CounterFrequency.QuadPart;
CameraTimer = lCurrent;
// Camera motion will be time based. This keeps the motion constant
// regardless of frame rate. Higher frame rates produce smoother
// animation and motion, they should not produce "faster" motion.
fLinear = fTime * 1.0f;
fAngular = (float)gltDegToRad(60.0f * fTime);
// Move the camera around, poll the keyboard
if(GetAsyncKeyState(VK_UP))
gltMoveFrameForward(&frameCamera, fLinear);
if(GetAsyncKeyState(VK_DOWN))
gltMoveFrameForward(&frameCamera, -fLinear);
if(GetAsyncKeyState(VK_LEFT))
gltRotateFrameLocalY(&frameCamera, fAngular);
if(GetAsyncKeyState(VK_RIGHT))
gltRotateFrameLocalY(&frameCamera, -fAngular);
}
// Call OpenGL drawing code
RenderScene();
// Call function to swap the buffers
SwapBuffers(hDC);
// Not validated on purpose, gives an endless series
// of paint messages... this is akin to having
// a rendering loop
//ValidateRect(hWnd,NULL);
}
break;
// Windows is telling the application that it may modify
// the system palette. This message in essence asks the
// application for a new palette.
case WM_QUERYNEWPALETTE:
// If the palette was created.
if(hPalette)
{
int nRet;
// Selects the palette into the current device context
SelectPalette(hDC, hPalette, FALSE);
// Map entries from the currently selected palette to
// the system palette. The return value is the number
// of palette entries modified.
nRet = RealizePalette(hDC);
// Repaint, forces remap of palette in current window
InvalidateRect(hWnd,NULL,FALSE);
return nRet;
}
break;
// This window may set the palette, even though it is not the
// currently active window.
case WM_PALETTECHANGED:
// Don't do anything if the palette does not exist, or if
// this is the window that changed the palette.
if((hPalette != NULL) && ((HWND)wParam != hWnd))
{
// Select the palette into the device context
SelectPalette(hDC,hPalette,FALSE);
// Map entries to system palette
RealizePalette(hDC);
// Remap the current colors to the newly realized palette
UpdateColors(hDC);
return 0;
}
break;
default: // Passes it on if unprocessed
return (DefWindowProc(hWnd, message, wParam, lParam));
}
return (0L);
}
/////////////////////////////////////////////////////////////////////////////
// Dialog procedure for the startup dialog
BOOL APIENTRY StartupDlgProc (HWND hDlg, UINT message, UINT wParam, LONG lParam)
{
switch (message)
{
// Initialize the dialog box
case WM_INITDIALOG:
{
int nPF;
HDC hDC; // Dialogs device context
HGLRC hRC;
DEVMODE devMode;
unsigned int iMode;
unsigned int nWidth; // Current settings
unsigned int nHeight;
char cBuffer[64];
HWND hListBox;
PIXELFORMATDESCRIPTOR pfd = { // Not going to be too picky
sizeof(PIXELFORMATDESCRIPTOR),
1,
PFD_DRAW_TO_WINDOW | PFD_SUPPORT_OPENGL | PFD_DOUBLEBUFFER,
PFD_TYPE_RGBA, // Full color
32, // Color depth
0,0,0,0,0,0,0, // Ignored
0,0,0,0, // Accumulation buffer
16, // Depth bits
8, // Stencil bits
0,0,0,0,0,0 }; // Some used, some not
// Initialize render options
startupOptions.bFSAA = FALSE;
startupOptions.bFullScreen = FALSE;
startupOptions.bVerticalSync = FALSE;
// Create a "temporary" OpenGL rendering context
hDC = GetDC(hDlg);
// Set pixel format one time....
nPF = ChoosePixelFormat(hDC, &pfd);
SetPixelFormat(hDC, nPF, &pfd);
DescribePixelFormat(hDC, nPF, sizeof(PIXELFORMATDESCRIPTOR), &pfd);
// Create the GL context
hRC = wglCreateContext(hDC);
wglMakeCurrent(hDC, hRC);
// Set text in dialog
SetDlgItemText(hDlg, IDC_VENDOR,
(const char *)glGetString(GL_VENDOR));
SetDlgItemText(hDlg, IDC_RENDERER,
(const char *)glGetString(GL_RENDERER));
SetDlgItemText(hDlg, IDC_VERSION,
(const char *)glGetString(GL_VERSION));
// Vertical Sync off by default
if(gltIsExtSupported("WGL_EXT_swap_control"))
EnableWindow(GetDlgItem(hDlg, IDC_VSYNC_CHECK), TRUE);
// Find a multisampled and non-multisampled pixel format
FindBestPF(hDC, &startupOptions.nPixelFormat,
&startupOptions.nPixelFormatMS);
// Done with GL context
wglMakeCurrent(hDC, NULL);
wglDeleteContext(hRC);
// Enumerate display modes
iMode = 0;
nWidth = GetSystemMetrics(SM_CXSCREEN); // Current settings
nHeight = GetSystemMetrics(SM_CYSCREEN);
hListBox = GetDlgItem(hDlg, IDC_DISPLAY_COMBO);
while(EnumDisplaySettings(NULL, iMode, &devMode))
{
int iItem;
sprintf(cBuffer,"%d x %d x %dbpp @%dhz", devMode.dmPelsWidth,
devMode.dmPelsHeight, devMode.dmBitsPerPel,
devMode.dmDisplayFrequency);
iItem = SendMessage(hListBox, CB_ADDSTRING, 0, (LPARAM)cBuffer);
SendMessage(hListBox, CB_SETITEMDATA, iItem, iMode);
if(devMode.dmPelsHeight == nHeight &&
devMode.dmPelsWidth == nWidth)
SendMessage(hListBox, CB_SETCURSEL, iItem, 0);
iMode++;
}
// Set other defaults /////////////
// Windowed or full screen
CheckDlgButton(hDlg, IDC_FS_CHECK, BST_CHECKED);
// FSAA, but only if support detected
if(startupOptions.nPixelFormatMS != 0)
EnableWindow(GetDlgItem(hDlg, IDC_MULTISAMPLED_CHECK), TRUE);
return (TRUE);
}
break;
// Process command messages
case WM_COMMAND:
{
// Validate and Make the changes
if(LOWORD(wParam) == IDOK)
{
// Read options ////////////////////////////////////////
// Display mode
HWND hListBox = GetDlgItem(hDlg, IDC_DISPLAY_COMBO);
int iMode = SendMessage(hListBox, CB_GETCURSEL, 0, 0);
iMode = SendMessage(hListBox, CB_GETITEMDATA, iMode, 0);
EnumDisplaySettings(NULL, iMode, &startupOptions.devMode);
// Full screen or windowed?
if(IsDlgButtonChecked(hDlg, IDC_FS_CHECK))
startupOptions.bFullScreen = TRUE;
else
startupOptions.bFullScreen = FALSE;
// FSAA
if(IsDlgButtonChecked(hDlg, IDC_MULTISAMPLED_CHECK))
startupOptions.bFSAA = TRUE;
else
startupOptions.bFSAA = FALSE;
// Vertical Sync.
if(IsDlgButtonChecked(hDlg, IDC_VSYNC_CHECK))
startupOptions.bVerticalSync = TRUE;
else
startupOptions.bVerticalSync = FALSE;
EndDialog(hDlg,TRUE);
}
if(LOWORD(wParam) == IDCANCEL)
EndDialog(hDlg, FALSE);
}
break;
// Closed from sysbox
case WM_CLOSE:
EndDialog(hDlg,FALSE); // Same as cancel
break;
}
return FALSE;
}
///////////////////////////////////////////////////////////////////////////////
// Display the startup screen (just a modal dialog box)
BOOL ShowStartupOptions(void)
{
return DialogBox (ghInstance,
MAKEINTRESOURCE(IDD_DLG_INTRO),
NULL,
StartupDlgProc);
}
///////////////////////////////////////////////////////////////////////////////
// Select pixelformat with desired attributes
// Returns the best available "regular" pixel format, and the best available
// Multisampled pixelformat (0 if not available)
void FindBestPF(HDC hDC, int *nRegularFormat, int *nMSFormat)
{
*nRegularFormat = 0;
*nMSFormat = 0;
// easy check, just look for the entrypoint
if(gltIsWGLExtSupported(hDC, "WGL_ARB_pixel_format"))
if(wglGetPixelFormatAttribivARB == NULL)
wglGetPixelFormatAttribivARB = (PFNWGLGETPIXELFORMATATTRIBIVARBPROC)
wglGetProcAddress("wglGetPixelFormatAttribivARB");
// First try to use new extended wgl way
if(wglGetPixelFormatAttribivARB != NULL)
{
// Only care about these attributes
int nBestMS = 0;
int i;
int iResults[9];
int iAttributes [9] = { WGL_SUPPORT_OPENGL_ARB, // 0
WGL_ACCELERATION_ARB, // 1
WGL_DRAW_TO_WINDOW_ARB, // 2
WGL_DOUBLE_BUFFER_ARB, // 3
WGL_PIXEL_TYPE_ARB, // 4
WGL_DEPTH_BITS_ARB, // 5
WGL_STENCIL_BITS_ARB, // 6
WGL_SAMPLE_BUFFERS_ARB, // 7
WGL_SAMPLES_ARB }; // 8
// How many pixelformats are there?
int nFormatCount[] = { 0 };
int attrib[] = { WGL_NUMBER_PIXEL_FORMATS_ARB };
wglGetPixelFormatAttribivARB(hDC, 1, 0, 1, attrib, nFormatCount);
// Loop through all the formats and look at each one
for(i = 0; i < nFormatCount[0]; i++)
{
// Query pixel format
wglGetPixelFormatAttribivARB(hDC, i+1, 0, 9, iAttributes, iResults);
// Match? Must support OpenGL AND be Accelerated AND draw to Window
if(iResults[0] == 1 && iResults[1] == WGL_FULL_ACCELERATION_ARB
&& iResults[2] == 1)
if(iResults[3] == 1) // Double buffered
if(iResults[4] == WGL_TYPE_RGBA_ARB) // Full Color
if(iResults[5] >= 16) // Any Depth greater than 16
if(iResults[6] > 0) // Any Stencil depth (not zero)
{
// We have a candidate, look for most samples if multisampled
if(iResults[7] == 1) // Multisampled
{
if(iResults[8] > nBestMS) // Look for most samples
{
*nMSFormat = i; // Multisamples
nBestMS = iResults[8]; // Looking for the best
}
}
else // Not multisampled
{
// Good enough for "regular". This will fall through
*nRegularFormat = i;
}
}
}
}
else
{
// Old fashioned way...
// or multisample
PIXELFORMATDESCRIPTOR pfd = {
sizeof(PIXELFORMATDESCRIPTOR),
1,
PFD_DRAW_TO_WINDOW | PFD_SUPPORT_OPENGL | PFD_DOUBLEBUFFER,
PFD_TYPE_RGBA, // Full color
32, // Color depth
0,0,0,0,0,0,0, // Ignored
0,0,0,0, // Accumulation buffer
24, // Depth bits
8, // Stencil bits
0,0,0,0,0,0 }; // Some used, some not
*nRegularFormat = ChoosePixelFormat(hDC, &pfd);
}
}
This chapter introduced you to using OpenGL on the Win32 platform. You read about the different driver models and implementations available for Windows and what to watch. You also learned how to enumerate and select a pixel format to get the kind of hardware-accelerated or software rendering support you want. You've now seen the basic framework for a Win32 program that replaces the GLUT framework, so you can write true native Win32 application code.
We also showed you how to create a 3-3-2 palette to enable OpenGL rendering with only 256 available colors for output, and we showed you how to create a full-screen window for games or simulation-type applications. Additionally, we discussed some of the Windows-specific features of OpenGL on Windows, such as support for TrueType fonts and multiple rendering threads.
Finally, we presented the ultimate OpenGL on Win32 sample program, SPHEREWORLD32. This program demonstrated how to use a number of Windows-specific features and WGL extensions if they were available. It also showed you how to construct a well-behaved program that will run on everything from an old 8-bit color display to the latest 32-bit full-color mega-3D game accelerator.
DescribePixelFormat | |
|---|---|
Purpose: | |
Include File: |
|
Syntax: | |
int DescribePixelFormat(HDC hDC, int iPixelFormat, | |
Description: | This function fills the |
Parameters: | |
|
|
|
|
|
|
|
typedef struct tagPIXELFORMATDESCRIPTOR {
   WORD nSize;
   WORD nVersion;
   DWORD dwFlags;
   BYTE iPixelType;
   BYTE cColorBits;
   BYTE cRedBits;
   BYTE cRedShift;
   BYTE cGreenBits;
   BYTE cGreenShift;
   BYTE cBlueBits;
   BYTE cBlueShift;
   BYTE cAlphaBits;
   BYTE cAlphaShift;
   BYTE cAccumBits;
   BYTE cAccumRedBits;
   BYTE cAccumGreenBits;
   BYTE cAccumBlueBits;
   BYTE cAccumAlphaBits;
   BYTE cDepthBits;
   BYTE cStencilBits;
   BYTE cAuxBuffers;
   BYTE iLayerType;
   BYTE bReserved;
   DWORD dwLayerMask;
   DWORD dwVisibleMask;
   DWORD dwDamageMask;
}  PIXELFORMATDESCRIPTOR;
|
Returns: | The maximum pixel format supported by the specified device context or 0 (zero) on failure. |
See Also: |
|
SwapBuffers | |
|---|---|
Purpose: | Quickly copies the contents of a window's back buffer to the front buffer (foreground). |
Include File: |
|
Syntax: | |
BOOL SwapBuffers(HDC hDC);
| |
Description: | When a double-buffered pixel format is chosen, a window has a front (displayed) and back (hidden) image buffer. Drawing commands are sent to the back buffer. This function enables you to copy the contents of the hidden back buffer to the displayed front buffer, to support smooth drawing or animation. Note that the buffers may be copied or just swapped by the implementation. After this command is executed, the contents of the back buffer are undefined. |
Parameters: | |
|
|
Returns: |
|
See Also: |
|
wglCreateLayerContext | |
|---|---|
Purpose: | Creates a new OpenGL rendering context suitable for drawing on the specified layer plane. |
Include File: |
|
Syntax: | |
HGLRC wglCreateLayerContext(HDC hDC, int iLayerPlane); | |
Description: | This function creates an OpenGL rendering context suitable for the given layer plane. When overlay and underlay planes are supported (only by some hardware implementations), you need a separate OpenGL rendering context for each one. The layer plane with index 0 is the main plane (what you normally render to). Positive indexes are overlay planes, and negative values are underlay planes. |
Parameters: | |
|
|
|
|
Returns: | The handle to the new rendering context or |
See Also: |
|
wglGetCurrentDC | |
|---|---|
Purpose: | Gets the windows device context associated with the current OpenGL rendering context. |
Include File: |
|
Syntax: | |
HDC wglGetCurrentDC(void); | |
Description: | This function enables you to acquire the windows device context of the window associated with the current OpenGL rendering context. It is typically used to obtain a windows device context to combine OpenGL and GDI drawing functions in a single window. |
Returns: | If the current thread has a current OpenGL rendering context, this function returns the handle to the windows device context associated with it. Otherwise, the return value is |
See Also: |
|
wglGetProcAddress | |
|---|---|
Purpose: | Gets the address of an extension function. |
Include File: |
|
Syntax: | |
PROC wglGetProcAddress(LPSTR lpszProc);
| |
Description: | This function retrieves the address of an extension function. If the extension function is not available, a |
Parameters: | |
|
|
Returns: | |
wglShareLists | |
|---|---|
Purpose: | Allows multiple rendering contexts to share display lists. |
Include File: |
|
Syntax: | |
BOOL wglShareLists(HGLRC hRC1, HGLRC hRC2); | |
Description: | A display list is a list of “precompiled” OpenGL commands and functions (see Chapter 11, “It's All About the Pipeline: Faster Geometry Throughput”). Memory is allocated for the storage of display lists within each rendering context. As display lists are created within that rendering context, it has access to its own display list memory. This function allows multiple rendering contexts to share this memory. This capability is particularly useful when large display lists are used by multiple rendering contexts or threads to save memory. Any number of rendering contexts can share the same memory for display lists. This memory is not freed until the last rendering context using that space is deleted. When using a shared display list space between threads, you should synchronize display list creation and usage. |
Parameters: | |
|
|
|
|
Returns: |
|
See Also: |
|
wglSwapLayerBuffers | |
|---|---|
Purpose: | Swaps the front and back buffers in the overlay, underlay, and main planes belonging to the specified device context. |
Include File: |
|
Syntax: | |
BOOL wglSwapLayerBuffers(HDC hDC, UINT fuPlanes); | |
Description: | When a double-buffered pixel format is chosen, a window has a front (displayed) and back (hidden) image buffer. Drawing commands are sent to the back buffer. This function enables you to copy the contents of the hidden back buffer to the displayed front buffer, to support smooth drawing or animation. Note that the buffers are not really swapped. After this command is executed, the contents of the back buffer are undefined. |
Parameters: | |
|
|
|
|
Returns: | |
See Also: |
|