6. Designing an Application Framework
It’s time to put the skills you learned so far to use and write some code. In this chapter, you design an Android application prototype—the basic framework upon which you will build a full application. Taking an iterative approach, you will add many exciting features to this application over the course of this book. So, let’s begin.
Designing an Android Trivia Game
Social trivia-style games are always popular. They are also an application category where you can, from a development perspective, explore many different features of the Android SDK. So, let’s implement a fairly simple trivia game, and by doing so, learn all about designing an application user interface, working with text and graphics, and, eventually, connecting with other users.
We need a theme for our game. How about reading? In our soon-to-be-viral game, users will be asked whether or not they’ve read a particular book. If they answer yes, they’ll get a point. If they answer no, they’ll get an opportunity to buy the book to read and improve their score.
The user with the highest score is the most well read and cultured. Let’s call the game Have You Read That?.
Determining High-Level Game Features
First, we need to roughly sketch out what we want this application to do. Imagine what features a good application should have and what features a trivia application will need. In addition to the game question screen, the application will likely need the following:
• A splash sequence that displays the app name, version, and developer
• A way to view scores
• An explanation of the game rules
• A way to store game settings
You also need a way to transition between these different features. One way to do this is to create a traditional main menu screen that the user can use to navigate throughout the application.
Reviewing these requirements, we find that we need six primary screens within the Have You Read That? application:
• Startup screen
• Main menu screen
• Game play screen
• Settings screen
• Scores screen
• Help screen
These six screens make up the core user interface for the Have You Read That? application.
Determining Activity Requirements
Each screen of the Have You Read That? application will have its own Activity class. Figure 6.1 shows the six activities required, one for each screen.
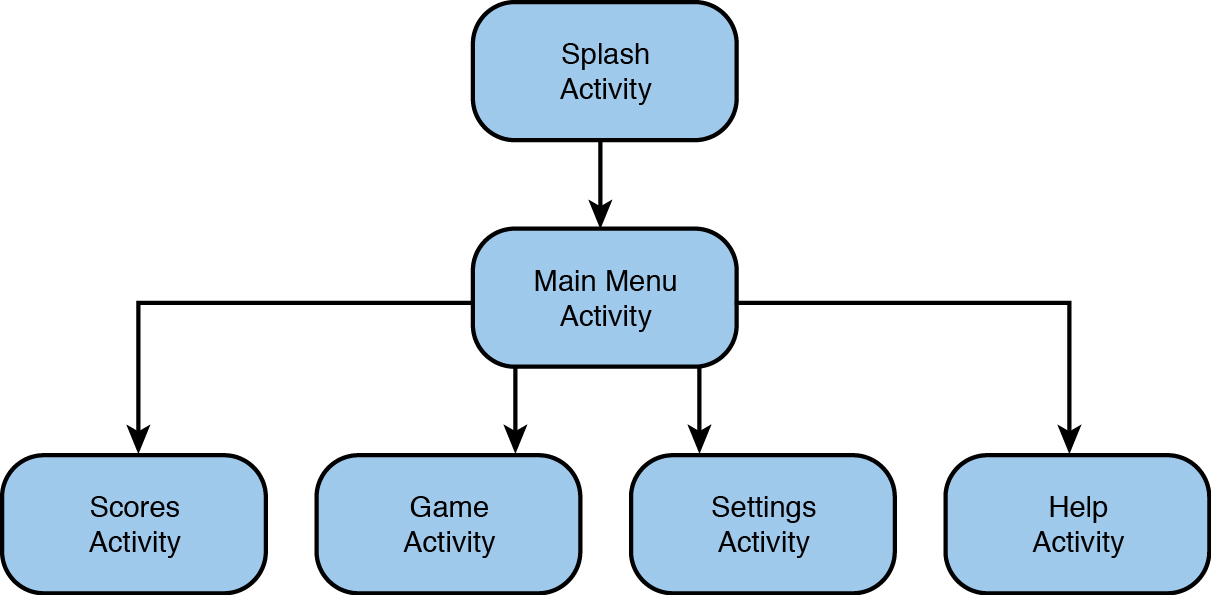
Figure 6.1. Rough Design of the Activity Workflows in the Have You Read That? Application
A good design practice is to implement a base Activity class with shared components, which we’ll simply call QuizActivity. You will employ this practice as you define the activities needed by the Have You Read That? game:
• QuizActivity—Derived from android.app.Activity, this is the base class. Here, you define application preferences and other application-wide configuration and shared functionality.
• QuizSplashActivity—Derived from QuizActivity, this class represents the splash screen.
• QuizMenuActivity—Derived from QuizActivity, this class represents the main menu screen.
• QuizHelpActivity—Derived from QuizActivity, this class represents the help screen.
• QuizScoresActivity—Derived from QuizActivity, this class represents the scores screen.
• QuizSettingsActivity—Derived from QuizActivity, this class represents the settings screen.
• QuizGameActivity—Derived from QuizActivity, this class represents the game screen.
Determining Screen-Specific Game Features
Now, it’s time to define the basic features of each activity in the Have You Read That? application.
Defining Splash Screen Features
The splash screen serves as the initial entry point for the Have You Read That? game. Its functionality should be encapsulated within the QuizSplashActivity class. This screen should do the following:
• Display the name and version of the application
• Display an interesting graphic or logo for the game
• Transition automatically to the main menu screen after a period of time
Figure 6.2 shows a hand-drawn mockup of the splash screen.
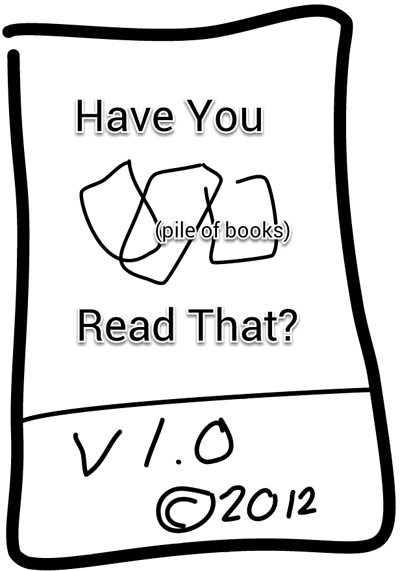
Figure 6.2. The Have You Read That? Splash Screen
Defining Main Menu Screen Features
The main menu screen serves as the main navigational screen in the game. This screen displays after the splash screen and requires the user to choose where to go next. Its functionality should be encapsulated within the QuizMenuActivity class. This screen should do the following:
• Automatically display after the splash screen
• Allow the user to choose Play Game, Settings, Scores, or Help
Figure 6.3 shows a hand-drawn mockup of the main menu screen.

Figure 6.3. The Have You Read That? Main Menu Screen
Defining Help Screen Features
The help screen tells the user how to play the game. Its functionality should be encapsulated within the QuizHelpActivity class. This screen should do the following:
• Display help text to the user and enable the user to scroll through text
• Provide a method for the user to suggest new questions
Figure 6.4 shows a hand-drawn mockup of the help screen.

Figure 6.4. The Have You Read That? Help Screen
Defining Scores Screen Features
The scores screen allows the user to view game scores. Its functionality should be encapsulated within the QuizScoresActivity class. This screen should do the following:
• Display top score statistics
• Show the latest score if the user is coming from the game screen
Figure 6.5 shows a hand-draw mockup of the scores screen.

Figure 6.5. The Have You Read That? Scores Screen
Defining Settings Screen Features
The settings screen allows users to edit and save game settings, including username and other important features. Its functionality should be encapsulated within the QuizSettingsActivity class. This screen should do the following:
• Allow the user to input game settings
• Allow the user to invite friends to play
Figure 6.6 shows a hand-drawn mockup of the basic settings screen.

Figure 6.6. The Have You Read That? Settings Screen
Defining Game Screen Features
The game screen displays the trivia quiz. Its functionality should be encapsulated within the QuizGameActivity class. This screen should do the following:
• Display a series of yes/no questions
• Handle input and keep score and state of the quiz
• Transition to the scores screen when the user finishes playing
Figure 6.7 shows a hand-drawn mockup of the game screen.
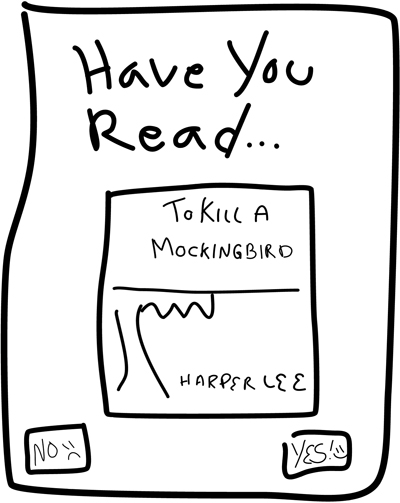
Figure 6.7. The Have You Read That? Game Screen
Implementing an Application Prototype
Now that you have a rough idea what the Have You Read That? application will do and how it will look, it’s time to start coding. This involves the following steps:
1. Creating a new Android project in Eclipse
2. Adding some application resources, including strings and graphics
3. Creating a layout resource for each screen
4. Implementing a Java class (derived from the Activity class) for each screen
5. Creating a set of application-wide preferences for use in all activities
Reviewing the Accompanying Source Code
Because of length limitations and other practical reasons, we cannot provide full code listings in every chapter of this book—they would take more than an chapter to review and be incredibly repetitive. Instead, we provide inline code excerpts based on the Android topic at hand and provide the complete Java source code project for each chapter (denoted by the project name, package name, and application icon) on the accompanying book CD, as well as online at the publisher’s website (http://www.informit.com/title/9780672335693) and the authors’ website (http://goo.gl/fYC7v).
These source files are not meant to be the “answers” to a test. The full source code is vital for providing context and complete implementations of the topics discussed in each chapter. We expect readers will follow along with the source code for a given chapter and, if they feel inclined, they can build their own incarnation of the Have You Read That? application in parallel. The full source code helps give context to developers less familiar with Java or mobile topics. Also, there may be times when the source code does not exactly match the code provided in the book—this is normally because we strip many comments, error checking, and exception handling from book code, again for readability and length.
For example, for Chapter 6 code, the source code Eclipse project name is HYRT_Chapter6, with a package name of com.kindlebook.hyrt.chapter6, and an icon that clearly indicates the chapter number (6). This allows you to keep multiple projects in Eclipse and install multiple applications on a single device without conflicts or naming clashes. However, if you are building your own version in parallel, you likely will only have one version-one Eclipse project and one application you revise and improve in each chapter, using the downloaded project for reference.
Creating a New Android Project
You can begin creating a new Android project for your application by using the Eclipse Android project wizard.
The project has the following settings:
• Project name—HYRT (Note: For this chapter’s source code, this chapter’s project is named BTDT_Hour6.)
• Build target—API Level 10 (Android Open Source Project as vendor)
• Application name—Have You Read That?
• Package name—com.kindlebook.hyrt (Note: For this chapter’s source code, the package is actually named com.kindlebook.hyrt.chapter6.)
• Create activity—QuizSplashActivity
Using these settings, you can create the basic Android project. However, you need to make a few adjustments.
Adding Project Resources
The Have You Read That? project requires some additional resources. Specifically, you need to add a Layout file for each activity and a text string for each activity name, and you need to change the application icon to something more appropriate.
Adding String Resources
Begin by modifying the strings.xml resource file. Delete the hello string and create six new string resources—one for each screen. For example, create a string called help with a value of "Help Screen". When you are done, the strings.xml file should look like this:
<?xml version="1.0" encoding="utf-8"?>
<resources>
<string
name="app_name">Have You Read That?</string>
<string
name="help">Help Screen</string>
<string
name="menu">Main Menu Screen</string>
<string
name="splash">Splash Screen</string>
<string
name="settings">Settings Screen</string>
<string
name="game">Game Screen</string>
<string
name="scores">Scores Screen</string>
</resources>
Adding Layout Resources
Next, you need layout resource files for each activity. Begin by renaming the main.xml layout to splash.xml. Then, copy the splash.xml file five more times, resulting in one layout for each activity: game.xml, help.xml, menu.xml, scores.xml, and settings.xml.
You may notice that there is an error in each Layout file. This is because the TextView control in the layout refers to the @string/hello string, which no longer exists. For each layout file, you need to use the Eclipse layout editor to change the String resource loaded by the TextView control. For example, game.xml needs to replace the reference to @string/hello with the new string you created, called @string/game. Now, when each layout loads, it displays the screen it is supposed to represent.
Adding Drawable Resources
While you are adding resources, you should change the icon for your application to something more appropriate. To do this, create a 48x48 pixel PNG file called ic_launcher.png (ic for icon, launcher for the launcher screen) and add this resource file to the /drawable-mdpi resource directory. This replaces the default ic_launcher.png file.
For the Kindle Fire source code, only the /drawable-mdpi directory matches the density of the Kindle Fire screen. However, even if you created four differently sized icons to support different types of device screens and placed them in the four main drawable resource directories (/drawable-ldpi, /drawable-mdpi, /drawable-hdpi, and /drawable-xhdpi), only a single reference to the icon is required. Just make sure that all the icons are named identically. This enables the Android operating system to choose the most appropriate icon version for the device. Note that if you don’t create the other three icons because you’re only targeting the Kindle Fire, Android Lint will give warnings about the missing icons.
Launcher Icons on Kindle Fire
Applications displayed on the Kindle Fire home screen do not use standard launcher icons. Instead, the large icons come from an Amazon web service tied to the images you upload to Amazon Appstore. When the application is not installed by downloading it via Amazon’s Appstore, these images are not available. In this scenario, the home screen uses the launcher icon supplied in the application package, as described here.
Implementing Application Activities
To implement a base Activity class, simply copy the source file called QuizSplashActivity.java. Name this new class file QuizActivity and save the file. This class should look simple for now:
package com.kindlebook.hyrt;
import android.app.Activity;
public class QuizActivity extends Activity {
public static final String GAME_PREFERENCES = "GamePrefs";
}
You will add to this class later. Next, update the QuizSplashActivity class to extend from the QuizActivity class instead of directly from the Activity class.
Creating the Rest of the Application Activities
Now, perform the same steps five more times, once for each new activity: QuizMenuActivity, QuizHelpActivity, QuizScoresActivity, QuizSettingsActivity, and QuizGameActivity. Note the handy way that Eclipse updates the class name when you copy a class file. You can also create class files by right-clicking the package name com.kindlebook.hyrt and choosing New Class. Eclipse presents a dialog where you can fill in class file settings.
Note that there is an error in each Java file. This is because each activity is trying to load the main.xml layout file—a resource which no longer exists. You need to modify each class to load the specific layout associated with that activity. For example, in the QuizHelpActivity class, modify the setContentView() method to load the layout file you created for the help screen, as follows:
setContentView(R.layout.help);
You need to make similar changes to the other activity files, such that each call to setContentView() loads the corresponding layout file.
Updating the Android Manifest File
You now need to make some changes to the Android manifest file. First, modify the application icon resource to point at the @drawable/ic_launcher icon you created. Second, you need to register all of your new activities in the manifest file so that they will run properly. Finally, verify that you have QuizSplashActivity set as the default activity to launch.
Creating Application Preferences
The Have You Read That? application needs a simple way to store some basic state information and user data. You can use Android’s shared preferences (android.content.SharedPreferences) to add this functionality.
You can access shared preferences, by name, from any activity within the application. Therefore, declare the name of your set of preferences in the base class QuizActivity so that they are easily accessible to all subclasses:
public static final String GAME_PREFERENCES = "GamePrefs";
Here are the steps to take to save shared preferences:
1. Use the getSharedPreferences() method to retrieve an instance of a SharedPreferences object within your Activity class.
2. Create a SharedPreferences.Editor object to modify preferences.
3. Make changes to the preferences by using the editor.
4. Commit the changes by using the commit() method in the editor.
You don’t need to do this now; we’ll add preferences when we need them.
Saving Specific Shared Preferences
Each preference is stored as a key/value pair. Preference values can be the following types:
• Boolean
• Float
• Integer
• Long
• String
After you decide what preferences you want to save, you need to get an instance of the SharedPreferences object and use the Editor object to make the changes and commit them. In the following sample code, when placed within your Activity class, illustrates how to save two preferences—the user’s name and age:
import android.content.SharedPreferences;
// ...
SharedPreferences settings =
getSharedPreferences(GAME_PREFERENCES, MODE_PRIVATE);
SharedPreferences.Editor prefEditor = settings.edit();
prefEditor.putString("UserName", "JaneDoe");
prefEditor.putInt("UserAge", 22);
prefEditor.commit();
You can also use the shared preferences editor to clear all preferences by using the clear() method and remove specific preferences by name by using the remove() method.
Retrieving Shared Preferences
Retrieving shared preference values is even simpler than creating them because you don’t need an editor. The following example shows how to retrieve shared preference values within your Activity class:
SharedPreferences settings =
getSharedPreferences(GAME_PREFERENCES, MODE_PRIVATE);
if (settings.contains("UserName") == true) {
// We have a user name
String user = Settings.getString("UserName", "Default");
}
You can use the SharedPreferences object to check for a preference by name, retrieve strongly typed preferences, or retrieve all the preferences and store them in a map.
Although you have no immediate needs for shared preferences yet in Have You Read That?, you now have the infrastructure set up to use them as needed within any of the activities within your application. This will be important later when you implement each activity in full in subsequent hours.
Running the Game Prototype
You are almost ready to run and test your application. But first, you need to create a debug configuration for your new project within Eclipse.
Creating a Debug Configuration
Each new Eclipse project requires a debug configuration. Be sure to set the preferred AVD for the project to one that is compatible with the Google APIs and within the API Level target range you set in your application (check the Manifest file if you are unsure). If you do not have one configured appropriately, simply click the Android SDK and AVD Manager button in Eclipse. From here, determine which AVDs are appropriate for the application and create new ones, as necessary.
Launching the Prototype in the Emulator
It’s time to launch the Have You Read That? application in the Android emulator. You can do this by using the little bug icon in Eclipse or by clicking the Run button on the debug configuration you just created.
As you see in Figure 6.8, the application does very little so far. It has a pretty icon, which a user can click to launch the default activity, QuizSplashActivity. This activity displays its TextView control, informing you that you have reached the splash screen. There is no real user interface to speak of yet for the application, and you still need to wire up the transitions between the different activities. However, you now have a solid framework upon which to build. In the next few hours, you will flesh out the different screens and begin to implement game functionality.
Figure 6.8. The Splash Screen for Have You Read That?
Exploring the Prototype Installation
The Have You Read That? application does little so far, but you can use tools on the Android emulator to peek at all you’ve done so far:
• Application Manager—This is helpful for determining interesting information about an application. In the emulator, navigate to the home screen, click the Menu button and choose Settings, Applications, Manage applications, and then choose the Have You Read That? application from the list of applications. Here, you can see some basic information about the application, including storage and permissions used, and information about the cache and so on. You can also kill the app or uninstall it.
• Dev Tools—This tool helps you inspect the application in more detail. In the emulator, pull up the application drawer, launch the Dev Tools application, and choose Package Browser. Navigate to the package name, com.kindlebook.hyrt. This tool reads information out of the manifest and allows you to inspect the settings of each activity registered, among other features.
Of course, you can also begin to investigate the application by using the DDMS perspective of Eclipse. For example, you could check out the application directory for the com.kindlebook.hyrt package on the Android file system. You could also step through the code of QuizSplashActivity.
Summary
In this chapter, you built a basic prototype on which you can build in subsequent chapters. You designed a prototype and defined its requirements in some detail. Then, you created a new Android project, configured it, and created an activity for each screen. You also added custom layouts and implemented shared preferences for the application.
Exercises
1. Add a log message to the onCreate() method of each Activity class in your Have You Read That? application prototype. For example, add an informational log message such as “In Activity QuizSplashActivity” to the QuizSplashActivity class.
2. Add an additional application preference string to the application prototype: lastLaunch. In the onCreate() method of QuizSplashActivity class, make the following changes: Whenever this method runs, read the old value the lastLaunch preference and print its value to the log output. Then, update the preference with the current date and time.
Hints: The default Date class (java.util.Date) constructor can be used to get the current date and time, and the SimpleDateFormat class (java.text.SimpleDateFormat) can be used to format date and time information in various string formats. See the Android SDK for complete details on these classes.
3. Sketch out an alternate design for the Have You Read That? application. Consider options, such as not including a main menu screen. Look over similar applications in the Android Market for inspiration. You can post links to alternative designs for the application on our book website (http://goo.gl/gPguA) or email them directly to us at [email protected].