
Hour 15. Working with XML
What You’ll Learn in This Hour
Although working with text files is common and made easier through the classes provided by the System.IO namespace, these classes do not enable you to easily work with and manipulate structured text in the form of XML. XML, which stands for Extensible Markup Language, is a simple and flexible text format that enables the exchange of data in a platform-independent manner.
The use of XML as a data exchange format is prevalent not just in the .NET Framework, but in other Microsoft products as well. The .NET Framework uses it for web services through Simple Object Access Protocol (SOAP) and Windows Communication Foundation (WCF), as the file format for Windows Presentation Foundation (WPF) and Silverlight Extensible Application Markup Language (XAML) files, the file format for Windows Workflow Foundation (WF) files, and as part of ADO.NET.
Even though XML is text-based and readable by humans, there must be a way to programmatically manipulate the XML. This is accomplished using an XML parser. The .NET Framework provides two XML parsers. One is a stream-based parser that reads the XML stream as it goes; the other is a tree-based parser that must read the entire stream into memory before constructing the tree.
In this hour, you learn about the different XML classes provided by the .NET Framework and how to use them to create and manipulate XML files.
Understanding the XML DOM
For you to programmatically read and manipulate an XML document, it must be represented in memory through the XML Document Object Model (DOM). The DOM provides a common and structured way XML data is represented in memory and is most commonly used for reading XML data into memory to change its structure, add or remove elements, or modify the data contained in an element.
A sample XML document is shown in Listing 15.1 and the corresponding DOM structure is shown in Figure 15.1.
<books>
<book>
<title>Sams Teach Yourself C# 5.0 in 24 Hours</title>
<isbn-10>0-672-33684-7</isbn-10>
<author>Dorman</author>
<price currency="US">34.99</price>
<publisher>
<name>Sams Publishing</name>
<state>IN</state>
</publisher>
</book>
</books>

Figure 15.1. XML DOM representation.
In Figure 15.1, each circle represents an element in the XML data. The lighter circle represents the document root, or starting, element. The document root node is the top-level node containing the document itself. All nodes except the document root have a single parent node, which is the node directly above them. When nodes have the same parent node, such as the author, isbn-10, publisher, price, and title nodes, they are child nodes, or descendent nodes, of that parent. Nodes all at the same level are sibling nodes.
Using LINQ to XML
LINQ to XML exposes the XML DOM through LINQ extension methods that enable you to manipulate and query XML documents that have been loaded into memory. All the classes needed to create and manipulate XML documents using LINQ to XML are contained in the System.Xml.Linq namespace. The most commonly used classes are shown in Figure 15.2.

Figure 15.2. LINQ to XML object model.
XDocument
The XDocument class represents an XML document instance. Unless you need to specify document type declarations, processing instructions (used by the XML parser), or top-level comments, you rarely interact with an XDocument instance. Instead, you should use the XElement class.
XElement and XAttribute
The XElement class, which represents an XML element, is one of the most commonly used classes and provides many useful methods and properties used for creating, modifying, and querying the XML data. An XML attribute is a name-value pair associated with an XML element, represented by the XAttribute class. Unlike elements, they are not nodes in the XML tree. Because attributes are simply name-value pairs associated with an element, they must have a name that is unique only to that element.
The XElement class contains a list of the attributes for that element. The most commonly used properties of the XAttribute class are NextAttribute and PreviousAttribute, which are useful for browsing the sequence of attributes on an element.
The code to create the XML from Listing 15.1 using XElement instances is shown in Listing 15.2.
Listing 15.2. Creating XML Using LINQ to XML
XElement document = new XElement("books",
new XElement("book",
new XElement("title", "Sams Teach Yourself C# 5.0 in 24 Hours"),
new XElement("isbn-10", "0-672-33684-7"),
new XElement("author", "Dorman"),
new XElement("price", new XAttribute("currency", "US"), 34.99M),
new XElement("publisher",
new XElement("name", "Sams Publishing"),
new XElement("state", "IN"))));
In contrast, using the standard DOM approach, supported by the classes in the System.Xml namespace, is shown in Listing 15.3.
Listing 15.3. Creating XML Using XML DOM
XmlDocument document = new XmlDocument();
XmlElement booksElement = document.CreateElement("books");
XmlElement bookElement = document.CreateElement("book");
XmlElement titleElement = document.CreateElement("title");
titleElement.InnerText = "Sams Teach Yourself C# 5.0 in 24 Hours";
XmlElement isbn10Element = document.CreateElement("isbn-10");
isbn10Element.InnerText = "0-672-33684-7";
XmlElement authorElement = document.CreateElement("author");
authorElement.InnerText = "Dorman";
XmlElement priceElement = document.CreateElement("price");
priceElement.InnerText = "34.99";
XmlAttribute currencyAttribute = document.CreateAttribute("currency");
currencyAttribute.Value = "US";
priceElement.Attributes.Append(currencyAttribute);
XmlElement publisherElement = document.CreateElement("publisher");
XmlElement publisherNameElement = document.CreateElement("name");
publisherNameElement.InnerText = "Sams Publishing";
XmlElement publisherStateElement = document.CreateElement("state");
publisherStateElement.InnerText = "IN";
booksElement.AppendChild(bookElement);
bookElement.AppendChild(titleElement);
bookElement.AppendChild(isbn10Element);
bookElement.AppendChild(authorElement);
bookElement.AppendChild(priceElement);
bookElement.AppendChild(publisherElement);
publisherElement.AppendChild(publisherNameElement);
publisherElement.AppendChild(publisherStateElement);
document.AppendChild(booksElement);
As you can see, the code in Listing 15.3 is almost three times as long and is much more difficult to read and understand. In addition, if you look at the declaration of the price element in Listing 15.2, you can set the value as a decimal directly, whereas the same code in Listing 15.3 must set the value as a string. This difference becomes important when you retrieve the value. Both the XElement and XAttribute classes enable you to read their contents using a direct cast to the desired type. If the conversion specified by the direct cast fails, it throws a FormatException.
Listing 15.4 shows two ways you could retrieve the value of the price element.
Listing 15.4. Retrieving the Value of an XElement Using a Direct Cast
decimal price = (Decimal)(document.Element("book").Element("price"));
price = (Decimal)document.XPathSelectElement("//price");
The XElement and XAttribute classes automatically handle encoding and decoding text that contains invalid XML characters. Given the following statement
XElement comments = new XElement("comments",
"This line contains special characters <node> & </node>");
the result is automatically encoded as follows:
<comments>This line contains special characters <node> & </node></
comments>
When the value is retrieved, it is automatically decoded.
Try It Yourself: Creating XML Documents
1. Create a new console application.
2. In the Main method of the Program.cs file, implement the code in Listing 15.2.
3. Write a statement that will print the content of the XElement created in step 2.
4. Run the application using Ctrl+F5. The output should look like Figure 15.3.
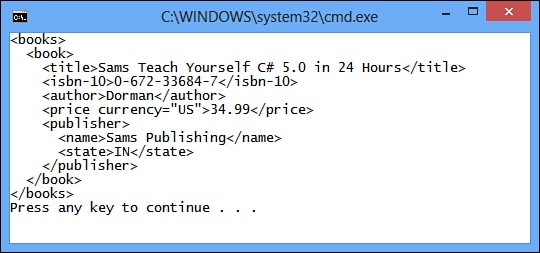
Figure 15.3. Creating XML documents.
Note: SetElementValue and SetAttributeValue
Using the constructor syntax shown in Listing 15.2 is not the only way to create XML. You can also use the SetElementValue and SetAttributeValue methods provided by the XElement class.
These methods make it easy to maintain a list of name-value pairs as a set of children elements or attributes, allowing you to add, modify, or delete pairs. If the name provided does not already exist as a child element or attribute, it will be created for you; otherwise, its value will be changed to the value you specified. If the value is null, the element or attribute is removed. When modifying or removing child elements or attributes, the first one with the specified name is modified or removed.
The following code shows how to create the same XML as produced in Listing 15.2, but uses the SetElementValue and SetAttributeValue methods:
XElement document = new XElement("books",
new XElement("book",
new XElement("publisher")));
XElement bookElement = document.Element("book");
XElement publisherElement = document.Element("publisher");
bookElement.SetElementValue("title",
"Sams Teach Yourself C# 5.0 in 24 Hours");
bookElement.SetElementValue("isbn-10", "0-672-33684-7");
bookElement.SetElementValue("author", "Dorman");
bookElement.SetElementValue("price", 34.99M);
bookElement.Element("price").
SetAttributeValue("currency", "US");
publisherElement.SetElementValue("name", "Sams Publishing");
publisherElement.SetElementValue("state", "IN");
XName and XNamespace
An XML name represents the name of an element or attribute in an XML document and consists of two parts: an XML namespace and a local name. An XML namespace enables you to uniquely qualify the names of elements and attributes to help avoid conflicts between different parts of an XML document. When you have declared an XML namespace, you can select a local name that is unique only within that namespace.
When using XML namespaces, you make use of XML prefixes, allowing you to create a shortcut for an XML namespace. Although XML prefixes can make the XML document more readable, they add complexity because they depend on their context to have meaning. The .NET Framework provides the XNamespace class to represent XML namespaces.
The XName class represents the local name. Throughout LINQ to XML, wherever an XML name is required, an XName is used. Fortunately, XName contains an implicit conversion from string, so you rarely work directly with an XName. Every XName contains an XNamespace. If the element is not in a namespace, the XNamespace is XNamespace.None.
XML namespace declarations have the same syntax as XML attributes, so it is common to think of them as attributes even though they are not. LINQ to XML represents namespaces in the XML tree as attributes to simplify the programming interface. If you need to determine if an attribute is actually a namespace declaration, you can use the IsNamespaceDeclaration property.
The code in Listing 15.5 shows creating the same XML from Listing 15.2 using a namespace.
Listing 15.5. Creating XML with a Namespace Using LINQ to XML
XNamespace ns = "http://www.w3.org/1999/xhtml";
XElement document = new XElement(ns + "books",
new XElement(ns + "book",
new XElement(ns + "title", "Sams Teach Yourself C# 5.0 in 24 Hours"),
new XElement(ns + "isbn-10", "0-672-33684-7"),
new XElement(ns + "author", "Dorman"),
new XElement(ns + "price", new XAttribute("currency", "US"), 34.99M),
new XElement(ns + "publisher",
new XElement(ns + "name", "Sams Publishing"),
new XElement(ns + "state", "IN"))));
This produces the XML shown in Listing 15.6.
<books xmlns="http://www.w3.org/1999/xhtml">
<book>
<title>Sams Teach Yourself C# 5.0 in 24 Hours</title>
<isbn-10>0-672-33684-7</isbn-10>
<author>Dorman</author>
<price currency="US">34.99</price>
<publisher>
<name>Sams Publishing</name>
<state>IN</state>
</publisher>
</book>
</books>
Even though the LINQ to XML classes automatically handle namespace declarations, it might be necessary to control how the namespace is represented in the XML data by providing a namespace prefix. This can be accomplished by explicitly defining the prefix to use for the namespace by including an xmlns attribute, as shown in Listing 15.7.
Listing 15.7. Creating XML with a Namespace Prefix Using LINQ to XML
XNamespace ns = "http://www.w3.org/1999/xhtml";
XElement document = new XElement(ns + "books",
new XAttribute(XNamespace.Xmlns + "ns", ns),
new XElement(ns + "book",
new XElement(ns + "title", "Sams Teach Yourself C# 5.0 in 24 Hours"),
new XElement(ns + "isbn-10", "0-672-33684-7"),
new XElement(ns + "author", "Dorman"),
new XElement(ns + "price", new XAttribute("currency", "US"), 34.99M),
new XElement(ns + "publisher",
new XElement(ns + "name", "Sams Publishing"),
new XElement(ns + "state", "IN"))));
This produces the XML shown in Listing 15.8.
Listing 15.8. XML Data with a Namespace Prefix
<ns:books xmlns:ns="http://www.w3.org/1999/xhtml">
<ns:book>
<ns:title>Sams Teach Yourself C# 5.0 in 24 Hours</ns:title>
<ns:isbn-10>0-672-33684-7</ns:isbn-10>
<ns:author>Dorman</ns:author>
<ns:price currency="US">34.99</ns:price>
<ns:publisher>
<ns:name>Sams Publishing</ns:name>
<ns:state>IN</ns:state>
</ns:publisher>
</ns:book>
</ns:books>
When you work with a document that uses namespaces, you usually access the namespaces through the URI and not through the namespace prefix. This allows you to work with the fully qualified name, also called the expanded name, which has the following form:
{namespacename}name
For example, the expanded name for the title element from Listing 15.6 is as follows:
{http://www.w3.org/1999/xhtml}title
XNamespace objects are atomized, which means that if two objects have exactly the same URI, they will share the same instance. Although it is possible to use the expanded name when creating an XElement or XAttribute instance, doing so has potential performance implications. Each time a string containing an expanded name is encountered, the string must be parsed to find the atomized namespace and name.
Try It Yourself: Working with XML Namespaces
1. Add a new statement that declares an XNamespace instance that defines a namespace of http://www.w3.org/TR/html4.
2. Modify the statements you previously wrote to include the namespace you just declared with a namespace prefix of ns and include the namespace as part of the element names.
3. Run the application using Ctrl+F5. The output should look like Figure 15.4.
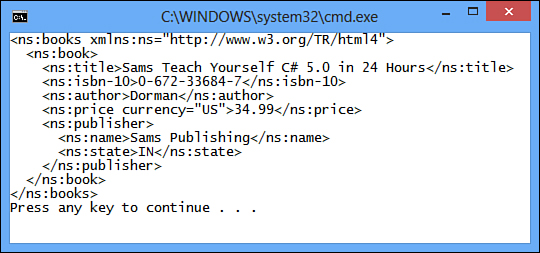
Figure 15.4. Creating XML documents with namespaces.
Selecting and Querying XML
When you have an XML document represented in memory through an XElement instance, you almost always need to select or query information. All classes that derive from XNode provide methods and properties for navigating directly to specific nodes in the XML tree.
The FirstNode and LastNode properties return the first and last child node, respectively, whereas the NextNode and PreviousNode properties enable you to move forward and backward through the collection of nodes. The Parent property enables you to navigate directly to the parent node.
Listing 15.9 shows an example of using these navigation properties with a simplified version of the XML presented in Listing 15.1.
Listing 15.9. Using the Navigation Properties of XElement
XElement document = new XElement("book",
new XElement("title", "Sams Teach Yourself C# 5.0 in 24 Hours"),
new XElement("isbn-10", "0-672-33684-7"),
new XElement("author", "Dorman"),
new XElement("price", new XAttribute("currency", "US"), 34.99M));
Console.WriteLine(document.LastNode);
Console.WriteLine(document.FirstNode);
Console.WriteLine(document.LastNode.Parent);
Console.WriteLine(document.LastNode.PreviousNode);
Console.WriteLine(document.FirstNode.NextNode);
XElement also provides the FirstAttribute and LastAttribute properties, which return the first and last attribute associated with the XElement they are invoked from. If the element contains no attributes, both of these properties will return null; if the element contains only one attribute they both return the same value. When you have retrieved the first or last attribute, you can use the NextAttribute and PreviousAttribute properties to move forward and backward through the collection of attributes.
Although these properties are convenient, they do not offer much flexibility. If you think of every node in the XML tree being a sequence of nodes, it would be possible to use the same LINQ queries you used in Hour 13, “Understanding Query Expressions.” This is entirely possible because each collection of nodes is an IEnumerable<T> instance.
Listing 15.10 shows how to perform a simple LINQ query against the XElement created from Listing 15.2.
Listing 15.10. A LINQ Query over an XElement
foreach (var o in document.Elements().
Where(e => (string)e.Element("author") == "Dorman"))
{
Console.WriteLine(o);
}
The code shown in Listing 15.10 makes use of the Elements method to return an IEnumerable<XElement> sequence of all child elements of the current XElement. In this case, all the child elements are returned; however, if a name were provided as an argument, only those child elements with the same name would be returned.
Note: LINQ to XML and XPath Queries
When using the traditional XML DOM classes provided in System.XML, you must use XPath queries to select node collections or single nodes. In LINQ to XML, this is no longer necessary but is supported through a set of extension methods provided by the System.Xml.XPath namespace.
These extension methods are as follows:
• CreateNavigator—Creates an XPathNavigator for an XNode
• XPathEvaluate—Evaluates an XPath expression, returning an object containing the result of the expression
• XPathSelectElement—Selects an XElement using an XPath expression
• XPathSelectElements—Selects a collection of elements using an XPath expression
The lambda expression provided to the Where method restricts the resulting sequence to those containing an author element whose value is equal to the string “Dorman”. The Element method is used to return the first XElement whose name corresponds to the name provided.
Selecting attributes is just as easy through the Attributes and Attribute method. The Attribute method returns the single attribute whose name corresponds to the name provided, or null if no matching attribute is found. The Attributes method returns an IEnumerable<XAttribute> sequence of attributes for the current XElement. Although the Attributes method can accept a name as an argument, it always returns either an empty collection if a matching attribute is not found or a collection of one because attributes must be uniquely named within each element.
Try It Yourself: Selecting XML
1. Replace the statement that prints the content of the XElement instance from the previous exercise with the code shown in Listing 15.10. Be sure to change the name of the element you are querying to include the XNamespace.
2. Run the application using Ctrl+F5. The output should look like Figure 15.5.
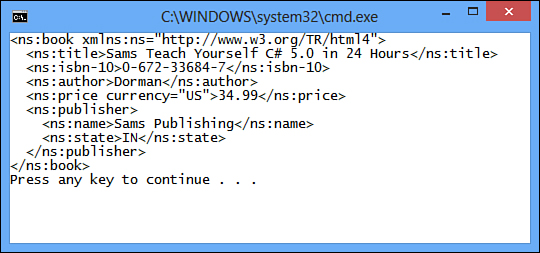
Figure 15.5. Selecting XML using a LINQ query.
3. Add a new XML file named books.xml that contains the XML shown in Listing 15.11.
4. Modify the XElement instance to load data, using the Load method, from the file named books.xml.
5. Modify the foreach statement to print only the title for all book elements.
6. Run the application again using Ctrl+F5. The output should look like Figure 15.6.
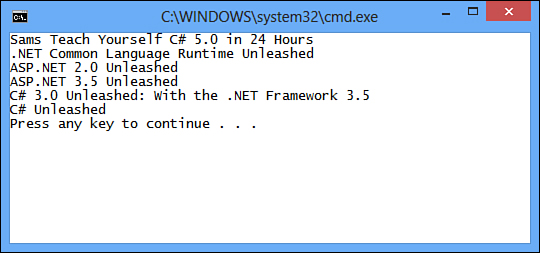
Figure 15.6. Selecting XML.
Putting all this together, it becomes possible to perform rather complex queries that can return XML that has been reshaped, or converted from one structural representation to another.
For example, the XML shown in Listing 15.11 can be reshaped to what is shown in Listing 15.12.
<books>
<book title="Sams Teach Yourself C# 5.0 in 24 Hours" author="Dorman" />
<book title=".NET Common Language Runtime Unleashed" author="Burton" />
<book title="ASP.NET 2.0 Unleashed" author="Walther" />
<book title="ASP.NET 3.5 Unleashed" author="Walther" />
<book title="C# 3.0 Unleashed: With the .NET Framework 3.5" author="Mayo" />
<book title="C# Unleashed" author="Mayo" />
</books>
Listing 15.12. Destination XML
<books>
<author name="Dorman">
<book title="Sams Teach Yourself C# 5.0 in 24 Hours"/>
</author>
<author name="Burton">
<book title=".NET Common Language Runtime Unleashed" />
</author>
<author name="Walther">
<book title="ASP.NET 2.0 Unleashed" />
<book title="ASP.NET 3.5 Unleashed" />
</author>
<author name="Mayo">
<book title="C# 3.0 Unleashed: With the .NET Framework 3.5" />
<book title="C# Unleashed" />
</author>
</books>
When using the LINQ to XML query shown in Listing 15.13, assume it has already been loaded into an XElement named books.
Listing 15.13. Transforming the Source XML Using a LINQ Query
XElement booksByAuthor = new XElement("books",
from book in books.Elements("book")
group book by (string)book.Attribute("author") into author
select new XElement("author", new XAttribute("name", (string)author.Key),
from book in author
select new XElement("book",
new XAttribute("title", (string)book.Attribute("title")))));
Modifying XML
Although creating and selecting XML is important, it is equally important to modify that XML. This can be accomplished quite easily using methods provided by XNode and its derived classes. When modifying XML, the technique used to navigate to the node being changed influences when the modification occurs. When using the properties shown in the beginning of the previous section (such as FirstNode or LastNode), the result occurs at the time you invoke it. If you remove or replace a node, the action is taken immediately within the XML tree held in memory. When using queries over XML, the modification methods are applied to the query expression result at the time the query is enumerated. This follows the default LINQ behavior of deferred query execution.
Earlier you saw how the SetElementValue and SetAttributeValue methods can be used to add a new element or attribute, remove an element or attribute, or change the value of an existing element or attribute. You can also use the SetValue method to change the value of the current element or attribute. The code shown in Listing 15.14 uses SetValue to change the content of the price element.
XElement books = XElement.Load("books.xml");
XElement book = books.Elements("book").
FirstOrDefault(b => (string)b.Element("author") == "Dorman");
book.Element("price").SetValue(30.99);
Replacing data is just as simple and uses the ReplaceAll, ReplaceAttributes, ReplaceNodes, or ReplaceWith methods. The ReplaceAll method replaces all children nodes and attributes of the current element, whereas the ReplaceAttributes and ReplaceNodes methods replace all the attributes and all the children nodes, respectively.
Caution: ReplaceWith and Children Nodes
The ReplaceWith method will replace only the current element with the new element. If the element you are replacing has any children, those children will not automatically be included as children of the new element.
The ReplaceWith method replaces only the current element with the element specified. The code shown in Listing 15.15 completely replaces the price element with a new one using the ReplaceWith method.
Listing 15.15. Using ReplaceWith
XElement books = XElement.Load("books.xml");
XElement book = books.Elements("book").
FirstOrDefault(b => (string)b.Element("author") == "Dorman");
book.Element("price"). ReplaceWith(new XElement("price", 30.99));
To remove the current element or attribute, use the Remove method. To remove all attributes associated with the current element, use the RemoveAttributes method. To remove all children nodes, use the RemoveNodes method. To remove both children nodes and attributes from the current element, use the RemoveAll method. The code shown in Listing 15.16 removes the book element that contains an author element whose value is equal to “Dorman”.
XElement books = XElement.Load("books.xml");
books.Elements("book").
FirstOrDefault(b => (string)b.Element("author") == "Dorman").
Remove();
Finally, adding new elements uses the Add, AddAfterSelf, AddBeforeSelf, or AddFirst methods. The Add method adds the provided content as child nodes to the current element, whereas AddFirst adds the content as the first child. The AddAfterSelf and AddBeforeSelf methods add the content as a sibling node after or before the current node, respectively. The code shown in Listing 15.17 adds a new child element to the book element.
XElement books = XElement.Load("books.xml");
XElement book = books.Elements("book").
FirstOrDefault(b => (string)b.Element("author") == "Dorman");
book.Add(new XElement("summary", ""));
Try It Yourself: Modifying XML
1. After the foreach statement you wrote in step 5 of the previous exercise, add a new foreach statement that inserts an empty summary child element as the first element of each book element.
2. Add a new child element of books named publisher, which includes the following children elements:
• <name>Sams Publishing</name>
• <state>IN</state>
3. Move the book elements from the root books element to a books child element of publisher.
4. Run the application using Ctrl+F5. The output should look like Figure 15.7.

Figure 15.7. Results of modifying XML.
Summary
In this hour, you learned how to work with XML data using LINQ to XML. You learned how the XElement class enables you to create XML documents and how the XNamespace class simplifies working with XML namespaces. Next, you learned how to select and query XML using both properties and methods provided by the XNode derived classes and using the declarative LINQ query syntax. Finally, you learned how to modify XML by removing, replacing, and creating new elements and attributes.
Q&A
Q. What is the XML Document Object Model (DOM)?
A. The DOM provides a common and structured way XML data is represented in memory and is most commonly used for reading XML data into memory to change its structure, add or remove elements, or modify the data contained in an element.
Q. What is the document root node?
A. The document root node is the top-level node containing the document itself.
Q. What are child and sibling nodes?
A. When nodes have the same parent node, they are child nodes of that parent. Nodes that are all at the same level are sibling nodes.
Q. What is the XElement class?
A. The XElement class represents an XML element and is the most commonly used because it can represent an entire document or an element within a document.
Workshop
Quiz
1. What three operations can SetElementValue perform?
2. Is it possible to explicitly define a namespace prefix for an XML namespace?
3. Do the XElement and XAttribute classes handle XML character encoding and decoding?
Answers
1. The SetElementValue method enables you to add a new child element, change the value of an existing child element, or delete a child element. If the name provided does not already exist as a child element, it will be created for you; otherwise, the value of the child element will be changed to the value you specified. If the value is null, the child element is removed. When modifying or removing child elements or attributes, the first one with the specified name is modified or removed.
2. Yes, a namespace prefix can be specified by including an xmlns attribute.
3. Yes, the XElement and XAttribute classes automatically handle encoding and decoding text that contains invalid XML characters.
Exercises
1. Create a new console application that transforms the XML shown in Listing 15.11 to that shown in Listing 15.12. The implementation necessary is shown in Listing 15.13.