
To host a UI fragment, an activity must:
-
define a spot in its layout for the fragment’s view
-
manage the lifecycle of the fragment instance
You can attach fragments to your activities in code. You determine when the fragment is added to the activity and what happens to it after that. You can remove the fragment, replace it with another, and then add the first fragment back again.
The code details will come later in the chapter. First, you are going to define MainActivity’s layout.
You will be adding a UI fragment in the hosting activity’s code, but you still need to make a spot for the fragment’s view in the activity’s view hierarchy. Locate MainActivity’s layout at res/layout/activity_main.xml. Open this file and replace the default layout with a FrameLayout. Your XML should match Listing 8.11.
Listing 8.11 Creating the fragment container layout (res/layout/activity_main.xml)
<androidx.constraintlayout.widget.ConstraintLayoutxmlns:android="http://schemas.android.com/apk/res/android"xmlns:tools="http://schemas.android.com/tools"xmlns:app="http://schemas.android.com/apk/res-auto"android:layout_width="match_parent"android:layout_height="match_parent"tools:context=".MainActivity"><TextViewandroid:layout_width="wrap_content"android:layout_height="wrap_content"android:text="Hello World!"app:layout_constraintBottom_toBottomOf="parent"app:layout_constraintLeft_toLeftOf="parent"app:layout_constraintRight_toRightOf="parent"app:layout_constraintTop_toTopOf="parent"/></androidx.constraintlayout.widget.ConstraintLayout><FrameLayout xmlns:android="http://schemas.android.com/apk/res/android" android:id="@+id/fragment_container" android:layout_width="match_parent" android:layout_height="match_parent"/>
This FrameLayout will be the container view for a CrimeFragment. Notice that the container view is completely generic; it does not name the CrimeFragment class. You can and will use this same layout to host other fragments.
Note that while activity_main.xml consists solely of a container view for a single fragment, an activity’s layout can be more complex and define multiple container views as well as widgets of its own.
Run CriminalIntent to check your code. You will see an empty FrameLayout below a toolbar containing the app name (Figure 8.12).

The FrameLayout is empty because the MainActivity is not yet hosting a fragment. Later, you will write code that puts a fragment’s view inside this FrameLayout. But first, you need to create a fragment.
(The toolbar at the top of your app is included automatically because of the way you configured your activity. You will learn more about the toolbar in Chapter 14.)
When the Fragment class was introduced in Honeycomb, the Activity class was changed to include a piece called the FragmentManager. The FragmentManager handles two things: a list of fragments and a back stack of fragment transactions (which you will learn about shortly) (Figure 8.13). It is responsible for adding the fragments’ views to the activity’s view hierarchy and driving the fragments’ lifecycles.

For CriminalIntent, you will only be concerned with the FragmentManager’s list of fragments.
Now that you have the FragmentManager, add the following code to give it a fragment to manage. (We will step through this code afterward. Just get it in for now.)
Listing 8.12 Adding a CrimeFragment (MainActivity.kt)
class MainActivity : AppCompatActivity() {

    override fun onCreate(savedInstanceState: Bundle?) {
        super.onCreate(savedInstanceState)
        setContentView(R.layout.activity_main)

        val currentFragment =
            supportFragmentManager.findFragmentById(R.id.fragment_container)

        if (currentFragment == null) {
            val fragment = CrimeFragment()
            supportFragmentManager
                .beginTransaction()
                .add(R.id.fragment_container, fragment)
                .commit()
        }
    }
}
To add a fragment to an activity in code, you make explicit calls to the activity’s FragmentManager.
You can access the activity’s fragment manager using the supportFragmentManager property.
You use supportFragmentManager because you are using the Jetpack library and the AppCompatActivity class.
The name is prefixed with “support” because the property originated in the v4 support library, but the support library has since been repackaged as an androidx library within Jetpack.
The best place to start understanding the rest of the code you just added is not at the beginning. Instead, find the add(…) operation and the code around it. This code creates and commits a fragment transaction.
    if (currentFragment == null) {
        val fragment = CrimeFragment()
        supportFragmentManager
            .beginTransaction()
            .add(R.id.fragment_container, fragment)
            .commit()
    }
Fragment transactions are used to add, remove, attach, detach, or replace fragments in the fragment list. They allow you to group multiple operations together, such as adding multiple fragments to different containers at the same time. They are the heart of how you use fragments to compose and recompose screens at runtime.
The FragmentManager maintains a back stack of fragment transactions that you can navigate. If your fragment transaction includes multiple operations, they are reversed when the transaction is removed from the back stack. This provides more control over your UI state when you group your fragment operations into a single transaction.
The FragmentManager.beginTransaction() function creates and returns an instance of FragmentTransaction.
The FragmentTransaction class uses a fluent interface –
functions that configure FragmentTransaction return a FragmentTransaction instead of Unit, which allows you to chain them together.
So the code highlighted above says, “Create a new fragment transaction, include one add operation in it, and then commit it.”
The add(…) function is the meat of the transaction. It has two parameters: a container view ID and the newly created CrimeFragment. The container view ID should look familiar. It is the resource ID of the FrameLayout that you defined in activity_main.xml.
A container view ID serves two purposes:
-
It tells the FragmentManager where in the activity’s view the fragment’s view should appear.
-
It is used as a unique identifier for a fragment in the FragmentManager’s list.
When you need to retrieve the CrimeFragment from the FragmentManager, you ask for it by container view ID:
    val currentFragment =
        supportFragmentManager.findFragmentById(R.id.fragment_container)

    if (currentFragment == null) {
        val fragment = CrimeFragment()
        supportFragmentManager
            .beginTransaction()
            .add(R.id.fragment_container, fragment)
            .commit()
    }
It may seem odd that the FragmentManager identifies the CrimeFragment using the resource ID of a FrameLayout. But identifying a UI fragment by the resource ID of its container view is built into how the FragmentManager operates. If you are adding multiple fragments to an activity, you would typically create separate containers with separate IDs for each of those fragments.
Now we can summarize the code you added in Listing 8.12 from start to finish:
First, you ask the FragmentManager for the fragment with a container view ID of R.id.fragment_container.
If this fragment is already in the list, the FragmentManager will return it.
Why would a fragment already be in the list? The call to MainActivity.onCreate(Bundle?) could be in response to MainActivity being re-created after being destroyed on rotation or to reclaim memory. When an activity is destroyed, its FragmentManager saves out its list of fragments. When the activity is re-created, the new FragmentManager retrieves the list and re-creates the listed fragments to make everything as it was before.
On the other hand, if there is no fragment with the given container view ID, then fragment will be null. In this case, you create a new CrimeFragment and a new fragment transaction that adds the fragment to the list.
MainActivity is now hosting a CrimeFragment. Run CriminalIntent to prove it. You should see the view defined in fragment_crime.xml, as shown in Figure 8.14.
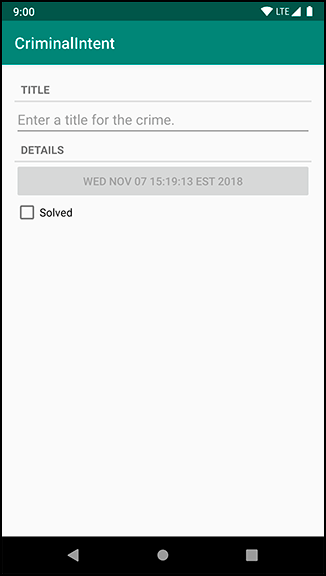
Figure 8.15 shows the fragment lifecycle. The fragment lifecycle is similar to the activity lifecycle: It has stopped, paused, and resumed states, and it has functions you can override to get things done at critical points – many of which correspond to activity lifecycle functions.

The correspondence is important. Because a fragment works on behalf of an activity, its state should reflect the activity’s state. Thus, it needs corresponding lifecycle functions to handle the activity’s work.
One critical difference between the fragment lifecycle and the activity lifecycle is that fragment lifecycle functions are called by the FragmentManager of the hosting activity, not the OS. The OS knows nothing about the fragments that an activity is using to manage things. Fragments are the activity’s internal business. The onAttach(Context?), onCreate(Bundle?), onCreateView(…), and onViewCreated(…) functions are called when you add the fragment to the FragmentManager.
The onActivityCreated(Bundle?) function is called after the hosting activity’s onCreate(Bundle?) function has executed. You are adding the CrimeFragment in MainActivity.onCreate(Bundle?), so this function will be called after the fragment has been added.
What happens if you add a fragment while the activity is already resumed? In that case, the FragmentManager immediately walks the fragment through whatever steps are necessary to get it caught up to the activity’s state. For example, as a fragment is added to an activity that is already resumed, that fragment gets calls to onAttach(Context?), onCreate(Bundle?), onCreateView(…), onViewCreated(…), onActivityCreated(Bundle?), onStart(), and then onResume().
Once the fragment’s state is caught up to the activity’s state, the hosting activity’s FragmentManager will call further lifecycle functions around the same time it receives the corresponding calls from the OS to keep the fragment’s state aligned with that of the activity.