Chapter Three: Markup
In Chapter 2, we considered the important concept of separating structured content from presentation and behavior. In this chapter, we’ll look at the content layer and how content can be marked up for the web using HTML. Then, in Chapter 4, we’ll look at ways of presenting this content using CSS.
The vast majority of content on the web is marked up using some flavor of “Hypertext Markup Language” or HTML. Understanding what HTML is designed to do—and not to do—will help you write better markup. In this chapter, we’ll look at the technical aspects of HTML along with its underlying concepts.
A quick note about terminology: throughout this book, I use the term HTML to apply to both HTML and XHTML unless I’m specifically referring to XHTML. We’ll look at the relatively minor syntactical differences between these two markup languages in just a moment.
Why “It Works in Browsers” Isn’t Enough
Developers often learn a set of techniques and concepts and then use these tools whenever they can, rather than extending their knowledge as the challenges they face increase in complexity or change in nature, or as the underlying technologies they are using mature. I’ve certainly been guilty of this, both as a web developer and a software developer. The approach makes a certain sense: “if it’s not broken, why fix it?” But just because it’s not broken now doesn’t mean it’s working well, or that it won’t break in the future. Browser developers work hard to handle as many markup errors as they can, but there’s no guarantee they’ll always work, or that different browsers will handle a given error in the same way.
Alas, the outdated techniques, invalid markup, and other mistakes that lie under the hood of many professionally developed websites reveals that this mindset is alive and well. But since you’ve made it this far, I’m going to assume that you’re interested in using HTML intelligently, effectively, and correctly, rather than slapping together markup that works just well enough to get by.
But enough preliminaries! Let’s start acutally developing with web standards.
HTML and XHTML
Just what is it we are attempting to achieve when we mark up content? Those familiar with word processing and desktop publishing are likely to think about presentation: that is, we are more likely to think of a piece of text as “bold,” or “italicized” than we are to consider the text “emphasized,” or as a structurally significant heading. But it’s the second approach—identifying the meaning of each part of our content and marking it up accordingly—that we should use when we’re marking up content. We’ll use HTML to mark up the semantics of the content (as much as HTML allows), and leave presentation to CSS.
HTML started life as an almost entirely semantic markup language. Devised by Tim Berners-Lee as a simple markup language for exchanging scientific data and publications, HTML initially had no mechanism for defining fonts or text colors, or of displaying images. Right from the beginning, HTML was designed for marking up the meaning and structure of a document (its semantics).
As the web exploded in popularity in the early to mid 1990s, browser developers like Netscape and Microsoft created their own HTML elements, like the font element, which gave developers the ability to use HTML to control presentation. At the time, there was no custodian or standards body for HTML, so the language rapidly devolved into a number of mostly compatible dialects, each of which managed presentation in slightly different ways. And so the vision of HTML as a structural and semantic markup language was swamped by the reality that designers and developers needed “stylish” websites, and were happy to use presentational markup to build them (at the time there was no alternative: CSS came later).
Why was this a problem? As we saw earlier, the benefits of separating presentation from markup include easier site maintainance and redesigns, better communication with search engines, and improved accessibility. All these benefits are lost when developers use markup, rather than CSS, to control presentation.
So what does semantic markup look like?
Syntax and Semantics
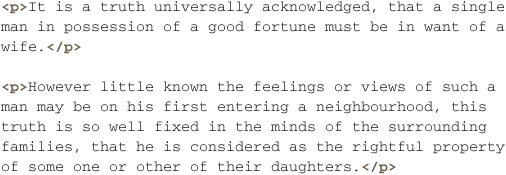
Markup languages have two key components: semantics or the meaning of various parts of the language, and syntax or the rules that developers must follow in order to produce meaningful, valid markup. The strong element is a good example of a semantic construction: it’s used for marking up words or phrases that should be strongly emphasized. The q element, which is used to mark up inline quotations, is another good exampple. Here’s how these elements look in practice.
![]()
The syntax of HTML is something slightly different. In spoken languages, syntactical rules specify such things as subject-verb agreement—for example, it’s syntactically incorrect to say “he are a good boy.” The syntactical rules of HTML specify which elements may contain other elements, which elements must have closing tags (and which “autoclose”), and which attributes an element may, must, or must not have.
A Very Short History of HTML
Understanding the history of HTML isn’t necessary for understanding the rest of this chapter. If you are interested, especially about the variants of HTML, please do read on. Otherwise, you can skip straight to the “Key Concepts” section later in the chapter.
After the publication of the initial HTML proposal by Tim Berners-Lee in 1991, four years passed before anything resembling a standard for HTML was published. Two significant attempts at standardizing the language, one by Berners-Lee and Dan Connolly, and another by Dave Raggett, faltered, and in 1995, the Internet Engineering Task Force (IETF) published RFC 1866, the HTML 2.0 standard.
In January 1997, the W3C published its first version of the HTML standard, HTML 3.2 (there was never a 3.0 version). At the end of that year, the W3C published HTML 4.0, which bears a strong resemblance to HTML 4.01, itself published in December 1999. HTML 4.01 is the last version of HTML (as opposed to XHTML) published to date, as HTML5 is currently still a draft specification.
HTML 4.01
Published in 1999 as HTML 4.0 and updated slightly in 2001 as version 4.01, this is still the most-up-to-date published version of HTML. HTML5, which I’ll detail in Chapter 11, is still in the draft stage. The current semantics and syntax of HTML—and the semantics of XHTML—are defined by HTML 4.01.
XHTML 1.0, 1.1, 2.0
After the publication of HTML 4 in 1999, the W3C turned its focus to XHTML, a very similar markup language grounded in the more modern general markup language, XML (itself a W3C standard for creating other, specialized markup languages). XHTML 1.0, published in early 2000, was designed to be entirely compatible with HTML 4.01, sharing the same semantics (the set of elements and attributes), and with a backward-compatible syntax. All XHTML 1.0 is valid HTML 4.01, though not all HTML 4.01 is valid XHTML 1.0.
Subsequent versions of XHTML moved away from direct compatibility with HTML 4.01. XHTML 1.1 removes from the language a number of elements that had been marked as “deprecated” in HTML 4.01; when a language feature is declared deprecated in a specification, this alerts us to the likelihood that it will be removed from later versions of the language. XHTML 1.1 is a purely semantic markup language, with no presentational elements or attributes like font or align.
In 2002 the W3C started work on a radical departure from HTML: XHTML 2. XHTML 2 keeps the basic syntax of XHTML, but introduces new elements and attributes without concern for compatibility with HTML 4.01 (or current browsers). As of the time of writing, the W3C announced that the XHTML 2 working group charter will not be renewed after 2009, effectively ending the development of the language.
HTML5
HTML5 began life outside the auspices of the W3C in a group of people associated with the development of the Mozilla and WebKit browser technologies, which, respectively underpin Firefox and Safari (and other browsers). In 2007, HTML5’s development was brought within the W3C. This move effectively anointed HTML5 as the future direction of HTML. HTML5 is very much a work in progress, but some aspects are usable today. For developers familiar with HTML 4.01 and XHTML 1, HTML5 won’t be difficult to learn, because the language’s core syntax and principles remain the same (HTML5 is backwards compatible with HTML 4 and XHTML 1).
For a detailed history of HTML5 and a lot more on how to use it, see Chapter 11.
Key Concepts of HTML
Time to get down to the nuts and bolts of markup for the web. We’ll begin with the core concepts and terminology, then cover all of the most significant features of the language.
What Is a Web Page?
When you visit a page in a web browser, what is going on?
A browser takes a text file, which contains text formatted according to the rules of HTML, and uses it to locate other resources like images, video, and audio to display as part of the page. The browser then fetches all these resources and renders the resultant page.
The key point is that an HTML document (with a couple of minor exceptions) contains only text, in a specific format. Any images or other resources a page needs are stored in separate files and the browser combines these files when drawing the contents of the page.
Throughout the book, I’ll use three important terms for a web page:
• An HTML file is the text file that contains the markup for an HTML document.
• An HTML document is content marked up according to the HTML syntax.
• A web page is what a browser renders with that HTML document.
Terminology: Elements, Attributes, Tags and More
HTML is a language, with a set of syntactical rules describing how content should be marked up. The basic structure of an HTML document and its core components is straightforward.
• An HTML document is made up of elements. Elements are, for the most part, containers for content and for other elements.
• Each element may have one or more attributes.
• Some types of element may contain other elements.
• Other types of elements have attributes but do not contain content or other elements.
So what does an element look like? Let’s begin with the two types of elements: those that may contain other elements (called, rather clumsily, non-empty elements), and elements that cannot contain other elements (called empty elements).
Non-Empty HTML Elements
At its simplest, an HTML element looks like this:
![]()
Let’s break it down.
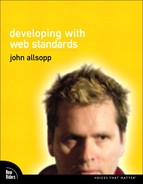
• It has a start tag (<p>) content—which in this case contains text and another element—and an end tag (</p>).
• Start tags have the form of an angled bracket (<), the element name (in this case, p), and a closing angled bracket (>).
• End tags are similar, but they have a slash (/) before the name of the element.
• Non-empty elements contain text and/or one or more other elements.
Elements may also have attributes. Attributes contain additional information about a particular element, and are contained within the element’s start tag. For example, here’s our paragraph with a unique identifier
![]()
The form of an attribute is almost invariably the attribute name, an equals sign (=), and a value. For most attributes, the value must be wrapped in quotation marks; this isn’t always mandatory, but for the sake of consistency and simplicity, I recommend always putting quotation marks around the values of attributes. If an element has more than one attribute, these are separated by spaces.
Empty HTML Elements
An empty element in HTML looks like the start tag for a non-empty element. For example, the HTML img (image) element is an empty element. It looks like this
![]()
Don’t be concerned with the src and alt attributes—we’ll cover those when we look at the img element in detail later in the chapter.
Here, we encounter the first difference between HTML and XHTML. So far, everything we’ve said applies to both languages, but there are a few syntactic differences between the two. Probably the most commonly encountered is that with XHTML syntax, empty elements finish with />, rather than simply with >. So, in XHTML, our image element would look like this:
![]()
The good news is that this is also valid HTML markup (whereas if you leave off the closing slash, it’s not valid XHTML).
See figure 3.1 for demonstrations of all of these concepts.
3.1 HTML elements, attributes, and tags
Document Types
We’ve seen already that there are two different “flavors” of HTML: HTML and XHTML. How does a browser know which it is dealing with? And for that matter, how will a browser know what version of HTML or XHTML a particular document is using?
Enter the DOCTYPE
At the very beginning of every HTML file, we provide this information via a Document Type Declaration or DOCTYPE. (The DOCTYPE isn’t technically part of the HTML document, even though it’s in the HTML file.) The DOCTYPE specifies the markup language and version, and also provides an additional piece of information that tells the browser how strict it should be in rendering the page. This last piece of information comes in one of the following three forms:
• Strict DOCTYPE—A document type that uses only non-presentational HTML elements and attributes. This variation is a subset of HTML 4.01/XHTML 1.0 that does away with older presentational features of those languages. If you declare an HTML document to be strict and then go on to include such elements as font, the document will be invalid (more on validation later in the chapter). Strict is the recommended doctype to be used for maximum forward compatibility.
• Transitional (or loose) DOCTYPE—This document type indicates that the markup can include all features, both presentational and non-presentational. It can be used with legacy content that includes presentational HTML, but is not recommended for new development.
• Frameset DOCTYPE—This document type is for use with HTML frames, a now-deprecated feature of HTML that you should avoid.
Declaring a DOCTYPE
We declare a DOCTYPE with a DOCTYPE declaration, which comes before everything else in the file. Here’s what our DOCTYPE will look like for HTML 4.01 strict:
![]()
You don’t really need to understand this in detail, but the first part of the DOCTYPE declares that this is a public DOCTYPE with the identifier "-//W3C//DTD HTML 4.01//EN"—the identifier for the HTML 4.01 strict DOCTYPE. The URL that follows is technically optional, but has very important real-world implications. (In some browsers, if you use the transitional doctype, leaving off this URL makes the browser render the document in something called Quirks mode. We’ll talk about that in Chapter 7, but in the meantime, you should just remember to always use the URL unless you’re intentionally invoking Quirks mode.
Here are the most important DOCTYPE declarations:
<!DOCTYPE HTML PUBLIC "-//W3C//DTD HTML 4.01 Strict //EN" "http://www.w3.org/TR/html4/strict.dtd"> HTML 4.01 strict doctype
<!DOCTYPE HTML PUBLIC "-//W3C//DTD HTML 4.01 Transitional//EN" "http://www.w3.org/TR/html4/loose.dtd"> HTML 4.01 transitional doctype
<!DOCTYPE html PUBLIC "-//W3C//DTD XHTML 1.0 Strict//EN" "http://www.w3.org/TR/1999/PR-xhtml1-19991210/DTD/xhtml1-strict.dtd"> XHTML 1.0 strict doctype
<!DOCTYPE html PUBLIC "-//W3C//DTD XHTML 1.0 Transitional//EN" "http://www.w3.org/TR/1999/PR-xhtml1-19991210/DTD/xhtml1-transitional.dtd"> XHTML 1.0 transitional doctype
The main point: once you’ve decided which language flavor (HTML or XHTML), version number, and document type (strict or transitional), you then add the appropriate DOCTYPE at the beginning of your HTML file.
For the rest of the chapter, we’ll focus on features of the strict DOCTYPE, and will mostly use XHTML syntax. Although developers disagree on some very detailed points, these are considered to be good practices for modern markup.
The Structural Basics of HTML
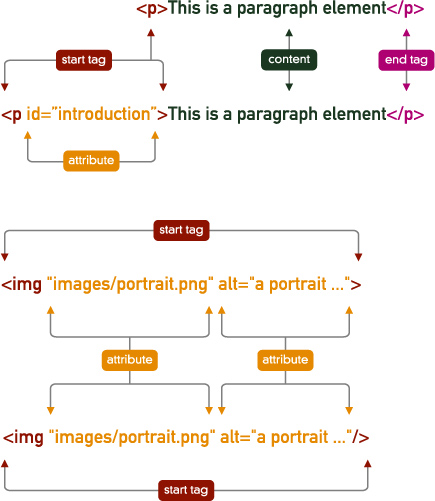
An HTML document is essentially a container of containers. (Technically, this is referred to as the document’s containment hierarchy.) Each of the containers is an HTML element, and most containers (non-empty elements) may contain other containers [3.2].
3.2 An HTML document as a container of containers
The Root html Element
The containment hierarchy of the document begins with the html element, the container that contains all of the other containers in the document. The html element is also known as the root element of the document. Every other element in the document is contained within this element, or to use the analogy of a family tree, is descended from this element. Typically, the html element does not have any attributes.
The html element contains two other elements directly: the head and body elements. By “directly,” I mean that these elements are nested only inside the html element, not nested within other elements that are themselves contained within the html element. We call elements contained directly within an element the children of that element: the head and body elements are children of the html element.
The head element contains mostly metadata: data about the document, such as its title, and links to external scripts and style sheet files. This information is used by the browser, but isn’t shown to actual human users. The body element contains the document’s content, which will be rendered by the browser as a web page.
The head Element
The head element is a required element that contains information about the document: a title that is typically displayed in the browser’s titlebar, meta elements which contain information such as keywords for the document for the benefit of search engines, as well as embedded script and CSS, and links to script and CSS files. We’ll take a look at each of these types of element now.
The head is a required element for any HTML document
title
The title element provides a description of the page that is typically displayed by browsers in the browser window’s titlebar. It also may be read out by screen-readers and otherwise presented to a user by a user agent.
It’s a non-empty element, whose only content is the text of the page title.
![]()
The title element is a required element of the head.
meta
meta elements are an optional mechanism for providing additional information about the page. They are empty elements and take two attributes: a name attribute that describes the type of data, and a content attribute that contains the value of the data. You might use a meta element to provide, for example, the name of the author of a document, the authoring tool used for the document, and keywords that are meant for search engines (although that last use is largely outdated). For example, we could add the following meta element for an online chapter of Pride and Prejudice:
![]()
The use of meta elements for providing search engine keywords, although once recommended, is no longer supported by any major search engine. Although this practice may still be useful for internal site search, using meta elements provides no benefit for search engine optimization.
script
We’ll focus on the Document Object Model, or DOM, and touch on JavaScript in Chapter 5, so here I’ll just note that there are two ways of including JavaScript in a web page: the script can be embedded in the page itself, or it can live in an external file and be linked to using the script element. Although we’ve included the script element in the head section of this chapter, it may actually appear anywhere in the document. JavaScript is often included in the body of the document—usually at the end—so the script doesn’t execute until after the page has fully loaded. With the rise of unobtrusive JavaScript as a best practice for DOM scripting, JavaScript should usually be included via a link to an external JavaScript file in the head of the document. (We’ll look at unobtrusive JavaScript in Chapter 5.)
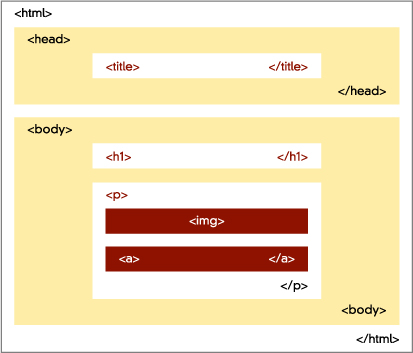
For completeness, here’s how we’d embed JavaScript within our document:
Alternately, we’d link to an external JavaScript file like this:
![]()
Although we use the script element for both linked and embedded JavaScript, you can’t combine the two in a single element. When there is a src attribute on the script element, the browser ignores any script embedded in the element. You can, however, have as many script elements—with links or embedded script—as you like.
style
CSS is covered in Chapter 4, but I’ll quickly touch on the two elements used to embed or link to CSS for a document. (We have to use two elements for this, unlike the single one we used for JavaScript.)
The style element is used to embed CSS in the head, and only in the head of the document. To link to CSS for a document, we use the link element in the head. (The link elements is different from the anchor element [a] that we use to create hyperlinks in the content of the document.)
link
The link element isn’t only used for linking to external CSS files. It can also be used to convey information about the relationship between different documents. The use of links for this purpose is rare, and the information is hidden from the user, not being part of the content of the document.
The use of such “hidden metatdata” is increasingly considered a less-than-ideal development practice; when possible use visible data such as anchors to convey this sort of information. For example, if you want to link to the license for a document, use a rather than link.
The body Element
The contents of the body element of the HTML document is what browsers display as a web page. It is a container for structured content such as headings, paragraphs, and lists, as well as linked content such as images and video.
Headings
HTML provides six levels of heading, via heading elements h1 to h6. These headings define the structure of the document, and some user agents (screen readers, in particular) use them to create a table of contents for the page.
Although it’s not required by HTML, you should use headings in a logical order: headings of level three (h3 elements) should be used one level down the document structure from h2 elements.
Headings are non-empty elements whose content is the text of the heading. For example, in our chapter of Pride and Prejudice, we would mark up our chapter heading using something like this:
![]()
Paragraphs
Paragraphs are blocks of text that typically contain thematically related content. The p element is used for marking up paragraphs of content. To continue with our example, we could mark up the beginning of Pride and Prejudice like this:
One thing it is important to understand is that a paragraph is a container for content, not a way of managing whitespace. Novice developers often use the p element as a sort of spacing instruction to the browser, but the element should never be used in that way. (CSS margins on a paragraph can easily allow us to control whitespace without misusing semantically meaningful elements for presentation.)
Breaking Lines
If we do need to break a line within a paragraph to maintain the integrity of a poem or other text in which exact line lengths are vitally important, we can use the line break element (br). This is an empty element with no content, but it isn’t simply an instruction to the browser to add space between two lines. Rather, it explicitly notes that the lines are broken at this point. Here is the start of Hamlet’s famous soliloquy marked up in HTML:
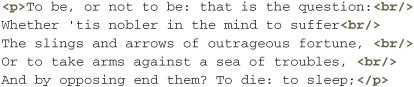
If you write semantic markup, you probably won’t use line breaks very frequently.
Preformatted Text
In HTML, whitespace such as spaces, tabs, and returns are not significant: they are all treated by the browser as a single space, regardless of how many you put together. In other words, four tabs, two returns, and eight spaces in a row will be treated by the browser as a single space.
There’s one exception to this rule. The contents of the pre element are rendered with returns, tabs, and spaces as they appear in the raw HTML file itself. Here’s how we might use pre with Hamlet’s soliloquy, thus avoiding the need for br elements at the end of lines.
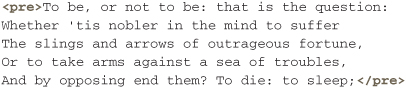
Preformatted content may still contain other markup, such as links. The pre element is most commonly used for code examples, and you should need it only rarely.
This is probably a good place to emphasize once again that HTML is designed for structured, meaningful markup. The use of p as a horizontal separator, the use of br as a general means of achieving the same thing, and the use of pre to achieve a design effect are all examples of seeing HTML as a presentational markup language. As much as possible, the markup we add to our content should reflect the nature of that content. So when a block of content needs to be formatted precisely in a given way with whitespace (for example code examples in which whitespace is usually significant), or when lines must break at a specific point (as in poetry), pre and br are the correct elements. If we are simply seeking a specific visual effect, we should use CSS instead.
divs
So far, we’ve mostly looked at elements that contain individual pieces of content—a single paragraph, a heading, and so on. But if a page is a container of containers, how might we group together, for example, the heading and all the paragraphs of a chapter?
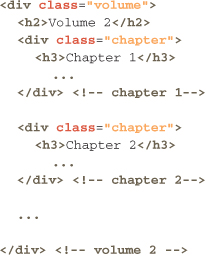
HTML provides the div element for grouping elements like paragraphs, headings, and so on. We can even make hierarchies of nested divs—for example, the entire book of Pride and Prejudice might be marked up as a div, then each volume as a div within the book’s div, then each chapter a div within the volume’s div:
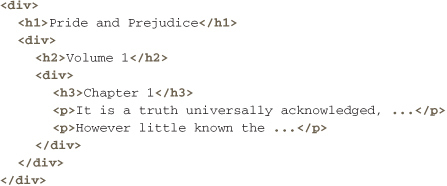
The div element is very common in modern web development. Its use can make markup much more readable, especially if whitespace is used to aid readability—since browsers ignore whitespace in HTML, we can (and should) indent our markup as in the preceding example to reflect the containment hierarchy of the document we’re working on. (More on that and other techniques for creating readable markup may be found in Chapter 8.)
The div element can also be combined with the class and id attributes to create meaningful sections of a document and make it easier to style content with CSS. We’ll get to that in just a moment. First, though, note that it’s best not to indiscriminately wall all sorts of content within divs. Use divs to group sets of elements that form a logical grouping, such as a chapter, an article, and so on.
Commenting Markup
Software developers know that commenting code helps make much more readable, maintainable code (though they don’t always use good commenting techniques as much as they should).
Commenting is far less widely used for markup, but is no less important. An HTML comment has this form:
![]()
One place they can be very useful is for noting which div a closing div tag closes. In our simple example above, we have nested divs, which close together further down in the file:
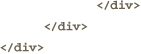
Even here, it might be difficult to determine which closes which div element (particularly as the opening tags can be a long way away in the markup). By adding a comment after the close of each of these elements, we can keep track of this.

HTML comments can be used almost anywhere in an HTML document, and are ignored by the browser when it renders a page.
Lists
HTML provides several types of list elements for marking up lists.
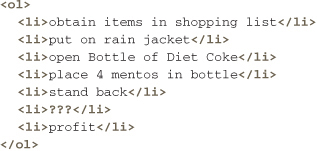
Ordered Lists
Ordered lists are meant for marking up lists of information in which the sequence is important, such as with steps in a recipe. The ol (ordered list) element contains one or more li (list item) elements.
Unordered Lists
An unordered list is very similar, but here the sequence of the items is not significant.
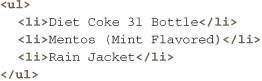
A very common use for unordered lists in web development is for marking up page and site navigation. The navigation for a site after all consists essentially of a list of lists.
Definition Lists
A rather different kind of list is a definition list, which is for marking up a word and the definitions for it. Definition lists comprise a dl element, then a dt element for each definition term, and one or more definition description (dd) elements for each dt element. Definition lists can also be used for other highly structured information, such as detailed data about an event.
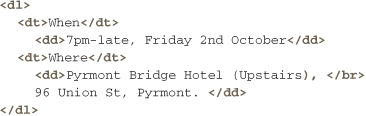
Definition terms may be associated with more than one dd element. We’ll look at this element in greater detail in Chapter 8.
Nesting Lists
It’s possible to nest lists within another lists, which would be common for complex site navigation. Here’s an example:
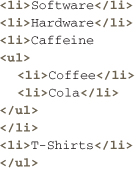
Note that the nested ul is itself inside an li element, because the nested list is an item of the list that contains it.
Inline Elements
With the exception of the br element, all the elements in the body that we’ve looked at have something in common: they’re all block elements, which means that they can (mostly) contain other block elements and can only be contained within block elements. (The p element, which is a block element that cannot contain other block elements, is the only exception.)
There’s a second kind of element called an inline element. Inline elements can only contain other inline elements, but may be contained by both inline and block elements.
To summarize these containment rules of HTML:
• Block elements can contain other block elements and inline elements.
• Block elements can only be contained within block elements.
• Inline elements can only contain inline elements.
• Inline elements can be contained in both block and inline elements.
• Paragraphs are block elements, but cannot contain other block elements.
Let’s turn to inline elements.
There are many inline elements, but we’ll focus on those used to write semantic, structured markup.
Emphasis
In English, we often make use of italics or bold text for emphasis. HTML provides two different elements for providing emphasis: the strong element, for strong emphasis, and the em element, for slightly less strong emphasis. By default, browsers render text contained in a strong element as bold weight text and text contained in an em element in italics, but it’s easy to change this using CSS.
Developers have been known to use the bold (b) and italic (i) elements for the purposes of emphasis, but the semantic strong and em elements are recommended in place of these presentational elements.
Abbreviation
Another relatively commonly used semantic inline element is the abbreviation (abbr) element. This can be used for a term that is abbreviated, or for an acronym, and the full or expanded version can be included in the title attribute of the abbr element, thus providing additional semantic information for abbreviations. For example:
![]()
Extending HTML Semantics
HTML provides a number of other semantic elements, both inline and block, and we’ll look at some of these, including elements for quotations and block quotations, in Chapter 8. But for all the elements HTML has, it still lacks elements that are associated with even the most common page components found in newspapers, magazines, and books. Additionally, a new set of design patterns (navigation bars and so on) made specifically for websites has evolved, but HTML doesn’t have elements for these components either. And since there’s no way to add elements to HTML, we must rely on the small number of elements that the language already offers.
Luckily, HTML does offer an informal but very useful way to extend its semantic capabilities via the class and id attributes.
class
The class attribute allows developers to describe an element in greater detail. If we think back to our example of Pride and Prejudice, and the three different levels of div (book, volume, and chapter) we might use the class attribute to classify each of these divs accordingly. If our document contained the whole of Pride and Prejudice, it would have 3 divs to contain the 3 volumes and a total of 61 divs to contain each of the chapters. Here is how we might mark up the first two chapters of volume two:
We’ve given related elements the same class values because they share a classification. Adding class like this makes our markup more readable and, very importantly, makes it much easier to style our documents with CSS and to use JavaScript to control behavior.
Precisely when and why an element should get a class attribute is something we’ll turn to in Chapter 8.
Note that elements may only have a single class attribute, but that they can have multiple class values, which are separated by spaces. class values may include most characters other than spaces and tabs, but letters, numbers, underscores, and hyphens are the most commonly used characters.
id
Closely related to the class attribute is the id attribute. Whereas class describes a group (or classification) to which an element belongs, id is a unique identifier for a given element. Only one element in a particular HTML document may have a given id value.
How might we use id? Turning once more to Pride and Prejudice, we see that although each of the chapters belong to the class of divs called chapter, each chapter is also unique and numbered. So, we could add an id for each chapter:
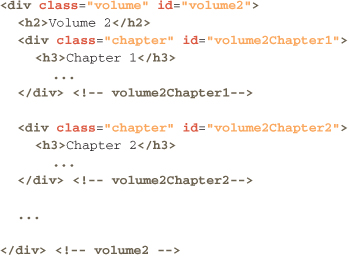
Because we have many chapters with the same number in this document (each volume has a Chapter 1, and so on), we’ve had to use the longer value volume2Chapter1 to ensure that the id value of each chapter is unique.
There’s no need to add an id value to every element in a document. Determining just when to add this attribute is more an art than a science, and we’ll consider it in detail in Chapter 8. As a rule of thumb, when an element is unique, and plays a significant role in the document, an id value may be valuable.
id and class attributes are not restricted to div elements, but they are often used with these elements, as is the next element we’ll turn to, the span element.
span
Almost all HTML elements have their own semantics. A paragraph, a heading, a list—all model things that make sense to us. The div element is different. It has no semantics of its own, and is simply a container for block and inline elements. There’s also an inline element that plays a similar role: the span element. We can use span to add additional, meaningful markup to our content. Well see span in action in Chapter 8, where it plays an important role in microformats.
Links: The “Hyper” in “Hypertext”
One of the things that makes the web the web is the hyperlink. In HTML, we link from an anchor to another location within the same page, or to another web page.
Anchors
The anchor (a) element plays two roles in linking. It’s the source of most outbound links, and it can also be the destination of a link.
When an anchor is the source—that is, the thing a user will click—it has an href attribute that points to the destination of the link.
![]()
When an anchor is a destination, it has an id that can be used as the destination of another anchor, For example, developers who are concerned with accessibility often use a link at the beginning of the page that allows users to skip over navigation elements and go to the contents of the page. To accomplish this, we can put an anchor at the beginning of the page and make another anchor (with an id of contents) that anchor’s destination.
![]()
With modern browsers, it’s also possible to use any element with an id as the destination for a link. So, for example, in our Pride and Prejudice site, if we have a table of contents with links to each of the volumes and chapters, we could link to the first volume of Chapter 2, which we marked up a little while ago like this:
![]()
This approach is preferable to adding extraneous empty anchor elements simply as a destination of a link.
In addition to linking within a document, we can link to:
• Other pages on the same site—that is, other pages within the same root directory on your server
• Parts of other pages on the same site
• Other pages on the web
• Parts of other pages on the web
• Other resources on the web, such as image files, resources located on ftp servers, and so on
We can also use a link to open a new email message in a mail application.
title and rel Attributes
Anchor elements can take two additional attributes that can add more information about the link. The first is the title attribute, which most HTML elements can take. According to the HTML 4 specification, the title attribute is designed for “advisory information about the element,” and is often used with links to provide additional information about the link that some browsers display as a tooltip, and that screen readers may read out to their users.
The rel attribute can be used to describe the relationship between the destination of the link and this document. We’ll look at this attribute in detail in Chapter 8.
Anchors and Containment
An anchor is an inline element, so it can only contain other inline elements. So if you have, say, a heading element that you want to be a link, the anchor element must be nested inside the heading element and not the other way around.
Absolute and Relative URLs
We can link to another document at the same site in one of two ways: via relative or absolute URLs. An absolute URL is a fully formed URL, with domain, directory and file names, and looks just like a link to another site. Relative URLs use only a relative path on the server—a path that shows the relationship between the location of the linking document and the location of the linked-to document.
Relative URLs can only be used when two files share a common root directory on a server. Most websites reside on a server within a single root directory, so it often makes sense to use relative links to link together resources at the same site.
Relative links are created using the following rules:
If a file we want to link to is in the same directory as the file we are linking from, the relative link is just the name of the destination file. For example if the index.html file where we are linking from and the contact.html file we are linking to are directly contained within the same directory, our link would look like this:
![]()
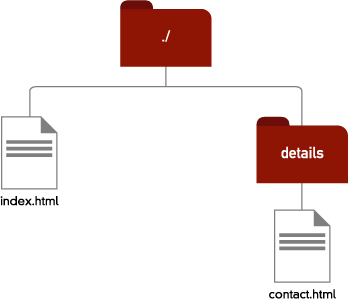
If the file we want to link to is inside a directory that is contained directly within the directory that the file we are linking from is in, then the relative url is the name of the directory that contains the destination file, a slash (/), and then the name of the destination file. In this case, our link would look like this:
![]()
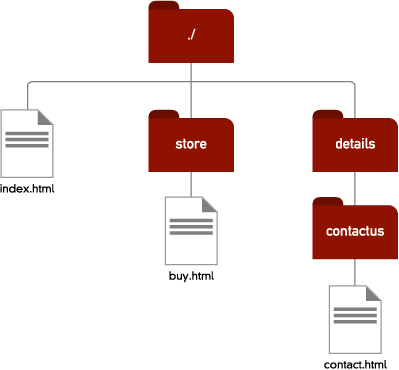
This says that the destination file is called contact.html, and it’s contained inside the directory called details, which itself is inside the same directory as the file we are linking from [3.3].
3.3 Relative links when a destination file is one level down in the server structure.
The same logic applies no matter how deeply nested in directories the destination file is. For example, if the destination file is inside a directory that is inside a directory that is in the same directory as the file we are linking from [3.4], our link in this instance would look something like this:
![]()
The other direction we will need to make relative links is “up” the server hierarchy. To go up one step in the hierarchy, we use “../” at the beginning of the relative url. To go up two levels, we use “../../” and so on.
To link from the contact.html file to index.html in figure 3.4, we need to go up two levels, and so our URL would look like:
3.4 A destination file nested several directories deeper than the file we are linking to.

Lastly, we can combine these two directions, if we need to go back up the directory hierarchy and then down into another directory. For example, in figure 3.5, we needed to link from contact.html to buy.html.
3.5 Going up the directory hierarchy and back down again
![]()
Creating relative URLs may seem a little confusing, but the underlying logic is simple: Go down the directory hierarchy by naming the directory to go “into.” Go up the hierarchy by using “../”—and at the end of it all, you identify the file you are linking to by name.
If we want to link to a specific part of any document, we simply add the id for the element we want to be the target of our link to the end of the URL. So if we want to link to the form with the id contactform inside the contact.html document we simply add #contactform to our link:
![]()
Linking to Resources on the Web
Linking to resources, including web pages on other sites, is simpler. We just use the entire absolute URL. For example, to link to my contact details, I would use the full URL: http://devwws.com/contact.
![]()
Note that the protocol (http://) is essential: without it, many browsers won’t resolve the link to the domain.
In this example, I’ve linked to a directory rather than a file. This can be risky, because it relies on the server to resolve a link to a specific file inside that directory. Most servers will resolve to a file called index.html, but unless they’ve been specially configured, most servers won’t resolve to files like index.php, which would be the default page for a PHP-driven site. If a server doesn’t resolve correctly, your link will lead to a 404 error page. If that happens, you can either change your server settings so that it returns index.php if no file name is specified, or you can link to the file by name.
Embedded Content
As we saw earlier, HTML files don’t themselves contain images, video, and other non-text content. These are contained in separate files and are linked to from the HTML document in various ways depending on the type of content. Images, video, audio, and content like Flash and Silverlight are often referred to as embedded content, which is a little confusing, as these aren’t literally embedded in the HTML file.
Images
The most common embedded content in websites is images. The most common of image type, supported by all modern browsers, is these types of bitmap format:
• Portable Network Graphics (PNG, pronounced “ping”)
• JPEG (pronounced “jay peg”)
• GIF (often pronounced “giff” with a hard “g” as in “gift,” but officially “jiff”)
We include images in all these formats in our HTML documents the same way, using the img element. (There’s also a standard vector graphics format for the web called SVGf which we examine in considerable detail in Chapter 16.)
Embedding Images
Each of these image formats is embedded in an HTML document using the img element. This is an empty element that takes the URL of the image (relative or absolute) as the value of an href attribute. For example, to link from an HTML file to a shopping cart image in a directory called “images” in the same directory we’d use this markup:
![]()
That’s really all there is to including an image in a document. Or rather, that’s almost all. HTML also requires every img element to have an alt attribute, which contains text that describes or takes the place of the image. This text is typically used by assistive devices and user agents for people with impaired vision, but most browsers also show this content when images are not available.
There’s quite a bit more to be said about img element accessibility, and you’ll find a full discussion in Chapter 6.
Content or Decoration?
Some images are purely presentational—for example, background or decorative border. These images should be added via CSS rather than being included in your HTML. Images that serve as content—maps, illustrations, portraits, logos, and so on—should be included in your markup.
One particularly challenging area that we’ll return to in Chapter 4 is image replacement, a technique in which the text of an element is hidden and an image of that text (in a desired font) is displayed in its place. For now, I’ll just say that text in a document should never be replaced by an image of that text using an HTML img element—this technique is inaccessible to users with disabilities and is hostile to search engines to boot.
Multimedia Content
As broadband internet connections become more common and with the rise of podcasting and of video-sharing sites like YouTube, there is an increasing use of video and audio content on the web. Rich Interactive Application (RIA) formats like Flash and Silverlight are also often part of the content of sites. These kinds of content are all embedded into HTML documents the same way. The exception, as we’ll see in Chapter 11, is HTML5’s new video and audio elements.
Most browsers require a plug-in of one kind or another to play audio, video, and other embedded content, whereas the image formats we’ve just discussed are supported “natively” by browsers, which means they don’t require a plug-in.
The object Element
The object element is the sole standards-based way of embedding multimedia content. This element can get quite complicated, but I’ll focus on its use for essentially embedding content that will begin playing once it has been downloaded. For a more detailed understanding of object and all it can do, check out the links in the Resources section at the end of this book.
The object element is a non-empty element, and its contents can be used to provide alternate content if the embedded object itself is not supported. An object can take a number of attributes, but the most important for our purposes are:
• data—A URL (relative or absolute) for the file to be embedded.
• type—The type of content. This is an optional attribute, but is recommended, because it allows the browser to determine whether it supports the format of the content before downloading the content.
Suppose we want to include a video of a local production of Hamlet along with the soliloquy we marked up earlier in this chapter—provided, of course, that we have the appropriate permissions and license for the content. First, we’ll link to an MPEG version of the file.
![]()
Here the data attribute is a relative URL to the video file, and the type lets the browser know what content to expect.
Now suppose the browser doesn’t have support for MPEG. We can specify alternate content, for example a still image from the video. We can simply include an img element inside the object element.

It’s also possible to provide several different object elements, each linking to the same video content in different formats, as the content of the main object element. This way, we’d have fallbacks to cover the common formats supported by common browsers on common platforms. In Chapter 11, we’ll look at this fallback mechanism in more detail in relation to the video element.
applet and embed?
You may have come across two other related elements, the applet element, and the embed element. embed was once widely used to embed content that required plug-ins to be rendered. It was never actually part of any HTML standard, and although it was once the only way to ensure cross-browser multimedia embedding, this is no longer the case.
The applet element is designed solely for use with Java applets, which were once quite common on the web. Since object can be used to embed Java, applet, which is deprecated in HTML 4, need not be used.
Forms
Most websites feature some type of form, whether it’s a simple contact form, or a complex e-commerce interface. It’s outside the scope of the book to consider how forms are integrated with server-side systems, but we will look at the ways in which forms are marked up.
HTML forms should always be contained within a form element. HTML provides several different form controls, including:
• Text fields
• Checkboxes
• Radio buttons
• Buttons
• Popup menus
• Labels for form controls
Forms can also be structured into related sets of controls using a fieldset element, which we’ll examine in Chapter 6.
The form Element
The form element is a container for all the controls of a web form. It has the method attribute that specifies what happens to the data when the user submits the form, and the required action attribute specifies the URL of a script on a server that will receive and process the data sent, and return any results.
The input Element
Form controls are unlike most other HTML elements. Most elements in HTML have different names (for example p, div, and so on) but only one—input—handles most form controls; the difference between these controls is determined by the value of the input element’s type attribute. All input elements must also have a name attribute, the value of which is sent along with the element’s value when the form is submitted. Without the name, it would not be possible to make sense of the data sent to the server. Let’s look at several of the most common input element types.
text and password
An input element with a type of text is a single-line text input element. input elements of type text can also take a size attribute, which specifies the width of the element in characters (not the maximum number of characters it may contain). While size is still commonly used, it’s better to use CSS to specify the width of an element. The value attribute can optionally be used to specify an initial value for the element. Here’s an example input element of type text:
It’s possible to specify a maximum number of characters the user may enter, via the maxlength attribute.
When the form is submitted, the browser sends the name of the input, along with the text the user has entered, to the server. As mentioned above, without a name, the data doesn’t make sense.
Closely related to inputs of type text are those of type password. The difference is that when the user types in a password field, a character that looks like a bullet point replaces each character, thus preventing curious onlookers from seeing the password as it’s typed in—importantly, though, this input does not offer protection from malicious scripts, keyloggers, and similar attacks.
Checkboxes and Radio Buttons
Checkboxes and radio buttons are familiar controls seen in Windows, Mac OS, and other GUI-based operating systems. In web forms, radio buttons are used in a group to provide several mutually exclusive options. A checkbox, on the other hand, may be used individually or along with other checkboxes to present related, but independent options, any combination of which may be selected. Both can be set as initially checked by setting the value of the checked attribute to checked (more on that in a moment).
The name attribute plays an important, but different role for each of these inputs. With checkboxes, more than one may share the same name. In this case, several different values may be sent to the server when the form is submitted—that is, the browser will send a name and value pair for each of the checked checkboxes, though no value is sent for unchecked checkboxes.
Here’s how we might mark up a checkbox, if we were trying to trick users into opting in to a mailing list by making the default state of the opt-in checkbox checked.
![]()
Keep checked in mind—we’ll look at something unusual about it in a moment.
When more one than radio button shares the same name value, the buttons are considered to be a group. The browser ensures that one—and only one—of these buttons will have a checked value of checked. When the form is submitted, the value of the checked radio button is sent along with its name. It’s important to specify which of the radio buttons in a group should be initially checked, because different browsers will make different default choices if this is not set explicitly.
Here’s how we might mark up a group of radio buttons:
![]()
In this instance, only one of the male or female radio buttons will ever be checked. When this form is submitted, only the value of the checked radio button will be sent to the server, along with the name gender.
Push Buttons
HTML provides a number of different ways of marking up push buttons.
• With input of type submit
• With input of type reset
• With input of type button
• With input of type image
• With the button element
An input of type submit is a button which, when activated, will submit the form. Forms may have more than one submit button, though all the buttons will submit the form to the same location. These buttons label themselves as Submit but this can be changed by changing the value attribute to a label you want. Because the type is submit, the button will still function as a submit button even if relabeled.
An input of type reset is a button that, when activated, will reset all the values of the form controls to their initial values. They label themselves Reset, but as with submit inputs, this can be changed using the value attribute.
An input of type button is a push button with no default behavior or label. You can give it functionality using JavaScript—we’ll see how we can attach an event handler for the click event in Chapter 5—and a label using the value attribute. For example, here’s a button with the label Calculate.
![]()
An input of type image is a button that displays itself using the image found at the value of its src attribute. These are infrequently used, and are not recommended, since CSS provides much more accessible ways to style buttons.
The button Element
The button element was introduced in HTML 4, and is more consistent with the way in which HTML elements typically work. It is a non-empty element, and the content of the element, rather than its value, is its label. buttons may also take a type attribute value, one of submit, reset, and button, and very importantly, by default, the type is submit. If you want a button that will have its own JavaScript-based action, then make sure the type is button. Here’s how we’d create the Calculate button in the preceding example using button.
![]()
One of the strengths of the button element is that the value can be different from the label. But this is also the most serious problem with the button element. Internet Explorer 6 and 7 handle the button element very badly. When activated in IE 6 or 7, the button element will send the contents of the element, rather than the value of its value attribute to the server. To make matters worse, when there are multiple buttons, all of their names and contents are sent to the server, even though only the activated button should have its name and value pair sent.
There are a number of ways of working around the problem, but none of them are perfect, and so the rough consensus of developers is that unless you don’t need to support IE 6 and 7, you should use input elements rather than buttons.
Menus
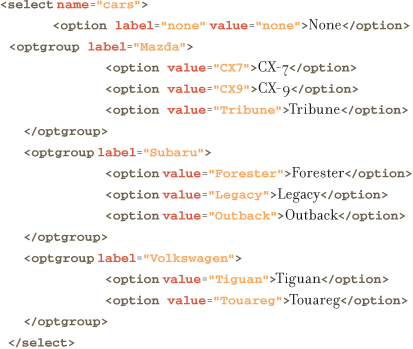
When you want users to choose between a small number of mutually exclusive options or a small number of related options more than one of which may be selected, the radio button and checkbox input types are appropriate. But when a large number of choices must be presented—for example, if you need users to select the country in which they live—dropdown menus are appropriate. We use the select element, along with the option and optgroup elements, to create dropdown menus.
The select element contains one or (usually) more option elements. Each of these is a menu item in the associated menu. If select contains a significant number of option elements, or it makes sense to group them, we can do so using the optgroup element, which is a container for the option elements. (A select element might have some option elements inside optgoup elements, and others directly inside the select element.)
For example, here’s how we’d create a menu of car models, grouped by make:
It’s possible to accept multiple selections from the user by setting the multiple attribute on the select element. This attribute, and others like it (such as checked), are a little different from most attributes we’ve seen. They are either true or false, and so are called Boolean attributes. We might expect them to take values of either true or false, but they don’t. Rather, if the attribute is present, then the value is true, and if the attribute is absent, the value is false. But the strangeness doesn’t end there. There are also two ways of including these elements in our markup. We can use the form checked="checked"—that is, the value of the attribute is its name in quotes—or we can simply include the attribute name without any value.
So, we could specify that multiple selections should be allowed for our select element in one of two ways:
![]()
Both are valid, but for consistency, some developers recommend adding the attribute value.
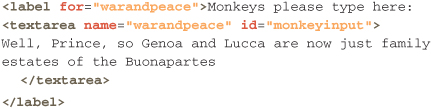
Text Areas
The text input is sometimes too small to accommodate the type of response you want from a user. When you want a more expansive response that requires multiple lines, use the textarea element instead. In addition to presenting a larger area for user input, textarea elements can receive “return” keystrokes thus allowing users to add line breaks, whereas text inputs will pass returns to the submit button for the form.
There are two optional attributes specifically for textarea elements—rows and cols—which specify, respectively, the width and height of the element in characters. Use CSS instead.
A textarea is a non-empty element, and its content (if any) will be the initial value of the element. For example a textarea for monkeys to try their luck at randomly typing War and Peace might look like this if we’ve given them a head start, thus immeasurably increasing the odds of any given monkey achieving the goal:

Disabling Controls
All of the form controls in an element can be initially disabled using the disabled attribute (like checked and multiple, this is a Boolean attribute). The only way for a disabled element to then be reenabled is via JavaScript.
Labeling Controls
If we were to take a look at almost all of our code examples in a browser, we’d notice something important: most lack labels. So there’s no way for our users to know what each radio button, checkbox, text area, or text input is for. Some elements label themselves, either with the value attribute or the contents of the element, but to those which don’t, we need to add a label.
The HTML label element is made to do just this. These non-empty elements may contain the elements for which they are the label (implicit labeling), or be associated with that element via the for attribute (explicit labeling). The for attribute contains the value of the id attribute of the element for which it is the label (although we’ve given most of the form controls a name attribute, we can’t use the value of this attribute in the for attribute).
Proper labeling makes a form much more accessible because assistive devices use labels to present information about a form. It also provides a huge usability advantage by setting user expectations about the behavior of controls. When a user clicks or otherwise activates a label, its associated form control is activated (though in IE 6, this only works with explicit labeling). With a text input or text area, the focus is put into the field; in the case of a radio button, it’s checked, and so on.
Proper use of form labels is often overlooked by developers, but it’s an important part of form markup best practices.
So should you make a label implicit, explicit, or both? Where possible, it makes sense to do both, but at the least, make the labeling explicit. This requires adding an id to each labeled form control, and using the for attribute for each label. It’s a little extra work, but has significant usability and accessibility benefits. Here’s how we’d label a text input, both implicitly and explicitly:
Containing Controls and Labels in a Form
A common error developers make with form controls and labels is containing them directly inside the form element. While this sounds eminently sensible, it’s not permitted in HTML. A label or form control cannot be the direct child of a form. Rather, it must be contained inside a block element like a div or paragraph.
Grouping Controls
Complex forms often consist of groups of related controls. HTML provides the fieldset element for grouping together form elements (it’s a container for related form controls), along with a legend element for providing a specific caption for this group of elements. We look at these in detail in Chapter 6, where we also focus on form accessibility in more detail.
It pays to explore forms beyond the basics, because a little extra effort and understanding can pay big dividends when it comes to accessibility and overall usability. The more accessible and usable form is, the more likely it is to be completed and submitted, which means the efforts will be rewarded by more leads, sales, and other interactions.
Tables
Tables have a difficult history for web developers. Long misused for page layout (as discussed in Chapter 9), they are often treated as pariahs. In fact, tables are entirely appropriate for tabular data, whether it’s a price list, financial data, experimental results, or one of many other possible types.
Table Structure
A table is a simple thing: it’s a table element with a number of rows (the tr element). These rows can be grouped into header rows (the thead element) one or more table body (tbody) elements, and table footer (tfoot) element. These groups are useful for more complex and longer tables, where a browser may present the thead and tfoot as fixed, and the tbody as a scrolling element.
Where used, the tfoot element must come before the tbody, which seems illogical, but allows the browser to render the tfoot rather than waiting for a large tbody to load before rendering the footer. Each of these elements must contain at least one table row.
Table rows contain one or more cells, which can be either th elements (a header cell), or td elements (a data cell). These cells can contain content, including HTML (even block elements).
Before we continue, here’s a very simple table, with a small number of rows, and no thead, tfoot, or tbody.
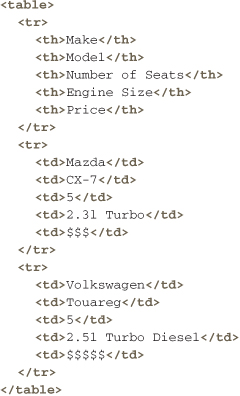
Here, we have headers as the cells in the top row, and in each column, we have matching data. Figure 3.6 shows how a browser might render this. It’s not especially pretty, but that’s where CSS comes in, as we’ll see in Chapter 4.

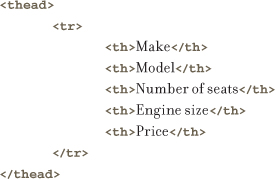
If we were to have a particularly large number of makes and models, we could group the first row into a thead element, like this:
Spanning Columns
There are times when one cell will span several columns. For example, in a conference timetable, some time slots will have a single event (a keynote presentation for example), while others will have multiple events at the same time [3.7].
3.7 A timetable with some events spanning multiple columns of the table

Here, we can specify that a td (or th) element spans a number of cells using the colspan attribute, and giving this a value of the number of cells it should span. As there are four columns of cells, and only two cells, the second cell spans three columns.
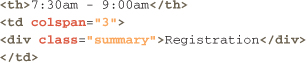
It’s important that the number of cells—plus the columns they span—adds up to the number of cells there would otherwise be in the row.
For the most part, you are likely to find yourself using simple tables, with a number of rows, each containing either header or data cells. In Chapter 6 we’ll return to tables, and look at some of their more advanced features that aid accessibility.
Frames and iframes
The frame element was at one time one of the most widely used features of HTML, but it’s now quite rare. It was used to present the contents of different HTML documents within the same browser window, but due to accessibility and usability challenges, it has fallen almost entirely out of use. As such, we won’t spend much time on it.
However, to clarify one area of potential confusion, inline frames (the iframe element) are widely used in mashup-style pages, as a way of embedding content from other sites and communicating across different domains. (iframes are a complicated topic associated with Ajax and mashup programming; you can find some resources on them at the end of this book.)
The reason iframes are superior to traditional frames is that iframes are part of the markup of a document, whereas frames are contained in entirely different documents, and contain within them links to the pages that display inside them. As such, iframes can be styled using CSS, and placed anywhere on the page; the placement of traditional frames is determined by various attributes of the frame element itself.
Characters and Entities
HTML and other web technologies are designed to be as universal as possible. One area in which this applies is accessibility, which is discussed in detail in Chapter 6. Another is that of languages.
Those of us who read and write English and other European languages typically don’t have to deal with the complexities of character sets other than those associated with Roman alphabets. The full complexities surrounding character encodings are too extensive for me to discuss here, but it is import to note how to include nonstandard characters in HTML documents. If we need to make occasional use of such characters as curly quotes(“”), the copyright symbol (©), characters from other alphabets, and so on, we can often use character entities or numeric character references to do so.
Character entities have the form of an ampersand (&) followed by the name of the entity. Common entities include:
• The copyright symbol (©)
• The ampersand (&)
• Less than and greater than (< and >)
• Left and right single curly quotes (‘ and ’)
• Left and right double curly quotes (“ and ”)
• The Euro sign (€)
Numeric character references have the form of an ampersand, followed by the pound sign (#) and a number, plus a semicolon (;). The common entities above have the following numeric character references:
• The copyright symbol (Α)
• The ampersand (&)
• Less than and greater than (< and >)
• Left and right single curly quotes (‘ and ’)
• Left and right double curly quotes (“ and „)
• The Euro sign (€)
When you use > and < and & characters in the text of a document, they must be included as the character entity or numeric reference, not as “raw” characters. (This is technically referred to as escaping these characters.) Browsers treat < and > as the beginning and end of HTML elements, but render < and > as the less-than and greater-than symbols. One of the most common validation errors for HTML documents is using unescaped ampersands in the text of a document. The character & should only appear in character entities and numeric references. At all other times—even in URLs—it should be escaped.
What’s the difference between numeric entities and references? Entities were invented as a more developer friendly version of some of the more common numeric entities. Entities are typically easier to remember and understand when you see them in code. But, while only a subset of characters has an entity, there’s a numeric character reference for every unicode character.
Quality Assurance
Browsers are usually very forgiving of markup that is incorrect (or invalid), which is both very good for users, and very bad for the quality of code on the web. Although browsers will work very hard to make sense of invalid markup, different browsers will handle the same invalid markup in different ways, which can make it very difficult to debug browser differences and rendering bugs. There’s one very simple way of ensuring your markup is correct: use a validator. Validators check that your markup conforms to the rules of HTML, and will report in detail where errors have been found. This, along with checking to ensure your links aren’t broken, are two easy to use, important quality assurance tools that should be as widely used as by developers as spell checking is for writers.
Validating Your Markup
There are commercial and free validators online and available as desktop applications. The one most widely used is that maintained by the W3C at validator.w3.org.
Validators take the DOCTYPE of a document and then check the document against the syntactical rules of the language variant you’ve chosen. At the W3C validator, you can check a document at a URL, via file upload, or by pasting in the HTML.
When you first validate a document, you might be surprised to see that there are several errors and warnings, when you might have thought that your document was entirely correct. Errors can creep into any code quite easily, and the forgiving nature of web browsers’ HTML parsers means they can easily go unnoticed. Sometimes a single containment error (for example an unclosed anchor) can cause multiple errors, and fixing that one error will fix all the errors that flow from it. Some of the most common validation errors are
• Unescaped ampersands in URLs and elsewhere in a document. The & character should only appear in character entities and numeric references.
• With XHTML DOCTYPEs, failing to use the correct syntax for empty elements (that is leaving off the / before the >).
• Uppercase letters in XHTML element names and attribute names.
• Incorrectly nested HTML elements (for example <strong><a href="index.html">Home</strong></a>).
• Block elements nested inside inline elements.
• Form controls and labels contained directly inside form elements (they must be inside block elements inside the form element).
• img elements and other elements that require an alt attribute missing this attribute—it can have an empty value, but must be present.
• Deprecated elements and attributes (like font and color) in documents with strict DOCTYPEs.
• A DOCTYPE directive at the top of a document that is not in all uppercase letters.
• In XHTML, failing to quote attribute values.
Validation is an essential though often overlooked quality assurance tool for your markup. It’s not difficult to include as part of your workflow, and it is something you’ll benefit from if you do it as you go—particularly if you aren’t quite sure about something—rather than leaving it to the end of your coding, only to find an overwhelming and hard to address cascade of errors.
Checking Links
Broken links are far too common on the web. These can be checked with many desktop and web-based tools, including the W3C’s own link checker. This can ensure that pages you link to haven’t moved or disappeared, and can also help you find errors where you’ve misentered a URL, either an internal or external one. The W3C’s link checker is at validator.w3.org/checklink.
HTML Tidy
If you’re cleaning up legacy markup, or markup generated by a word processor, such as Microsoft Word, HTML Tidy—a free, open source tool from the legendary Dave Raggett—is invaluable. While the command line versions for Unix, Linux, Windows, and Mac OS are not for the fainthearted, there are numerous desktop applications that incorporate Tidy, as well as web-based versions such as HTMLHelp’s valet.htmlhelp.com/tidy.
Tidy can convert HTML to XHTML, fix all kinds of errors like the ones we’ve discussed here, and deal with some of the particularly poor HTML that Word produces with its “Save as Web Page” feature. Tidy is not a replacement for good coding practices, but it is a great tool for freshening up legacy and other less than perfect code.
HTML versus XHTML
Throughout this chapter, we’ve referred to XHTML and HTML as essentially the same thing. We’ve noted that there are some differences, particularly when it comes to syntax, but that they share identical semantics. Let’s look a little closer.
Syntax Differences
We’ve seen that these two languages have syntactic differences. XHTML is designed so that all valid XHTML documents are also HTML documents. You should be able to validate any XHTML document you develop as HTML. The reverse is not true. Valid HTML documents, unless they contain no empty elements, cannot be valid XHTML documents.
Serving the Document
As we’ve touched on briefly, when a server serves any file, it does so along with a MIME type (also known as a content type). For example, PNG images are served as “image/png,” style sheets as “text/css,” and so on. Most of the time, we can safely ignore the type the server uses to serve the document. When it comes to XHTML, though, we can’t. Keep reading just a little longer to find out why.
Error Handling
As noted earlier in this chapter, the forgiving nature of HTML parsers in all web browsers means that no matter how invalid a document’s markup is, a browser will do its best to render it in a sensible manner. This is both a blessing and a curse. XHTML, on the other hand, is an application of XML, and XML has very strict parsing rules. If an XML parser encounters even the slightest error in XML markup—and XHTML is XML markup—it must report this error and stop parsing. You can imagine the impact on the web if this were the error handling rule for HTML.
Why is it then that we see little of this problem on the web? Do XHTML developers routinely create perfectly valid markup? Sadly, the answer is no: it’s often extremely hard to do so, since many sites include third-party content such as advertisements, user comments that may contain HTML, mashup content, and so on. Ensuring that this third-party content is perfectly valid is often impossible.
Faced with this disparity, browser makers hit on a compromise when it comes to XHTML. If XHTML documents (those with an XHTML DOCTYPE) are served as “text/html,” then browsers treat them as HTML, not XML. If, on the other hand, they are served with a MIME type of “application/xhtml+xml,” then browsers should treat them as XML, so if there is a single error, the parsing stops and the user gets an error message. So documents should only be served as “application/xhtml+xml” when you can be absolutely sure they are and will remain valid.
There’s a further complication. Internet Explorer, even as of version 8, lacks an XHTML parser. Rather than treating documents served as “application/xhtml+xml” as HTML, it asks the user whether they want to download the document to disk, effectively treating these documents as being of an unknown type.
While the full complexities, including techniques for serving different types to different browsers, is beyond the scope of this book, unless you are particularly well versed in the issues, XHTML and HTML should both be served as “text/html.”
Which Should You Use?
As mentioned right at the start of this very long chapter, for many years, XHTML was considered by most developers—and the W3C—to be the future direction of HTML. With the demise of XHTML 2 and the rise of HTML5—which can be marked up using either HTML or XHTML syntax—the situation is no longer so clearcut. Both HTML and XHTML syntax will be with us for a long time to come.
But which should you use, and why?
In many respects, it boils down to a matter of taste. As someone who has used the XHTML syntax for many years, along with many professional developers, I am sure I’ll instinctively use it long into the future. Arguably, one benefit its syntax has over traditional HTML is a consistency that can make both writing and reading markup easier. All attributes are quoted, empty elements always close with the trailing slash, and all elements must close themselves.
There are arguments against using XHTML syntax, one of the best of which was written by Maciej Stachowiak (a core developer of WebKit and co-chair of the W3C HTML Working Group), can be found here: webkit.org/blog/68/understanding-html-xml-and-xhtml. If you are interested in learning more, there’s no better place to start.
My personal choice is for XHTML markup, along with a strict DOCTYPE, to simplify the language (strict versions of HTML and XHTML omit all presentational elements and attributes). Regardless of which syntax you choose, a strict DOCTYPE for new projects will help ensure that your markup focuses on the semantic aspects of your content, not on its presentation, which is the domain of CSS.
Which, not coincidentally, is where we’ll turn next.