1. Chop chocolate into small pieces. Combine chopped white chocolate, marshmallows, butter, and milk in a microwavable bowl. FIG. 2.
FIG. 2 Add marshmallows, milk, butter, and white chocolate to a microwaveable bowl.
2. Microwave on high for 1 minute and stir until smooth. If needed, microwave for 30 seconds as needed until everything is melted. FIG. 3.
FIG. 3 Microwave briefly and mix well.
3. Stir in clear vanilla extract and mix.
4. Add confectioners’ sugar and stir to combine.
5. Sprinkle a sheet pan with confectioners’ sugar and scrape the marshmallow mixture onto the sugar-coated surface. FIG. 4.
FIG. 4 Stir in confectioners’ sugar and pour onto sugar-coated sheet pan.
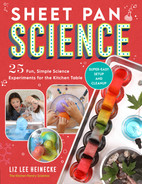
6. Dust the marshmallow mix with more confectioners’ sugar and knead it on the pan, incorporating confectioners’ sugar until it is no longer sticky. You may need to add more confectioners’ sugar. It will probably take 5 to 10 minutes of kneading, and you may have to occasionally scrape the mixture off your fingers with a spatula or rubber scraper. FIG. 5.
FIG. 5 Wash hands and knead the mixture, adding confectioners’ sugar until it is no longer sticky.
7. Use food coloring to tint the fondant by kneading the color in. Make it all one color or divide it and create several colors. FIG. 6.
FIG. 6 Form the fondant into balls and add food coloring.
8. Fondant dries out quickly, so use a rolling pin to roll it out and then wrap it in plastic until you’re ready to use it. Fondant can be stored for a week or two at room temperature, tightly wrapped.
9. Use cookie cutters or your hands to cut and shape the fondant into decorations to top a cake or cupcakes. Fondant can also be used to make sugar crystal geodes, like the ones in Lab 12, but you will want to quadruple the recipe. FIG. 7.
FIG. 7 Roll, cut, and sculpt the fondant.
PROTOCOL
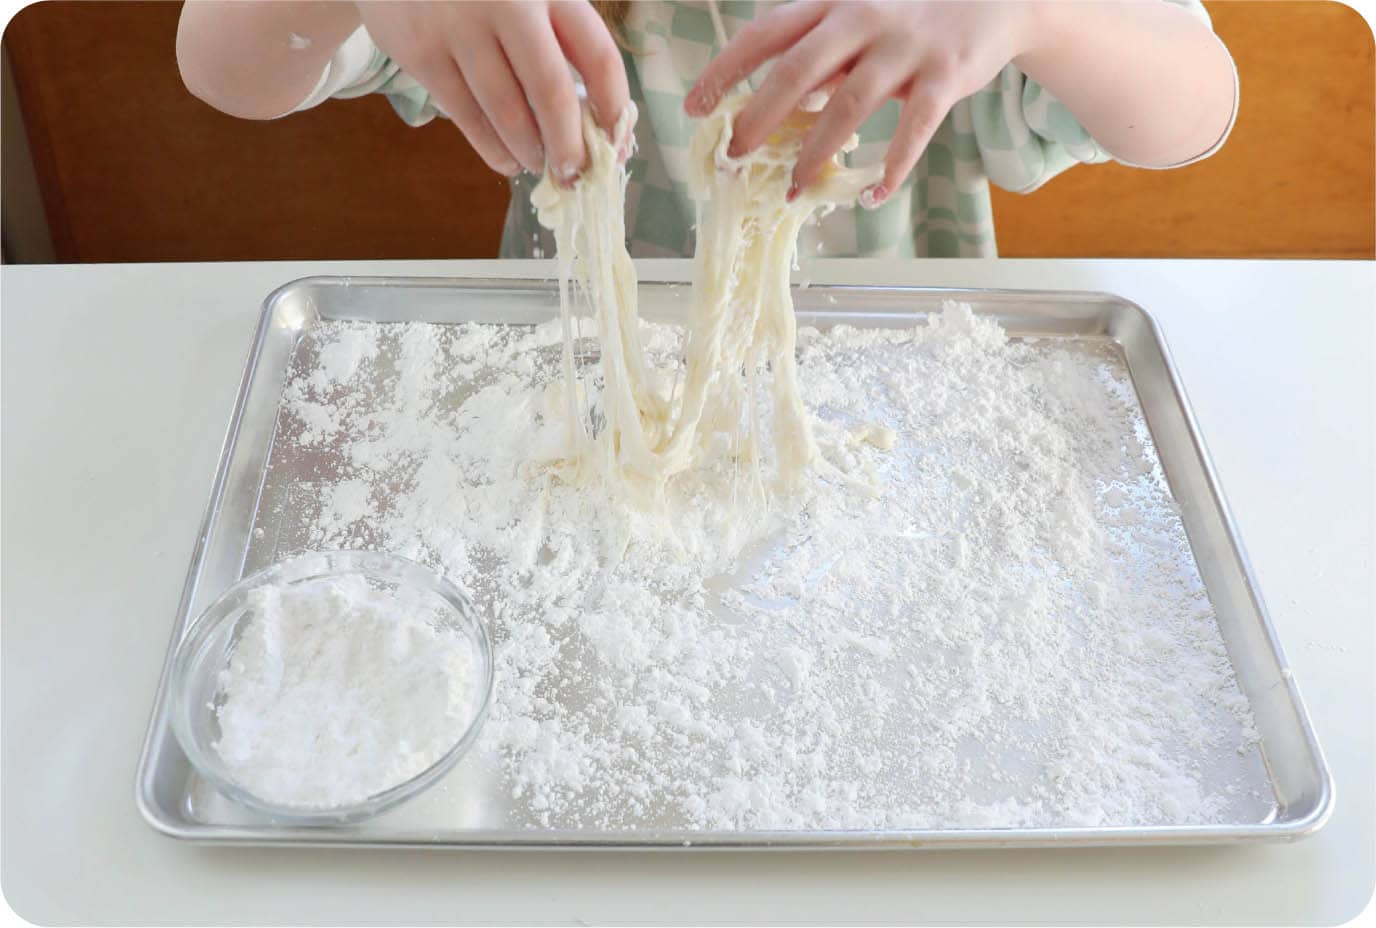
1. Combine granulated sugar with water in a medium saucepan. Bring ingredients to a boil until all the sugar is dissolved and the syrup is clear. FIG. 2.
FIG. 2 Make a sugar syrup.
2. Add food coloring to the syrup to create the color you want the crystals to appear.
3. Allow the syrup to cool to a safe temperature while you make the outside of the geode.
4. Lay down a sheet of nonstick baking paper on a flat surface such as a full-sheet pan or a tabletop. (If rolling on a sheet pan, you may have to put a silicon potholder under the pan to keep it from sliding around.)
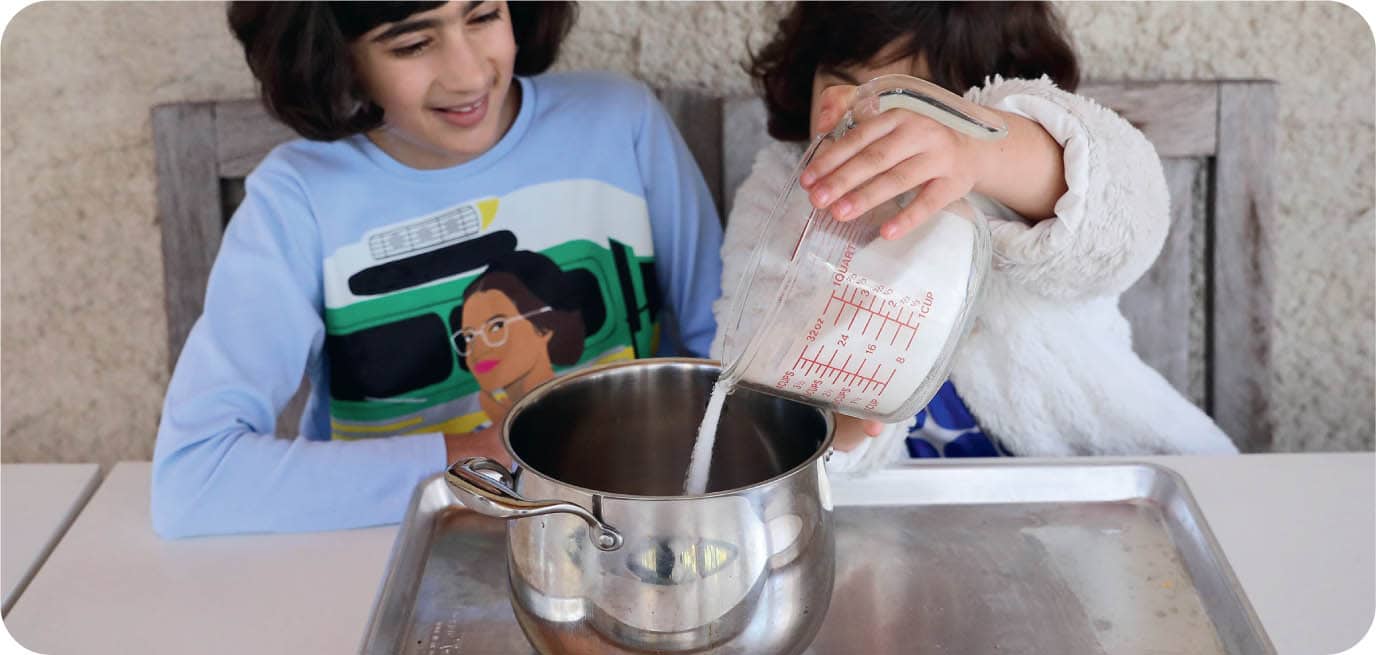
5. Mix white, black, and other fondant colors together in clumps and form them into a ball. Twist the fondant and fold it once or twice slightly so that the colors are combined but not completely mixed. Roll the fondant into a circle large enough to cover the outside of the bowl you will use for the geode. FIG. 3, FIG. 4, FIG. 5.
FIG. 3 Combine black, white, and colorful fondant into a ball.
FIG. 4 Roll out the fondant.
FIG. 5 The fondant slab should be large enough to cover the outside of your bowl.
6. Roll out a second piece of white fondant approximately the same size as the first one.
7. Rub a small amount of water across the colorful fondant to moisten the surface and make it sticky. Flip the white fondant over and lay it across the colorful fondant so that they stick together. Remove the baking paper from the top of the white fondant. FIG. 6.
FIG. 6 Roll a piece of white fondant the same size and lay it over the colorful fondant slab.
8. Completely cover a large sheet pan with foil. Fold two sheets of foil together if necessary.
9. Place a folded kitchen towel in the center of the foil and place a bowl on top of the towel.
10. Place another piece of foil on top of the bowl and push it to the bottom, forming it to the bowl so that it forms a crumpled surface inside the bowl.
11. Add a second piece of foil to emphasize the crumpled surface, which will form the surface of the geode. FIG. 7.
FIG. 7 Cover the inside of a bowl with two layers of aluminum foil.
12. Spray the foil inside the bowl with cooking spray or oil it lightly. FIG. 8.
FIG. 8 Lightly oil the foil so the fondant won’t stick.
13. Flip the fondant over and lay it across the foil-lined bowl, white fondant up.
14. Remove the baking paper and press the fondant into the bowl. FIG. 9.
FIG. 9 Put the fondant into the bowl, white-side up, and mold it to the foil lining.
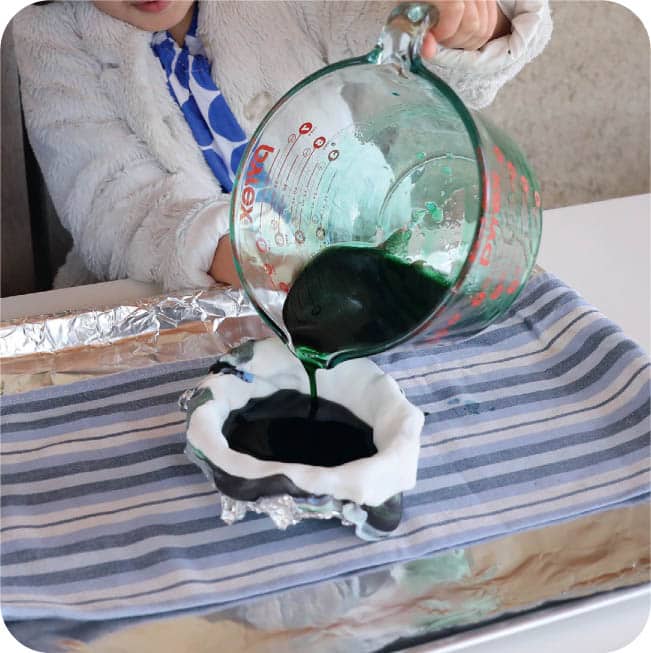
15. Press a few sugar crystals into the fondant and then fill the fondant bowl to the top with sugar syrup. FIG. 10.
FIG. 10 After pressing a few sugar crystals into the fondant, fill the bowl with sugar syrup.
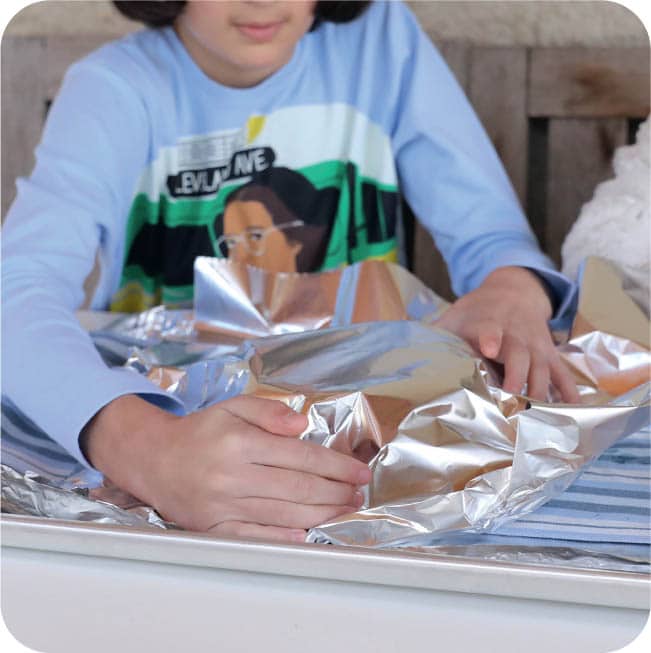
16. Pull the foil lining on the sheet pan up around the bowl to form a protective cover. Set the sheet pan somewhere where it will not be disturbed for several days. FIG. 11.
FIG. 11 Cover the bowl with foil and let it sit undisturbed for 5 to 7 days.
17. Open the foil case and pour the excess syrup into a container. Observe the crystals. FIG. 12.
FIG. 12 Pour the syrup out of the fondant-lined bowl. You may have to break a layer of crystals on the surface of the liquid.
18. Break off any crystals you don’t like.
19. Remove the towel from the sheet pan. Add another piece of foil and turn the bowl upside down to dry. FIG. 13.
FIG. 13 Turn the bowls upside down on a sheet pan to drain.
20. Trim off any excess fondant and observe the sugar crystals through a magnifying glass. FIG. 14, FIG. 15.
FIG. 14 Trim off excess fondant to create the edge of your geode.
FIG. 15 Study the shape of the sugar crystals.
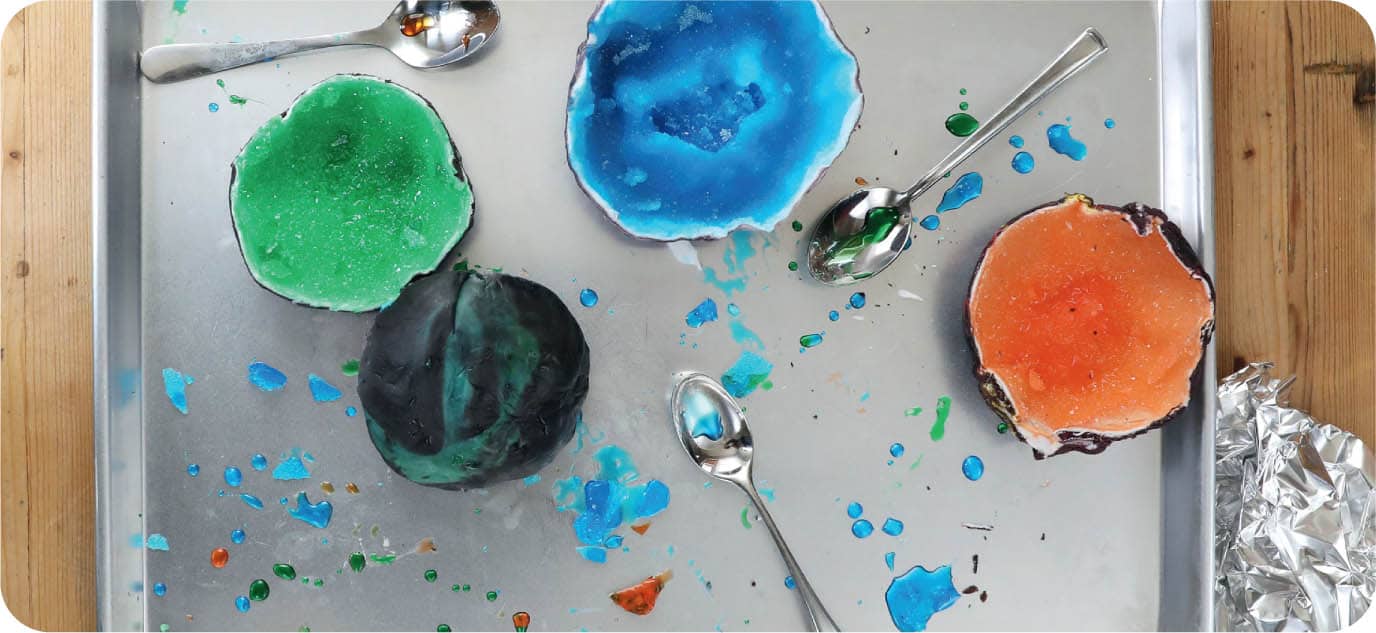
21. Allow the geodes to dry, crystal-side down. When they are dry, turn them over to reveal the sparkling crystals inside. FIG. 16.
FIG. 16 Allow the geodes to dry, crystal-side down. When they are dry, turn them over to reveal the sparkling crystals inside.
PROTOCOL
1. Preheat the oven to lowest setting (170°F, or 77°C).
2. Add chopped fruit to a saucepan. If using mango, add ¾ cup (177 ml) water to the mixture.
3. Stir in lemon juice and some honey to the fruit. Blueberries and strawberries require more honey (8 tablespoons [160 g]) than mango or peaches (4 tablespoons [80 g]). FIG. 2.
FIG. 2 Add fruit, water, and honey to a saucepan.
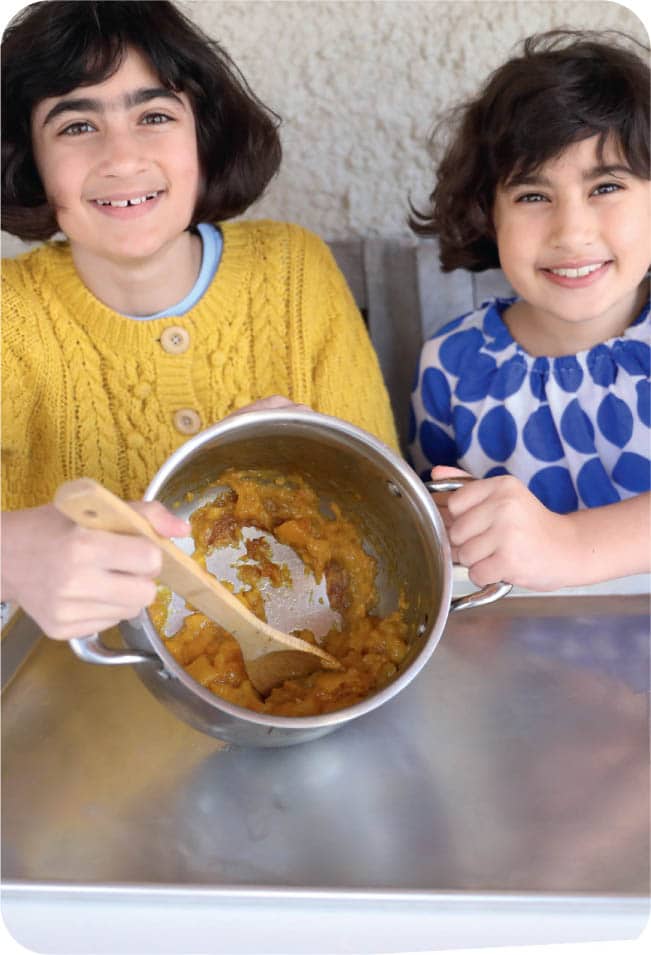
4. Cook fruit mixture over medium heat, stirring occasionally until it has a soft, jamlike consistency and most of the water has evaporated. FIG. 3.
FIG. 3 Cook the fruit until it has a jamlike consistency.
5. Cool fruit mixture completely.
6. Mash the cooked fruit with a fork, or blend it using a blender, food processor, hand blender, until it is smooth. FIG. 4.
FIG. 4 Blend the fruit until smooth and pour it onto a baking mat or parchment paper.
7. Spread the fruit into a thin, even layer on a silicone mat (or parchment paper) on a sheet pan. FIG. 5.
FIG. 5 Spread the puree evenly onto a baking mat.
8. Bake the fruit for several hours, until it is no longer sticky. It may get a little bit crisp at the edges. FIG. 6.
FIG. 6 Bake at a low temperature until the fruit is no longer sticky.
9. Cool the dried fruit, peel it off the baking mat or parchment paper, and cut off the crispy edges. FIG. 7.
FIG. 7 Peel the fruit off the sheet pan and cut off any dry edges.
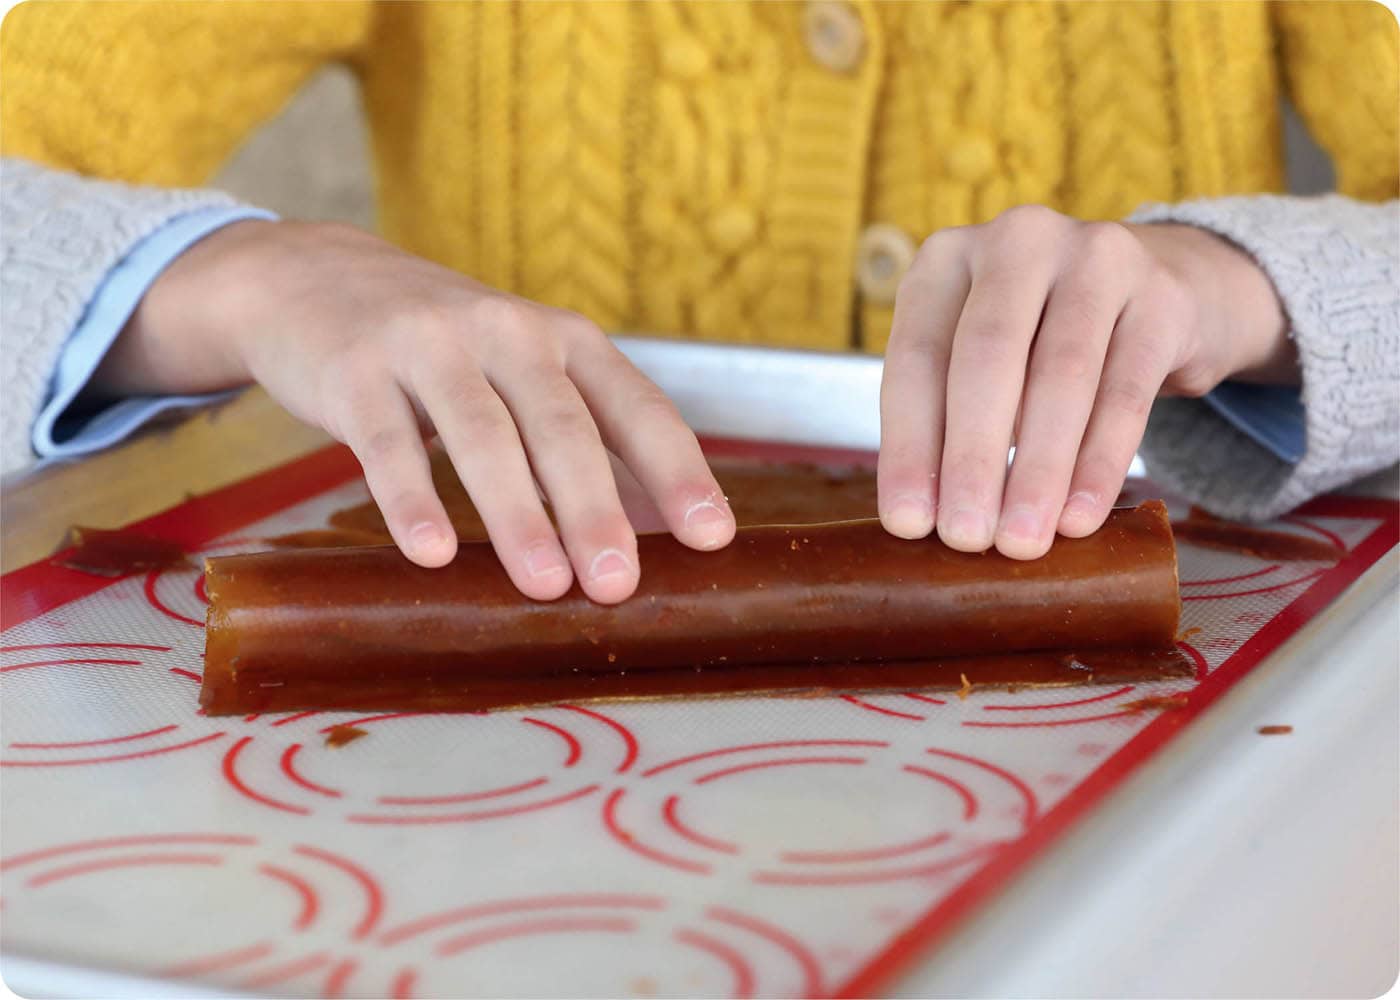
10. Roll the fruit leather up, cut it into small rolls if desired, and store it in parchment paper or a plastic bag until you eat it. FIG. 8.
FIG. 8 Roll up the dried fruit and taste your healthy, homemade snack.
PROTOCOL
1. Set a large mixing bowl on a sheet pan. Add the softened butter, 2 tablespoons (26 g) sugar, and salt to the bowl and mix well with a fork. FIG. 2.
FIG. 2 Mix butter, sugar, and salt.
2. Crack two eggs and add them to the mixture. Beat the eggs with a fork and mix them in with the butter, sugar, and salt as well as you can. The mixture will be chunky. FIG. 3.
FIG. 3 Beat two eggs into the mixture.
3. Warm the milk in a microwavable container or in a pan so that it feels warm but not hot. (Thirty seconds in a microwave usually works well.) Stir it into the mixture in the bowl and mix until somewhat smooth. FIG. 4.
FIG. 4 Stir in warm milk.
4. Add flour onto the top of the liquid in the bowl. Before mixing, add 2¼ teaspoons (9 g) yeast to the flour and stir together with a fork. Mix yeast and flour into the liquid until it forms a large, shaggy ball of dough. FIG. 5, FIG. 6.
FIG. 5 Add flour and yeast.
FIG. 6 Mix until you have a shaggy ball of dough.
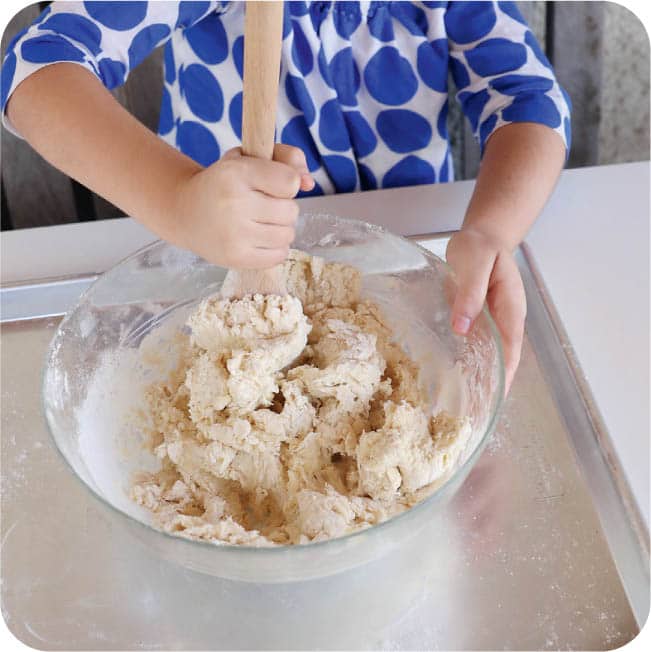
5. Sprinkle flour on the sheet pan and dump the bread dough onto the flour. Knead the dough for about 5 minutes by gathering it together and pushing on it with the palms of both hands. Fold it over, rotate it, and repeat. If it gets too sticky, sprinkle flour on the sheet pan and the dough and continue kneading. FIG. 7, FIG. 8.
FIG. 7 Scrape the dough onto a sheet pan dusted with flour.
FIG. 8 Knead dough for 5 minutes or so.
6. Put the dough back in the bowl, cover with plastic wrap or a damp towel, and let it rise for about 45 minutes. FIG. 9.
FIG. 9 Cover the dough with plastic wrap or a damp towel and let it rise.
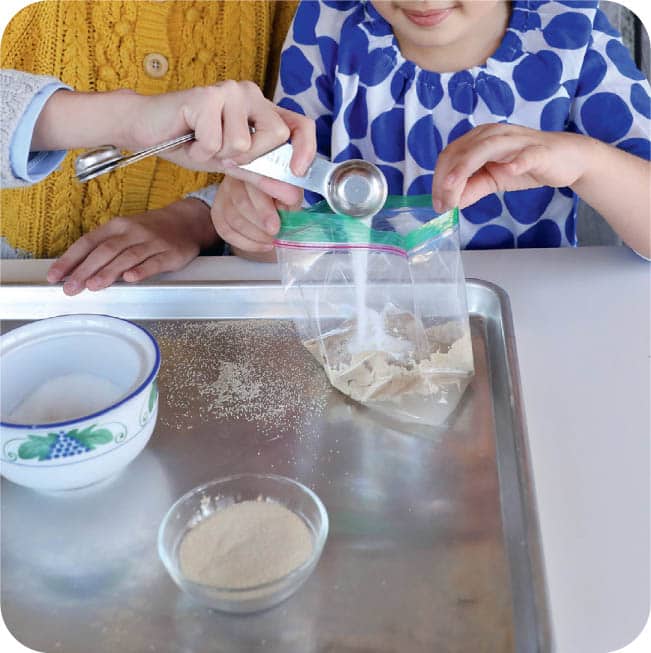
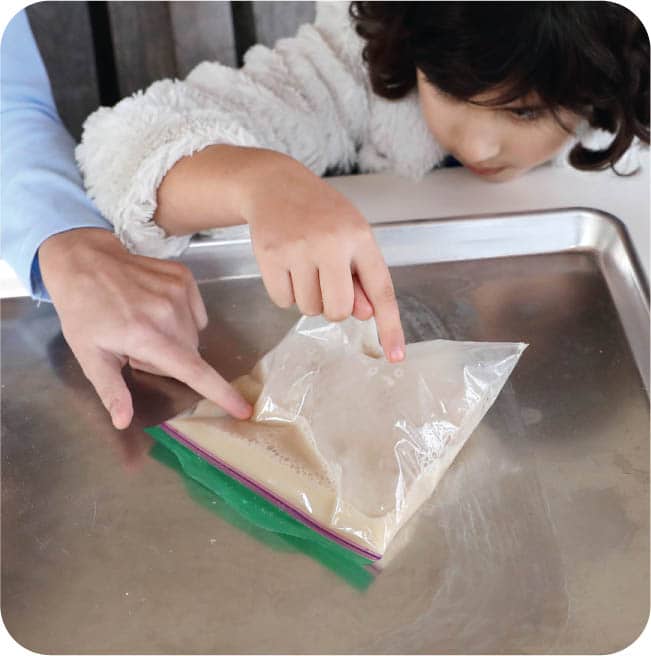
7. Preheat the oven to 375°F (190°C, or gas mark 5). While the dough rises, do an experiment to see how growing yeast makes carbon dioxide. On the sheet pan, add 2¼ teaspoons (9 g) yeast, 2 teaspoons (9 g) sugar, and water to a plastic zipper bag. Squeeze the air out of the bag and seal it. FIG. 10, FIG. 11.
FIG. 10 While the dough rises, add water, yeast, and sugar to a zipper bag.
FIG. 11 Squeeze any air out of the bag and set it beside the rising dough.
8. Wash the sheet pan and set the bowl of dough and yeast-filled plastic bag side by side on the pan to observe how they change as the yeasts grow and produce gas bubbles.
9. After 45 minutes, remove the plastic from the dough and punch it once to release some of the carbon dioxide gas that made it rise. FIG. 12.
FIG. 12 After 45 minutes, punch excess gas out of the dough and check the plastic bag of yeast.
10. Divide the dough into twelve pieces of equal size by pinching off pieces of dough. Form each piece into a smooth ball and put the dough balls back in the bowl. FIG. 13.
FIG. 13 Form the dough into twelve small balls.
11. Grease the sheet pan with butter or cover it with parchment paper.
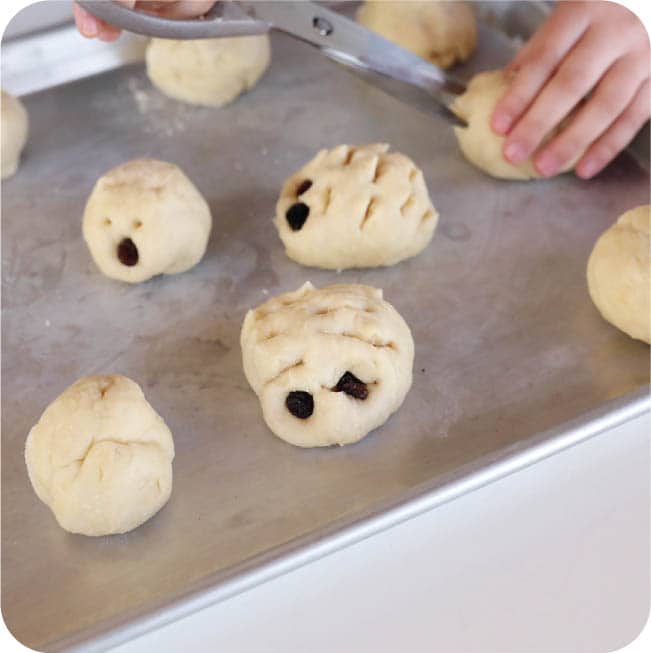
12. Place the dough balls on the sheet pan, equally spaced. At this point, you can shape them into monsters or animals by clipping them with kitchen shears and adding dried fruit as eyes and noses. FIG. 14.
FIG. 14 Shape the dough balls into beasts and use kitchen shears to add details.
13. Cover the rolls with plastic wrap and let them rise again for about an hour or until they’ve doubled in size. When the rolls have almost finished rising, preheat oven to 375°F (190°C, or gas mark 5). To give them a shiny finish, beat an egg and brush it onto the rolls (optional).
14. Check the plastic zipper bag again to see how much gas was produced by the growing yeast. Open the bag to release the pressure and throw the bag and yeast away. FIG. 15.
FIG. 15 Check the plastic bag again and let the carbon dioxide gas out so that it doesn’t explode. Throw the bag away.
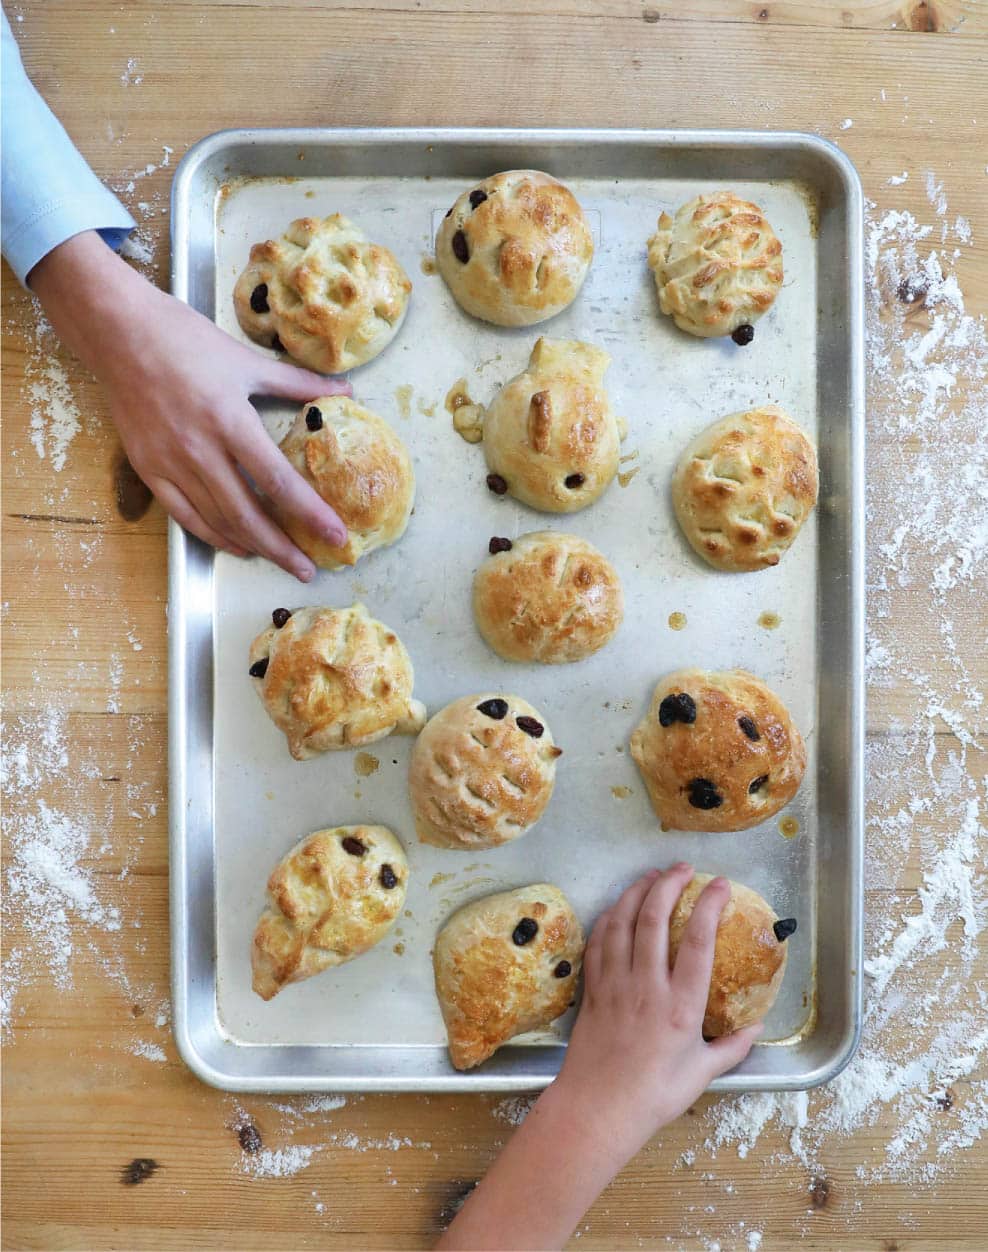
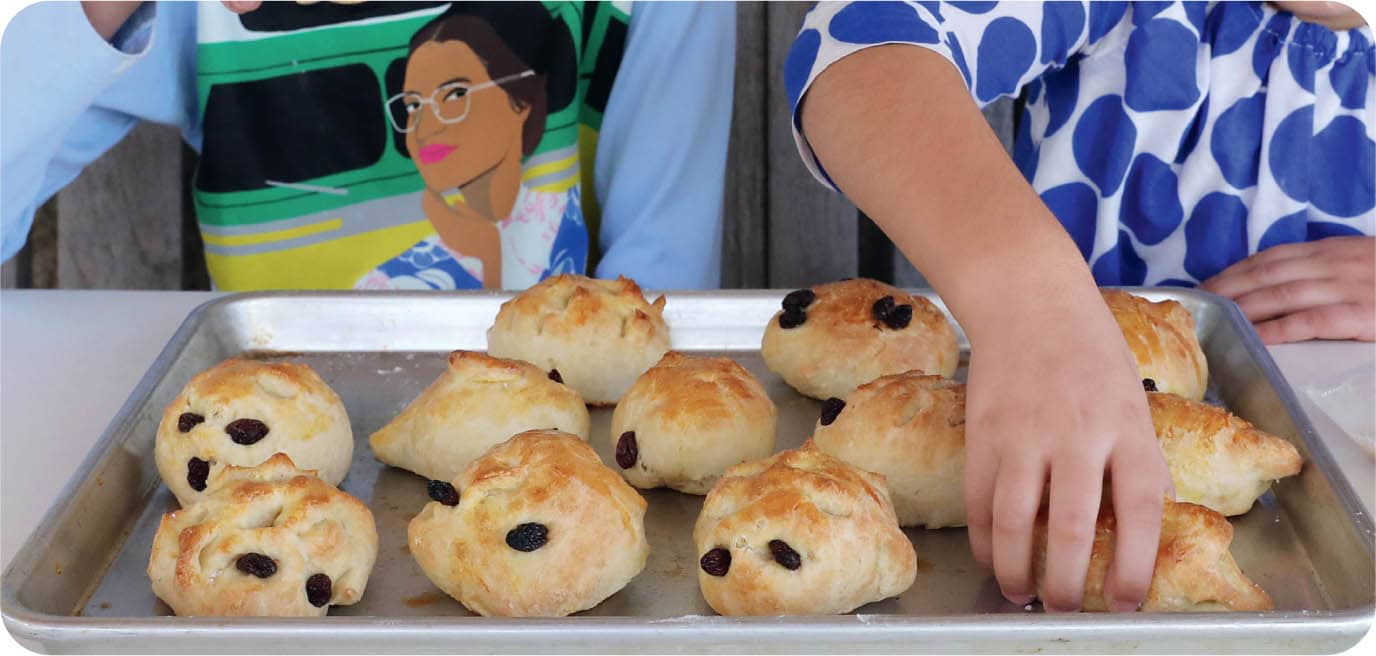
15. Bake the rolls at 375°F (190°C, or gas mark 5) for 15 to 20 minutes, until they are light brown and the center is done. Eat your science experiment. FIG. 16.
FIG. 16 Bake the yeast rolls at 375°F (190°C, or gas mark 5) and then eat your science experiment.
PROTOCOL
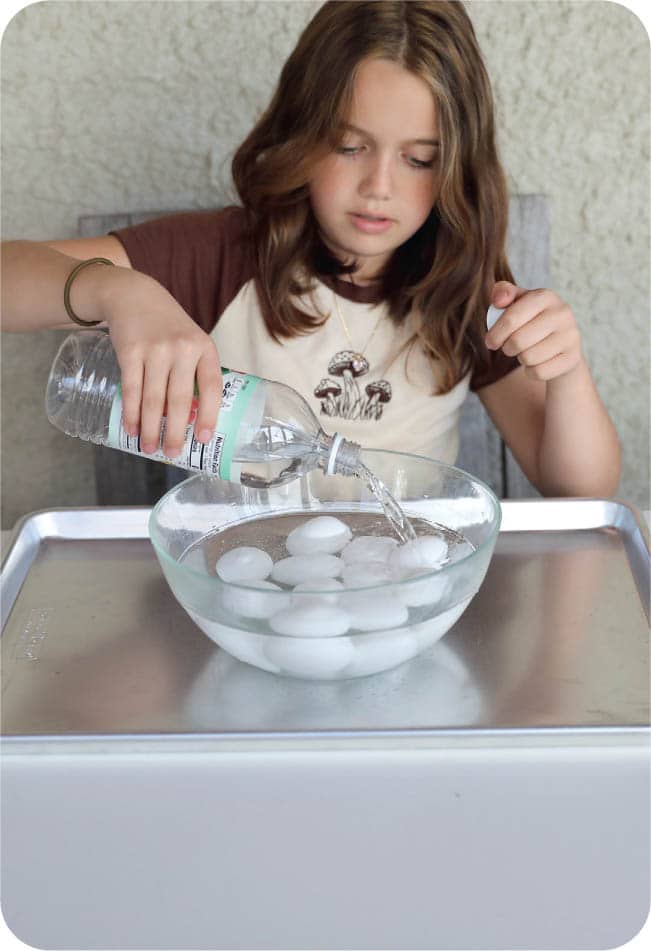
1. To test the strength of an eggshell, hold a raw egg over a sheet pan and squeeze it as hard as you can. Chances are you won’t be able to break it with your bare hand. (Remove rings before squeezing the raw egg.)
2. Place several hard-boiled eggs in a bowl and cover them with vinegar for 15 minutes. Observe the carbon dioxide bubbles that form as the shells react with the vinegar. FIG. 2.
FIG. 3 Add a layer of paper towels to a sheet pan.
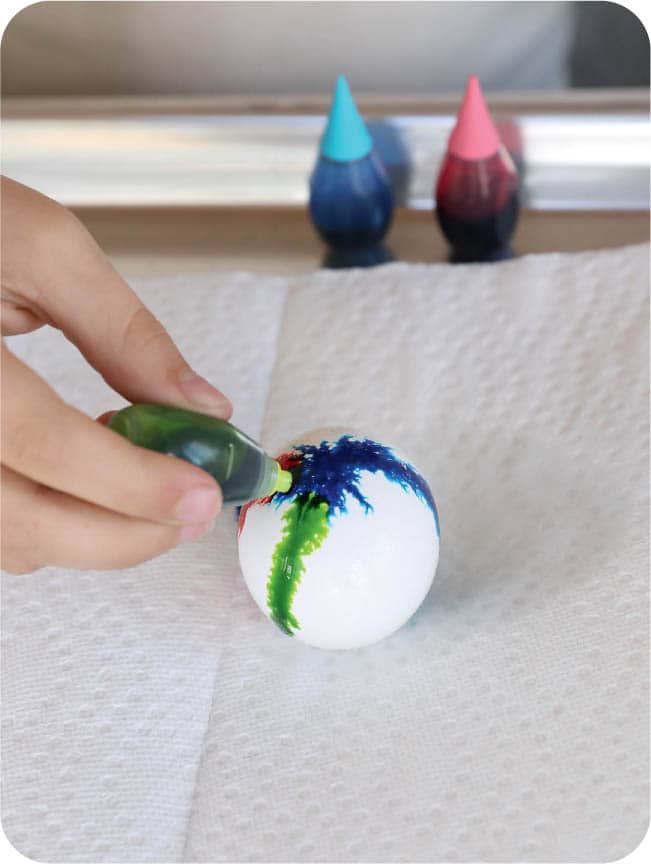
4. Use a spoon to remove the eggs from the vinegar and place them on the paper towels. Drip food coloring onto the eggs. FIG. 4.
FIG. 4 After 15 minutes, put the eggs on the paper towels and drip food coloring onto the shells.
5. If you want lines on the eggs, stretch rubber bands around them before adding food coloring to prevent the dye from reaching the covered areas. FIG. 5.
FIG. 5 Before you add food coloring, you can put rubber bands on some of the eggs to create lines.
6. Create multiple colors and patterns on the eggs. Use a spoon to turn the eggs, if you want to dye the underside.
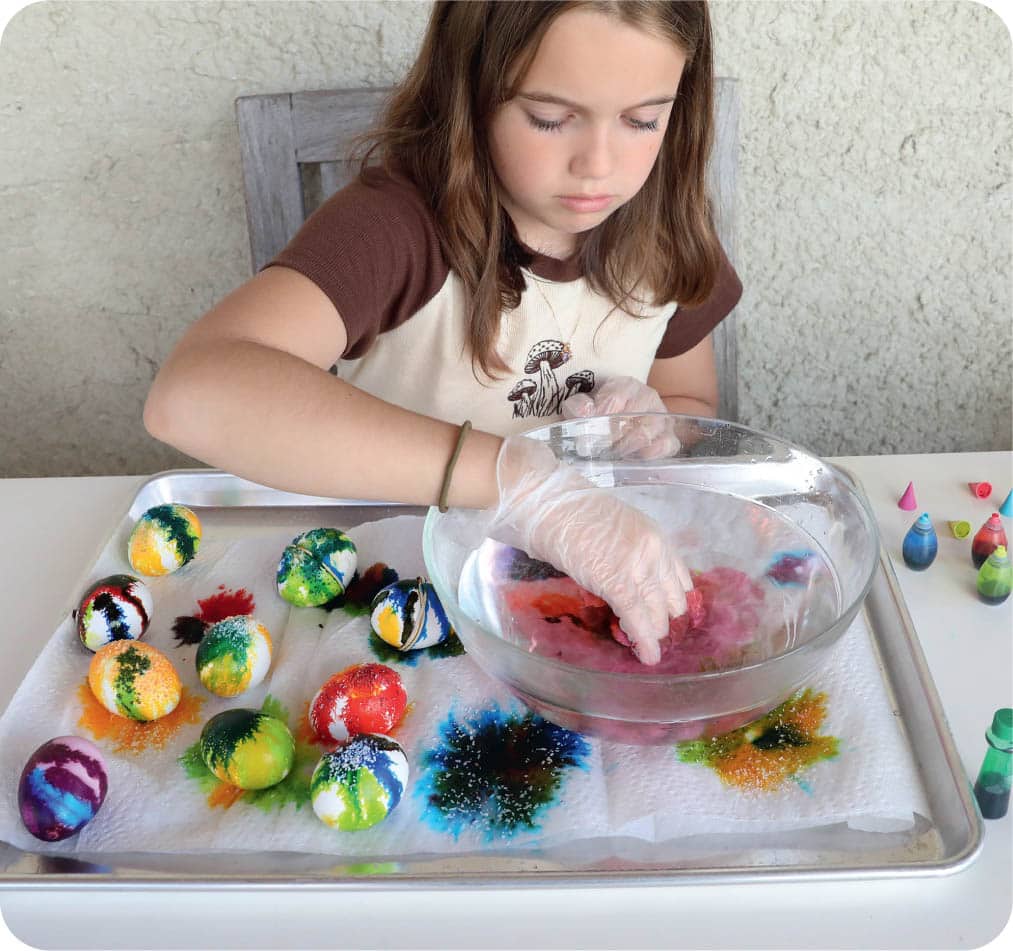
7. Sprinkle coarse salt onto some of the dyed eggs to see what happens. FIG. 6.
FIG. 6 Sprinkle salt on a few eggs to see what happens.
8. When you have finished, let the food coloring sit on the eggs for around 30 minutes.
9. Put gloves on, if you have them. Fill a bowl with water and dip the eggs in the water to rinse off excess dye. Allow the eggs to dry on a paper towel. FIG. 7.
FIG. 7 When you are done adding color, briefly rinse the eggs in a bowl of water and put them back on the paper towels to dry.
10. The color stays on the shells because food coloring is a chemical called an acid dye, and vinegar is an acid that helps the food coloring stick to the eggshells. FIG. 8.
FIG. 8 Vinegar is an acid that helps the food coloring stick to the eggshells.
11. Peel one of the kaleidoscopic eggs. Did the food coloring move all the way through the shell?