
What You’ll Do
It almost seems that every page you visit on the Web uses Flash or other multimedia in some way or another. Whether it’s an intro movie, or animated buttons, it’s everywhere. However, if you don’t have applications such as Flash, does that mean you can’t create multimedia? If you have Dreamweaver it’s a snap to quickly add Flash and other multimedia to your Web pages.
In addition to Flash elements such as text and buttons, Dreamweaver lets you add user-defined Flash movies, Java Applets (Java programs used on Web pages to operate animation, calculators, and other tasks), and ActiveX Controls (can be used to add specialized functionality, such as animation, pop-up menus, or Web pages). Most multimedia is controlled by specific plug-ins. For example, the Flash plug-in allows you to play flash movies, just as the QuickTime plug-in allows you to play QuickTime movies. Plug-ins are a part of the open application architecture of Web browsers. Without the ability to use plug-ins, the only way you would be able to use some of the current multimedia would be if the players were actually coded into the browsers, which would be unreasonable and not very practical.
This chapter will introduce you to multimedia and how to incorporate it into your Web design. As with anything in design, the important thing is to use multimedia to support your message, not just to fill space.
Adobe Flash allows you to create a variety of file types—FLA, SWF, SWT, SWC, and FLV—for different purposes. The Flash file (.fla) is the source file format for the Adobe Flash program. This file format cannot be opened in Dreamweaver; you can only open this file format in Flash. You use the source Flash file (.fla) to create the other Flash file formats.
You can insert the following Flash file formats into a Web page in Dreamweaver:
• Flash SWF (.swf). This file format creates a compressed movie of the Flash (.fla) file.
• Flash Template (.swt). This file format creates a SWF file you can customize with your own text or links, such as a Flash button or Flash text.
• Flash element file (.swc). This file format creates a SWF file you can create Rich Internet applications with customizable parameters.
• Flash Video file (.flv). This file format creates a video file with audio and video encoding you can play in the Flash Player.
If you have Adobe FlashPaper 2 or later, you can convert printable files into Flash documents or Adobe PDF files, which you can insert into Dreamweaver.
You don’t need to have Adobe Flash installed on your computer to insert these file formats into pages in Dreamweaver. However, when you do have Adobe Flash installed on your computer, you can make changes to the source Flash files (.fla), and then create the file format you want to use in Dreamweaver.
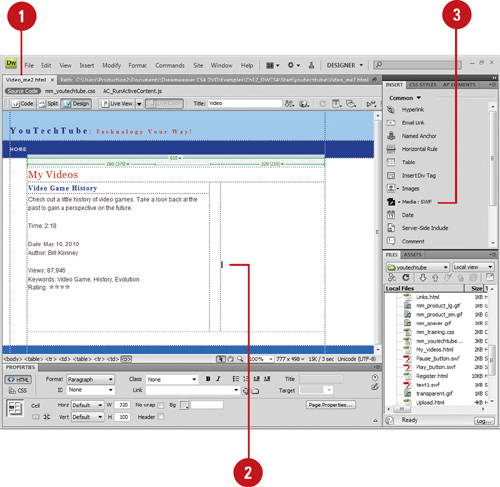
You can use the Media button on the Common tab on the Insert panel, or use the Media submenu on the Insert menu to add different Flash file types into a page in Dreamweaver.


DW 7.2
Flash can create all types of multimedia content. From a lead-in page (called a splash screen), to animated banners, to cool-looking, as well as functional menus, Flash is leading the way in Web based multimedia content. Flash utilizes resolution independent vector graphics, streaming audio, and even raster images to create fast-loading Web content. Flash is so popular that according to the World Wide Web Consortium, over 90 percent of people surfing the Web have browsers that can view Flash content. And since version 4, Flash has its own scripting language to help designers take designs into the Stratosphere. Dreamweaver does not create Flash movies; however, it makes it very easy to add them to your Web pages. Once inserted, the Properties panel will give you access to controls that instruct the browser exactly what to do when the movie loads.
![]() Open the Web page you want to insert a movie.
Open the Web page you want to insert a movie.

![]() Click to place the insertion point where you want the movie.
Click to place the insertion point where you want the movie.
![]() Insert the movie using one of the following options:
Insert the movie using one of the following options:
Click the Common tab on the Insert panel, click the Media arrow button, and then click SWF or Shockwave.
Click the Insert menu, point to Media, and then click SWF or Shockwave.
![]() Navigate to the location with the Flash file (extension .swf or .swc), and then select it.
Navigate to the location with the Flash file (extension .swf or .swc), and then select it.
![]() Click OK.
Click OK.
![]() Enter the accessibility attributes (title, access key, and tab index) you want.
Enter the accessibility attributes (title, access key, and tab index) you want.
![]() Click OK.
Click OK.
![]() To view the Flash content, click the Flash placeholder icon, and then click the Play button in the Properties panel to begin the preview. Click Stop to end the preview.
To view the Flash content, click the Flash placeholder icon, and then click the Play button in the Properties panel to begin the preview. Click Stop to end the preview.
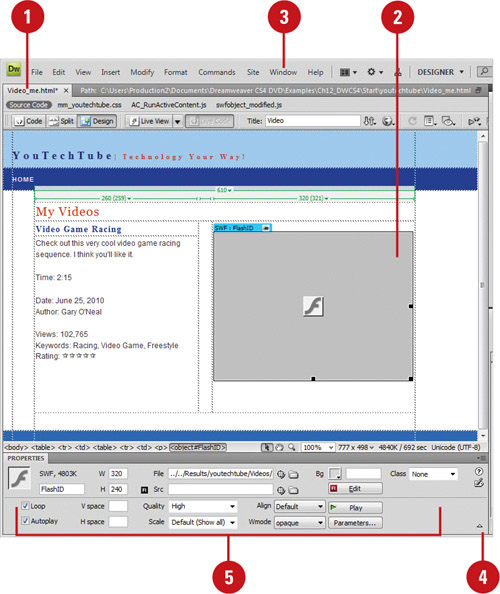
After you insert a Flash or Shockwave movie into your page in Dreamweaver, you can use the Properties panel to set or change movie properties. You can use the Properties panel to adjust the movie size and scale, set loop and autoplay options, show or hide a border, align the movie on the page, and specify a background color for the movie area. If you have the Flash program installed on your computer, you can even edit the source Flash file (.fla) associated with the SWF file directly from the Properties panel.
![]() Open the Web page with the movie you want to change properties.
Open the Web page with the movie you want to change properties.
![]() Select the Flash SWF file or a Shockwave movie.
Select the Flash SWF file or a Shockwave movie.
![]() Click the Window menu, and then click Properties to display the Properties panel.
Click the Window menu, and then click Properties to display the Properties panel.
![]() Click the expander arrow in the lower-right corner of the Properties panel to view all Flash options.
Click the expander arrow in the lower-right corner of the Properties panel to view all Flash options.
![]() Set any of the following options to control a Flash or Shockwave movie:
Set any of the following options to control a Flash or Shockwave movie:
• Name. Enter a name to identify the movie for scripting.
• W and H. Enter the width and height of the movie (in pixels).
• File. Enter the path to the Flash or Shockwave file. Or click the folder icon to browse to a file, or type a path.
• Src. Specifies the path to a Flash source document (FLA) (when Dreamweaver and Flash are both installed on your computer).
• Edit. Click to locate and update a FLA file; the option is grayed out if the Flash program is not installed on your computer.
• Reset Size. Click to return the selected movie to its original size.
• Loop. Select to make the movie play continuously.
• Autoplay. Select to automatically play the movie when the page loads.
• V Space and H Space. Specify the number of pixels of white space above, below, and on both sides of the movie.
• Quality. Controls anti-aliasing during playback of the movie.
• Scale. Controls how the movie fits into the dimensions set in the width and height text boxes.
• No Border. Select to fit the movie into the set dimensions so that no borders show and it maintains the original aspect ratio.
• Exact Fit. Select to scale the movie to the set dimensions, regardless of the aspect ratio.
• Align. Controls how the movie is aligned on the page.
• Bg. Defines a background color for the movie area.
• Parameters. Opens a dialog box for entering additional parameters to pass to the movie.

Did You Know?
You can preview all Flash content in a page. Press Ctrl+Alt+Shift+P (Win) or Shift+Option+
![]() +P (Mac) to set all Flash objects and SWF files to play.
+P (Mac) to set all Flash objects and SWF files to play.
DW 7.2
When you create a Flash video (.flv) file using Adobe Flash, you insert the Flash video component in Dreamweaver. When you view the page in a browser, the component displays the Flash video and playback controls. You can deliver the Flash video in two delivery formats: Progressive Download Video or Streaming Video. Progressive Download Video downloads the FLV file to the visitor’s computer and then plays it. The video starts to play before the download is complete to speed up the process. On the other hand, streaming video buffers the video on the Web server with Adobe Flash Media Server, and then plays it.
![]() Open the Web page you want to insert a Flash video.
Open the Web page you want to insert a Flash video.
![]() Click to place the insertion point where you want the Flash video.
Click to place the insertion point where you want the Flash video.
![]() Insert the Flash video using one of the following options:
Insert the Flash video using one of the following options:
Click the Common tab on the Insert panel, click the Media arrow button, and then click FLV.
Click the Insert menu, point to Media, and then click FLV.
![]() Click the Video Type popup, and then click Progressive Download Video or Streaming Video.
Click the Video Type popup, and then click Progressive Download Video or Streaming Video.

![]() Select from the following Flash video options:
Select from the following Flash video options:
• URL (Progressive). Specifies a relative or absolute path to the FLV file.
• Server URI (Streaming). Specifies the server name, program name, and instance name.
• Stream Name (Streaming). Specifies the name of the FLV file; .flv extension is optional.
• Skin. Click the Skin popup, and then select the appearance of the Flask Video component.
• Width and Height. Specifies the width and height of the FLV video (in pixels).
• Constrain. Select to maintain the same aspect ratio between the width and height.
• Live Video Feed (Streaming). Select to play the streaming live video content from the Flash Media Server.
• AutoPlay. Select to play the video when the page opens.
• Auto Rewind. Select to return the playback to the beginning.
• Buffer Time (Streaming). Specifies the time (in seconds) needed to buffer before the video starts to play.
![]() Click OK.
Click OK.

Did You Know?
You can remove the code that detects the Flash Player version. Click the Commands menu, and then click Remove Flash Video Detection.
You can delete the Flash Video component. Select the Flash Video component, and then press Delete.
You can edit the Flash Video component. Select the Flash Video component placeholder, open the Properties panel, and then make your changes.
If you have Adobe Fireworks 4 or later installed on your computer, you can create a complete Web photo album in Dreamweaver within minutes. The Web photo album contains thumbnails that when clicked show the larger size of the pictures with navigation to go forward or backward to view the entire album. A Web photo album can be used to showcase products, portfolios, art and photography galleries and more... Dreamweaver thinks of everything.
![]() Create a folder for your photo album on your hard drive (in this example, a folder was created named, PhotoAlbum).
Create a folder for your photo album on your hard drive (in this example, a folder was created named, PhotoAlbum).
![]() Open Dreamweaver, and then open a blank page (only used to access the Create Web Photo Album command).
Open Dreamweaver, and then open a blank page (only used to access the Create Web Photo Album command).
![]() Click the Commands menu, and then click Create Web Photo Album.
Click the Commands menu, and then click Create Web Photo Album.
![]() In the Create Web Photo Album dialog box, specify any of the following options:
In the Create Web Photo Album dialog box, specify any of the following options:
• Photo Album Title. Enter a title for the photo album (appears in the thumbnail page).
• Subheading Info. Enter subheading info (shows along with the enlarged pictures).
• Other Info. Enter any additional information (shows along with the enlarged pictures).
• Source Images Folder. Click Browse to select the folder containing the original images.
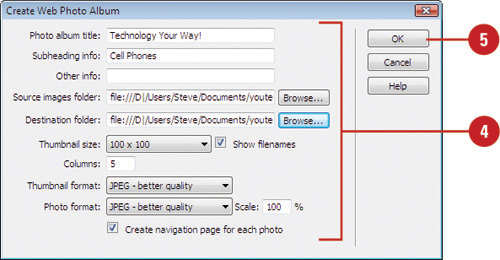
• Destination Folder. Click Browse to select the folder you created in step 1 (this folder should be located within the working site folder).
• Thumbnail Size. Click the button to select a specific size for the thumbnails.
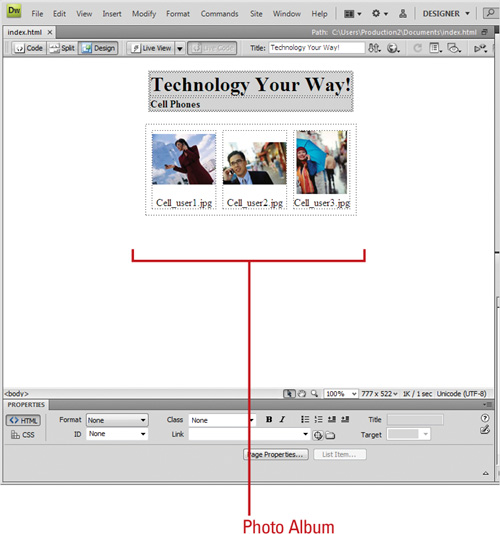
• Show Filenames. Select to display filenames along with the images.
• Columns. Enter the number of columns to use for displaying the thumbnails.
• Thumbnail Format. Select a thumbnail file format.
• Photo Format. Select a photo file format.
• Create Navigation Page For Each Photo. Select to create a navigation page for each image.
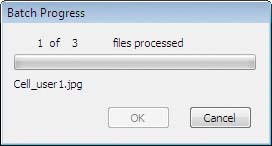
![]() Click OK to create the album.
Click OK to create the album.
Dreamweaver prompts you with a popup box, and a message saying that the photo album has been created and you can view the album.
![]() Click OK.
Click OK.
Dreamweaver creates three sub-folders inside your original folder, and an index page.
• Thumbnails. Contains all the thumbnails.
• Images. Contains all the images.
• Pages. Contains the larger images and navigation between pictures and go back to home.
• Index.htm. The page which will have all the thumbnails with links to the larger images.
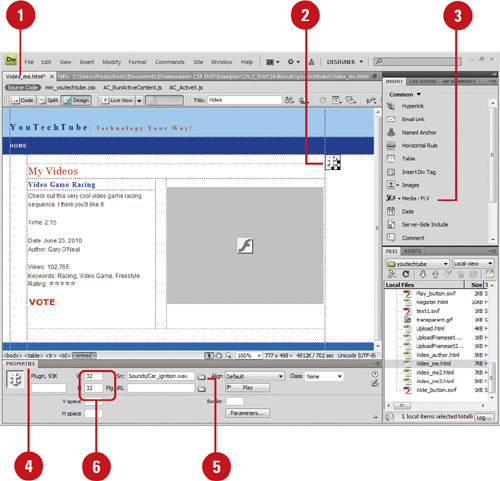
If you want to add some life to a Web page, you can add sound to it. Dreamweaver allows you to add a variety of sounds formats, including WAV, MIDI, MP3 (MPG), AIF, RA (Real Audio), MOV (QuickTime). Some audio formats require visitors to download and install a plug-in to play the sound. Some plug-ins include QuickTime, Windows Media Player or RealPlayer. You can add a sound to a page by linking the audio file to text or an image or by embedding the audio file directly into the page. When you link an audio file, the visitor needs to click the link to play the sound. When you embed an audio file, the sound plays when you load a page with a background sound, or when you trigger an event. When you add sounds to one or more pages, use careful judgement and discernment. The old adage “less is more” seems to be a good rule of thumb. It’s always a good practice to provide a way for visitors to turn off the sound.
![]() Open the Web page you want to create a link to an audio file.
Open the Web page you want to create a link to an audio file.
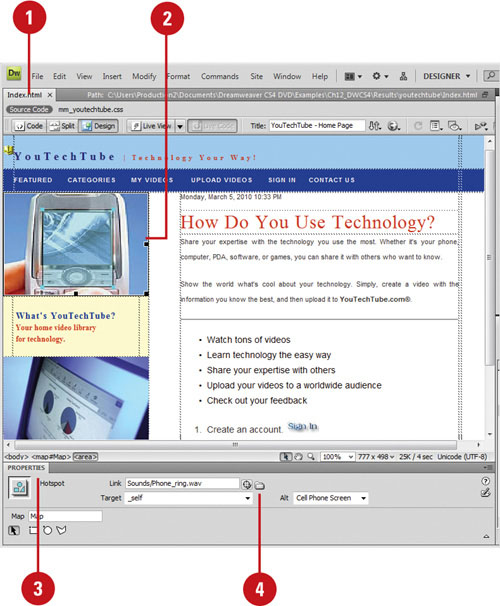
![]() Select the text or image you want to use as the link to the audio file.
Select the text or image you want to use as the link to the audio file.
![]() Open the Properties panel.
Open the Properties panel.
![]() Click the Browse For File button next to the Link box to select the audio file, or enter the file’s path and name.
Click the Browse For File button next to the Link box to select the audio file, or enter the file’s path and name.
Did You Know?
You can link to or embed other videos (AVI or MPEG). Instead of using a sound file, you can use the same steps to link to a video file or embed a video file.
![]() Open the Web page you want to embed a sound file.
Open the Web page you want to embed a sound file.
![]() Click to place the insertion point where you want to embed a sound file.
Click to place the insertion point where you want to embed a sound file.
![]() Embed a sound file using one of the following options:
Embed a sound file using one of the following options:
Click the Common tab on the Insert panel, click the Media arrow button, and then click Plugin.
Click the Insert menu, point to Media, and then click Plugin.
![]() Open the Properties panel.
Open the Properties panel.
![]() Click the Browse For File button next to the Link box to select the audio file, or enter the file’s path and name.
Click the Browse For File button next to the Link box to select the audio file, or enter the file’s path and name.
![]() Enter the width and height for the placeholder, or drag to resize it.
Enter the width and height for the placeholder, or drag to resize it.
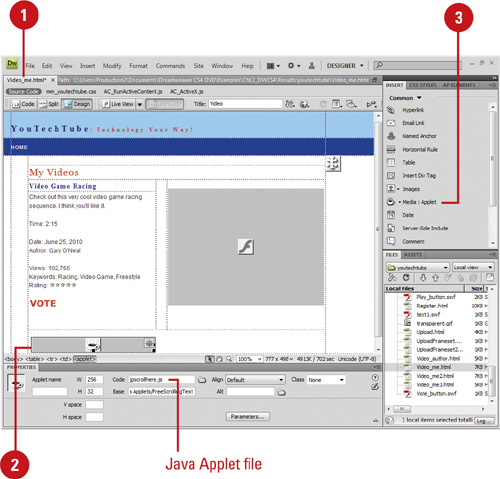
You can insert a Java applet into an HTML document using Dreamweaver. Java is a programming language that allows the development of lightweight applications (applets) that can be embedded in web pages. Java applets are executed in a secure area (called a sandbox) by most Web browsers, preventing them from accessing local data. The code of the applet is downloaded from a Web server and the browser embeds the applet into a Web page. In order for an applet to run, it requires the Java plug-in, which isn’t available by default on all browsers. It is considered more difficult to build and design a good user interface with Java than other technologies such as DHTML and Flash. It is, however, still a very popular system for the design of Web navigational systems, games, and audio and text effects.
![]() Open the Web page you want to insert a Java applet.
Open the Web page you want to insert a Java applet.
![]() Click in the Document window to place the insertion point.
Click in the Document window to place the insertion point.
![]() Insert the Java applet using one of the following options:
Insert the Java applet using one of the following options:
Click the Common tab on the Insert panel, click the Media arrow button, and then click Applet.
Click the Insert menu, point to Media, and then click Applet.
![]() Navigate to the location with the file containing a Java applet.
Navigate to the location with the file containing a Java applet.
![]() Select a file containing a Java applet.
Select a file containing a Java applet.
![]() Click OK.
Click OK.
![]() Enter the accessibility attributes (title, access key, and tab index) you want.
Enter the accessibility attributes (title, access key, and tab index) you want.
![]() Click OK.
Click OK.
![]() Open the Web page you want to modify settings for a Java applet.
Open the Web page you want to modify settings for a Java applet.
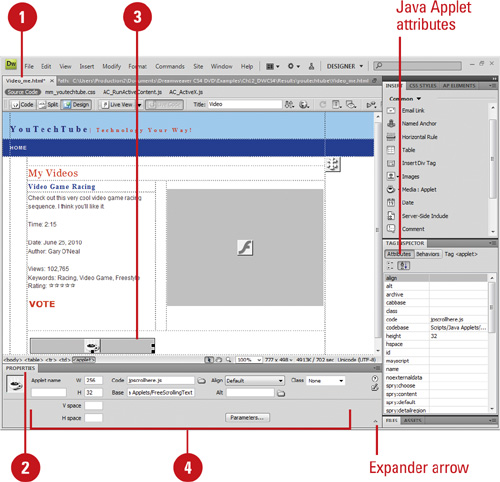
![]() Open the Properties panel, and then click the expander arrow to display all properties.
Open the Properties panel, and then click the expander arrow to display all properties.
![]() Select the Java applet for which you want to modify settings.
Select the Java applet for which you want to modify settings.
![]() Select from the following Java Applet options:
Select from the following Java Applet options:
• Name. Enter a name to identify the applet for scripting.
• W and H. Enter the width and height of the applet, in pixels.
• Code. Enter the file containing the applet’s Java code, or click the folder icon to browse to a file.
• Base. Displays the folder containing the selected applet (this text box is filled automatically, when you select an applet).
• Align. Controls the alignment of the applet on the page.
• Alt. Specifies alternative content (usually an image) to be displayed if the user’s browser doesn’t support Java applets or has Java disabled.
• V Space and H Space. Specify the amount of white space in pixels above, below, and on both sides of the applet.
• Parameters. Opens a dialog box for entering additional parameters to pass to the applet.
You can insert an ActiveX control in your page. ActiveX controls (formerly known as OLE controls) are reusable components, somewhat like miniature applications, that can act like browser plug-ins. They run in Internet Explorer with Windows, but they don’t run on the Macintosh or in Netscape Navigator. The ActiveX object in Dreamweaver lets you supply attributes and parameters for an ActiveX control in your visitor’s browser.
![]() Open the Web page you want to insert an ActiveX control.
Open the Web page you want to insert an ActiveX control.
![]() Click to place the insertion point where you want to insert an ActiveX control.
Click to place the insertion point where you want to insert an ActiveX control.
![]() Insert the ActiveX control using one of the following options:
Insert the ActiveX control using one of the following options:
Click the Common tab on the Insert panel, click the Media arrow button, and then click ActiveX.
Click the Insert menu, point to Media, and then click ActiveX.
![]() Enter the accessibility attributes (title, access key, and tab index) you want.
Enter the accessibility attributes (title, access key, and tab index) you want.
![]() Click OK.
Click OK.
An icon marks where the ActiveX control appears on the page in Internet Explorer.
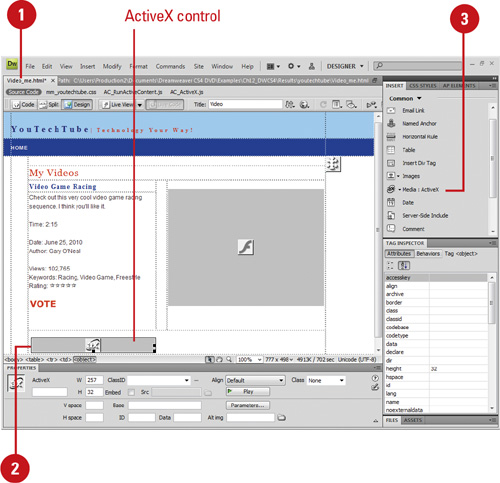
![]() Open the Web page you want to modify ActiveX control properties.
Open the Web page you want to modify ActiveX control properties.

![]() Select the ActiveX icon in the Document window.
Select the ActiveX icon in the Document window.
![]() Open the Properties panel, and then click the expander arrow to display all properties.
Open the Properties panel, and then click the expander arrow to display all properties.
![]() Select from the following options:
Select from the following options:
• Name. Enter a name to identify the ActiveX object for scripting.
• W and H. Enter the width and height of the object (in pixels).
• Class ID. Identifies the ActiveX control to the browser (enter a value or select one).
• Embed. Inserts an embed tag within the object tag for the ActiveX control.
• Align. Aligns the object.
• Parameters. Select to enter additional parameters to pass to the ActiveX object.
• Src. Defines the data file used for a Netscape Navigator plug-in if the Embed option is on.
• V Space and H Space. Enter the amount of white space (in pixels) above, below, and on both sides of the object.
• Base. Displays the URL containing the ActiveX control.
• Alt Img. Enter an image to be displayed if the browser doesn’t support the object tag.
• Data. Enter a data file for the ActiveX control to load.
![]() Click the File menu, point to Preview In Browser, and then select a browser to preview the ActiveX control.
Click the File menu, point to Preview In Browser, and then select a browser to preview the ActiveX control.
You can include content on a page that runs in a Netscape Navigator plug-in, such as a QuickTime or RealPlayer movie, in the user’s browser. After you insert content for a Netscape Navigator plug-in, you can use the Properties panel to set options and parameters for the selected element. When you’re ready to preview the content, you can play all the plug-in elements at once or play them individually. If you want to play movies in Design view, the proper plug-ins must be installed on your computer.
![]() Open the Web page you want to insert a plug-in content.
Open the Web page you want to insert a plug-in content.
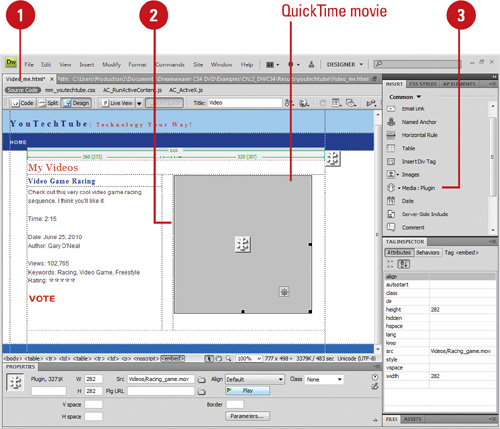
![]() Click to place the insertion point where you want to insert Plug-in content.
Click to place the insertion point where you want to insert Plug-in content.
![]() Insert the Plug-in using one of the following options:
Insert the Plug-in using one of the following options:
Click the Common tab on the Insert panel, click the Media arrow button, and then click Plugin.
Click the Insert menu, point to Media, and then click Plugin.
![]() Navigate to the location with the Plug-in file, and then select it.
Navigate to the location with the Plug-in file, and then select it.
![]() Click OK.
Click OK.
An icon marks where the Plug-in control appears on the page in Netscape Navigator.
![]() Open the Web page with the plug-in you want to play.
Open the Web page with the plug-in you want to play.

![]() Use any of the following options to play a Plug-in:
Use any of the following options to play a Plug-in:
• Selected Elements. Select the media elements, click the View menu, point to Plugins, and then click Play, or click the Play button in the Properties panel.
• All Elements. Click the View menu, point to Plugins, and then click Play All.
![]() Use any of the following options to stop a Plug-in:
Use any of the following options to stop a Plug-in:
• Selected Elements. Click the View menu, point to Plugins, and then click Stop, or click the Stop button in the Properties panel.
• All Elements. Click the View menu, point to Plugins, and then click Stop All.
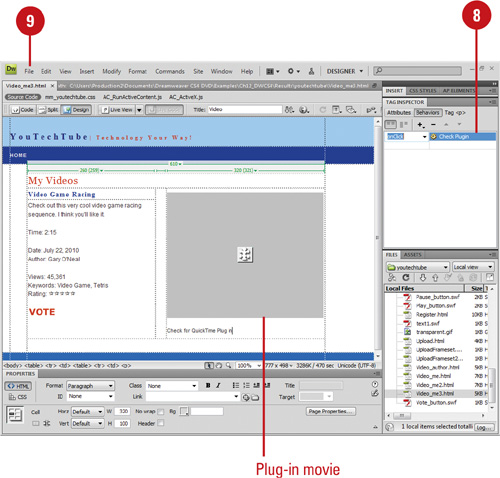
Use the Check Plugin action to send visitors to different pages depending on whether they have the specified plug-in installed. For example, you might want visitors to go to one page if they have Shockwave and another page if they do not. The Check Plugins action is an excellent tool for making your visitor’s experience a pleasant one.
![]() Open the Web page you want to use.
Open the Web page you want to use.

![]() Select an object (for an element) or click the <body> tag in the tag selector (for an entire page).
Select an object (for an element) or click the <body> tag in the tag selector (for an entire page).
![]() Open the Behaviors panel.
Open the Behaviors panel.
![]() Click the Plus (+) button, and then click Check Plugin from the Actions menu.
Click the Plus (+) button, and then click Check Plugin from the Actions menu.
![]() Select a plug-in from the Plugin popup, or type the exact name of the plug-in in the adjacent text box.
Select a plug-in from the Plugin popup, or type the exact name of the plug-in in the adjacent text box.
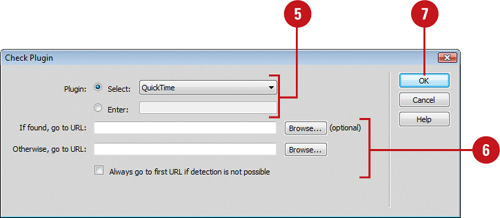
![]() Configure Check Plug-in using the following options:
Configure Check Plug-in using the following options:
• If Found, Go To URL. Enter a URL for visitors who have the plug-in.
• Otherwise, Go To URL. Enter an alternative URL for visitors who don’t have the plug-in.
• Always Go To First URL If Detection Is Not Possible. In general, if the plug-in content is integral to your page, select this option; visitors without the plug-in will often be prompted by the browser to download the plug-in. If the plug-in content is not essential to your page, leave this option deselected.
![]() Click OK.
Click OK.
![]() Select an event from the popup menu.
Select an event from the popup menu.
![]() Click the File menu, point to Preview In Browser, and then select a browser to test the page from the available options.
Click the File menu, point to Preview In Browser, and then select a browser to test the page from the available options.
Important
Plug-in detection is not possible in Internet Explorer on the Macintosh, and most plug-ins cannot be detected in Internet Explorer on Windows.
The Share My Screen command (New!) on the File menu allows you to connect to Adobe ConnectNow, which is a secure Web site where you can start an online meeting and collaborate on any design project across platforms and programs. You can share and annotate your computer screen or take control of an attendee’s computer. During the meeting, you can communicate by sending chat messages, using live audio, or broadcasting live video. In addition, you can take meeting notes, and share files.
![]() Click the File menu, and then click Share My Screen.
Click the File menu, and then click Share My Screen.
![]() Enter your Adobe ID and password.
Enter your Adobe ID and password.
• If you don’t have an Adobe ID and password, click the Create a Free Adobe ID link, and then follow the online instructions.
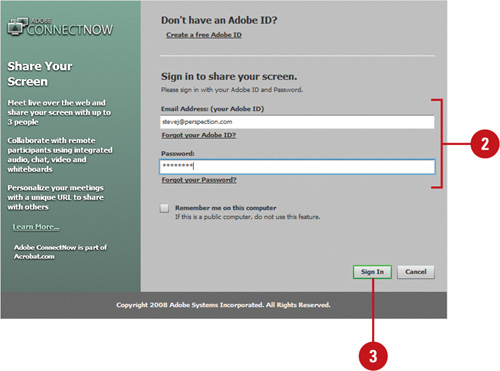
![]() Click Sign In.
Click Sign In.
• If prompted, sign in to ConnectNow.
![]() To share your computer screen, click the Share My Computer Screen button.
To share your computer screen, click the Share My Computer Screen button.
![]() Use the ConnectNow toolbar to do any of the following:
Use the ConnectNow toolbar to do any of the following:
• Meeting. Use to invite participants, share my computer screen, upload a file, share my webcam, set preferences, and end a meeting, and exit Adobe ConnectNow.
• PODS. Use to show and hide pod panels.
• Help. Use to get help, troubleshoot problems, and set account and Flash Player settings.

![]() Click the participant buttons at the bottom to specify roles, remove a user, or request control of a user’s computer.
Click the participant buttons at the bottom to specify roles, remove a user, or request control of a user’s computer.