Publishing Packages
The previous section looked at how to create packages. Creating packages is useful, but at some point, you may to want to share them with the world. If you don't care to share them, you can still make use of NuGet with private feeds. I cover that later.
Publishing to NuGet.org
By default, NuGet points to a feed located at https://nuget.org/api/v2/.
To publish your package to this feed, you do the following:
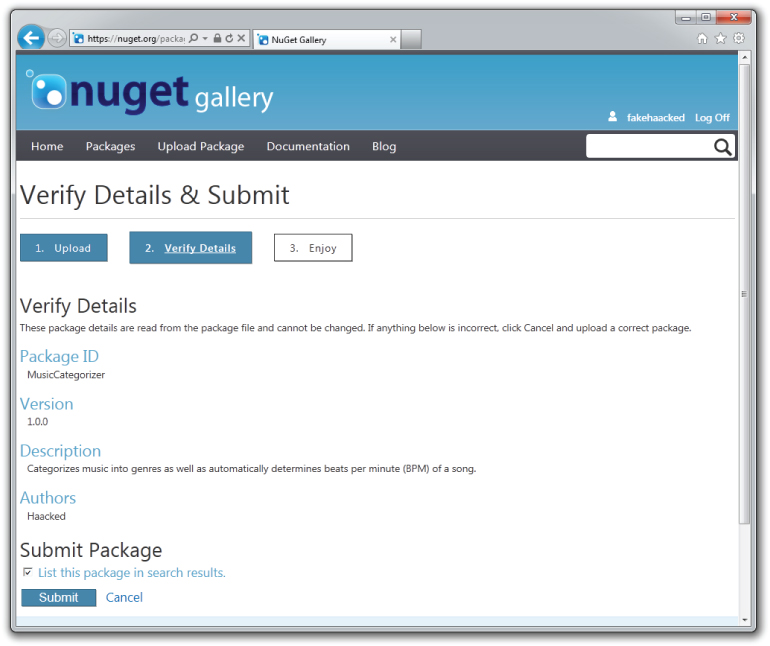
Uploading a package takes you to a screen that enables you to verify the metadata for the package, as shown in Figure 10.22. If you want to upload the package but keep it hidden from search results, uncheck the “List this package in search results” option. Note, the package can still be installed if you know the ID and version. This is useful if you want to test the package before you list it publicly.


Using NuGet.exe
Given that you can use NuGet.exe to create a package, wouldn't it be nice if you could also use it to publish a package? The good news is you can do that with the NuGet push command. But before you run the command, you'll need to make note of your API key.
On the NuGet website, click your username to navigate to the account page. This page enables you to manage your account, but more importantly, it displays your access key, which is required when publishing packages using NuGet.exe. Simply scroll down a bit and click on the big blue area to reveal your API key, as shown in Figure 10.23.
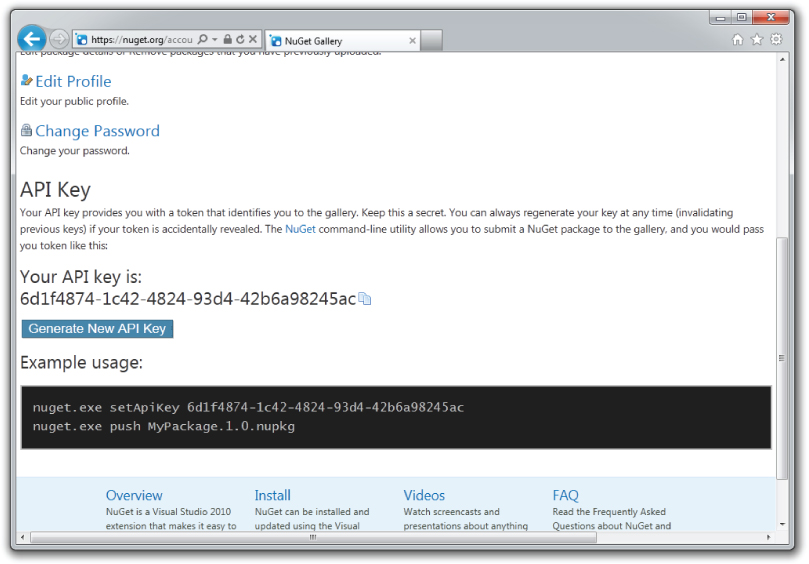
Conveniently, there's also a button labeled Generate New API Key in case you accidentally leak your key, much like I just did by posting this screenshot.
When you use the NuGet push command, it requires that you specify your API key. However, you can use the setApiKey command to have NuGet remember your API key by securely storing it so that you don't need to specify it every time you run the push command. Figure 10.24 shows an example of using the setApiKey command.
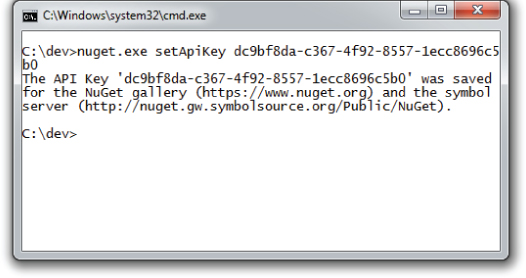
The API key is saved to a NuGet.config file in your Roaming profile. For example, on my Windows 7 machine, it's stored at C:UsersHaackedAppDataRoamingNuGetNuGet.config.
With the API key saved, publishing a command is as easy as running the push command and specifying the .nupkg file you want to publish, as shown in Figure 10.25.

This makes the package immediately available in the feed and is thus available for installation via the dialog or console. Note that it may take a few minutes before this change is reflected in the nuget.org website.
Using the Package Explorer
After building your package, you may want to examine the package to ensure that it's been packaged up properly. All NuGet packages are, at their core, simply zip files. You can rename the file to have a .zip file extension and then unzip the contents to take a look.
That's good to know, but there's an easier way to look inside a package: by using the Package Explorer. This is a ClickOnce application, which is available on NuGet's CodePlex release page at http://nuget.codeplex.com/releases.
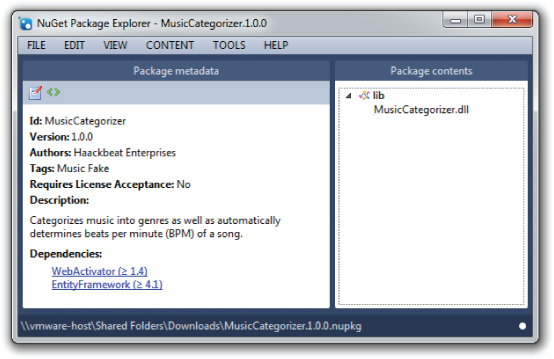
After installing the Package Explorer, you can double-click any .nupkg file to view its contents, as shown in Figure 10.26.
The Package Explorer can also be used to make quick edits to a package file or even to create a brand new package. For example, clicking the Edit menu and selecting Edit Package Metadata makes the metadata editable, as shown in Figure 10.27.

Files can be dragged into the appropriate folder within the Package Contents pane. When dropping a file into the Package Contents pane but not on any particular folder, Package Explorer prompts the user with a suggested folder depending on the content. For example, it suggests putting assemblies in the lib folder and PowerShell scripts in the Tools folder.
When you are done editing the package, you can save the .nupkg file by going to the File &cmdarr; Save menu option or by using the Ctrl+S key combination.
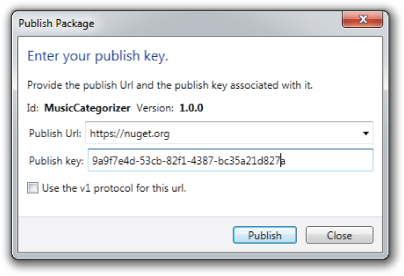
Package Explorer also provides a convenient means to publish the package via the File &cmdarr; Publish menu. This brings up a publish dialog, as shown in Figure 10.28. Just enter your API key and click Publish, and the package will show up in the feed immediately.