
Chapter 15
Storing Data in Files
In This Chapter
![]() Considering how permanent storage works with applications
Considering how permanent storage works with applications
![]() Deciding how to work with permanently stored content
Deciding how to work with permanently stored content
![]() Writing to a file for the first time
Writing to a file for the first time
![]() Obtaining content from the disk
Obtaining content from the disk
![]() Changing file content as needed
Changing file content as needed
![]() Removing a file from disk
Removing a file from disk
Until now, application development might seem to be all about presenting information onscreen. Actually, applications center around a need to work with data in some way. Data is the focus of all applications because it’s the data that users are interested in. Be prepared for a huge disappointment the first time you present a treasured application to a user base and find that the only thing users worry about is whether the application will help them leave work on time after creating a presentation. The fact is, the best applications are invisible, but they present data in the most appropriate manner possible for a user’s needs.
If data is the focus of applications, then storing the data in a permanent manner is equally important. For most developers, data storage revolves around a permanent media such as a hard drive, Solid State Drive (SSD), Universal Serial Bus (USB) flash drive, or some other methodology. (Even cloud-based solutions work fine, but you won’t see them used in this book because they require different programming techniques that are beyond the book’s scope.) The data in memory is temporary because it lasts only as long as the machine is running. A permanent storage device holds onto the data long after the machine is turned off so that it can be retrieved during the next session.
 In addition to permanent storage, this chapter also helps you understand the four basic operations that you can perform on files: Create, Read, Update, and Delete (CRUD). You see the CRUD acronym used quite often in database circles, but it applies equally well to any application. No matter how your application stores the data in a permanent location, it must be able to perform these four tasks in order to provide a complete solution to the user. Of course, CRUD operations must be performed in a secure, reliable, and controlled manner. This chapter also helps you set a few guidelines for how access must occur to ensure data integrity (a measure of how often data errors occur when performing CRUD operations).
Understanding How Permanent Storage Works
You don’t need to understand absolutely every detail about how permanent storage works in order to use it. For example, just how the drive spins (assuming that it spins at all) is unimportant. However, most platforms adhere to a basic set of principles when it comes to permanent storage. These principles have developed over a period of time, starting with mainframe systems in the earliest days of computing.
Data is stored in files. You probably know about files already because every useful application out there relies on them. For example, when you open a document in your word processor, you’re actually opening a data file containing the words that you or someone else has typed.
Files typically have an extension associated with them that defines the file type. The extension is generally standardized for any given application and is separated from the filename by a period, such as MyData.txt. In this case, .txt is the file extension, and you probably have an application on your machine for opening such files. In fact, you can likely choose from a number of applications to perform the task because the .txt file extension is relatively common.
Internally, files structure the data in some specific manner to make it easy to write and read data to and from the file. Any application you write must know about the file structure in order to interact with the data the file contains. The examples in this chapter use a simple file structure to make it easy to write the code required to access them, but file structures can become quite complex.
Files would be nearly impossible to find if you placed them all in the same location on the hard drive. Consequently, files are organized into directories. Many newer computer systems also use the term folder for this organizational feature of permanent storage. No matter what you call it, permanent storage relies on directories to help organize the data and make individual files significantly easier to find. To find a particular file so that you can open it and interact with the data it contains, you must know which directory holds the file.
Directories are arranged in hierarchies that begin at the uppermost level of the hard drive. For example, when working with the downloadable source code for this book, you find the code for the entire book in the BP4D directory. However, this directory doesn’t actually contain any source code files. To locate the source code files, you must open one of the chapter directories contained in the BP4D directory first. To locate the source code files for this chapter, you look in the BP4DChapter 15 directory.
Notice that I’ve used a backslash () to separate the directory levels. Some platforms use the forward slash (/), while others use the backslash. You can read about this issue on my blog at http://blog.johnmuellerbooks.com/2014/03/10/backslash-versus-forward-slash/. The book uses backslashes when appropriate and assumes that you’ll make any required changes for your platform.
A final consideration for Python developers (at least for this book) is that the hierarchy of directories is called a path. You see the term path in a few places in this book because Python must be able to find any resources you want to use based on the path you provide. For example, C: BP4DChapter 15 is the complete path to the source code for this chapter on a Windows system. A path that traces the entire route that Python must search is called an absolute path. An incomplete path that traces the route to a resource using the current directory as a starting point is called a relative path.
Creating Content for Permanent Storage
A file can contain structured or unstructured data. An example of structured data is a database in which each record has specific information in it. An employee database would include columns for name, address, employee ID, and so on. Each record would be an individual employee and each employee record would contain the name, address, and employee ID fields. An example of unstructured data is a word processing file whose text can contain any content in any order. There is no required order for the content of a paragraph, and sentences can contain any number of words. However, in both cases, the application must know how to perform CRUD operations with the file. This means that the content must be prepared in such a manner that the application can both write to and read from the file.
Even with word processing files, the text must follow a certain series of rules. Assume for a moment that the files are simple text. Even so, every paragraph must have some sort of delimiter telling the application to begin a new paragraph. The application reads the paragraph until it sees this delimiter, and then it begins a new paragraph. The more that the word processor offers in the way of features, the more structured the output becomes. For example, when the word processor offers a method of formatting the text, the formatting must appear as part of the output file.
The cues that make content usable for permanent storage are often hidden from sight. All you see when you work with the file is the data itself. The formatting remains invisible for a number of reasons, such as these:
- The cue is a control character, such as a carriage return or linefeed, that is normally invisible by default at the platform level.
- The application relies on special character combinations, such as commas and double quotes, to delimit the data entries. These special character combinations are consumed by the application during reading.
- Part of the reading process converts the character to another form, such as when a word processing file reads in content that is formatted. The formatting appears onscreen, but in the background the file contains special characters to denote the formatting.
- The file is actually in an alternative format, such as eXtensible Markup Language (XML) (see http://www.w3schools.com/xml/default.ASP for information about XML). The alternative format is interpreted and presented onscreen in a manner the user can understand.
 Other rules likely exist for formatting data. For example, Microsoft actually uses a .zip file to hold its latest word processing files (the .docx) file. The use of a compressed file catalog, such as .zip, makes storing a great deal of information in a small space possible. It’s interesting to see how others store data because you can often find more efficient and secure means of data storage for your own applications.
Now that you have a better idea of what could happen as part of preparing content for disk storage, it’s time to look at an example. In this case, the formatting strategy is quite simple. All this example does is accept input, format it for storage, and present the formatted version onscreen (rather than save it to disk just yet). This example also appears with the downloadable source code as FormattedData.py (which contains the class used to format the information) and FormattedDataTest.py (which outputs the data onscreen).
- Open a Python File window.
You see an editor in which you can type the example code.
- Type the following code into the window — pressing Enter after each line:
class FormatData:
def __init__(self, Name="", Age=0, Married=False):
self.Name = Name
self.Age = Age
self.Married = Married
def __str__(self):
OutString = "'{0}', {1}, {2}".format(
self.Name,
self.Age,
self.Married)
return OutStringThis is a shortened class. Normally, you’d add accessors (getter and setter methods) and error-trapping code. (Remember that getter methods provide read-only access to class data and setter methods provide write-only access to class data.) However, the class works fine for the demonstration.
The main feature to look at is the __str__() function. Notice that it formats the output data in a specific way. The string value, self.Name, is enclosed in single quotes. Each of the values is also separated by a comma. This is actually a form of a standard output format, comma-separated value (CSV), that is used on a wide range of platforms because it’s easy to translate and is in plain text, so nothing special is needed to work with it.
- Save the code as FormattedData.py.
- Open another Python File window.
- Type the following code into the window — pressing Enter after each line:
from FormattedData import FormatData
NewData = [FormatData("George", 65, True),
FormatData("Sally", 47, False),
FormatData("Doug", 52, True)]
for Entry in NewData:
print(Entry)The code begins by importing just the FormatData class from FormattedData. In this case, it doesn’t matter because the FormattedData module contains only a single class. However, you need to keep this technique in mind when you need only one class from a module.
Most of the time, you work with multiple records when you save data to disk. You might have multiple paragraphs in a word processed document or multiple records, as in this case. The example creates a list of records and places them in NewData. In this case, NewData represents the entire document. The representation will likely take other forms in a production application, but the idea is the same.
Any application that saves data goes through some sort of output loop. In this case, the loop simply prints the data onscreen. However, in the upcoming sections, you actually output the data to a file.
- Choose Run⇒Run Module.
You see the output shown in Figure 15-1. This is a representation of how the data would appear in the file. In this case, each record is separated by a carriage return and linefeed control character combination. That is, George, Sally, and Doug are all separate records in the file. Each field (data element) is separated by a comma. Text fields appear in quotes so that they aren’t confused with other data types.

Figure 15-1: The example presents how the data might look in CSV format.
Creating a File
Any data that the user creates and wants to work with for more than one session must be put on some sort of permanent media. Creating a file and then placing the data into it is an essential part of working with Python. You can use the following steps to create code that will write data to the hard drive. This example also appears with the downloadable source code as FormattedData.py and CreateCSV.py.
- Open the previously saved FormattedData.py file.
You see the code originally created in the “Creating Content for Permanent Storage” section, earlier in this chapter, appear onscreen. This example makes modifications to the original code so that the class can now save a file to disk.
- Add the following import statement to the top of the file:
import csv
The csv module contains everything needed to work with CSV files.
Python actually supports a huge number of file types natively, and libraries that provide additional support are available. If you have a file type that you need to support using Python, you can usually find a third-party library to support it when Python doesn’t support it natively. Unfortunately, no comprehensive list of supported files exists, so you need to search online to find how Python supports the file you need. The documentation divides the supported files by types and doesn’t provide a comprehensive list. For example, you can find all the archive formats at https://docs.python.org/3/library/archiving.html and the miscellaneous file formats at https://docs.python.org/3/library/fileformats.html. - Type the following code into the window at the end of the existing code — pressing Enter after each line:
def SaveData(Filename = "", DataList = []):
with open(Filename,
"w", newline=' ') as csvfile:
DataWriter = csv.writer(
csvfile,
delimiter=' ',
quotechar=" ",
quoting=csv.QUOTE_NONNUMERIC)
DataWriter.writerow(DataList)
csvfile.close()
print("Data saved!") Make absolutely certain that SaveData() is properly indented. If you add SaveData() to the file but don’t indent it under the FormatData class, Python will treat the function as a separate function and not as part of FormatData. The easiest way to properly indent the SaveData() function is to follow the same indentation used for the __init__() and __str__() functions.
Notice that the method accepts two arguments as input: a filename used to store the data and a list of items to store. This is a class method rather than an instance method. Later in this procedure, you see how using a class method is an advantage. The DataList argument defaults to an empty list so that if the caller doesn’t pass anything at all, the method won’t throw an exception. Instead, it produces an empty output file. Of course, you can also add code to detect an empty list as an error, if desired.
The with statement tells Python to perform a series of tasks with a specific resource — an open csvfile named Testfile.csv. The open() function accepts a number of inputs depending in how you use it. For this example, you open it in write mode (signified by the w). The newline attribute tells Python to treat the
control character (linefeed) as a newline character.In order to write output, you need a writer object. The DataWriter object is configured to use csvfile as the output file, to use /n as the record character, to quote records using a space, and to provide quoting only on nonnumeric values. This setup will produce some interesting results later, but for now, just assume that this is what you need to make the output usable.
Actually writing the data takes less effort than you might think. A single call to DataWriter.writerow() with the DataList as input is all you need. Always close the file when you get done using it. This action flushes the data (makes sure that it gets written) to the hard drive. The code ends by telling you that the data has been saved.
- Save the code as FormattedData.py.
- Open a new Python File window.
You see an editor in which you can type the example code.
- Type the following code into the window — pressing Enter after each line:
from FormattedData import FormatData
NewData = [FormatData("George", 65, True),
FormatData("Sally", 47, False),
FormatData("Doug", 52, True)]
FormatData.SaveData("TestFile.csv", NewData)This example should look similar to the one you created in the “Creating Content for Permanent Storage” section, earlier in the chapter. You still create NewData as a list. However, instead of displaying the information onscreen, you send it to a file instead by calling FormatData.SaveData(). This is one of those situations in which using an instance method would actually get in the way. To use an instance method, you would first need to create an instance of FormatData that wouldn’t actually do anything for you.
- Choose Run⇒Run Module.
The application runs, and you see a data saved message as output. Of course, that doesn’t tell you anything about the data. In the source code file, you see a new file named Testfile.csv. Most platforms have a default application that opens such a file. With Windows, you can open it using Excel and WordPad (among other applications). Figure 15-2 shows the output in Excel, while Figure 15-3 shows it in WordPad. In both cases, the output looks surprisingly similar to the output shown in Figure 15-1.

Figure 15-2: The application output as it appears in Excel.

Figure 15-3: The application output as it appears in WordPad.
Reading File Content
At this point, the data is on the hard drive. Of course, it’s nice and safe there, but it really isn’t useful because you can’t see it. To see the data, you must read it into memory and then do something with it. The following steps show how to read data from the hard drive and into memory so that you can display it onscreen. This example also appears with the downloadable source code as FormattedData.py and ReadCSV.py.
- Open the previously saved FormattedData.py file.
You see the code originally created in the “Creating a File” section, earlier in this chapter, appear onscreen. This example makes modifications to the original code so that the class can now save a file to disk.
- Type the following code into the window at the end of the existing code — pressing Enter after each line:
def ReadData(Filename = ""):
with open(Filename,
"r", newline=' ') as csvfile:
DataReader = csv.reader(
csvfile,
delimiter=" ",
quotechar=" ",
quoting=csv.QUOTE_NONNUMERIC)
Output = []
for Item in DataReader:
Output.append(Item[0])
csvfile.close()
print("Data read!")
return Output As previously mentioned, make absolutely certain that ReadData() is properly indented. If you add ReadData() to the file but don’t indent it under the FormatData class, Python will treat the function as a separate function and not as part of FormatData. The easiest way to properly indent ReadData() is to follow the same indentation used for the __init__() and __str__() functions.Opening a file for reading is much like opening it for writing. The big difference is that you need to specify r (for read) instead of w (for write) as part of the csv.reader() constructor. Otherwise, the arguments are precisely the same and work the same.
It’s important to remember that you’re starting with a text file when working with a .csv file. Yes, it has delimiters, but it’s still text. When reading the text into memory, you must rebuild the Python structure. In this case, Output is an empty list when it starts.The file currently contains three records that are separated by the /n control character. Python reads each record in using a for loop. Notice the odd use of Item[0]. When Python reads the record, it sees the nonterminating entries (those that aren’t last in the file) as actually being two list entries. The first entry contains data; the second is blank. You want only the first entry. These entries are appended to Output so that you end up with a complete list of the records that appear in the file.
As before, make sure that you close the file when you get done with it. The method prints a data read message when it finishes. It then returns Output (a list of records) to the caller.
- Save the code as FormattedData.py.
- Open a Python File window.
You see an editor in which you can type the example code.
- Type the following code into the window — pressing Enter after each line:
from FormattedData import FormatData
NewData = FormatData.ReadData("TestFile.csv")
for Entry in NewData:
print(Entry)The ReadCSV.py code begins by importing the FormatData class. It then creates a NewData object, a list, by calling FormatData.ReadData(). Notice that the use of a class method is the right choice in this case as well because it makes the code shorter and simpler. The application then uses a for loop to display the NewData content.
- Choose Run⇒Run Module.
You see the output shown in Figure 15-4. Notice that this output looks similar to the output in Figure 15-1, even though the data was written to disk and read back in. This is how applications that read and write data are supposed to work. The data should appear the same after you read it in as it did when you wrote it out to disk. Otherwise, the application is a failure because it has modified the data.

Figure 15-4: The application input after it has been processed.
Updating File Content
Some developers treat updating a file as something complex. It can be complex if you view it as a single task. However, updates actually consist of three activities:
- Read the file content into memory.
- Modify the in-memory presentation of the data.
- Write the resulting content to permanent storage.
In most applications, you can further break down the second step of modifying the in-memory presentation of the data. An application can provide some or all of these features as part of the modification process:
- Provide an onscreen presentation of the data.
- Allow additions to the data list.
- Allow deletions from the data list.
- Make changes to existing data, which can actually be implemented by adding a new record with the changed data and deleting the old record.
So far in this chapter, you have performed all but one of the activities in these two lists. You’ve already read file content and written file content. In the modification list, you’ve added data to a list and presented the data onscreen. The only interesting activity that you haven’t performed is deleting data from a list. The modification of data is often performed as a two-part process of creating a new record that starts with the data from the old record and then deleting the old record after the new record is in place in the list.
Don’t get into a rut by thinking that you must perform every activity mentioned in this section for every application. A monitoring program wouldn’t need to display the data onscreen. In fact, doing so might be harmful (or at least inconvenient). A data logger only creates new entries — it never deletes or modifies them. An e-mail application usually allows the addition of new records and deletion of old records, but not modification of existing records. On the other hand, a word processor implements all the features mentioned. What you implement and how you implement it depends solely on the kind of application you create.
Separating the user interface from the activities that go on behind the user interface is important. To keep things simple, this example focuses on what needs to go on behind the user interface to make updates to the file you created in the “Creating a File” section, earlier in this chapter. The following steps demonstrate how to read, modify, and write a file in order to update it. The updates consist of an addition, a deletion, and a change. To allow you to run the application more than once, the updates are actually sent to another file. This example also appears with the downloadable source code as FormattedData.py and UpdateCSV.py.
- Open a Python File window.
You see an editor in which you can type the example code.
- Type the following code into the window — pressing Enter after each line:
from FormattedData import FormatData
import os.path
if not os.path.isfile("Testfile.csv"):
print("Please run the CreateFile.py example!")
quit()
NewData = FormatData.ReadData("TestFile.csv")
for Entry in NewData:
print(Entry)
print(" Adding a record for Harry.")
NewRecord = "'Harry', 23, False"
NewData.append(NewRecord)
for Entry in NewData:
print(Entry)
print(" Removing Doug's record.")
Location = NewData.index("'Doug', 52, True")
Record = NewData[Location]
NewData.remove(Record)
for Entry in NewData:
print(Entry)
print(" Modifying Sally's record.")
Location = NewData.index("'Sally', 47, False")
Record = NewData[Location]
Split = Record.split(",")
NewRecord = FormatData(Split[0].replace("'", ""),
int(Split[1]),
bool(Split[2]))
NewRecord.Married = True
NewRecord.Age = 48
NewData.append(NewRecord.__str__())
NewData.remove(Record)
for Entry in NewData:
print(Entry)
FormatData.SaveData("ChangedFile.csv", NewData)This example has quite a bit going on. First, it checks to ensure that the Testfile.csv file is actually present for processing. This is a check that you should always perform when you expect a file to be present. In this case, you aren’t creating a new file, you’re updating an existing file, so the file must be present. If the file isn’t present, the application ends.
The next step is to read the data into NewData. This part of the process looks much like the data reading example earlier in the chapter.
You have already seen code for using list functions in Chapter 12. This example uses those functions to perform practical work. The append() function adds a new record to NewData. However, notice that the data is added as a string, not as a FormatData object. The data is stored as strings on disk, so that’s what you get when the data is read back in. You can either add the new data as a string or create a FormatData object and then use the __str__() method to output the data as a string.The next step is to remove a record from NewData. To perform this task, you must first find the record. Of course, that’s easy when working with just four records (remember that NewData now has a record for Harry in it). When working with a large number of records, you must first search for the record using the index() function. This act provides you with a number containing the location of the record, which you can then use to retrieve the actual record. After you have the actual record, you can remove it using the remove() function.
Modifying Sally’s record looks daunting at first, but again, most of this code is part of dealing with the string storage on disk. When you obtain the record from NewData, what you receive is a single string with all three values in it. The split() function produces a list containing the three entries as strings, which still won’t work for the application. In addition, Sally’s name is enclosed in both double and single quotes.
The simplest way to manage the record is to create a FormatData object and to convert each of the strings into the proper form. This means removing the extra quotes from the name, converting the second value to an int, and converting the third value to a bool. The FormatData class doesn’t provide accessors, so the application modifies both the Married and Age fields directly. Using accessors (getter methods that provide read-only access and setter methods that provide write-only access) is a better policy.
The application then appends the new record to and removes the existing record from NewData. Notice how the code uses NewRecord.__str__() to convert the new record from a FormatData object to the required string.
The final act is to save the changed record. Normally, you’d use the same file to save the data. However, the example saves the data to a different file in order to allow examination of both the old and new data.
- Choose Run⇒Run Module.
 You see the output shown in Figure 15-5. Notice that the application lists the records after each change so that you can see the status of NewData. This is actually a useful troubleshooting technique for your own applications. Of course, you want to remove the display code before you release the application to production.
 - Open the ChangedFile.csv file using an appropriate application.
You see output similar to that shown in Figure 15-6. This output is shown using WordPad, but the data won’t change when you use other applications. So, even if your screen doesn’t quite match Figure 15-6, you should still see the same data.

Figure 15-5: The application shows each of the modifications in turn.
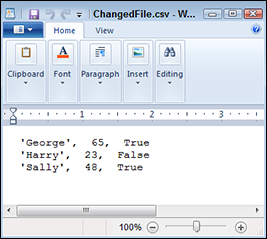
Figure 15-6: The updated information appears as expected in ChangedFile.csv.
Deleting a File
The previous section of this chapter, “Updating File Content,” explains how to add, delete, and update records in a file. However, at some point you may need to delete the file. The following steps describe how to delete files that you no longer need. This example also appears with the downloadable source code as DeleteCSV.py.
- Open a Python File window.
You see an editor in which you can type the example code.
- Type the following code into the window — pressing Enter after each line:
import os
os.remove("ChangedFile.csv")
print("File Removed!") The task looks simple in this case, and it is. All you need to do to remove a file is call os.remove() with the appropriate filename and path (as needed, Python defaults to the current directory, so you don’t need to specify a path if the file you want to remove is in the default directory). The ease with which you can perform this task is almost scary because it’s too easy. Putting safeguards in place is always a good idea. You may want to remove other items, so here are other functions you should know about:- os.rmdir(): Removes the specified directory. The directory must be empty or Python will display an exception message.
- shutil.rmtree(): Removes the specified directory, all subdirectories, and all files. This function is especially dangerous because it removes everything without checking (Python assumes that you know what you’re doing). As a result, you can easily lose data using this function.
- Choose Run⇒Run Module.
The application displays the File Removed! message. When you look in the directory that originally contained the ChangedFile.csv file, you see that the file is gone.