
Session
1
Light It Up:
Paper Circuits

New makers will make paper creations that light up in interesting and surprising ways. In the process, they will learn how to make electrical circuits.
Session Goals
In this session, makers will
- Build a circuit on paper using conductive tape, LEDs (light-emitting diodes), and coin cell batteries.
- Design a light-up project, such as a greeting card.
- Learn about basic electrical circuits and explore ways to create projects with circuits.
✓ Getting Ready
You’re about to begin your group’s journey with Start Making! As a first step, work with others to set up your space so it is welcoming and interesting. Arrange materials and tools so they’re organized and accessible, while keeping safety in mind.

Before the session, make your own paper circuit project using the materials and instructions that follow. We recommend making at least two examples to help participants imagine a range of possibilities. If you have other facilitators working with you, you can each work on making an example to share.

Example of a paper circuit
Materials

- LED lights (one or more colors)
- 3V coin cell batteries (such as the CR2032)
- Copper tape (conductive foil)
- Paper (note cards, cardstock, construction paper, paper cups, or other paper)
- Scissors
- Clear tape
- Binder clips (small, about 3/4-inch wide)
- Colored pens, pencils, or markers
Space and Tools Setup
Lay out the materials on a table that will be easy for everyone to reach. Group the tools, such as scissors, together. Make sure there is enough open table space for participants to work on their projects.
 Opening
To begin your first session, start with an icebreaker to help everyone get to know each other. Gather in a group and have each person share their name, where they’re from, and something they like to make (or their favorite activity).
 Demoing
Share two or three different examples of paper circuits with the group. Pass around the examples and briefly describe your process. Encourage members of the group to imagine what kind of project they might want to make.

Facilitator sharing how she made a light-up paper circuit
 Building a First Project
For their first project, makers explore how to make a simple circuit that lights up an LED on a piece of paper. This can provide the foundation for many related projects.
- Make the LED light up. Give one LED light and a battery to each maker. Encourage them to explore the look and feel of these materials and share what they notice. Then, ask them to try to make the LED light up.

Lighting up an LED with a battery (Sci-Bono Clubhouse, Johannesburg, South Africa)

- Notice that the battery has a symbol on each side. One side has a plus (+) sign, which stands for the positive terminal. The other side has a minus (–) sign, which stands for the negative terminal.
- The LED also has positive and negative terminals. The longer leg is positive and the shorter one is negative.
- To make the LED light up, connect the negative side of the battery to the negative leg of the LED and the positive side of the battery to the positive leg of the LED.
- Introduce the circuit layout. Once everyone is able to make their LED light up, introduce this basic layout that they can use to make their circuit on paper. You can hand out printed copies, or you can draw the diagram on a board for everyone to refer to when they are making their own.

Basic layout for a paper circuit (designed by Jie Qi)

Start placing the copper tape in the center of the battery circle to make sure that it will make contact with the battery.
Below are the steps for making the paper circuits, which you can use to help guide the makers.
- Add copper tape.
Take a piece of paper and on it, place copper tape so it follows the lines in the diagram.
To make turns, tape until you reach the corner where you want to turn. Then, fold the tape to turn the corner.

Folding the copper tape to turn corners

- Attach the LED.
Take the LED and spread the legs so that they are sticking out to each side. Place the LED on top of the copper tape, so the legs touch the tape. Then secure them in place with clear tape.


- Add the battery.
Place the battery negative (–) side down, where the circle with the (–) sign is. It should touch the copper tape. Next, fold over the corner of the paper so that the tape going to the positive (+) circle touches the battery. Your light should turn on.


- Complete the circuit.
Use a binder clip to hold the circuit in place. If the light doesn’t turn on, check that the copper tape is running to both sides of the battery and the LED with no breaks, and that the two tape lines don’t touch each other.

 Taking It Further
You can show examples of other types of circuits, such as a circuit with a switch or more than one light.
Sharing More Examples
To add a switch, make a break in the circuit by removing a piece of the copper tape. Then, add a way to connect the two parts with something conductive, such as by putting a piece of foil on your finger or by adding a flap of paper with copper tape on it. (For more instructions, see the paper circuit basics tutorial in the list of resources at the end of this chapter.)


Adding a switch to a circuit
If you want to add more lights to a circuit, you can connect them in two different ways:
- Parallel circuit To make a parallel circuit, add the lights so that each has its own row. Make sure to connect the positive ends of all the LEDs to the positive side of the battery.

You can make a parallel circuit to add more than one light.

- Series circuit To make a series circuit, place the lights in a single loop, connecting the positive end of one LED to the negative end of the other. For a series circuit, you need more batteries to power more lights—one for each light.

Making a series circuit by stacking three batteries to power three lights


A series circuit on the back of a drawing (with the person’s hands connecting across the break in the tape)

Light-up project inspired by a favorite memory (credit: Alisha Panjwani)
Generating Ideas
After making a simple circuit, gather the group to discuss what they noticed and to brainstorm ideas for what they might want to make with paper circuits using what they’ve learned so far. Have them jot down their ideas and post them on the idea wall.

Ideas for light-up projects shared by new makers
 Open Make
Provide time for the makers to experiment and design their own projects. They can pursue ideas they’ve shared on the idea wall or try some of the following ideas.
Make a Drawing
Make a drawing that lights up. Poke a small hole in the paper where you want the LED light. Push the top of the LED through the hole and bend the legs. Connect the tape and battery on the back side of the paper.

A drawing with lights added
Light-Up Origami
Make an origami sculpture and add a paper circuit to make it light up. (See the paper lantern tutorial in the resource list at the end of the chapter for ideas.)
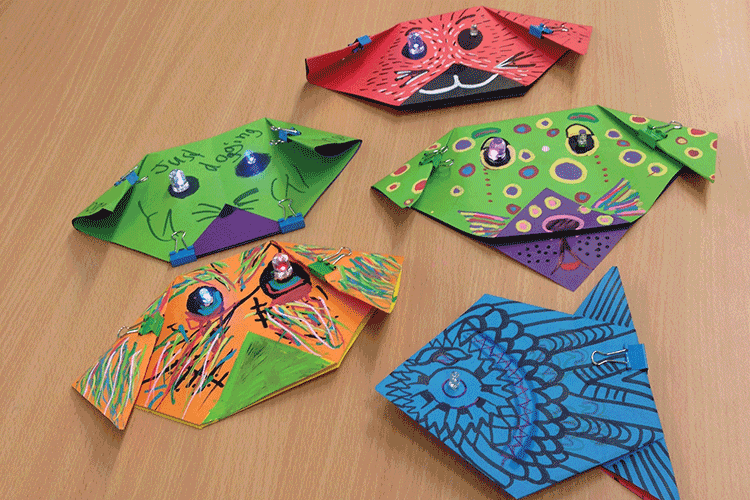

Light-up origami examples (Youth Connections Clubhouse, Lismore, Australia [Top]; Neve Yosef Clubhouse, Haifa, Israel [Bottom])
Illuminate Your Journal
Add paper circuits to your journal. Make a light-up portrait of yourself or your favorite activity.
 Sharing and Reflecting
Give the makers time to reflect and note their thoughts and ideas in their journals. Then gather everyone together and have them share their projects and experiences with the group.
 Documenting and Displaying
Invite makers to display their projects on a shelf, wall, or online gallery. Encourage them to take photos and document their experiences to share the process with other makers. They can also include drawings of the circuits they created so that they remember how to build circuits for future projects.

A shelf displaying light-up creations by new makers (Flagship Clubhouse, Museum of Science, Boston, MA)
Story from the Clubhouse Network: An Example of a First Session of Start Making!
To give you a sense of what a Start Making! session is like, here’s a description of the first session at one of the Clubhouses.
A group of 11 girls showed up for the first day of the Start Making! program, which was being offered on Saturday mornings. During the opening icebreaker, the girls introduced themselves and shared something they liked to do. A couple of the girls were shy and reluctant to talk, whereas several others were lively and talkative. The facilitators strived to make everyone feel welcome and comfortable. Some of the girls expressed interest in learning to make things; others mentioned that they came to spend time with their friends.
The facilitators shared a few examples of light-up cards, which they had made before the new makers had arrived. They passed the examples around the table, and the girls looked carefully at the cards and seemed curious about how they could make their own.
The facilitators gave each girl a battery and an LED and encouraged them to figure out how to make it light up. Some of the girls figured out how to make it work on their own, while others needed help. Getting their lights glowing generated excitement among the girls and heightened their interest in doing more.
The facilitators then suggested that the girls make personalized maker journals to document what they were making. They provided precut construction and printer paper, paper clips, pens, and other materials. The process of making and personalizing the journals gave the facilitators and new makers a chance to talk and get to know each other.

Examples of handmade journals created by new makers (Flagship Clubhouse)
The facilitators then brought out the copper tape and other materials so the girls could start making paper circuits. The facilitators shared the basic template for a circuit, which one of the facilitators had posted on the wall. The girls drew the circuit on a piece of paper and started using copper tape to make their circuits.
The facilitators encouraged those who had their circuits working to help the others who were encountering difficulties. The most common problem was that the connections from the copper tape to the battery or LED were loose. Also, some had cut the copper tape instead of folding it at the corner, so the circuits were not fully connected. In the end, everyone was happy to get their circuits working.
During the open make time, the girls made a range of personalized light-up projects. Several made flowers or hearts with LEDs in the center. Some made projects that reflected activities they liked to do. For example, one girl made a guitar that lit up. Other projects included a person with bright eyes, a clown with a light-up nose, and a glowing jellyfish.
For the closing, everyone came together in a circle to share their projects. The facilitators asked the girls questions about their experiences, using the reflection prompts, and then encouraged the girls to write or draw their reflections in their journals. Those who had been reluctant to speak at the beginning of the session expressed themselves in other ways, by sharing their projects or by writing their reflections in their journals.
After the girls headed home, the facilitators reflected on how the first session went, sharing what went well, what they had questions about, and what they thought could be improved.
They knew that the first session sets the tone for the rest of program, so they felt it was worth all the planning and preparation to help the new makers feel welcome to start making together.
Story from the Clubhouse Network: Making Light-up Badges and Buttons
Facilitators who led Start Making! at their Clubhouses found that new makers enjoyed the paper circuit activity and often applied the skills they’d learned to make other light-up projects. For example, Cindy Priester, Clubhouse Coordinator at the Southeast & Armed Services YMCA in Colorado Springs, CO, suggested that the new makers in her Clubhouse create name badges to introduce themselves when new people joined their program. They made light-up name badges using note cards with a pin on the back. They expressed their personality through their designs, adding LEDs to light up their names and images of themselves.
She explained how they later built on this idea:
Makers at our Clubhouse had the idea to take their first paper circuit name badges further to create buttons with words of encouragement (such as “Keep trying!”) or to describe a maker “superpower” (such as “creativity”). Later, when the circuit-based projects got more challenging, I would sometimes suggest that they make a quick paper circuit note card or badge so that they could practice their understanding of basic electronics and get a quick success to remind them they could do it. Later, they demoed their perseverance when they participated in Maker Media’s Maker Camp and posted their light-up button innovations to the online community.
Additional Resources
- Paper circuit basics: hlt.media.mit.edu/?p=2505
- Flapping origami crane: hlt.media.mit.edu/?p=1448
- Paper lantern tutorial: evilmadscientist.com/2008/paper-circuitry-at-home-electric-origami/
