Depending on the permissions, a user will have the drill-through feature option available from different locations. If the user is running a supported browser, the drill-through feature option will also be available along with launching other Cognos studios. The following screenshot shows the drill-though feature along with other Cognos studio options:

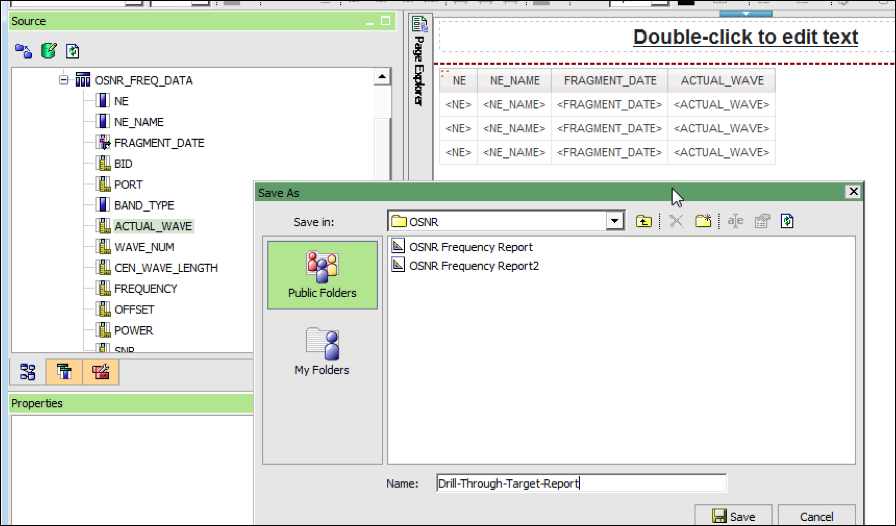
If the Launch menu is used to start drill-through options, the user will be able to create drill-through definitions that can be used in multiple reports. We shall, however, create a test drill using the Report Studio. As you may see in the previous screenshot, the Report Studio is also available to launch. Once launched, select a package that you want to use for the data model. Let us create a list report as the new report. Populate the list by dragging and dropping columns from the left package/model. We shall create NE_Name as the drill-through field. This newly created report will be our target report, that is, we shall first open some other report, and we shall drill down to this report from that report.
Once all the required fields have been dragged and dropped into list components of the page, save the report as Drill-Through-Target-Report. The following screenshot shows the data model, the selected fields, and the report being saved:
We shall also apply a filter in the target report and send a parameter to this report from the source report. The following screenshot shows that a filter is being applied on the NE_Name field of the target report that is being compared to a parameter value:

Next, we shall open the source report, where we shall set a field that will work as a drill-through field. This means that when we click on that field, it will drill down to the target report that we created and will show the data only for the record that we clicked on in the source report. For doing this, we shall make some changes in the source report. The following screenshot shows the page view of the source report:

Right-click on the NE_Name column of the source report in the page view and go to the Drill-Through Definitions 1 option. A dialog will open up, as shown in the following screenshot:

Create a new drill-through report using Open on the bottom-left corner of the dialog box. Select the target report that we created earlier in the Report field. You may open a new window when the NE_Name link is clicked on. Also select and configure the parameter for this dialog box. This parameter will be set as a list containing values. Once all the values for the dialog box have been set, click on ok. The source report's NE_Name column will change to links.
Now we shall run this report. On running, it may be observed that when we click on any row in the NE_Name column, it opens up a new window where we can see the data only for the record that we selected. The next screenshot shows the source report where the NE_Name column is being shown as a hyperlink pointing to the target report. Once it is clicked on, the target report appears in a new window or tab with only the relevant data.

Once the link in the previous screenshot is clicked on, it drills through to the target report with only the data that we want. The following screenshot shows the target report:

There are a number of drill-through options that we may use in order to create a dynamic and feature-full report.