
There's a few additional configuration steps to consider when hosting your blog on a VPS.
Now that your have Ghost up and running, a common next step will be pointing a domain name at your blog. This section will cover the concepts of pointing your custom domain name at the server hosting Ghost. These steps will be specific for a domain purchased at Namecheap to a DigitalOcean droplet running Ghost. We have chosen to document NameCheap and DigitalOcean because of their popularity, but almost every domain name registrar has similar steps.
Perform the following steps to point your custom domain to Ghost:
- Buy a domain name at Namecheap.
- Now you need to configure your domain to point to DigitalOcean. To do that click on the My Account tab in Namecheap and then on Manage Domains.
- Next click on your domain name.
- On this page click on Transfer DNS to Webhost. Then you have the option to input custom DNS Servers. By inputting the custom DNS server, you can configure where your domain name points to. In this example, you can input the nameservers for DigitalOcean.
- In custom DNS servers 1 to 3, fill in the following details:
  ns1.digitalocean.com
  ns2.digitalocean.com
  ns3.digitalocean.com
- Now click on Save Changes.
- Next log in to your DigitalOcean account. Once logged in, click on the DNS link.
- Click on the Add Domain button in the upper-right corner.
- Now, select your Ghost droplet name and fill in your domain name.
If you are using a VPS and would like to host multiple Ghost blogs on that VPS, we have provided some configurations to help you. We have an example configuration for Nginx as it is recommended for Ghost.
On both CentOS and Ubuntu, the configuration files can be found in /etc/nginx/.
server {
  listen 80;
  server_name blog-one.com;

  location / {
    proxy_set_header   X-Real-IP $remote_addr;
    proxy_set_header   Host      $http_host;
    proxy_pass         http://127.0.0.1:2368;
  }
}

server {
  listen 80;
  server_name blog-two.com;

  location / {
    proxy_set_header   X-Real-IP $remote_addr;
    proxy_set_header   Host      $http_host;
    proxy_pass         http://127.0.0.1:8080;
  }
}In all of the manual walkthroughs in this chapter, the last command is:
npm start --production
This command will start Ghost and keep it running while your current terminal session remains open. This is fine when testing or checking out Ghost for the first time, but is not a feasible option if you are looking to keep your Ghost blog up and running. The problem with npm start is that it will only continue to run as long as you have the connection established. This means that if you close your command prompt, your Ghost blog will quit running. Therefore, a process manager is needed to keep Ghost up and running at all times in the background.
forever is a process manager that performs very well with Ghost. It will start Ghost and restart Ghost if it crashes. forever works great on CentOS and Ubuntu.
The following steps should be performed while Ghost is not running and should be executed from the Ghost user that was created during the steps in the Installing Ghost on CentOS (VPS and local) and Installing Ghost on Ubuntu (VPS and local) sections:
- Change to your Ghost user:
su - ghost - Before installing
forever, you must be inside the Ghost directory:cd /var/www/ghost - Install
forever:npm install forever - Add the new
forevercommand to your path:echo "export PATH=/var/www/ghost/node_modules/forever/bin:$PATH" >> ~/.bashrc . ~/.bashrc
- Start Ghost with
forever:NODE_ENV=production /var/www/ghost/node_modules/forever/bin/forever start index.js
You should see the Forever processing file: index.js message.

At this point, forever should have started Ghost. You are free to continue using your command prompt without interrupting Ghost. You can check to make sure that forever has started Ghost by using the sudo forever list command or by browsing to your site to see if it is up and running. Here are some of the most useful forever commands:
forever stopall: This stops all the processes offoreverforever restartall: This restarts all the processes offoreverforever logs: This shows the logs of all the currentforeverprocessesforever list: This shows a list of all theforeverprocessesNote
For more information on
forever, check out their Github page at https://github.com/nodejitsu/forever.
If you are going to be using Ghost in production, it is a good idea to protect your login page with an SSL certificate. If your login page is not protected with SSL, your administrator password will be sent across your network in plain text making it easy to steal if someone is snooping on your network. To add SSL for security, perform the following steps:
- The first step is to get an SSL certificate. There are many different SSL certificate providers out there, so choose the one you trust or ask your hosting provider how to get one and follow their instructions to obtain your certificate.
- Now that we have created and received the SSL certificate files, we want to copy those files into a Nginx SSL directory:
mkdir /etc/nginx/ssl
cp server.crt /etc/nginx/ssl/server.crt
cp server.key /etc/nginx/ssl/server.key
- After those two files are in place, we need to make some changes to the Nginx config. Go ahead and open up your Ghost Nginx
conffile:sudo vi /etc/nginx/sites-available/ghost.conf - You do have to add a few lines so that Nginx knows where the SSL certificate is. Here is an example configuration; make sure you change the domain name in this configuration to your web address:
server { listen 80; listen 443 ssl; server_name <your domain name>.com www.<your domain name>.com; ssl_certificate /etc/nginx/ssl/<your domain name>/<your domain name>.com.crt; ssl_certificate_key /etc/nginx/ssl/<your domain name>/<your domain name>.com.pem; location / { proxy_set_header X-Forwarded-For $proxy_add_x_forwarded_for; proxy_set_header Host $http_host; proxy_set_header X-Forwarded-Proto $scheme; proxy_pass http://127.0.0.1:2368; } } - Save and exit the
conffile and restart Nginx:sudo service nginx restart - Nginx should be all set up now. The last change we need to make is inside of the actual Ghost
config.jsfile. So, let's open up that file:sudo vi /var/www/ghost/config.js - Once you have opened the file, scroll down to the Production section. Under the URL line create a new line and add the following:
forceAdminSSL: true, - Save and exit.
- Restart Ghost.
Once you have restarted Ghost, you should only be able to log into Ghost over HTTPS. This is highly recommended as it will help to keep your blog more secure.
At regular intervals, Ghost monitors for new releases. When the Ghost team releases a new version, you will see a notification like the following screenshot.
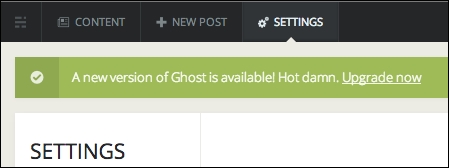
Clicking on the Upgrade now link will take you to http://ghost.org/download so you can download the latest release.
Whether you installed Ghost locally, or on a remote server, you can use the following steps to upgrade your Ghost installation (note that in a future release of Ghost the upgrade process will be built into Ghost and can be completed with a one-click process):
- Stop Ghost. If you are using
forever, change to your Ghost user and run:forever stopall - Download and move updated files into place:
cd path/to/ghost/folder
mkdir temp
cd temp/
wget https://ghost.org/zip/ghost-latest.zip
unzip ghost-latest.zip
cd ..
sudo cp temp/*.md temp/*.js temp/*.json .
sudo sudo rm -R core
sudo cp -R temp/core .
sudo cp -R temp/content/themes/casper content/themes
sudo npm install --production
sudo rm -R temp
All of the updated files have been placed and Ghost is ready to be started. If you are developing locally, you can use the npm start --production command to start Ghost; or if you are running Ghost on a VPS, you can start Ghost with the following forever command:
cd /var/www/ghost
NODE_ENV=production /var/www/ghost/node_modules/forever/bin/forever start index.js