
We will start exploring how data export and import work in Odoo, and from there, we will move on to the more technical details.
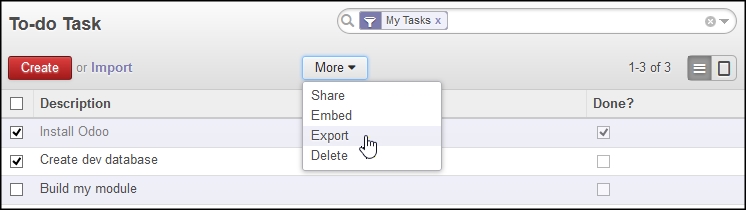
Data export is a standard feature available in any List view. To use it, we must first select the rows to export by selecting the corresponding checkboxes on the far left, and then select the Export option from the More button.
Here is an example, using the recently created to-do tasks:
The Export option takes us to a dialog form, where we can choose what to export. The Import Compatible Export option makes sure that the exported file can be imported back to Odoo. We will need to use this.
The export format can be CSV or Excel. We will prefer CSV file to get a better understanding of the export format. Next, we should pick the columns we want to export and click on the Export To File button. This will start the download of a file with the exported data.
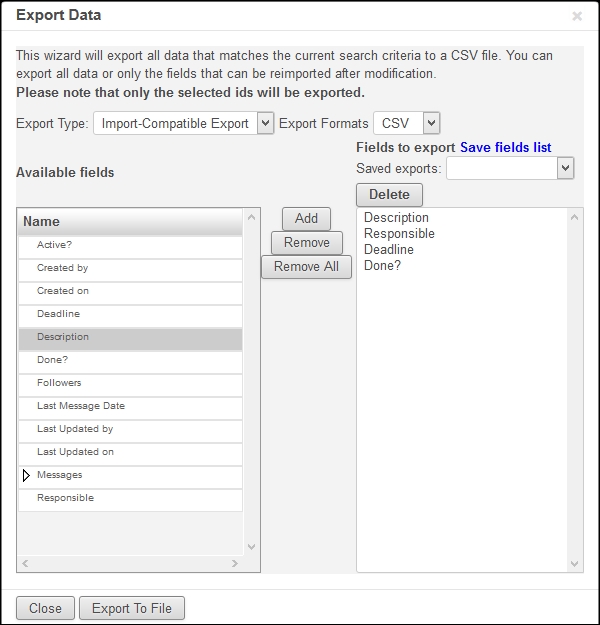
If we follow these instructions and select the fields shown in the preceding screenshot, we should end up with a CSV text file similar to this:
"id","name","user_id/id","date_deadline","is_done"
"__export__.todo_task_1","Install Odoo","base.user_root","2015-01-30","True"
"__export__.todo_task_2","Create dev database","base.user_root","","False"
Notice that Odoo automatically exported an additional id column. This is an External ID that is automatically generated for each record. These generated External IDs use __export__ in place of an actual module name. New identifiers are only assigned to records that don't already have one, and from there on, they are kept bound to the same record. This means that subsequent exports will preserve the same External IDs.
First we have to make sure the import feature is enabled. This is done in the Settings menu, Configuration | General Settings option. Under the Import / Export topic, make sure the Allow users to import data from CSV files checkbox is enabled.
With this option enabled, the List views show an Import option next to the Create button at the top of the list.
Let's perform a mass edit on our to-do data: open in a spreadsheet or a text editor the CSV file we just downloaded, then change a few values and add some new rows.
As mentioned before, the first id column provides a unique identifier for each row allowing already existing records to be updated instead of duplicated when we import the data back to Odoo. For new rows we may add to the CSV file, the id should be left blank, and a new record will be created for them.
After saving the changes on the CSV file, click on the Import option (next to the Create button) and we will be presented with the import assistant. There we should select the CSV file location on disk and click on Validate to check its format for correctness. Since the file to import is based on an Odoo export, there is a good chance it will be valid.
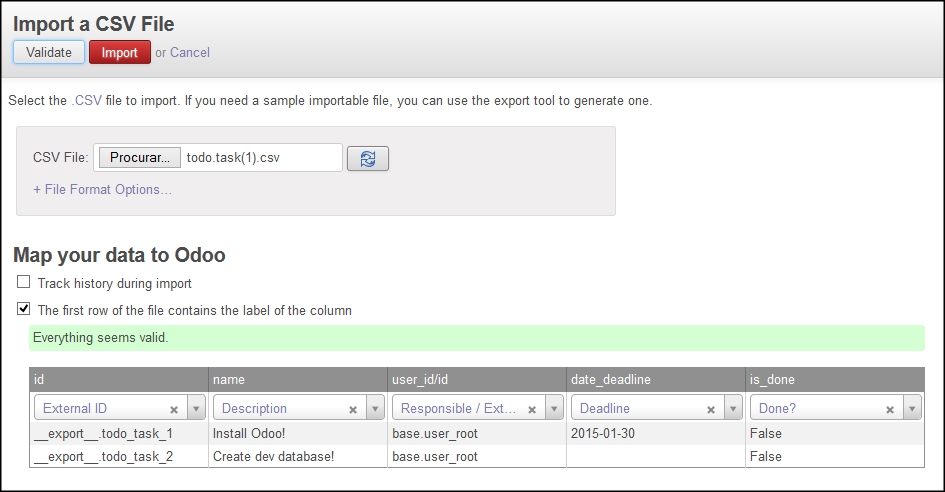
Now we can click on Import and there you go: our modifications and new records should have been loaded into Odoo.
In the example seen above, the user responsible for each task is a related record in the users model, with a many to one (or foreign key) relation. The column name used for it was user_id/id and the field values were External IDs for the related records, such as base.user_root for the administrator user.
Relation columns should have /id appended to their name, if using External IDs, or /.id, if using database (numeric) IDs. Alternatively, a colon (:) can be used in place of the slash for the same effect.
Similarly, many to many relations are also supported. An example of a many to many relations is the one between Users and Groups: each User can be in many Groups, and each Group can have many Users. The column name for this type of field should have appended a /id. The field values accept a comma-separated list of External IDs, surrounded by double quotes.
For example, the to-do task follower is a many-to-many relation between To-do Tasks and Partners. It's column name could be follower_ids/id and a field value with two followers could be:
"__export__.res_partner_1,__export__.res_partner_2"
Finally, one to many relations can also be imported through a CSV. The typical example of this type of relations is a document "head" with several "lines".
We can see an example for such a relation in the company model (form view available in the Settings menu): a company can have several bank accounts, each with its own details, and each bank account belongs to (has a many-to-one relation with) only one company.
It's possible to import companies along with their bank accounts in a single file. For this, some columns will correspond to the company, and other columns will correspond to the bank account details. The bank details column names should be prefixed with the one-to-many fields linking the company to the banks; bank_ids in this case.
The first bank account details goes in the same row as its related company data. The next bank account's details go in the next rows, but only the bank details related columns should have values; the company data columns should be empty in those lines.
Here is an example loading a company with three banks:
id,name,bank_ids/id,bank_ids/acc_number,bank_ids/state
base.main_company,YourCompany,__export__.res_partner_bank_4,123456789,bank
,,__export__.res_partner_bank_5,135792468,bank
,,__export__.res_partner_bank_6,1122334455,bank
Notice that the two last lines begin with two commas: this corresponds to empty values in the first two columns, id and name, regarding the head company data. But the remaining columns, regarding bank accounts, have the values for the second and third bank records.
These are the essentials on working with export and import from the GUI. It's useful to set up data in new Odoo instances, or to prepare data files to be included in Odoo modules. Next we will learn more about using data files in modules.