
Chapter 6: Screen Space Reflections – Adding Reflection to the Water
Now that we have some rocks and grass set up in the scene, I want to explore another element that often comes up when creating a realistic environment: water. Water can be very hard to get right, especially in EEVEE. Considering EEVEE only uses approximations of light and reflection, it can be really difficult to create a lake or ocean that really accurately reflects your surroundings. Also, because humans are deeply attuned to nature, it can be really easy to spot a fake environment if something is just not quite right. In this chapter, we're going to set up the water shader and then tune the settings of our render to get perfect results. A new concept that we haven't covered yet that I'll start to introduce in this chapter is the usage of light probes. Using light probes is an alternative way to calculate light in EEVEE and should help us in this chapter to create a really nice lake that adds to the natural beauty of the environment we're trying to create.
In this chapter, we will cover the following:
- Screen space reflections
- Reflection plane light probes
- Adding volume and transparency to the water
Technical requirements
Download the starting file of this chapter, MiniProject 2-Chapter6-Start.blend, or use the project we worked on in the last chapter to start. I want to give the choice to skip chapters, which is why I provide a starting file for each chapter, but if you worked through Chapter 5, Setting Up an Environment with Geometry Nodes, you should have a file that is ready to start from, without needing to download it from GitHub. We'll be using procedural methods to add some noise to the water in this chapter, so there are no extra files to download.
The sample files used in this chapter are available here:
Screen space reflections
Before we start to create the water shader, it's pertinent to go over what exactly screen space reflection means. Screen space reflection is a method of creating a reflection in a real-time rendering engine. The reflection is calculated using a depth buffer (a way of representing depth in 3D graphics) to calculate reflections based on the screen view we are using. As a result, reflections from a point of view other than the camera in a render might not be accurate. Screen space reflections are much more accurate than using reflection probes and also allow us to use a reflection plane to further inform the direction of the reflection effect. We'll use screen space reflections in this chapter to create a reflection effect on the surface of the water. Let's jump into creating the water shader. I started this chapter by disabling the Geometry Nodes Modifier we created in Chapter 5, Setting Up an Environment with Geometry Nodes, by clicking the Monitor button for each system.
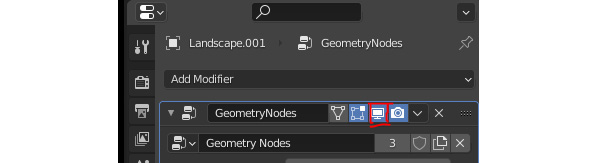
Figure 6.1: Turning off the Geometry Nodes
This hides them from the viewport so that our computer doesn't lag while we're trying to create water. My rule of thumb is to hide anything from the viewport that doesn't affect the part of the scene we're working on. That way, we can create small pieces of a complex scene and then render them all together at the end, reducing the strain on our computer.
The first thing we'll do is add a shader that creates a reflective surface for our WaterVolume object:
- Select the WaterVolume object and add a new material by clicking the New button in the Shader panel.
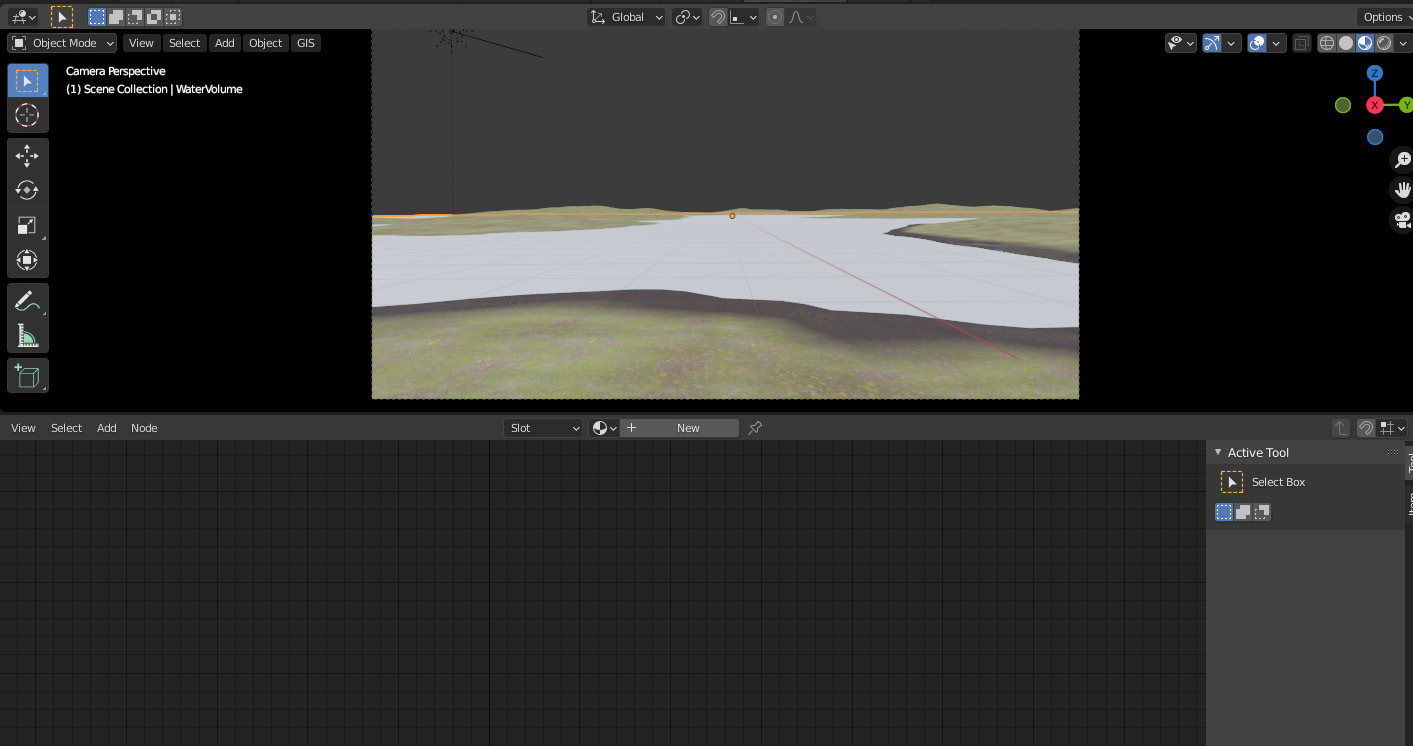
Figure 6.2: Adding a new material
- The water shader will utilize the default Principled BSDF shader, but we need to decrease the Roughness value and then change the Base Color value to full black.
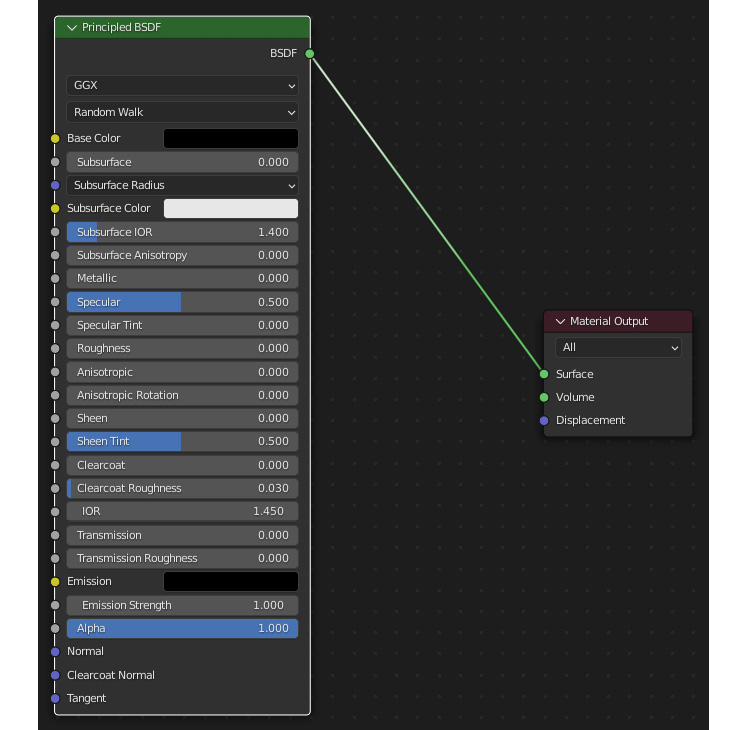
Figure 6.3: Material settings
The water shader will now look like it's reflecting the sky! This is pretty cool, considering all we did was change two aspects of the Principled shader.

Figure 6.4: Results of the Principled shader
From this image, we could call it a day, consider our water shader done, and go home. But let's test it first, to make sure we have true reflectivity. Create a Cube object (or any other object of your choice) and suspend it over the water.
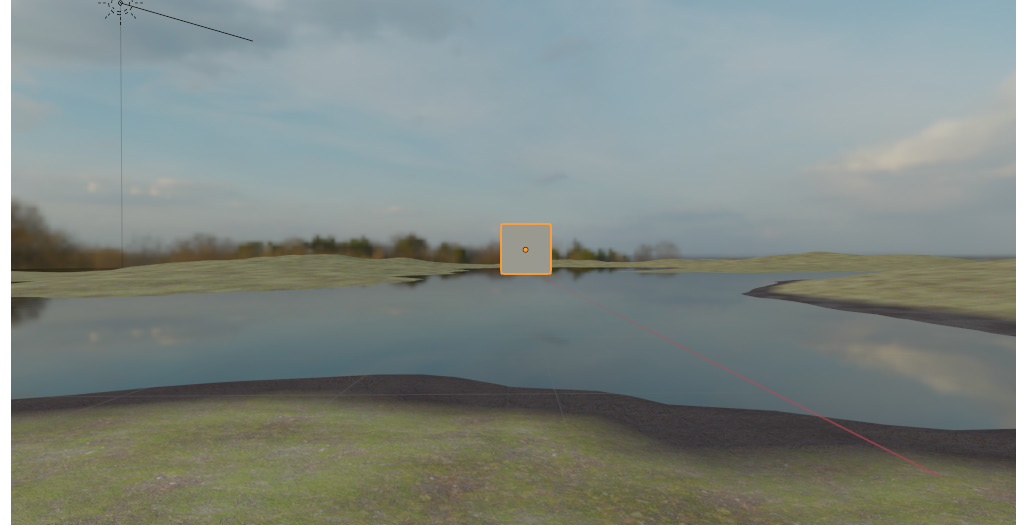
Figure 6.5: No reflections!
There are no reflections! True water would reflect an object, the cube, and we would see the reflection on the water. So, obviously, this water shader isn't working exactly as we want. The way to fix this behavior in EEVEE is to turn on Screen Space Reflections so that we actually get the cube reflecting in the water. Let's try that right now:
- Go to the Render Properties panel on the right side of the screen.
- Check the box next to Screen Space Reflections.
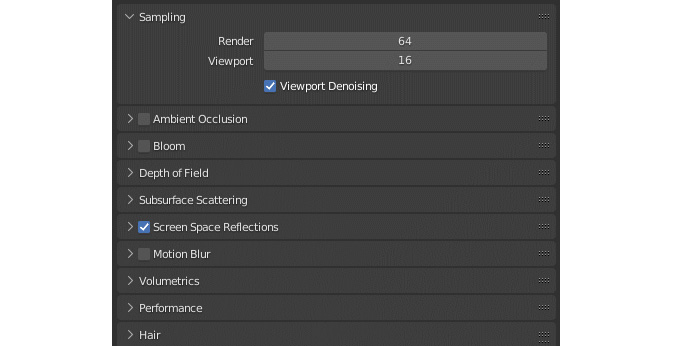
Figure 6.6: Screen Space Reflections
- Open the Screen Space Reflections options using the twirl-down arrow next to the checkbox and make sure Refraction is checked. Most of the defaults in this section are pretty good, but experimenting with them can definitely be useful to understand the full capacity of the Screen Space Reflections option.
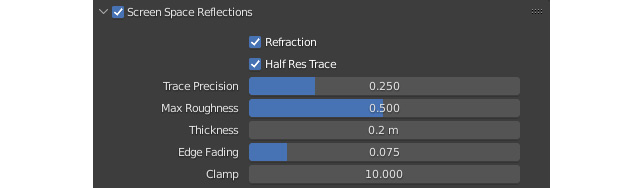
Figure 6.7: Screen space properties
Now, if we look at the viewport, the cube is being reflected in the water!
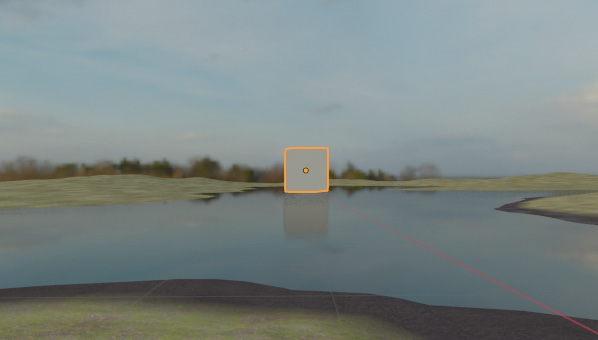
Figure 6.8: Reflection!
Screen Space Reflections can enhance any reflective material, from windows to water, so make sure you use it when needed. I think it gives great results, but as usual, we could always make them better. Let's try using a reflection light probe in the next section and refine this reflection even further!
Light probes – reflection planes
Light probes, as we touched on briefly earlier, are auxiliary objects in the scene (they won't be visible in the render) that we can use to tell EEVEE to compute lighting or reflectivity more accurately than just the default. In this section, we'll use a reflection plane probe to add more accuracy to the reflectivity of the water. Let's get started:
- Add a reflection probe by using the usual Add menu shortcut of Shift + A and then selecting Light Probe, then the Reflection Plane option.

Figure 6.9: Adding the light probe
- The reflection plane should look like a flat box with an arrow pointing in the direction we want reflections to be calculated. Make sure that the arrow is pointed up (as should be the default) and the box is slightly on top of our lake.
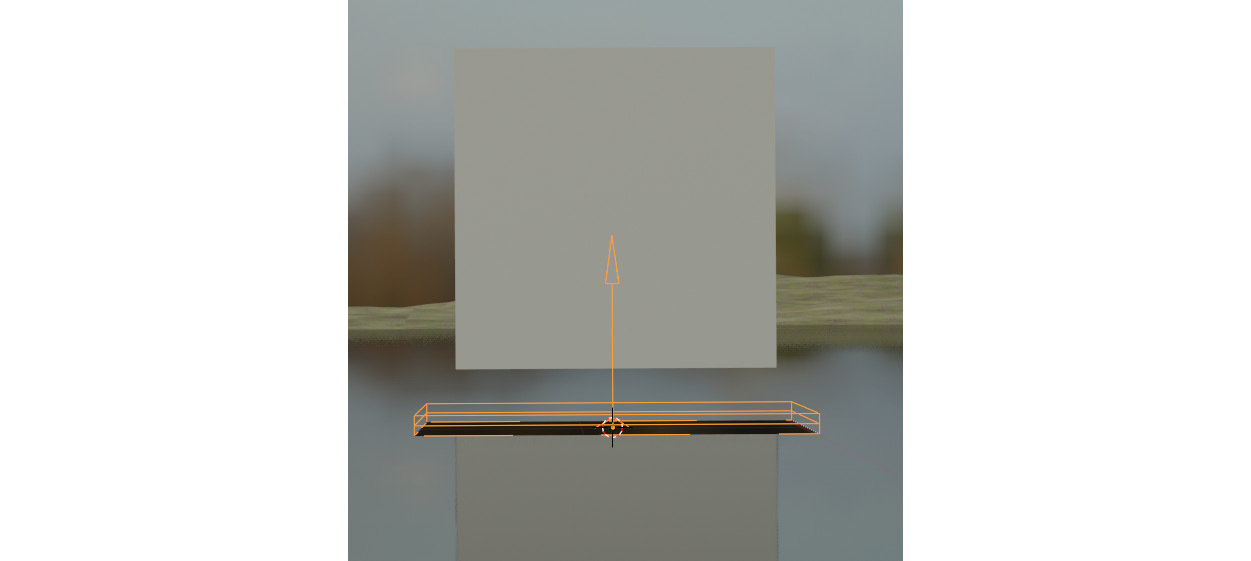
Figure 6.10: The light probe in the scene
- Next, we'll scale up the reflection plane by using the S shortcut. Scale it so it covers most of the water area we can see in the camera view. If you aren't getting something similar to what I get, try moving your reflection plane up or down a little bit. Or you can experiment with moving the cube up and down as I have in Figure 6.11. Reflection planes only have a limited sphere of influence, so the cube might be outside of the plane's influence. The best way to understand this is to experiment and see how the reflection reacts as you change things.
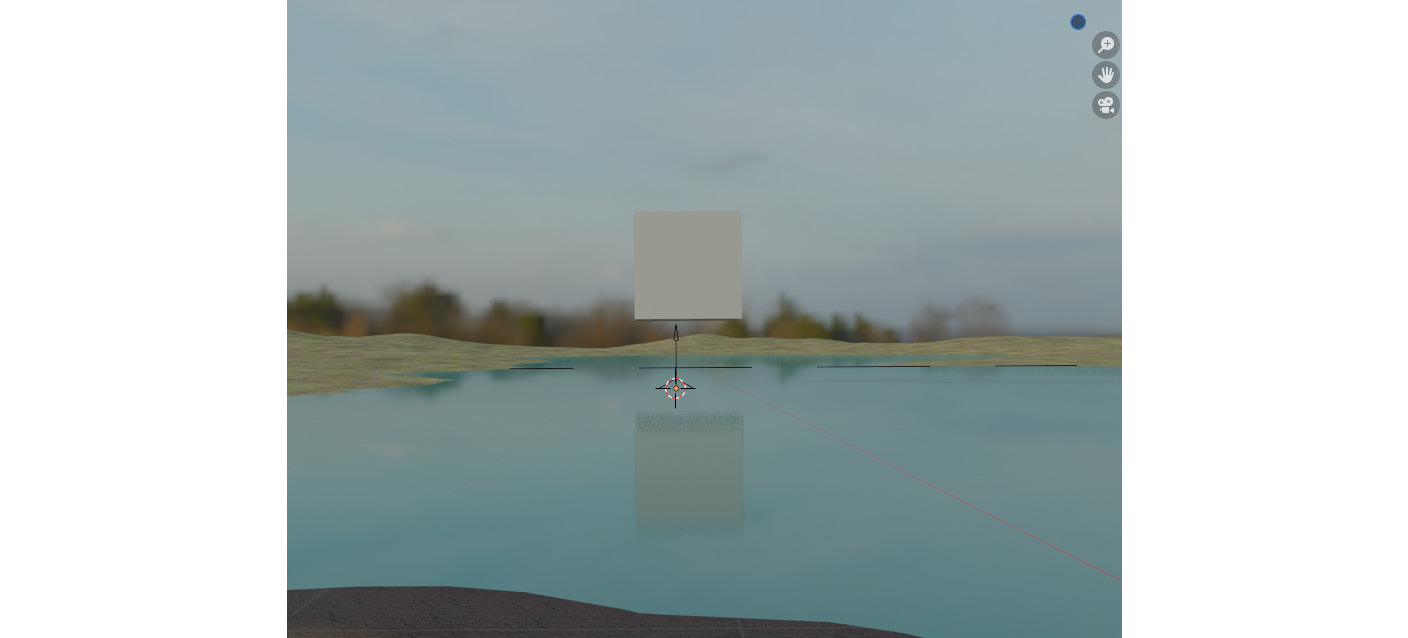
Figure 6.11: Scaling up the reflection plane
- We can now specify the range of the reflectivity. As you can see from the previous screenshot, the reflection plane doesn't really seem to have changed much. But now, we can tweak our reflection by going to the properties sidebar and selecting the Object Data Properties option for Light Probe.
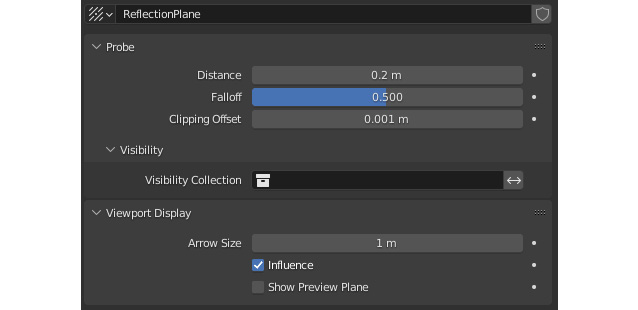
Figure 6.12: Reflection plane properties
- By changing the Distance value to something such as 8 m, you can see that the area the reflection plane is affecting changes to encompass the cube object that I'm using to test the reflectivity of the lake.
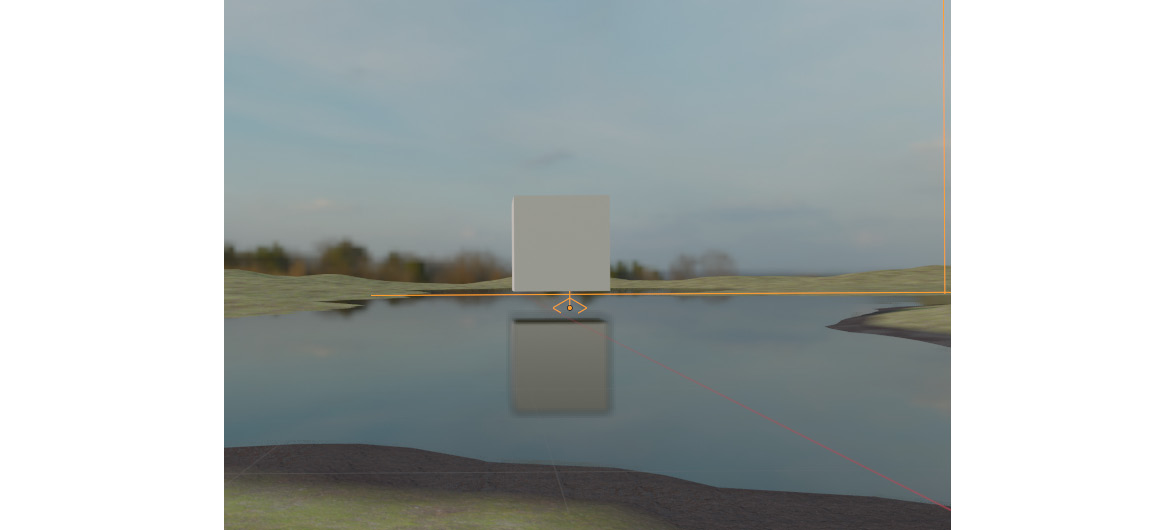
Figure 6.13: Changing the Distance property
Try comparing the result with the reflection plane enabled and the previous reflection, before you added the light probe, as shown in Figure 6.8. The reflection plane enables us to get much more accuracy on reflections and even allows us to tweak the reflection with the Light Probe properties, so we have much more control over our scene. We'll explore light probes more in future chapters. Now, we're going to move back to the water shader and create a more advanced version that takes into account the real physical properties of water to make our water really over the top.
Advanced water – volume and transparency
What we have so far for the water is pretty good, but let's not let ourselves settle for "pretty good"! Let's make it completely amazing. We'll start by changing some of the properties of our water shader, so let's select the WaterVolume object and get back to the Material Editor:
- Let's change the Base Color value of the water to something that fits our scene a little more. I went with a dark turquoise blue, but experiment and see what fits for you. I also changed the IOR value to 1.33, as this is the correct Index of Refraction (IOR) for water.
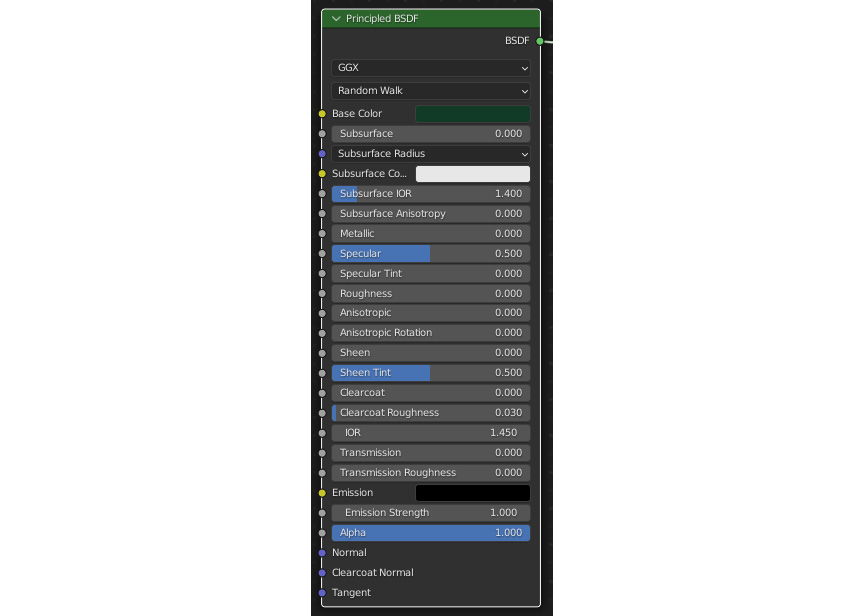
Figure 6.14: Changing the color and IOR
- Next, we'll add some transparency to the water material. We'll do this using a concept called Fresnel. Fresnel is the equation for how reflective water is at a certain angle. If you've ever looked at a lake from the shore, you'll notice the water close to you is quite transparent because you're looking at it almost from above, whereas the water further away is quite reflective, because you're viewing it at a more oblique angle. We can mimic this property using a Fresnel node, so let's add a Fresnel node, change the value to 0.5, and connect it to the Alpha input on the Principled shader.
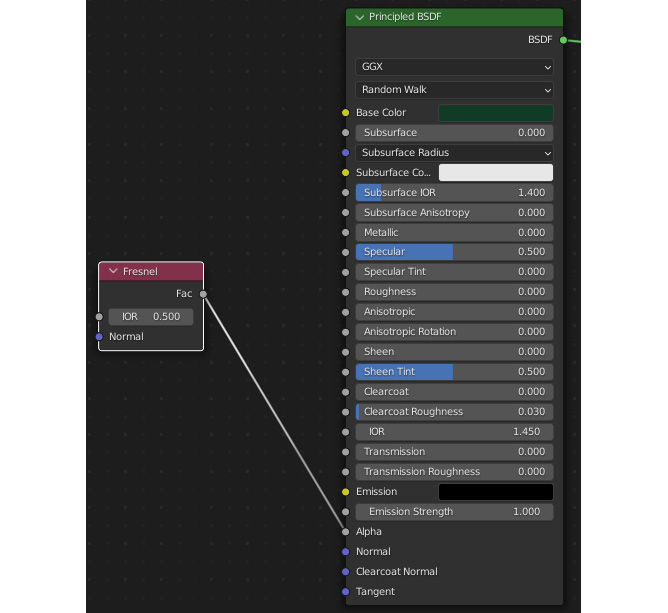
Figure 6.15: Adding transparency
- You'll notice this seems to do nothing. We need to tell EEVEE what kind of transparency we want. If you scroll down in the Material Properties on the right side of the screen, you'll see the settings where we can change Blend Mode to Alpha Blend. The 0.5 value for the Fresnel is not a value I chose based on any real-world value, so experiment with different values and see how it affects the translucency.
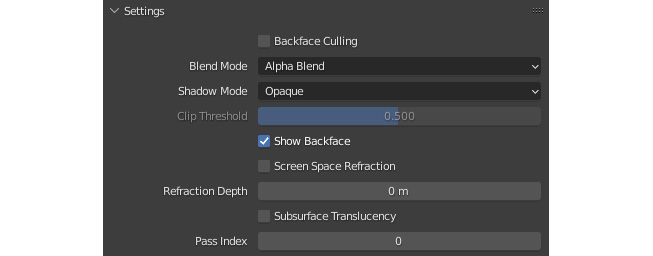
Figure 6.16: Settings for material transparency
We have some transparency in the shallows of the water now, and it changes to less transparency the further away from the camera we go.
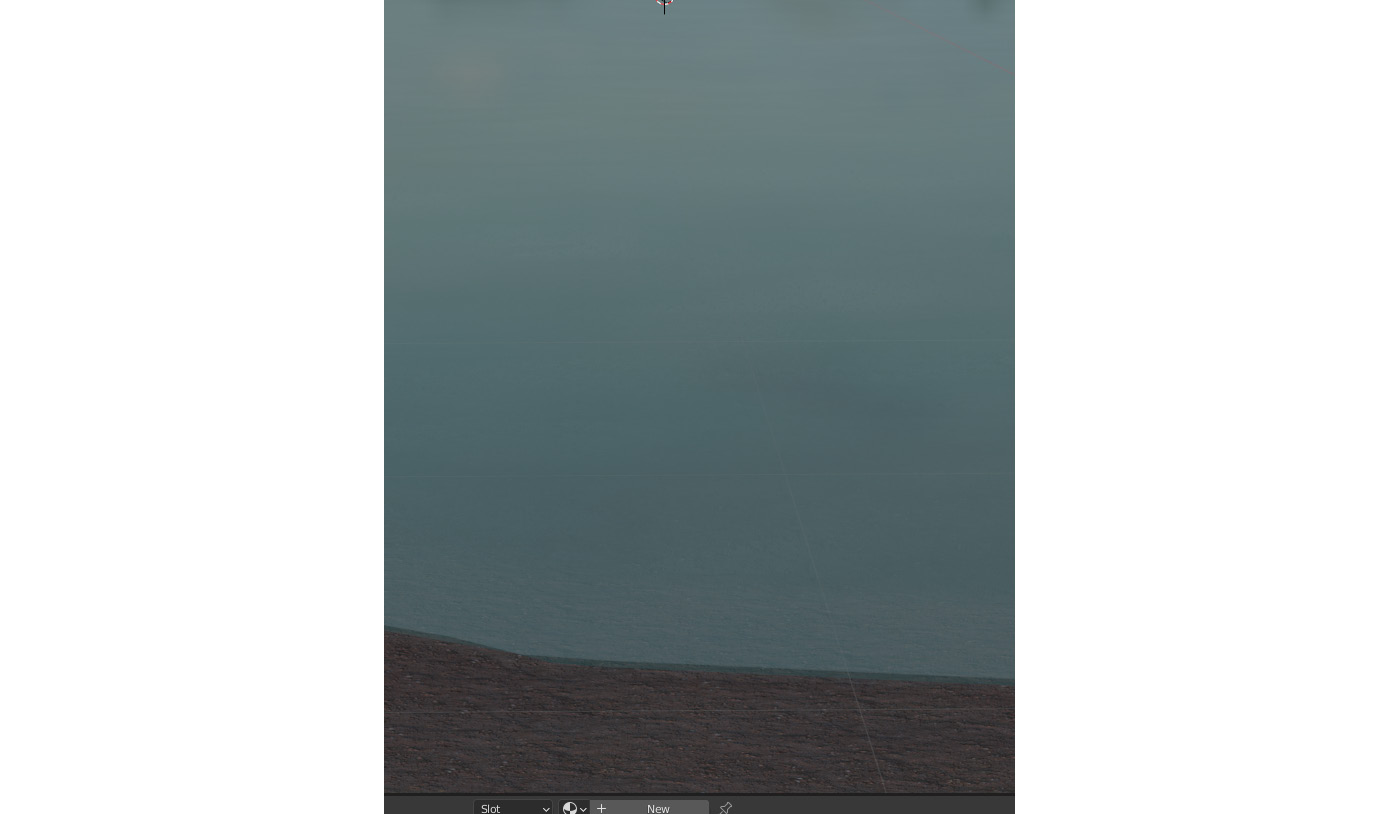
Figure 6.17: Transparent water on the shore
- But we can see that our water looks very flat. Let's give it a slight bump, so it looks a little more like water that's being displaced as fish or wind move it around. Add a Noise Texture node and change the Scale value to 200. Then, add a ColorRamp and a Bump node. Connect Noise Texture to the ColorRamp and ColorRamp to Bump, and then Bump to the Normal input of the Principled shader. This takes the Noise Texture node, changes it to a black and white image (with ColorRamp), and then applies that as a displacement to the surface of the lake. This creates variation to the surface of our lake with minimal computational power. Change the strength of Bump to 0.09.
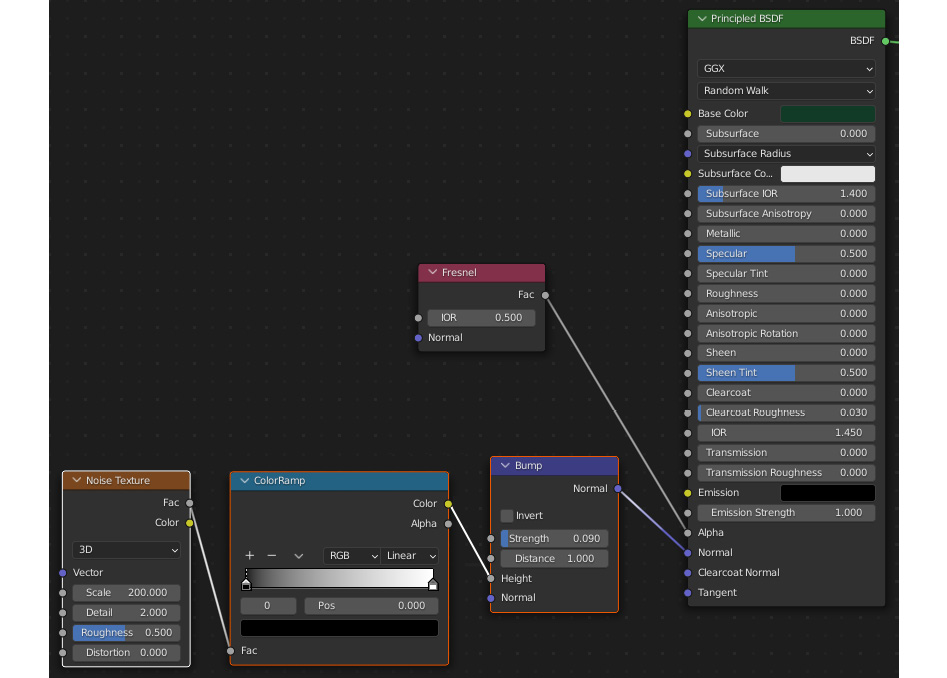
Figure 6.18: Noise bump for water
The result I have at this point is looking pretty good. The only thing I think we can improve upon is giving the water some depth.
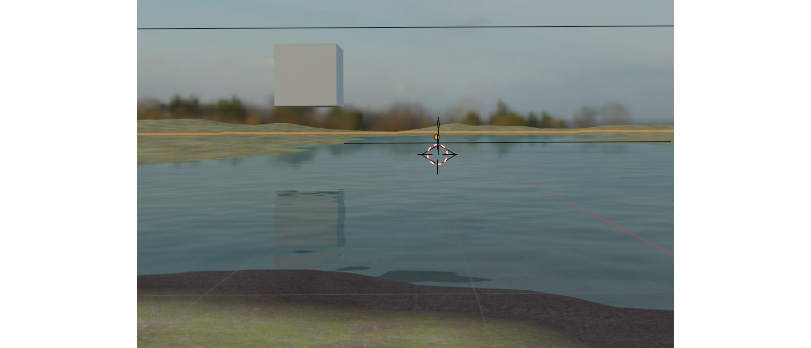
Figure 6.19: Noise bump adding waves to the water
- The surface of the water is done at this point. Let's add some volume to the water shader. Add a Principled Volume shader and Volume Absorption to the water shader. Connect them with Mix Shader and connect Mix Shader to the Volume socket on Material Output.
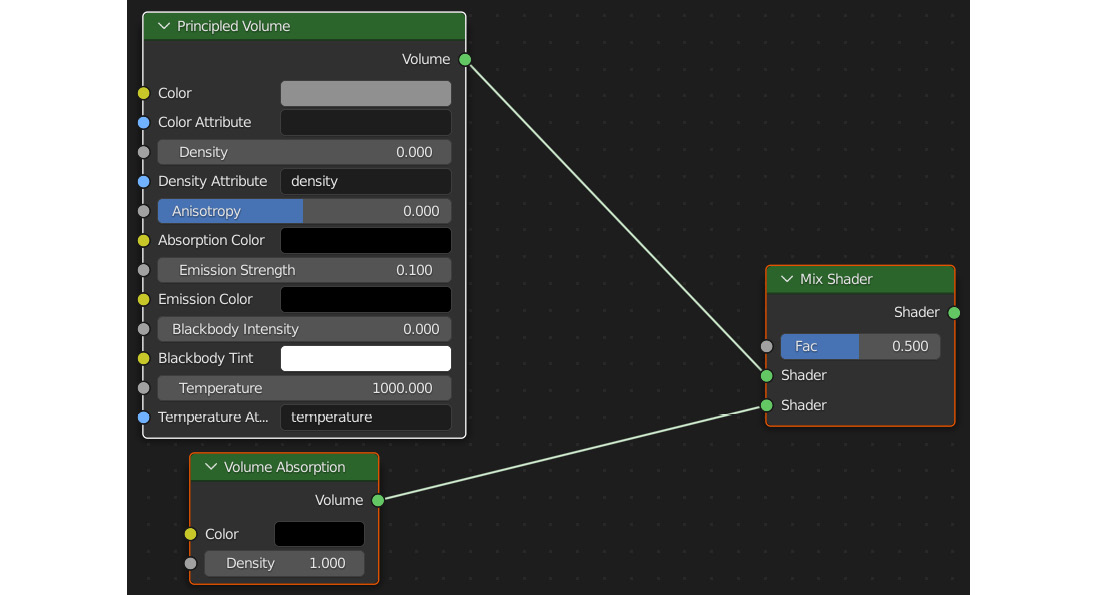
Figure 6.20: Principled Volume and Volume Absorption shaders
- Now, let's tweak the values. Change the Density value on Principled Volume to something lower, such as 0.4. Change the Density volume on Volume Absorption to something lower too, such as 0.3 or 0.4. We'll also add some Emission to Principled Volume, so change Emission Strength to 0.1. Finally, we'll change Mix Shader Fac to 0.7.
- We have all the numerical values dialed in, but we also don't want our water color to be just gray or white. Change Color and Emission Color on Principled Volume to a greenish-blue and Color on Volume Absorption to a light blue.
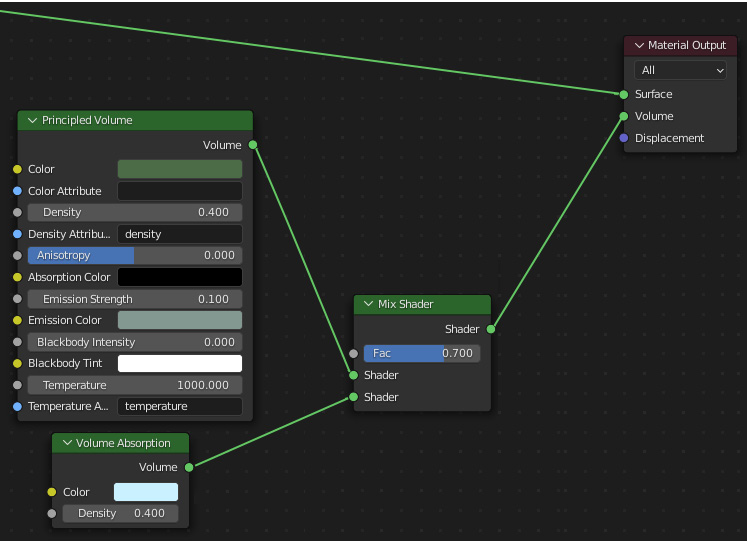
Figure 6.21: Completed water shader
You may not notice a huge change by adding volume to the water. The change is most pronounced when you want to submerge something in the water, as you'll get the correct refraction and coloration of the object as if it really were underwater.
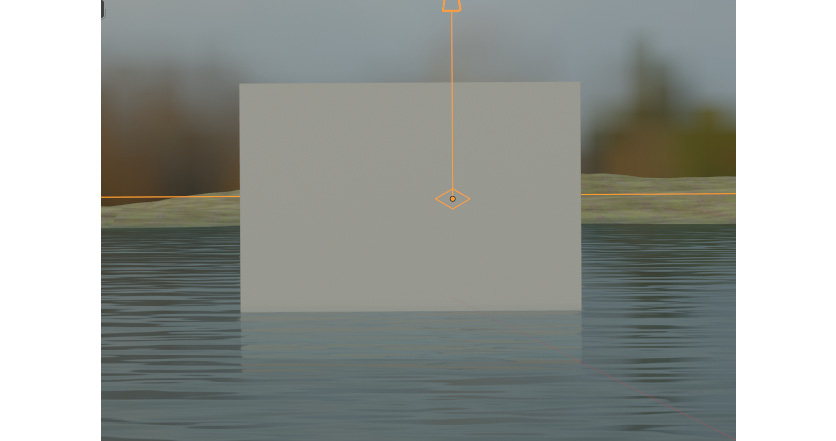
Figure 6.22: Object in the water
That finishes our water shader! In this section, we took what was just a flat water plane and turned it into a fully dimensional lake that interacts with our environment properly. This way, we can be sure the water in our scene is realistic, but also that it doesn't add too much to our render times.
Summary
At this point, I think our water shader looks amazing. Creating the more advanced version and being able to control our reflectivity through a light probe also makes this system of water shading more flexible. There's the ability to create any type of water, from ocean to swamp, depending on the scene. From this chapter, you should understand some of the principles regarding water shading in EEVEE and be able to apply them to other projects where you need water. Considering how much water there is in the world, you might find yourself using the water shader we made here a lot more than you'd think. We also dipped our toes into light probes and talked about how to optimize reflections for EEVEE.
In the next chapter, we're going to take a look at making our scene even more refined, by adding depth of field and baking some of the lighting so that EEVEE doesn't have to calculate it at runtime.