
In this recipe, let's use the SQL Server database as the backend. We will create the MyTask table in the SQL Server Express database.
For this recipe, let's create a WCF service project similar to the last recipe. Let's call this project Recipe3_WCFSQLService.
In this recipe, we will create the WCF Service project with SQL Server as the backend database. We use the ADO.NET Entity Framework to create all the entity objects, and then we add the methods to return the results to the client application.
- In this recipe, we will add SQL Server Express database to the project. Name it
MyTasks.mdf.
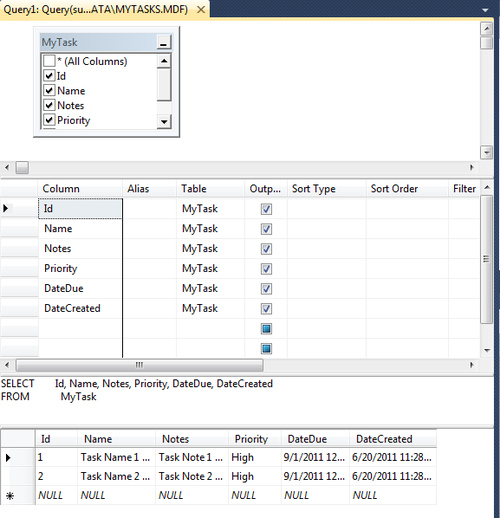
- Double-click the database to open it and then right-click on Tables to add a new table. Call this table
MyTaskand add the columns as shown in the following screenshot:
- After the table is created, add a couple of test records using insert statements; or you can directly enter them in the result grid.
- Now using the graphical view build a query by selecting all the columns from the table MyTask. When you run the query you should see two test rows from the table and this is illustrated in the next screenshot:
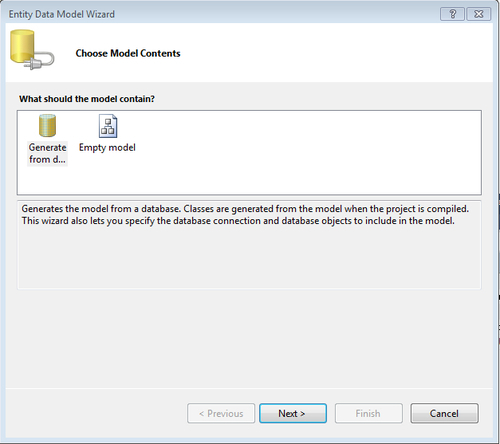
- Now let's use the ADO.NET Entity Data Model to generate proxy classes. Right-click the project and select Add New item. Select ADO.NET Entity Data Model from the dialog box:

- You are given a choice to create the model using either Generate from database or Empty model. Select the Generate from Database icon and click on Next. This will take you to another dialog box with a list of objects in the database.
- Next select the database objects. Select the Tables folder and check the MyTask (dbo) checkbox. Type
MyTaskModelunder Model Namespace. Click on the Finish button, as shown in the following screenshot:
- Once complete, the
MyTask.edmxfile is added to the project. When you open this file you should see the model as shown in the following screenshot: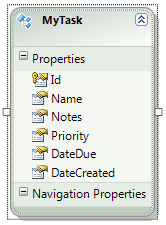
- Now add a new item and select the WCF Service template. Name the file
MyTaskService.svc, as shown in the following screenshot. When created, it addsIMyTaskServiceandMyTaskService.svcfiles.
- Open the
IMyTaskService.csfile and add aServiceContract:[ServiceContract] public interface IMyTaskService { [OperationContract] MyTask GetTask(int value); } - Now open the
MyTaskService.svcfile and implement theGetTaskfunction:public MyTask GetTask(int value) { MyTasksEntities _ctx = new MyTasksEntities(); return _ctx.MyTasks.Where(c=>c.Id == value).Single(); } - Now press F5 and run the project.
- Once the service is built, let's build the client application. Create a new Phone 7 Application and name it
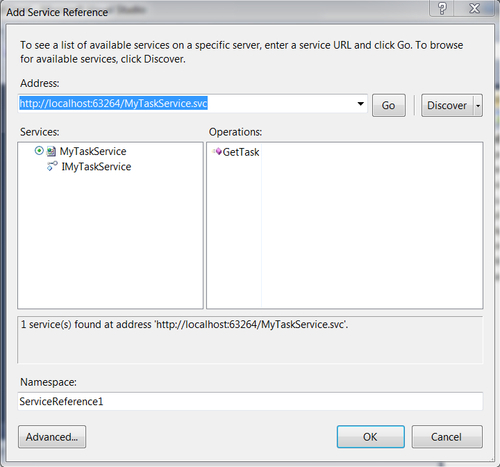
Recipe3_WcfSqlClient. - Right-click on Service References in the project and select Add Service Reference. Copy the service address into Address or click on the down arrow mark in the Address dropdown. This is shown in the following screenshot:
- Open the
MainPage.xamlfile and change theApplicationTitleandPageTitleproperties in theTextBlockcontrols:<!--TitlePanel contains the name of the application and page title--> <StackPanel x:Name="TitlePanel" Grid.Row="0" Margin="12,17,0,28"> <TextBlock x:Name="ApplicationTitle" Text="MY RECIPES" Style="{StaticResource PhoneTextNormalStyle}"/> <TextBlock x:Name="PageTitle" Text="WCF SQL EF" Margin="9,- 7,0,0" Style="{StaticResource PhoneTextTitle1Style}"/> </StackPanel> - Add a textbox, to search for the task
id, and a button to click in the first content grid:<!--ContentPanel - place additional content here--> <Grid x:Name="ContentPanel" Grid.Row="1" Margin="12,0"> <TextBox Height="72" HorizontalAlignment="Left" Margin="0,52,0,0" Name="textBox1" Text="" VerticalAlignment="Top" Width="460" /> <TextBlock Height="30" HorizontalAlignment="Left" Margin="14,32,0,0" Name="textBlock1" Text="Task Id:" VerticalAlignment="Top" /> <Button Content="Get Task Details" Height="72" HorizontalAlignment="Left" Margin="0,116,0,0" Name="button1" VerticalAlignment="Top" Width="243" Click="button1_Click" /> </Grid>
- Now add another Grid with the name
ContentPanel2. Add fourRowDefintionsand twoColumnDefinitions. Add fourTextBlockcontrols to display the task details:<!--ContentPanel - place additional content here--> <Grid x:Name="ContentPanel2" Margin="12,217,12,-13" Grid.Row="1"> <Grid.RowDefinitions> <RowDefinition Height="50"/> <RowDefinition Height="50"/> <RowDefinition Height="50"/> <RowDefinition Height="50"/> </Grid.RowDefinitions> <Grid.ColumnDefinitions> <ColumnDefinition Width="100" /> <ColumnDefinition Width="300" /> </Grid.ColumnDefinitions> <TextBlock Grid.Row="0" Grid.Column="0" Text="Name:" /> <TextBlock Grid.Row="0" Grid.Column="1" Text="{Binding Name}" FontWeight="Bold" Foreground="OrangeRed"/> <TextBlock Grid.Row="1" Grid.Column="0" Text="DateDue:" /> <TextBlock Grid.Row="1" Grid.Column="1" Text=" {Binding DateDue}" /> <TextBlock Grid.Row="2" Grid.Column="0" Text="Priority:" /> <TextBlock Grid.Row="2" Grid.Column="1" Text="{Binding Priority}" Foreground="Yellow"/> <TextBlock Grid.Row="3" Grid.Column="0" Text="Notes:" /> <TextBlock Grid.Row="3" Grid.Column="1" Text=" {Binding Notes}" /> </Grid> - Open the
MainPage.xaml.csfile, and add a reference to the WCF service we referenced at the top of the page:using Recipe3_WcfSqlService.ServiceReference1;
- Declare an object to context class
MyTaskServiceClientbefore theMainPageconstructor:public partial class MainPage : PhoneApplicationPage { MyTaskServiceClient _context; // Constructor public MainPage() { .. - Next, initialize the context object and add the event handler delegate as follows:
public MainPage() { InitializeComponent(); _context = new MyTaskServiceClient(); _context.GetTaskCompleted += new EventHandler<GetTaskCompletedEventArgs>(GetTaskCompleted); } void GetTaskCompleted(object sender, GetTaskCompletedEventArgs e) { if (e.Result != null) { this.DataContext = e.Result; } } - Add the button click event method that will call the
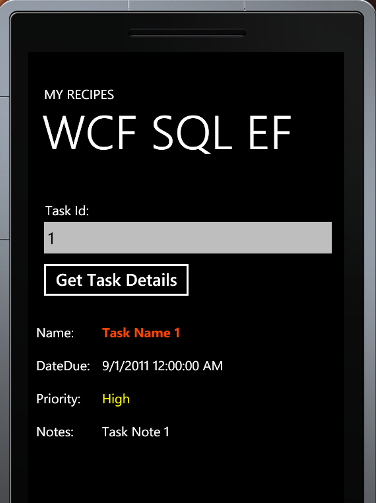
GetTaskAsyncmethod withidas the parameter:private void button1_Click(object sender, RoutedEventArgs e) { if(!String.IsNullOrEmpty(textBox1.Text)) _context.GetTaskAsync(int.Parse(textBox1.Text)); } - Press F5, type in a Task Id and click the Get Task Details button. You should see the result as shown in the following screenshot:
All the main functionalities in this recipe are added by the Entity Framework model. Open the MyTask.designer.cs file and you can see the code generated in two categories: Context and other Entities.
Context class takes care of connecting to the backend database and Entities creates the MyTask class out of the MyTask table with all the columns as properties.
In this recipe, we demonstrated how to get the results and display them. The Entity Framework has all the functionalities to update and delete as well. By updating the entity context we can easily update the backend database.