The most important work for our presentation is done. Just fill in the details and present them. Piece of cake!
What does filling in the details exactly mean? It's more than adding a few pictures to your prezi. It's a good idea to use images in your presentation, because you don't have to show in words what you tell. A picture can represent the exact meaning of the things you say, but it can also be a metaphor or a funny picture. Humor is great for presentations.
You don't have to use a picture for every word. Sometimes, you will use a combination of pictures and words. It's important to remember not to show too much at once. Most of the times, it's best to show just one picture or just one word.
Videos also work very well for presentations, because videos can put emotion in the presentations. They also create a quiet moment for you in the presentation when you can think of your next sentences or relax a bit.
So, have a look at your mind map in your prezi and go look for nice pictures and videos. Of course, you can take pictures and videos yourself, but you can also find a lot on the Internet. Make sure you don't violate any copyright laws. If you're not sure, don't use it. There are lots of stock photo sites out there where you can buy (cheap) fantastic material. We bought some pictures from iStockphoto.com.
As a metaphor for the future, we bought a nice picture of a crystal ball. It's a nice effect to show the crystal ball not in the beginning of the presentation but at the end—as a surprise. We'll start the presentation with our title The Future.
We are going from mind map to story. So, let's write down the flow of our presentation first.
We'll start with the text The Future. To make a jump to the past, but with a relation to the future, we'll show a small part of the famous movie Back to the Future. A few seconds is enough to start our presentation in a nice manner. Then, we'll talk a bit about the future, we'll show a picture of Google Glass, and we'll ask the audience what comes up in their mind when they think about the future. Next, we'll tell about our idea of future and how we think about our family, work, study, and sports in the future. We'll use this as an example for the audience. Then, we'll show the crystal ball as a metaphor because we can't predict the future. Finally, we'll ask the audience to think about their future. We could also ask the audience to grab a piece of paper and write it down to make the presentation more active.
Now, it's time for us to write down the answers to the three important questions we haven't answered yet:
- What do I want to achieve with this presentation? (goal)
- What do I want the audience to remember? (message)
- Who is the audience?
The answers are as follows:
- My personal goal is to create a better presentation using brainstorming techniques and to make the audience more active during my presentation.
- I want the audience to say after my presentation, "This wasn't a boring presentation at all. It was actually really nice!"
- My colleagues are the audience.
This is how we create the prezi. We'll start by explaining how we made the beginning and the end of the prezi.
Tip
What is a path?
With a path you create your storyline in Prezi. You can add every object to the path. When presenting, Prezi automatically zooms in to the objects you added to the path and puts them straight. Your path is the flow of your presentation. You can test your path with the Present button. You can click through it with the arrow keys or by using a remote.
To add an object to the path, you first open the path by clicking on the Edit Path button on the left-hand side of the screen. Then, just click on the object you want to add to the path and Prezi automatically adds the object to the path. A thumbnail appears for every step in the path. You can drag the thumbnails to change to order of the path.
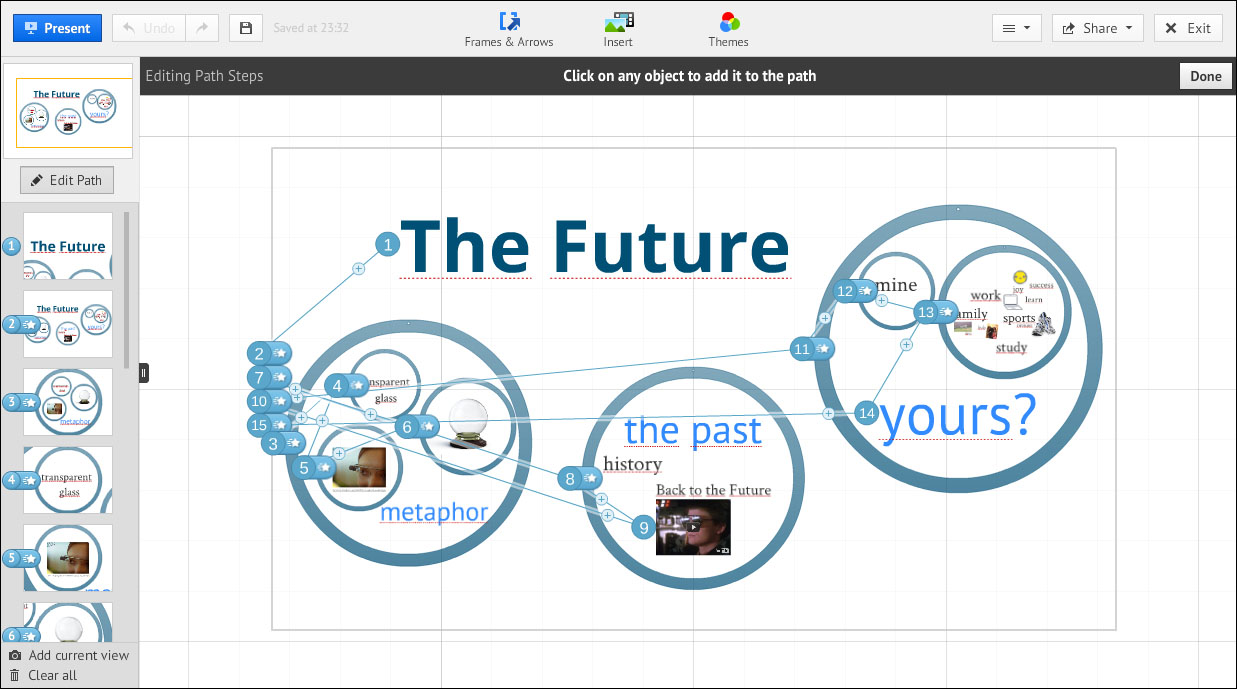
The following steps show how to create the path step 1 and the last part of the presentation:
- Insert a image of a crystal ball in your prezi.
- Make it big and place the crystal ball under the mind map. You can also work inside the mind map. However, because this is the most important picture for the presentation and it's the end point of the prezi, we'll start a new prezi under the mind map.
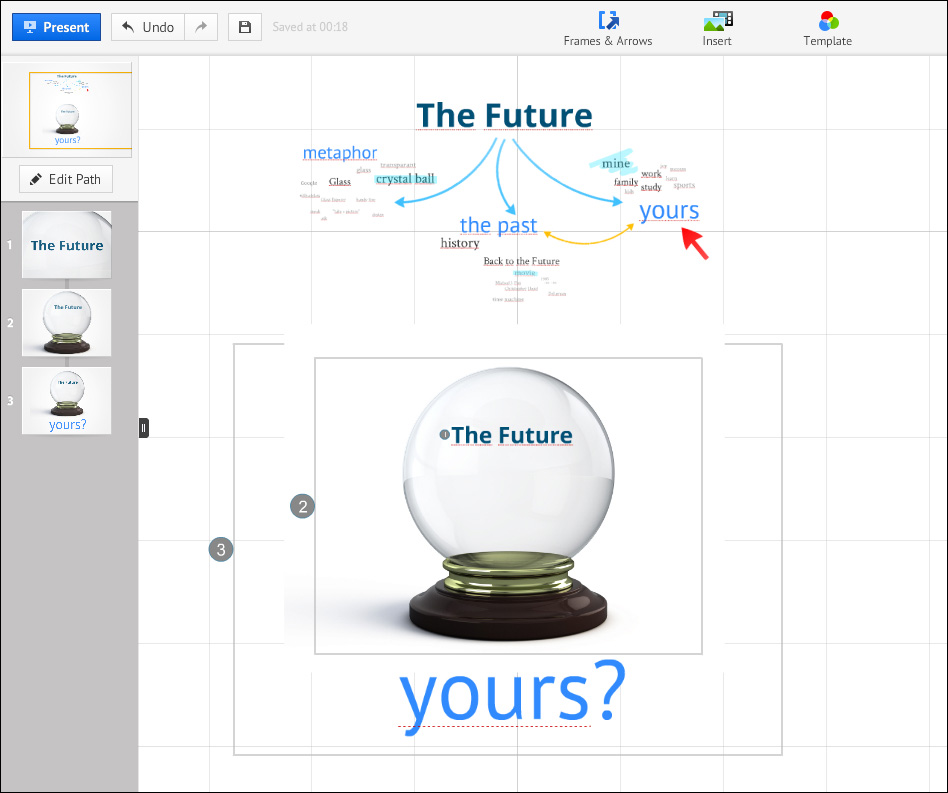
- Move (or copy) the text The Future inside the ball. Then, put the text yours under the crystal ball.
The crystal ball will be the last image of the presentation (zooming out) with an extra zooming out (extra surprise) the text yours? will become visible. Let's test this first.
Tip
Invisible frames
With frames, you can visually structure the content. This provides your audience with clarity and overview. Frames are also the stepping stones of the path you create to go through your prezi. However, sometimes you don't want all your frames to be visible, because a visible frame can also distract the audience. Then, you can create invisible frames. It works the same as the visible frames, but you don't see these frames in the presentation mode.
You create an invisible frame by selecting Draw Invisible Frame from Frames & Arrows and then clicking-and-dragging the frame on the canvas.
- Draw an invisible frame around the crystal ball
- Draw an extra invisible frame around the crystal ball and the text yours?.
- Add the text The Future and the two invisible frames to the path
- Test the path via the Present button
In the following screenshot, you'll see the path we've made so far in the Edit Path side bar on the left-hand side of the screen:
The beginning and the end of the presentation are ready. Now it's time to fill in the middle part.
The following steps should be performed to create path step 2:
- Go to YouTube.com, search for "back to the future" and look for a nice fragment of video.
- Copy the address of the YouTube movie and return to your prezi.
- Navigate to Insert | YouTube video... and paste the address of the video in the text field.
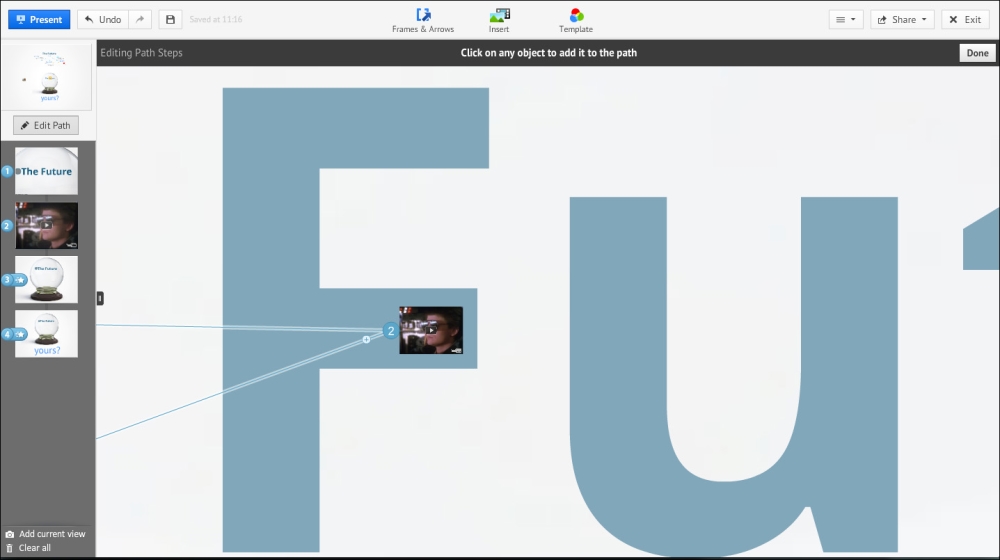
- Make the video smaller with the transformation tool to make it fit inside the character F.
- Before you zoom out, add the video to the path and move it to path step two, as shown in the following screenshot:
The following steps should be performed to create path step 3:
- Zoom out completely by clicking on the small house on the right side of the screen.
- Navigate to Insert | Image, type
google glassin the search field, and mark the checkbox Search only images licensed for commercial use, as shown in the following screenshot: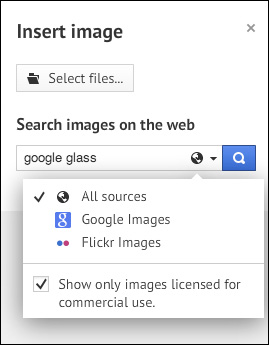
- Choose a picture and drag it on the canvas.
- Most of the pictures you'll find in this way are pictures from Wikipedia. To make sure that we are allowed to use this picture, we also search for this picture on the Internet using the query
google glass wikipedia. We find the source of this picture, read the license, and add the source to the picture. - Add the picture to the path and move it to path step 3.
The following steps should be performed to create path step 4:
- Now, copy (or move) the text of the main topic mine into the crystal ball. We then change the word mine to my future.
- Draw an invisible frame around all these words and add it to the path.
- Move it to path step 4.
To make our personal story more lively, we add a few pictures and a video to it. We also use some Prezi symbols (the computer and the smiley). You can find these symbols by navigating to Insert | Symbols & shapes.... We used the category Stickers.
For the section family, we copy two photo frames from a Prezi scrapbook template. To do this, perform the following steps:
- Add a new tab in your browser by using the Ctrl/Command + T keys.
- Find the scrapbook template on www.prezihotshot.com, open it in the new tab, and make a copy of this prezi by clicking on the button Make a copy. The scrapbook prezi will be copied to your account.
- Open the prezi in the editor by clicking on the Edit button.
- Select a photo frame and use the Ctrl/Command + C keys to copy it.
- Click on the tab of your original prezi and paste the copied photo frame in it with Ctrl/Command + V.
Sometimes, we add the pictures or text directly to the path. We first draw an invisible frame around it and then add the invisible frame to the path, as shown in the following screenshot:

Of course, we need to remove our mind map from the canvas. The fastest way to remove the mind map is to hold down the Shift key and click and drag a rectangle around the mind map. Then, click on the Delete key.
You can also keep it in a separate prezi file if you want to save it. First, select the mind map by dragging a rectangle around it while holding down the Shift key. Then, copy the mind map with Ctrl/Command + C. Open a new prezi and paste the mind map in it with Ctrl/Command + V.
Our story in prezi is now complete. Watch it online at www.prezihotshot.com.
We went from a brainstorm with lots of words to a prezi with images, video, and a few words. In this task, we finally created our prezi.
We started with a nice image of a crystal ball. We started the prezi and made the last part of the prezi first. The crystal ball is the surprise at the end of the prezi.
Then, we filled in the content of our presentation. We used images and videos and created a nice flow.
If you use frames, it's even easier to fill in the details of your presentation and create a path. You can use the frame-based mind map as the basis and you can leave it as it is. You can only add pictures and videos to it and create a path.
Draw an invisible frame around the whole mind map and add this frame between every main topic in the path. This gives your audience an overview before you go to the next subject. For the overview, it's better to use an invisible frame; otherwise, this frame would attract too much attention and it also would bound the information too much. Now, the structure remains open and there's more attention for the three visible circle frames that represent the subjects.
Of course, you can also watch this prezi online at www.prezihotshot.com.