STREET SCENE
When choosing an architectural scene to draw, think of how you will frame what you see. Is this a large scene that will take up the whole page, or do you want to focus on one portion of the scene? Also note if there is perspective involved or if you have a flat view of the scene.

When drawing a busy one-point perspective scene, start with a quick frame to simplify things. Lightly sketch in a frame and the horizon line. Very loosely sketch where the buildings are, and use a ruler to double-check that they follow the lines of perspective.

Once the buildings and guidelines are in place, start adding more details. The windows and doors should all follow the perspective guidelines.

Start adding more details to the entire scene: trees, eaves on the windows or doors, and any signs or details on the buildings.
Once all the details are sketched out, grab a pen and go over the lines. Take your time, especially when outlining small details.

Start building up the shadows with hatch marks and crosshatch marks. The direction of your lines can be used to show the perspective of the scene as well. Don’t feel like you need to draw every single brick or crack along the walls. You can simplify the scene as much as you want! If there is a specific focal point that you want the viewer to focus on, add the most detail to this point to draw attention. When the pen is dry, erase any visible pencil marks.
Watercolor pencils are a great option when you encounter more detailed architectural details, especially brickwork. While you can still achieve great detail with regular colored pencils, watercolor pencils can speed up the process. Start by outlining your window lightly with pencil. Begin with the basic shape; you will add the bricks after establishing the shape and size of the window. Keep an eye out for any instances of skewed perspective where the frame or bricks are angled toward the sky, the viewer, or the ground. This will vary according to the angle from which you’re viewing the window. Still working with regular pencil, lightly sketch in the bricks. Bricks are usually a consistent size and shape, but there are, of course, some variations. Draw the angles of any bricks on the arches, sides of the windows, and ledges. With watercolor pencils, roughly shade in the bricks all over with light brown and tan. You can do this by laying the lead on its side or working with dull pencils. Don’t worry if pencil marks show; these will be blended with water. Do your best to avoid getting any color on the windowpanes. Using a brush with clean water, blend the first layer of colors. If you’re using regular drawing paper, keep in mind that you will only be able to add a couple layers of water before your paper begins to buckle or break down. With a medium gray pencil, go over your original pencil lines to shade in the grout between the bricks. You can also shade in the underside of the arch and the sides of the window frame. This is best done with a dull pencil instead of a freshly sharpened one. Use light blue to add a little color to the windowpanes, preserving the bright white paper for the highlights. Using red-browns, yellow ochre, and varying shades of gray and brown, add texture to your bricks. Not all the bricks need to be identical, so you can layer in the color sporadically to show the varying colors. With a small brush and a little water, loosely blend your marks on the bricks. You can blend the windowpanes as well. Add any last shadows to the grout and under the arch and ledge.BRICK WINDOW


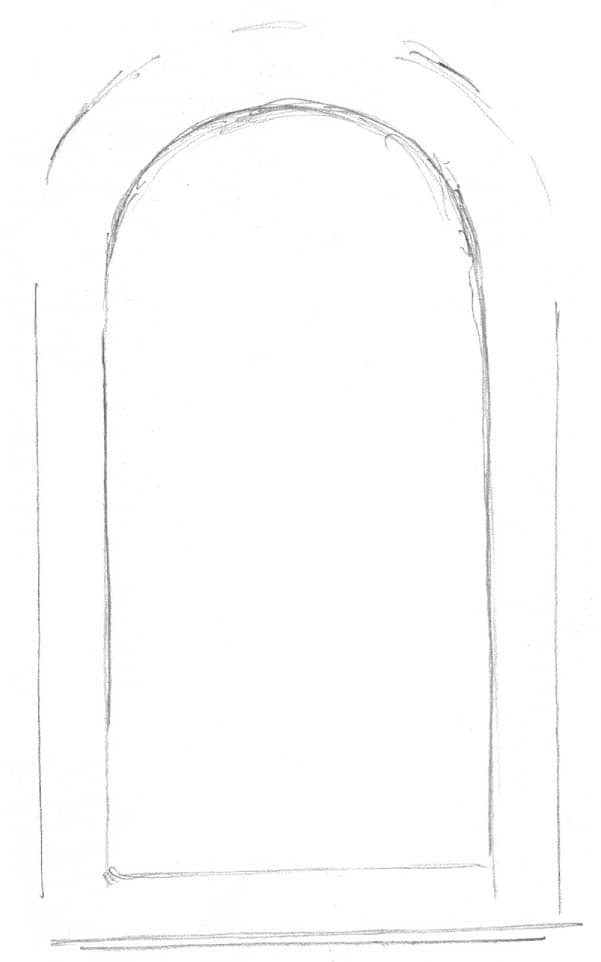
Doors and doorways also make great sources of inspiration. Especially in older architecture, doors appear massive and ancient! Many include lots of unique textures and details. Break down the door into its basic shapes with pencil first. For this arched doorway, start with the simple lines of the outer arch. From this vantage point, the door is at an angle, so you can see inside the archway over the door. This inner archway matches the first outer shape, but it’s pushed back into the frame a little bit. Lightly add details to the door. Sketch the final details on the door and the brickwork along the upper arch. Pay attention to the angle of the bricks in the inner arch, and note the perspective skew. Loosely sketch in the first layers of color on the bricks, columns, and door. With the same colors as before, press a little harder to add another layer of color in areas that need more shadows. In areas that need to be even darker, start layering in darker shades and dark gray. With dark brown, begin adding more defined shadows and details to the brickwork. Make sure the brick faces along the inner arch all follow the proper lines of perspective. Using a black pencil, define the edges of the bricks and along the columns. You can also use light layers of black on the door for shadows or even a darker shade of blue.DOORWAY


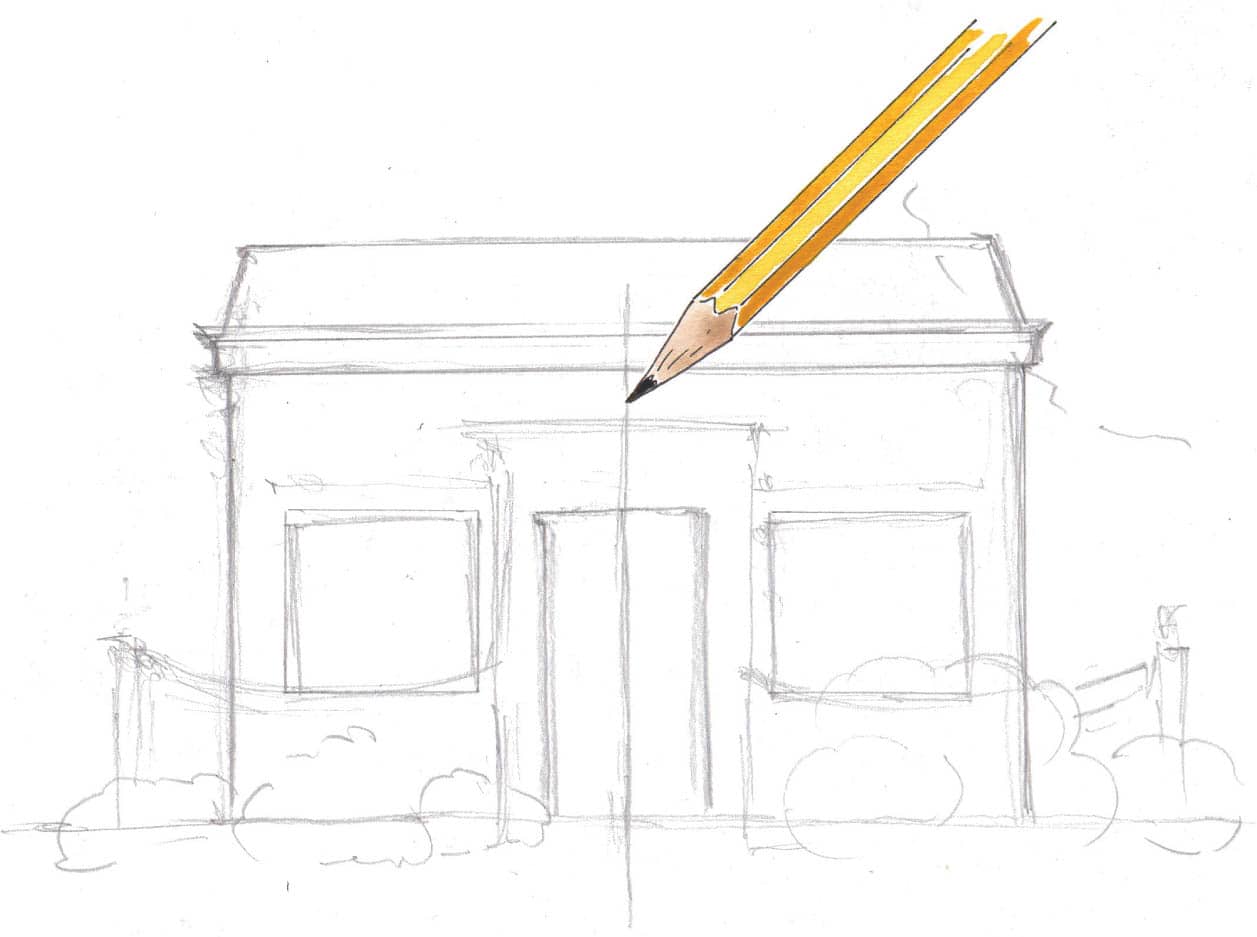
Drawing houses or buildings with a flat view can be fun as well, and they make lovely portraits. You can simplify the subject into basic shapes and give it a more illustrated look with pen and watercolors. Start by breaking the house down into basic shapes—rectangles, trapezoids, and squares. Be loose and light with your marks until the proportions and sizing are right. You can sketch freehand first, before going in with a ruler to straighten the lines and angles. Next divide the building in half. This particular house has a symmetrical facade, so the line down the center will help determine if each side is even and ensure that the windows and doors are symmetrical. Lightly start marking in any exterior details, such as shrubs, fences, trees, windows, etc. Start breaking it down into more detail by adding windowpanes on the door and posts to the fence. Finish the details with pencil and trace over your lines with a fine-point waterproof pen. These lines can still be loose and choppy to give your drawing a more illustrative quality. When the pen is dry, erase any visible pencil marks. Finish with watercolor paint or colored pencils. Remember to start with the lightest colors before building up shadows. Preserve the white of the paper for the highlights.HOUSE


For this landscape, create a floating frame because the mountains in the distance are naturally framed by two foreground oak trees. When drawing a scene with mountains and rolling hills, there likely aren’t many perspective lines to follow—the key is to keep the proportions of the mountains and hills relative to one another. Sketch in the horizon line where the land meets the base of the mountains, and lightly sketch in the mountain range. From the base of the mountains, sketch each hill in order as they approach the bottom of the page. These lines can be loose and sketchy, overlapping with the lines for the trees along the right and left sides. Start adding more detail with your pencil. These marks can still be loose and rough. Define the mountain range and skyline more, making marks to indicate changes in direction of the ridges. On the valley floor, sketch where the trees will go. For the hills closest to you in the foreground, add trees and vineyards. Compared to the trees on the valley floor, these hillside trees should be more defined and detailed, since they’re closer and more visible. The house on this hill has a little bit of two-point perspective, so use a ruler to keep the lines of perspective straight. Start building up the shadows in the scene, using long hatch marks to indicate their direction. The lines can curve over the hills to show their roundness. Don’t add any pencil marks or shading where there are highlights. To get the shadows darker, switch to a softer lead pencil—anything from a 4B to an 8B is great. With your pencil on its side, you can smooth out the shadows so they’re soft and gradual. As you add the shadows to the hills and trees closest to you, build up the layers more or use a softer pencil so they’re darker. Use a 6B on the closest hills and save your darkest pencil for the two framing trees.LANDSCAPE (IN GRAPHITE)


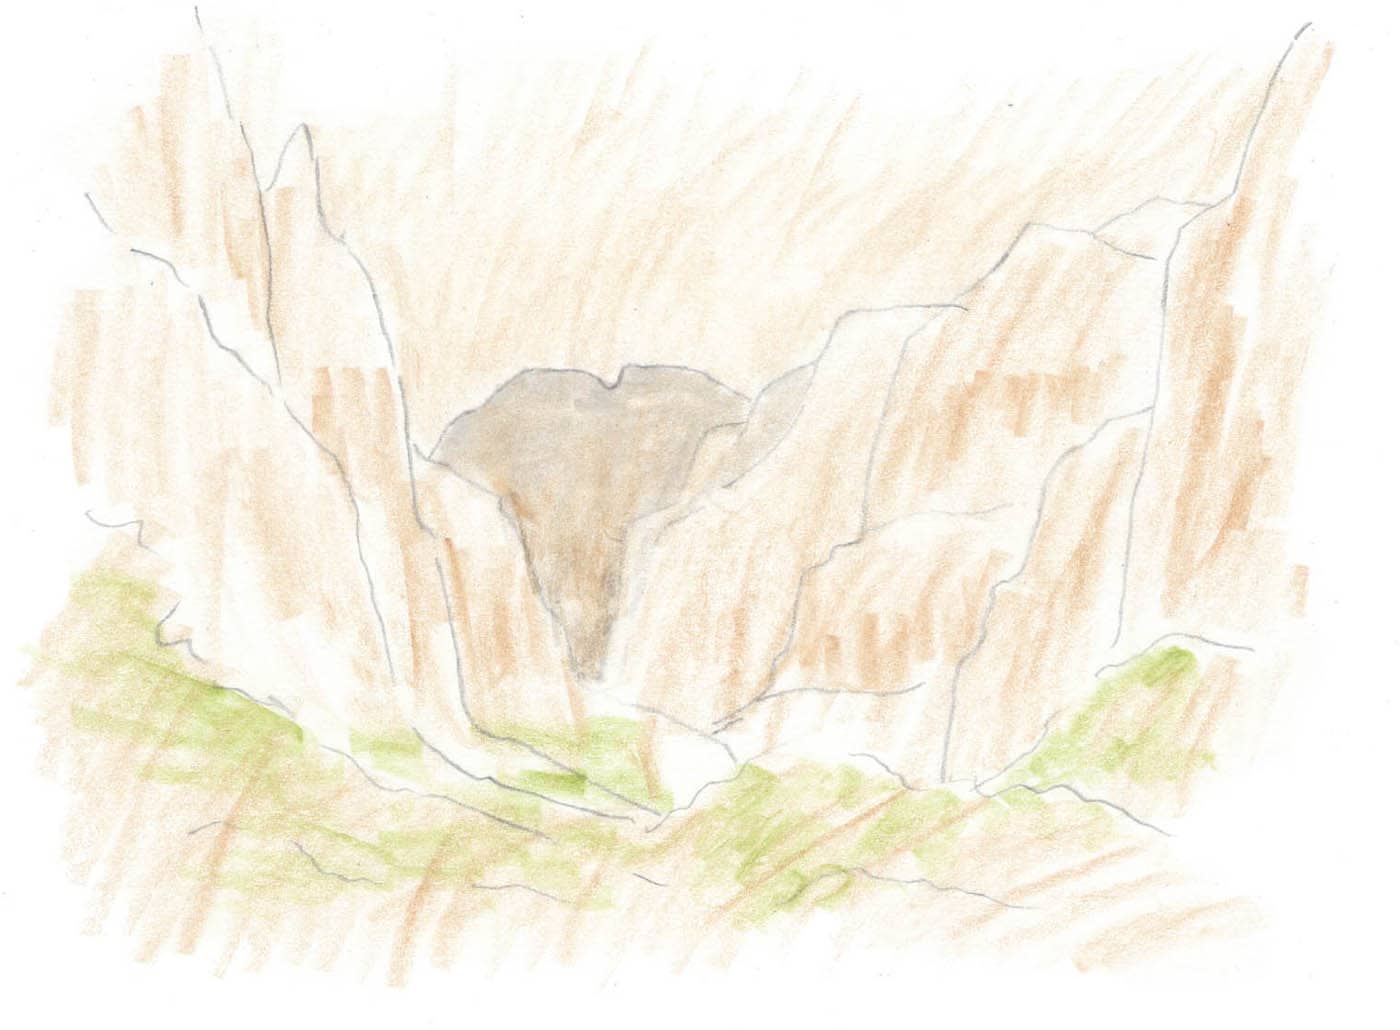
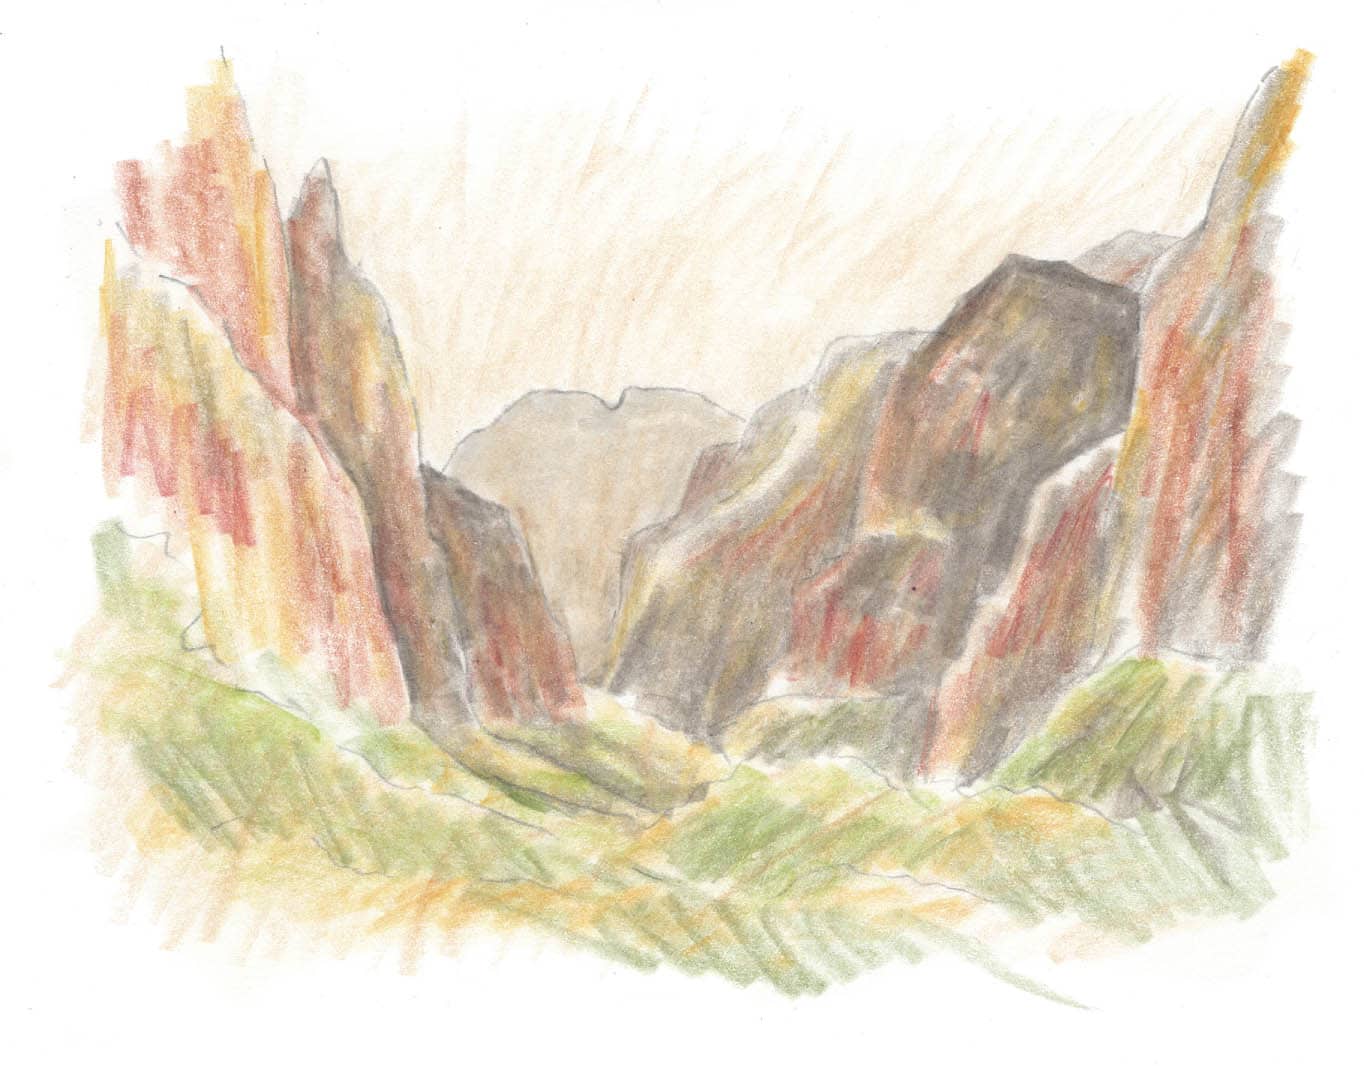
The colors of the rock formations of Zion National Park in southern Utah are a great exercise for color blending and showing the depth of the canyon. In this landscape study, you’ll work from the distance to the foreground, layering in darker colors as you go. In regular pencil, lightly and loosely sketch the rock faces and layers as they descend into the canyon. Quickly and loosely layer light tan all over the scene. It may appear dark, but this color will end up as the highlight color after you layer in all the other colors. Use the side of your pencil lead or work with a dull pencil. Using sap green, start adding quick gestures of color on the foliage along the bottom of the canyon. With light gray, lightly shade in the ridge farthest in the distance. Make sure you use light gray, and shade it in lightly! It will look dark on the page at first, but you will build up the colors and shadows to make it appear lighter in the end. Moving on to the next-closest ridges, shade them with a slightly darker gray. Build up the yellows and browns in the other ridges, and even in the foliage and trees along the bottom. Time to make the foreground ridges pop! With dark grays and rich red-browns, make quick and bold strokes to show texture and layer in the shadows. As you layer in these darker colors, that first layer of light gray on the distant ridge will slowly recede into the back of the scene. By leaving that first layer light, subtle, and without texture, you naturally push it into the distance and build up the atmosphere of the scene. Adding more texture to the closer ridges and the plants below will bring these areas closer to the foreground. Continue to build up the shadows in the ridges closest to the viewer. You can add more gray and even light purple to the ridges in the middle zone, but try to keep the texture to a minimum in those areas to push them back. With your darkest browns and some black, burnish in the darkest shadows on the rocky cliffs and the foliage below.LANDSCAPE (IN COLOR)


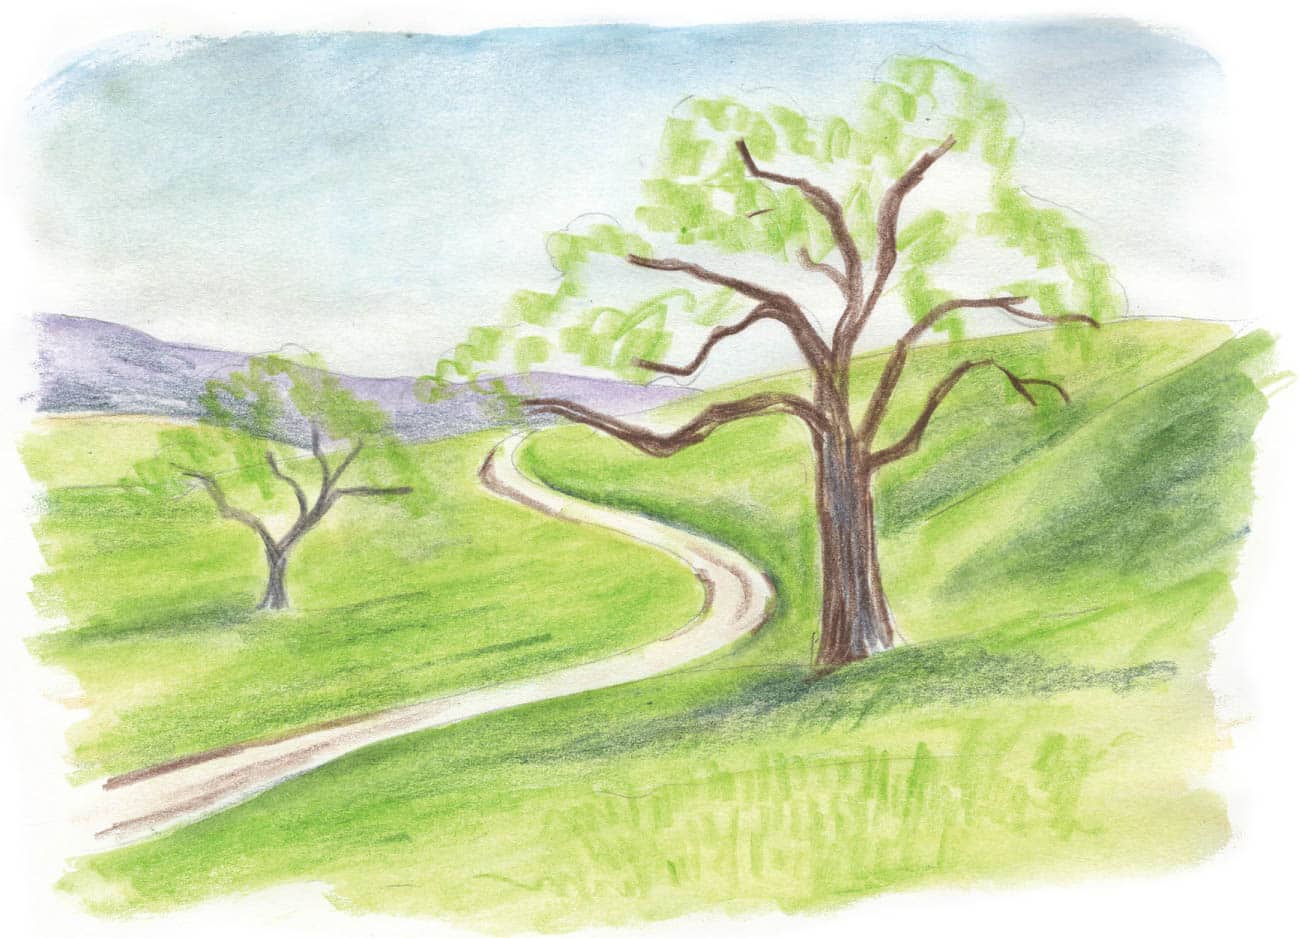
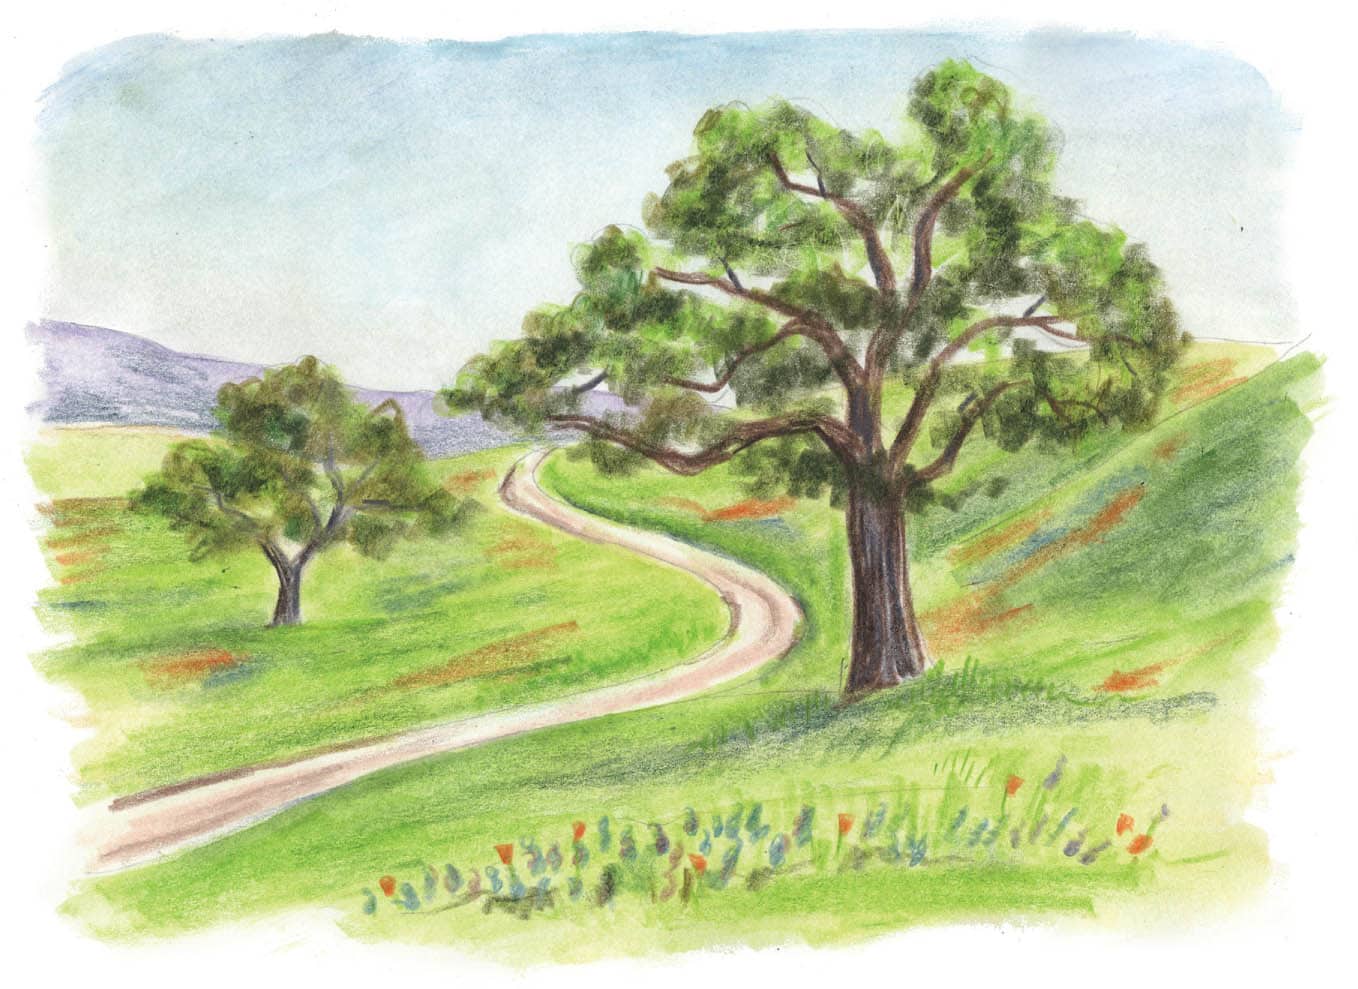
Try this landscape using watercolor pencils! With watercolor pencils, you can quickly add a variety of colors to the page and blend them together to build atmosphere in your piece and background layers. Once dry, you can add the fine details to make your landscape really stand out. Sketch your scene lightly in pencil. Your trees can overlap the horizon line and other details, since these will be added last using darker colors. Keep in mind that if you use regular paper and add too many layers of water, your paper will buckle! If you plan to add more than two layers of water, use thick card stock or watercolor paper. With dull pencils, or using the lead on its side, loosely layer in the first layers of light green, yellows, and dark green on the grassy hill. Add purples and blues to the sky, keeping the darker concentration of blue toward the top of the sky because the sky lightens as it nears the horizon line. With a brush and clean water, blend each area. Do the sky first, since it’s the lightest, and then move on to the darker areas. Try to leave the trunks of the trees blank so you keep the white paper to help add highlights to the bark. You can also achieve a similar look by blending oil-based pencils with some distilled turpentine. When your paper is dry, add more layers of green into the hills to build the shadows and texture and make the colors richer. With shades of brown, start coloring in the trunks of the trees and branches. Loosely add in some of the foliage of the trees with light greens first. Add in the darkest colors in the tree trunks, branches, and foliage. To add wildflowers along the hills, use a dull pencil or the side of your pencil for the flowers on the distant hills. Use a sharpened pencil for the flowers, grass, and details in the foreground.LANDSCAPE WITH TREES