
Now that we can add a new entry to the developers' collection, let's show a list of all the developers on the front page of the "Coders repository".
Open the file ch6/ts/step-1/home.ts (or step-2, depending on your progress during the past section), and enter the following content:
import {Component} from '@angular/core';
import {DeveloperCollection} from './developer_collection';

@Component({
  selector: 'home',
  templateUrl: './home.html'
})
export class Home {
  constructor(private developers: DeveloperCollection) {}

  getDevelopers() {
    return this.developers.getAll();
  }
}
There is nothing new to us here. We extend the functionality of the Home component by providing an external template and implementing the getDevelopers method, which delegates its call to the instance of DeveloperCollection that is injected in the constructor.
The template itself is something that we're already familiar with:
<table class="table" *ngIf="getDevelopers().length > 0">
  <thead>
    <th>Email</th>
    <th>Real name</th>
    <th>Technology</th>
    <th>Popular</th>
  </thead>
  <tr *ngFor="let dev of getDevelopers()">
    <td>{{dev.email}}</td>
    <td>{{dev.realName}}</td>
    <td>{{dev.technology}}</td>
    <td [ngSwitch]="dev.popular">
      <span *ngSwitchCase="true">Yes</span>
      <span *ngSwitchCase="false">Not yet</span>
    </td>
  </tr>
</table>
<div *ngIf="getDevelopers().length == 0">
  There are no any developers yet
</div>
We list all the developers as rows within an HTML table. For each developer, we check the status of its popular flag. If its value is true, then for the Popular column, we show a span with the text Yes, otherwise we set the text to No.
When you enter a few developers in the Add developer page and then navigate to the home page, you should see a result similar to the following screenshot:
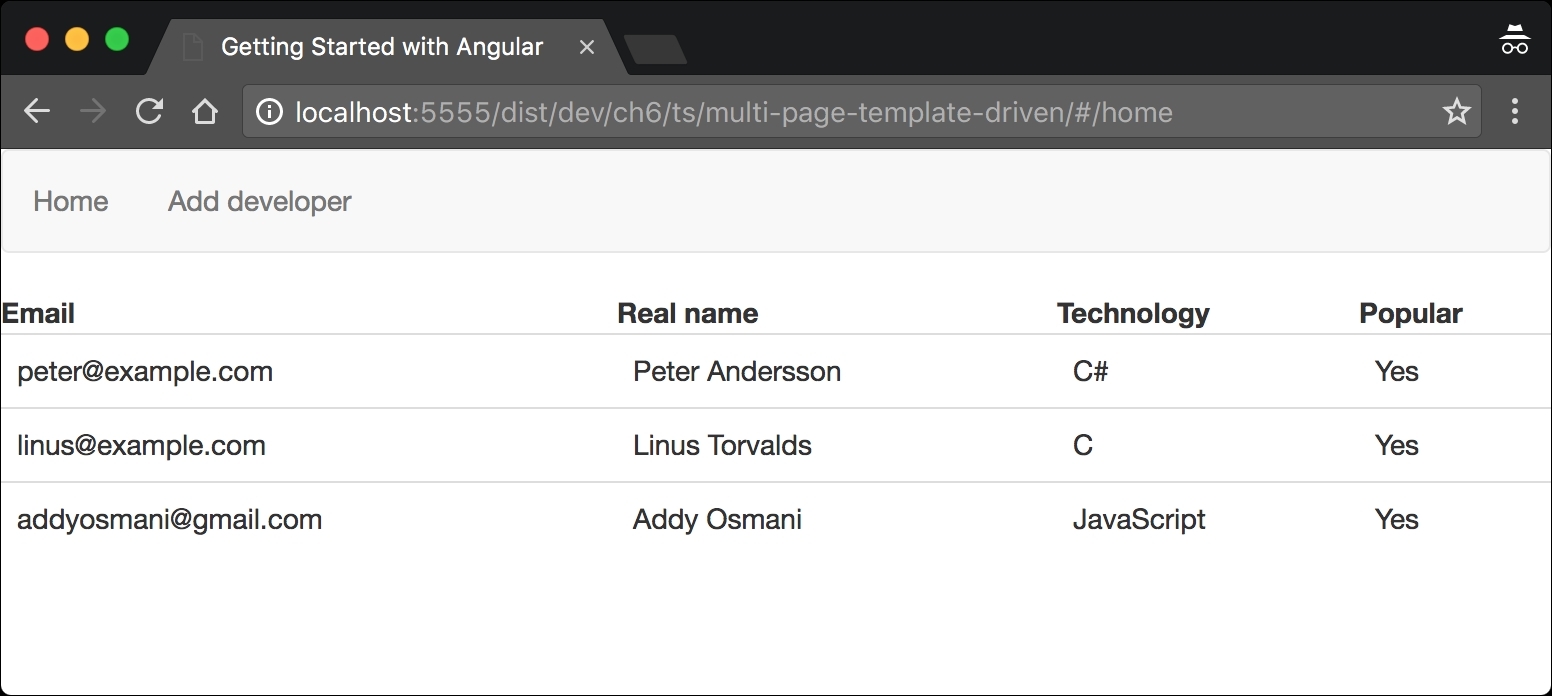
Figure 7