
Chapter 4
Embracing JavaScript Variables
In This Chapter
![]() Creating and using variables
Creating and using variables
![]() Using Boolean values
Using Boolean values
![]() Using numeric values
Using numeric values
![]() Using strings
Using strings
![]() Defining data collections with arrays
Defining data collections with arrays
The purpose of most applications is to work with data in some way. Data are defined as any kind of information you want to interact with in some fashion — anything from simply displaying it to creating new information or manipulating existing information to see it in new ways. Variables provide storage containers for data. You store the data until you need to use it in the application, take the data out, do something with it, and then put it back into the variable when you’re done. The term variable is appropriate because you can store different data items in a variable — the content is, well, variable. The variable content changes to meet application needs. This chapter helps you understand how variables work in JavaScript and how you can use them to perform tasks within your application.
The chapter divides variables into a number of types. Just as you wouldn’t normally store food in shoe boxes or cleaning equipment in jewelry boxes, you use different kinds of variables to store certain types of data. Knowing which kind of container to use for your data is an important part of keeping it safe.
In addition, this chapter discusses one sort of data collection. Think of a collection in the same way as you think of storage shelves. Each shelf contains boxes, each of which contains an item. The kind of collection discussed in this chapter is the array, a type of collection supported by most programming languages. Arrays provide simple, yet effective, means of collecting like data together so that you can access it with greater ease — just as using shelves makes it easier to locate and access items in boxes.
Understanding Simple Variables
The title for this section should tell you something. Yes, there are multiple variable types. Simple variables act as storage containers and nothing more. In some cases, that’s all you really need — nothing fancy, just a place to put your data for a while. JavaScript also supports a number of complex variable types, such as objects and arrays, but for now, think about the beauty of simple storage. The following sections describe how you can use simple variables to meet a wide range of application needs.
Seeing variables as storage bins
Some developers become confused when working with variables because they make the variables too complicated. A variable is nothing more than a storage bin. If you look in your computer’s memory, a variable is simply a series of electrical impulses, 1s and 0s, placed in a certain physical location for later retrieval. In short, a variable really is a storage bin — a place to put data.
In the Discovering variable types section, later in this chapter, you discover how JavaScript differentiates between kinds of variables. The differentiation is for your benefit. As far as the computer is concerned, data consists of 1s and 0s stored as electrical impulses in a specific physical location in memory — nothing more. Humans need to categorize the data to see it in a useful way, but the computer doesn’t.
 It may surprise you to learn that the computer has no concept of characters, Booleans (true/false values), or any other human data construction. Everything is 1s and 0s — even characters. When you see the letter A onscreen, the computer sees it as the number 65. Actually, the computer sees the binary version of 01000001. A lowercase a is actually a value of 01100001 (97 decimal) — the computer doesn’t even have any concept of uppercase or lowercase letters.
The point is that when you think about variables, you see all sorts of shades of meaning. However, you also need to remember that variables are simply physical memory locations to the computer that just happen to have a particular sequence of electrical impulses in them.
Declaring variables
To use a variable, you must tell JavaScript to create it. After all, when you want to store something in a box in real life, you must first acquire the box. There's no JavaScript store where you go to buy a box — you simply tell JavaScript you need one by using the var keyword, followed by the variable name. To place something in the box immediately, you use the assignment operator (=), which assigns the value to the box, and you must also provide what you want to store in the variable.
Here's an example that creates a variable named AVariable and stores the value 5 in it. (You can find this example in the Chapter 04Simple Variables folder of the downloadable code as DeclareVariables.HTML.)
<!DOCTYPE html>
nbps;
<html>
<head>
<title>Declaring Variables</title>
<script language="JavaScript">
function UseVariable()
{
// Create a variable.
var AVariable = 5;
// Display it onscreen.
alert(AVariable);
}
</script>
</head>
nbps;
<body>
<h1>Declaring Variables</h1>
<input type="button"
value="Click Me"
onclick="UseVariable()" />
</body>
</html>
When a user clicks the Click Me button, the application calls UseVariable(). The UseVariable() function creates AVariable and places the value 5 in it. The function then calls on alert() to display the content of AVariable onscreen where the user sees a message box with the value 5 in it.
 Unlike many programming languages, JavaScript doesn't require you to do anything fancy to create a variable. All you need to do is use the
 var keyword, followed by a variable name. To assign a value, you add an equals sign (=) followed by a value.
Understanding the computer view of variables
Here’s an example of how the computer looks at data: You may have a variable that contains the number 23 and another variable that contains two characters, 2 and 3. The two characters form a string — a string of characters. The computer sees the number 23 as 00010111. However, it sees the string 23 as 00110010 00110011. That’s two separate memory locations — one for each character. The number and the character form of 23 have no distinction to the computer, even though the values are quite different. If you confuse them, you would create errors in your application.
Discovering variable types
As previously mentioned, the notion of a variable type is for your convenience — the computer doesn’t actually understand variable types. To make things easier for developers though, JavaScript assigns a type to variables. A variable can hold characters, for example, or numbers. Each variable has its own variable type. You need to know about variable types to aid in debugging. In addition, using variable types makes it less likely you’ll use the data incorrectly by confusing a number with a letter. The computer sees the data differently, but you may not (see the “Understanding the computer view of variables” sidebar for details).
JavaScript uses a simple variable type system. For example, you need to know only that a variable contains a number — not what type of number is stored there. Some programming languages make a distinction between integer values (those that are whole numbers) and floating point values (those with a decimal part), but JavaScript doesn’t.
You also need to know that JavaScript is a dynamic language, which means that you can assign values of different types to the same variable. JavaScript actually changes the type of the variable to match the data it contains. It’s best though if you place a single type within a given variable to avoid becoming confused.
The following list describes the types that JavaScript supports:
![]() String: A string holds characters. Each character is a letter, like the letters you see in this book. You must enclose string values in either double or single quotes. For example,
String: A string holds characters. Each character is a letter, like the letters you see in this book. You must enclose string values in either double or single quotes. For example, var Name = "John Doe" and var Name = 'John Doe' both assign the string, John Doe, to the variable Name. You can also combine quotes to achieve special effects. For example, var Statement = 'My name is "John Doe"' assigns the string My name is "John Doe" to the variable Statement. Notice that John Doe is enclosed in double quotes.
![]() Number: Humans see all numbers as being alike. Even though 4 is slightly less than 4.1, humans see both as numbers. A computer sees 4 as an integer and 4.1 as a floating point (real) number. The two values are actually handled by different parts of the computer processor. Because of this difference, most computer languages provide separate types for integers and floating point numbers. However, like humans, JavaScript sees all numbers as being the same. Whether you create an integer or a floating point value, JavaScript sees the variable as a number. To create a number, you provide the usual variable declaration with a number that isn't enclosed in any form of quote like this:
Number: Humans see all numbers as being alike. Even though 4 is slightly less than 4.1, humans see both as numbers. A computer sees 4 as an integer and 4.1 as a floating point (real) number. The two values are actually handled by different parts of the computer processor. Because of this difference, most computer languages provide separate types for integers and floating point numbers. However, like humans, JavaScript sees all numbers as being the same. Whether you create an integer or a floating point value, JavaScript sees the variable as a number. To create a number, you provide the usual variable declaration with a number that isn't enclosed in any form of quote like this: var MyNumber = 15.
![]() Boolean: Computers need to make decisions based on user input, data, or application state. Decisions rely on Boolean variables, which are either true or false. You can use various statements to test the truth of a Boolean variable or a Boolean expression (an equation that results in a value of
Boolean: Computers need to make decisions based on user input, data, or application state. Decisions rely on Boolean variables, which are either true or false. You can use various statements to test the truth of a Boolean variable or a Boolean expression (an equation that results in a value of true or false).
Boolean variables are named after George Boole, a 19th century mathematician you can read about at http://www.buzzle.com/articles/boolean-origination-history-and-origin-of-boolean-logic.html.
![]() Array: An array is a kind of collection. You can create a collection of any sort of variable that JavaScript supports. For example, an array of strings can contain the client name list. Arrays are extremely useful collections that you use often in JavaScript to conveniently manipulate data in ways that would otherwise require a lot of code (and head scratching).
Array: An array is a kind of collection. You can create a collection of any sort of variable that JavaScript supports. For example, an array of strings can contain the client name list. Arrays are extremely useful collections that you use often in JavaScript to conveniently manipulate data in ways that would otherwise require a lot of code (and head scratching).
![]() Object: Most real-world data is complex. For example, when you see a customer, the customer has a name and other features (properties), you can perform certain tasks for the customer (methods), and the customer can make requests of you (events). To model real-world data, computers require objects. Using objects makes it possible to describe the real-world data in terms that a computer can manipulate.
Object: Most real-world data is complex. For example, when you see a customer, the customer has a name and other features (properties), you can perform certain tasks for the customer (methods), and the customer can make requests of you (events). To model real-world data, computers require objects. Using objects makes it possible to describe the real-world data in terms that a computer can manipulate.
![]() Null: The word
Null: The word null is a special kind of keyword that means nothing. You can set a variable to the null type when you don't want it to contain anything. JavaScript also sets variables to null when there isn't any information it can supply for that variable. A null variable may not seem very useful, but it's incredibly useful because you can test for null data and then perform tasks based on that test.
![]() Undefined: When a variable is undefined, it means that JavaScript knows that the variable exists, but the variable doesn't contain any information. An undefined variable is one that hasn't been initialized to contain any data yet. You can test for undefined variables by using the
Undefined: When a variable is undefined, it means that JavaScript knows that the variable exists, but the variable doesn't contain any information. An undefined variable is one that hasn't been initialized to contain any data yet. You can test for undefined variables by using the undefined keyword.
You can declare any variable directly by inserting a value into it, as described in the preceding section. However, you may want to create a variable, declare it as a certain type, but not fill it with anything immediately. In this case, you use the new keyword to create the variable. Here are examples of creating variables by using the new keyword:
var MyString = new String();
var MyNumber = new Number();
var MyBoolean = new Boolean();
var MyCollection = new Array();
var ComplexData = new Object();
At their lowest level — a level that most developers really don’t care about — all JavaScript variables are objects. Yes, the variable has a type, and that type determines how JavaScript interacts with it, but JavaScript uses objects to hold all variable data. JavaScript lacks the concept of a value type (one stored on the stack) and uses reference types (those stored on the heap as objects) exclusively.
Understanding undefined and null variables
Many developers have problems understanding undefined and null variables. An undefined variable is one that hasn't been initialized yet — a null variable is one that's set to a value of null. In both cases, the storage that the variable represents is empty — it contains no data.
JavaScript provides two keywords that you need to know about when working with undefined and null variables. Interestingly enough, the keywords are null and undefined — imagine that! You can use these keywords to test variables to determine whether they match the criteria for being null or undefined. The following example shows how to perform such a test. (You can find the full source code for this example in the Chapter 04Simple Variables folder of the downloadable code as TestNullAndUndefined.HTML.)
function UseVariable()
{
// Create an undefined variable and test it.
var MyVariable;
alert(MyVariable + " has a type of: " +
typeof(MyVariable));
// Define the variable and test again.
MyVariable = "I Am Defined!";
nbps;
alert(MyVariable + " has a type of: " +
typeof(MyVariable));
nbps;
// Empty the variable of data and test again.
MyVariable = null;
alert(MyVariable + " has a type of: " +
typeof(MyVariable));
}
In this example, the code begins by creating MyVariable but doesn't initialize it. As far as JavaScript is concerned, MyVariable exists, but it doesn't contain anything. When the code uses the alert() function to display the content of MyVariable, you see the word, undefined, in the resulting dialog box. The alert function also uses the typeof() function to determine the type (kind) of MyVariable, which is also undefined, so the output reads "undefined has a type of: undefined".
The next step is to define MyVariable by assigning a value to it. When the code calls alert() again, the output changes. This time, you see "I Am Defined! has a type of: string" when the browser displays the dialog box. Notice that JavaScript automatically detects the change in type. If you were to assign a numeric value to the same variable and display it again, you'd see that the type changes to number.
Now that MyVariable is initialized and contains a value, the code empties it by assigning it a value of null. The null keyword is special because it lets you create an empty variable. This time alert() displays something interesting, it tells you that "null has a type of: object". That's right, MyVariable remains initialized, but it's empty, so it has a value of null but a type of object.
Working with Booleans
Boolean variables have only two possible values: true or false. Computers need a way to determine whether something is true or false in order to make decisions. The decision-making process makes it possible for a computer to perform a task, to choose between two tasks, or to stop performing a task. Chapters 8 and 9 help you understand the decision making process better. For now, all you need to really understand is that Boolean variables are traditionally used to make a decision or to tell the user the truth value of the Boolean variable (possibly as the result of performing a calculation or checking the status of data).
In most cases, you create a Boolean variable by assigning the variable a value of true or false like this: var MyBoolean = true. You can also assign a variable a Boolean value by using an expression that equates to true or false, such as var MyBoolean = 3 < 4. In this case, 3 is less than 4, so MyBoolean is true. The < symbol is an operator. (The Understanding the operators section, later in this chapter, describes the various operators that JavaScript supports.)
You can create Boolean values by using the new operator. The statement MyBoolean = new Boolean(); creates a new Boolean variable that's initialized to false. You can also add a value or an expression between the parentheses. Some odd things happen in this situation. For example, if you provide MyBoolean = new Boolean("Hello");, JavaScript creates a Boolean variable with a value of true. The variable is true because the string you supplied isn't empty — it contains a value. This is one of several techniques you can use to test other variables for content in JavaScript.
The Boolean new operator accepts all sorts of inputs. The following list of inputs creates variables that contain a value of false:
![]()
0
![]()
-0
![]()
null
![]()
""
![]()
false
![]()
undefined
![]()
NaN
The NaN keyword stands for Not a Number. It occurs when you perform certain esoteric math functions. In addition, some JavaScript functions return this value when you use them incorrectly. For example, if you call parseInt("Hello"), the parseInt() function returns NaN because "Hello" isn't a number and parseInt() can't turn it into a number.
Working with Numbers
JavaScript supports both integer and floating point numbers by using a single type, number. This is probably the most important difference between JavaScript and many other languages. However, JavaScript does support the full range of standard operators (special characters used to perform tasks such as addition), and you can perform the full range of standard math tasks using it.
Numbers are values and not text. You can use numbers in comparisons and to aid in making decisions. In addition, you can use equations to create new numeric values. The most common method of placing a number in a variable is to use one of the assignment operators; however, you can also use the new operator to create a number, such as MyNumber = new Number(10);, which places the value 10 in MyNumber.
Most JavaScript applications perform some sort of math tasks (amongst other things). You need to perform math for all sorts of reasons — everything from calculating output for the user to positioning an item onscreen. Consequently, JavaScript, like most computer languages, provides strong support for numeric operations. The following sections provide an overview of the numeric functionality that JavaScript provides.
Understanding the operators
JavaScript supports a number of operators. The easiest way to remember the various operators is to group them into categories. The following sections break the operators that JavaScript supports into categories to make them easier for you to work with and understand.
Using the arithmetic operators
Arithmetic operators let you perform calculations by using JavaScript applications. The JavaScript operators perform basic math — you use functions to perform more complicated tasks. Table 4-1 shows the arithmetic operators.
Table 4-1 JavaScript Arithmetic Operators
|
Operator |
Example |
Description |
|
|
|
The addition operator adds the values to the right of the assignment operator and places the result in |
|
|
|
The subtraction operator subtracts the rightmost value from the leftmost value in the expression to the right of the assignment operator and places the result in |
|
|
|
The multiplication operator multiplies the values to the right of the assignment operator and places the result in |
|
|
|
The division operator divides the leftmost value by the rightmost value in the expression to the right of the assignment operator and places the result in |
|
|
|
The modulus operator divides the leftmost value by the rightmost value in the expression to the right of the assignment operator and places the remainder in |
|
|
|
The increment operator adds 1 to the value of |
|
|
|
The decrement operator subtracts 1 from the value of |
It's essential to remember precedence when working with arithmetic in JavaScript. When viewing the information in Table 4-1, the increment and decrement operators have the highest precedence. Multiplication, division, and modulus come second. Addition and subtraction are third. As a consequence, consider the case where you have a variable named MyVariable and assign it a value of 4. The following equation produces a result of 35:
MyVariable = ++MyVariable + 5 * 6;
In this case, MyVariable is incremented first because the increment operator has the highest precedence, changing the MyVariable content to 5. The sub-expression 5 * 6 comes next, which produces a value of 30. Finally, MyVariable is added to the value of 30 to produce a result of 35. The brief discussion of precedence at https://developer.mozilla.org/docs/JavaScript/Reference/Operators/Operator_Precedence provides additional details.
Using the assignment operators
Assignment operators make it possible to place a numeric value into a variable. Table 4-2 shows the assignment operators that JavaScript supports.
Table 4-2 JavaScript Assignment Operators
|
Operator |
Example |
Description |
|
|
|
The standard assignment operator simply places the value into the variable. |
|
|
|
The add-then-assign operator adds the value found in |
|
|
|
The subtract-then-assign operator subtracts the value on the right side of the assignment from the value found in |
|
|
|
The multiply-then-assign operator multiplies the value found in |
|
|
|
The divide-then-assign operator divides the value found in |
|
|
|
The modulus-then-assign operator divides the value found in |
Using the comparison operators
Comparison operators make it possible to establish a relationship between the values of two expressions. The expressions can be an equation, a variable, or a value. The result is a Boolean value that you can then use to make decisions based on the relationship between the two expressions. For example, you might decide to perform a calculation only when one variable is less than another. Chapters 8 and 9 provide examples of how to use the comparison operators. Table 4-3 shows the comparison operators that JavaScript supports.
Table 4-3 JavaScript Comparison Operators
|
Operator |
Example |
Description |
|
|
|
The less-than operator determines whether the value on the left is less than the value on the right. In this case, the comparison would return |
|
|
|
The less-than-or-equal-to operator determines whether the value on the left is less than or equal to the value on the right. In this case, the comparison would return |
|
|
|
The equal-to operator determines whether the value on the left is equal to the value on the right. In this case, the comparison would return |
|
|
|
The greater-than-or-equal-to operator determines whether the value on the left is greater than or equal to the value on the right. In this case, the comparison would return |
|
|
|
The greater-than operator determines whether the value on the left is greater than the value on the right. In this case, the comparison would return |
|
|
|
The exactly-equal-to operator determines whether the value on the left is equal to the value on the right. In addition, this comparison verifies that the type of the value on the left is the same as the type of the value on the right. In this case, the comparison would return |
|
|
|
The not-equal-to operator determines whether the value on the left is not equal to the value on the right. In this case, the comparison would return |
|
|
|
The exactly-not-equal-to operator determines whether the value on the left is not equal to the value on the right. In addition, this comparison verifies that the type of the value on the left is different from the type of the value on the right. In this case, the comparison would return |
Using the logical operators
Logical operators help you perform Boolean logic. You use them to perform tasks based on the truth value of one or more expressions. For example, if you wanted to determine whether Value1 is less than 2 and Value2 is greater than 4, you would express it as ((Value1 < 2) && (Value2 > 4)). Table 4-4 shows the logical operators and explains their use.
Table 4-4 JavaScript Logical Operators
|
Operator |
Example |
Description |
|
|
|
The AND operator combines two expressions such that both sub-expressions must evaluate to |
|
|
|
The OR operator combines two expressions such that one sub-expression or the other can be true and make the entire expression true. In this case, the expression evaluates to |
|
|
|
The NOT operator changes the state of an expression to its opposite value. In this case, the expression evaluates to |
Developers often have problems figuring out the logical operators. In fact, many colleges teach entire courses on Boolean logic just to make it easier for mathematicians and developers to work through complex logic situations. The AND, OR, and NOT operators can make it possible to create complex comparisons using JavaScript, which means that your application can evaluate and respond to complex real-world events.
Table 4-5 shows the truth logic for the AND operator, and Table 4-6 shows the truth logic for the OR operator. Use these tables to figure out when an expression will evaluate to true or false based on the value of the individual sub-expressions.
Table 4-5 AND Operator Logic
|
Expression 1 |
Expression 2 |
Result |
|
|
|
|
|
|
|
|
|
|
|
|
|
|
|
|
Table 4-6 OR Operator Logic
|
Expression 1 |
Expression 2 |
Result |
|
|
|
|
|
|
|
|
|
|
|
|
|
|
|
|
Using the grouping operators
JavaScript supports the use of parentheses as grouping operators. The left parenthesis, (, begins a group, and the right parenthesis, ), ends it. The use of parentheses is incredibly important in some situations because the parenthesis has higher precedence (is evaluated before) any other operator discussed in this chapter. Consequently, the expression 4 + 5 * 6 evaluates to 34, but the expression (4 + 5) * 6 evaluates to 54.
Doing simple math
You now have the tools to create your first real application. In this case, the example performs simple four-function math. The resulting page can add, subtract, multiply, or divide two numbers. The interface part of the code includes three text inputs (one set for read-only use) and four buttons (one for each math function), as shown here. (You can find the complete source code for this example in the Chapter 04Numbers folder of the downloadable code as VariableMath.HTML.)
<body>
<h1>Performing Simple Math</h1>
<p>
Value1:
<input type="text" id="Value1" value="4">
</p>
<p>
nbps;
Value1:
<input type="text" id="Value2" value="5">
</p>
<p>
Result:
<input type="text" id="Result" value=""
readonly="true">
</p>
<input type="button"
value="+"
onclick="DoAdd()" />
<input type="button"
value="-"
onclick="DoSub()" />
<input type="button"
value="*"
onclick="DoMul()" />
<input type="button"
value="/"
onclick="DoDiv()" />
</body>
When you display the page, you see the entry fields and associated buttons. Figure 4-1 shows how they appear in Firefox. This figure also shows the result of performing a division using the two input numbers.

Figure 4-1: The example provides inputs and buttons for performing simple math tasks.
Each button has a different JavaScript function associated with it. The essential tasks are the same in each case:
1. Obtain the input from Value1 and convert it to a number.
2. Obtain the input from Value2 and convert it to a number.
3. Change the value attribute of Result to reflect the math operation on Value1 and Value2.
The attribute value you receive from the document is always in text form, so numeric conversion is essential. Otherwise, what you'd really do is create a combined string. For example, if Value1 is 4 and Value2 is 5, the result would read 45 — the combination of Value1 and Value2 as strings. Here's the code used to perform addition:
function DoAdd()
{
// Obtain the current values of Value1 and Value2.
var Value1 = new Number(
document.getElementById("Value1").value);
var Value2 = new Number(
document.getElementById("Value2").value);
// Set the result to reflect the addition
// of the two numbers.
document.getElementById("Result").setAttribute(
"value", Value1 + Value2);
}
The code begins by creating a number using the new keyword. It obtains the current text value of Value1 and converts it to a number type. Notice that you must use the value property. If you were to use the getAttribute() function instead, the code would return the initial value of Value1, not the current value. The code performs the same task with Value2.
At this point, the code has access to two numbers. It calls the setAttribute() function for Result and sets this attribute to the combination of Value1 + Value2.
The DoSub(), DoMul(), and DoDiv() functions look the same. The only difference is that each of these functions performs a different math task.
Changing number formats
Formatting numbers is important. The presentation of a number affects how the viewer sees it. For example, dollar amounts have two decimal places, even if there’s no decimal (cents) portion. Fortunately, JavaScript provides some simple functions you can use to control the presentation of numeric information. The following list provides a short description of each of these functions:
![]()
toExponential(): Displays the number in scientific (exponential) format, even if JavaScript would normally display the number in standard format.
![]()
toFixed(): Displays the number with a fixed number of digits after the decimal point.
![]()
toLocaleString(): Displays the number by using the browser's locale information. For example, some countries use a comma for the decimal point, but others use a period.
![]()
toPrecision(): Displays the number by using the specified number of digits for the entire number.
![]()
toString(): Displays the number as a string in the specified radix (base). For example, you can use this function to convert a number into hexadecimal format.
The easiest way to understand numeric formats is to write a short program to display them. This example begins with something new — a global variable. You place the global variable, ThisNumber, in the <head> section of the page like this:
<script language="JavaScript">
var ThisNumber = 22.5
</script>
A global variable is one that you can access anywhere on the current page. The following code creates a page that displays ThisNumber in all of the formats that JavaScript makes available. (You can find the complete source code for this example in the Chapter 04Numbers folder of the downloadable code as DisplayNumber.HTML.)
<body>
<h1>Formatting Numbers</h1>
<p>toExponential():
<script language="JavaScript">
document.write(ThisNumber.toExponential(5));
</script>
</p>
<p>toFixed():
<script language="JavaScript">
document.write(ThisNumber.toFixed(5));
</script>
</p>
<p>toLocaleString():
<script language="JavaScript">
document.write(ThisNumber.toLocaleString());
</script>
</p>
<p>toPrecision():
<script language="JavaScript">
document.write(ThisNumber.toPrecision(5));
</script>
</p>
<p>toString():
nbps;
<ul>
<li>Binary:
<script language="JavaScript">
document.write(ThisNumber.toString(2));
</script>
</li>
<li>Octal:
<script language="JavaScript">
document.write(ThisNumber.toString(8));
</script>
</li>
<li>Decimal:
<script language="JavaScript">
document.write(ThisNumber.toString(10));
</script>
</li>
<li>Hexadecimal:
<script language="JavaScript">
document.write(ThisNumber.toString(16));
</script>
</li>
</ul>
</p>
Each output uses five places of precision as defined by that function, when the function allows you to specify the amount of precision. The toString() function is different in that it requires a radix (base) as input. For example, toString(10) displays the number in decimal format. Figure 4-2 makes the various numeric formats a lot easier to understand.

Figure 4-2: Presenting numbers correctly helps viewers understand their meaning.
Working with Text
The string data type (text) is the presentation format that most humans think about when viewing information on the screen. Even though the underlying data is some other type, what a human sees is text. As far as JavaScript is concerned, strings are just one of many data types. Developers need to be aware of the difference between what the human sees and what JavaScript manipulates using application code. Even so, you find yourself working with strings regularly because strings lend themselves to certain tasks, such as searching for specific information and creating pretty displays.
Throughout this book you work with strings to create text output in various ways. The following sections get you started with text, but they’re only the tip of a large iceberg.
Concatenating text
Strings are made up of many different pieces of information in many cases. You’ve seen some examples of concatenation — the act of combining string pieces to create a larger whole — several times in the book already. In fact, it’s hard to create any application without using concatenation. Essentially, concatenation involves adding strings together by using the plus sign (+).
Consider two strings: ThisString and ThatString. ThisString contains "Hello ", and ThatString contains "World". When you see
var FinalString = ThisString + ThatString;
in an application, FinalString equals "Hello World". Using the plus sign concatenates the two strings into a new string.
Changing word and letter formats
JavaScript provides a wealth of string functions. This section covers only four formatting functions that you use to control the appearance of strings. The rest of the book contains other functions that affect your use of strings. It’s amazing to think about all the ways in which you can use strings with JavaScript. Keeping this flexible nature in mind, here are four formatting functions to start off your library of JavaScript string functions:
![]()
toLocaleLowerCase(): Changes all the characters in a string to lowercase versions while respecting lowercase rules for the current locale.
![]()
toLocaleUpperCase(): Changes all the characters in a string to uppercase versions while respecting the uppercase rules for the current locale.
![]()
toLowerCase(): Changes all the characters in a string to lowercase equivalents without regard to locale.
![]()
toUpperCase(): Changes all the characters in a string to uppercase equivalents without regard to locale.
As with formatting numbers, the best way to see string formatting is to create an application to do it. As with the DisplayNumber.HTML page, this page begins with a global variable, ThisString, that contains "This is a Sample String". The following code shows how to use the various functions. (You can find the complete source code for this example in the Chapter 04Strings folder of the downloadable code as DisplayText.HTML.)
<body>
<h1>Formatting Strings</h1>
<p>Original String:
<script language="JavaScript">
document.write(ThisString);
</script>
</p>
<p>toLocaleLowerCase():
<script language="JavaScript">
document.write(ThisString.toLocaleLowerCase());
</script>
</p>
<p>toLocaleUpperCase():
<script language="JavaScript">
document.write(ThisString.toLocaleUpperCase());
</script>
</p>
<p>toLowerCase():
<script language="JavaScript">
document.write(ThisString.toLowerCase());
</script>
</p>
<p>toUpperCase():
<script language="JavaScript">
document.write(ThisString.toUpperCase());
</script>
</p>
</body>
Unlike the number-formatting functions, you won’t find any way to customize the string output. What you see depends on your browser and your locale. Figure 4-3 shows typical output from this application.

Figure 4-3: JavaScript provides a number of interesting string formatting functions.
Working with Arrays
Arrays are a kind of collection. Each array contains zero or more like items that you can manipulate as a group. The following sections provide an extremely brief overview of arrays that will lead into other discussions found in the book.
Creating an array
JavaScript provides three methods for creating arrays: regular, condensed, and literal. In general, one way is as good as another. Of the three, the regular method shown in the following listing is the easiest to understand, but the literal method is the most compact. (You can find the complete source code for this example in the Chapter 04Arrays folder of the downloadable code as CreateArray.HTML.)
<body>
<h1>Creating Arrays</h1>
<h2>Regular:</h2>
<script language="JavaScript">
// Create the array.
var Colors = new Array();
// Fill the array with data.
Colors[0] = "Blue";
Colors[1] = "Green";
Colors[2] = "Purple";
// Display the content onscreen.
document.write(Colors);
</script>
nbps;
<h2>Condensed:</h2>
<script language="JavaScript">
// Create the array and fill it with data.
var Colors = new Array("Blue", "Green", "Purple");
// Display the content onscreen.
document.write(Colors);
</script>
<h2>Literal:</h2>
<script language="JavaScript">
// Create the array and fill it with data.
var Colors = ["Blue", "Green", "Purple"];
// Display the content onscreen.
document.write(Colors);
</script>
</body>
All three methods produce precisely the same array. The regular method creates the array first and then assigns strings to each array element by number. The square brackets behind Colors indicate the element number, which begins at 0 and increments by 1 for each element you add. Notice that when using the condensed method you enclose the array elements in parentheses as part of the constructor. However, when using the literal method, you enclose the array elements in square brackets. You can see the results of this example in Figure 4-4.
Accessing array members
Each array member has a unique number — an address of sorts. You access array members by providing the array name and then the element number within square brackets. Normally, you use a loop to access array members. Chapter 9 discusses loops in detail. For now, just consider a loop as a means of automating array access.
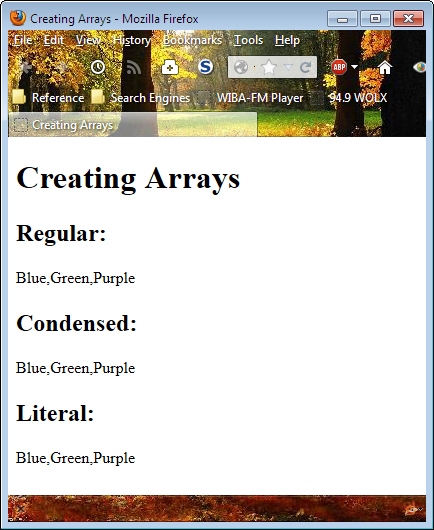
Figure 4-4: Use any of the methods that JavaScript provides for creating arrays.
The following code shows an example of how you might access an array, one element at a time, and display its content. (You can find the complete source code for this example in the Chapter 04Arrays folder of the downloadable code as AccessArray.HTML.)
<body>
<h1>Access Array Elements</h1>
<script language="JavaScript">
// Create the array and fill it with data.
var Colors = ["Blue", "Green", "Purple"];
// Define a loop to access each array element
// and display it onscreen.
for (i = 0; i < Colors.length; i++)
{
document.write(
"Colors " + i + " = " +
Colors[i] + "<br />");
}
</script>
</body>
This example uses a for loop. The for loop creates a counter variable (a number) named i that begins at 0 (the first element of the array) and continues to increment (i++) until it has accessed all the array elements (i < Colors.length). The document.write() function outputs the Colors element number, the content (as Colors[i] where i is the element number), and an end-of-line tag. Figure 4-5 shows the output from this example.
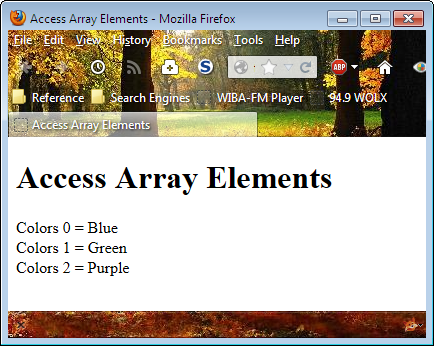
Figure 4-5: Access each array element by number.