
Chapter 12
Backing Up and Restoring SharePoint
Microsoft Exam Objective Covered in This Chapter:
- Maintain a SharePoint Environment
- Backup and Restore a SharePoint Environment
This chapter provides the core information necessary to plan and execute a backup and restore strategy for SharePoint Server 2010. You’ll begin by learning the required permissions for various accounts including the Timer Service account and then proceed to SharePoint backup details. The information covers the different variations in performing backup and restore tasks, including backing up and restoring the entire server farm as well as performing similar jobs using smaller SharePoint elements such as exporting and importing a list or document library.
Configuring Permissions for Backup and Recovery
The backup and restore process for SharePoint is dependent on accounts, groups, and users having access to specific operations and directories. Accounts include the Timer Service account and the SQL Server service account. The required permissions aren’t present by default, and a SharePoint farm administrator must initially configure and then maintain these permissions.
Required Services and Groups for Backup and Recovery
Both the SharePoint Services Timer V4 (SPTimerV4) and the SQL Server service account are required to perform backup and restore operations, and they both need to have Full Control permission on any folders used for backup. Also, members of both the Administrators group on the local computer and the Farm Administrators group require specific permissions to different farm components.
Managing Service Permissions
Before performing any backup and restore operations, you must create a network folder in which to store backups and then give SharePoint Services Timer V4 (SPTimerV4) and the SQL Server service account Full Control over this folder. You can add these permissions to the folder in the same way you would do so on the local computer, by using the Security tab in the folder properties dialog box to add the accounts and giving them Full Control. You must also grant Full Control to the required group accounts as outlined in the next section.
Managing Group Permissions
To perform recovery operations from Central Administration, being a member of the Administrators group for the local computer is required for backing up and restoring the farm, service applications, and content database. Being a member of the Farm Administrators group is required for backing up and restoring site collections, as well as sites, lists, and document libraries.
If you are using Windows PowerShell for backing up and restoring, you must be a member of the Administrators group on the local machine and have Full Control on the backup folder to perform these operations on the farm, service applications, and content database. To back up and restore a site collection using PowerShell, you must be a member of the Farm Administrators group and have Full Control on the backup folder. To perform these operations on sites, lists, and document libraries using PowerShell, you must be a member of the Administrators group on the local machine and have Full Control on the backup folder.
Managing Permissions to Back Up andRestore Using Windows PowerShell
Anyone who will be performing backup and restore operations using Windows PowerShell must be a member of the SharePoint_Shell_Access role on the relevant database as well as have the permissions described in the previous section. The Add-SPShellAdmin cmdlet is used to accomplish this task. You need to grant this permission only once to a specific user account and to all the relevant databases unless new farm components are added. The task will have to be performed again for the relevant accounts for new components.
Adding and Removing Accounts to the SharePoint_Shell_Access Role
To add a user account to a specific database, type the following command at the prompt and then press Enter, replacing the sample values with your production values:
Add-SPShellAdmin -Username <User account> -Database <Database ID>
To add a user account to all the databases in the farm, type the following command, and then press Enter, replacing the sample values with your production values:
ForEach ($db in Get-SPDatabase) {Add-SPShellAdmin -Username <User account> -Database $db}
To remove a user account from all the databases in the farm, type the following command, and then press Enter, replacing the sample values with your production values:
ForEach ($db in Get-SPDatabase) {Remove-SPShellAdmin -Username <User account> -Database $db}
To view the user accounts currently added to the databases in the farm, type the following command, and then press Enter, replacing the sample values with your production values:
ForEach ($db in Get-SPDatabase) {Get-SPShellAdmin -Database $db}
If you are responsible for a server infrastructure of any kind, you know what a backup is and what it’s good for. You also know you can’t live without an adequate backup plan, and you cannot ignore a substandard or absent backup solution for even one day, because that could be the day when a flood hits or something explodes.
Backing Up SharePoint Components
SharePoint’s backup solution is capable of preserving your environment on a continuum, from backing up the entire farm to any of its components, right down to lists and libraries. This section of the chapter will present that continuum one element at a time, starting with its biggest piece, the whole farm, and working its way down.
Backing Up the Farm
In terms of performing a backup of the farm, you must back up both the entire contents of the farm and the farm configuration.
You can think of the farm as being made up of two large, general components: the farm content database and the farm configuration database. The content database contains all the content that comprises the SharePoint farm, including site collections, sites, list, and library content. The farm configuration database contains all the SharePoint configuration information for the server farm.
In Central Administration, when you click Perform A Backup under Backup And Restore, you can see on the subsequent page all of the components that are backed up when you back up the content and configuration data for the entire farm, including the following:
- InfoPath Forms Services and all its subsettings
- SharePoint Server State Service
- Microsoft SharePoint Foundation web application, which includes all web applications containing site collections
- WSS_Administration, which contains SharePoint Central Administration
- SharePoint Server State Service proxy
- SPUserCode, which contains the various groups of code collected for backup
- Diagnostics Service
- Global Search Settings
- SharePoint Foundation Help Search
- Application Registry Service
- Shared Services, which includes Shared Services applications and Shared Services proxies
You must perform this activity regularly to ensure that if a catastrophic failure of the farm should occur, usually because of a significant hardware failure, you would be able to restore the farm environment.
Although the farm can continue to be accessed during the backup, farm performance will be affected by this process, so it’s usually done after business hours if possible. Prior to performing this task for the first time, you will need to create a folder either on the local computer or on the network to which you will back up the farm. The recommended procedure is to first back up the farm to a folder on the local machine and then transfer the backup to a remote location on the network.
Although a farm backup stores the farm configuration and the content databases, the restore process cannot be performed for these elements using SharePoint Server 2010 tools. The restore process will be covered later in this chapter.
Although the SharePoint farm backup process backs up the Business Data Connectivity (BDC) service external content type definitions, it doesn’t back up the actual data source. If you intend on protecting this data, back up the data source at the same time you back up the BDC service.
Restoring the BDC service can be a little tricky. If you restore the BDC service first and then restore the data service to a different location, you must change the location information stored in the external content type definition. Failure to do so might result in the BDC service being unable to find the data source.
SharePoint backs up the remote Binary Large Object stores, also called BLOB stores, only if you use the FILESTREAM remote BLOB store provider to move data in remote BLOB stores. If you use a different provider, you are required to manually back up the remote BLOB stores. For more information on BLOB stores, see Chapter 14, “Optimizing SharePoint.”
One final note before proceeding with farm backup tasks: backing up the farm does not back up any certificates used to create trust relationships. To reestablish these trusts after restoring the farm, you must make sure you have copies of these certificates before you begin the farm backup.
The beauty of using Windows PowerShell to back up the farm is that you canperform the task either manually or as part of an automated script that periodically executes the backup. Exercise 12-1 shows you the manual procedure. If you are backing up the farm for the first time, you must use the Full option. You can subsequentlyuse the Differential option. The -BackupMethod parameter is used to indicate the desired option.
Exercise 12-1: Backing Up the Farm with Windows PowerShell
1. Open Windows PowerShell as an administrator.
2. At the prompt, type the following command and then press Enter, substituting the sample values for your production values and selecting either Full or Differential:
Backup-SPFarm -Directory <Backup folder> -BackupMethod {Full | Differential} [ -Verbose]
You can perform the same task using Central Administration. You must be a member of the Farm Administrators group to approach this task. Exercise 12-2 shows you how. After you configure and start the backup, the backup process may take several seconds to begin.
You will not be able to perform farm backup and restore tasks on a single-server SharePoint deployment with a built-in database.
Exercise 12-2: Backing Up the Farm with Central Administration
1. On the Central Administration home page, click Perform A Backup under Backup And Restore.
2. On the page that says Perform a Backup – Step 1 of 2: Select Component To Back Up, select the farm in the available list, as shown here, and then click Next.

3. On the page that says Start Backup – Step 2 of 2: Select Backup Options, under Backup Type, select either Full if this is the first backup for the farm or Differential if you have previously performed a full farm backup.
4. Under Back Up Only Configuration Settings, click Back Up Content And Configuration Settings.
5. Under Backup File Location, type the UNC path to the backup folder and then click Start Backup.
6. Review the status of the backup under Readiness at the top of the Backup And Restore Status page and under Backup lower on the page, either allowing the information to refresh every 30 seconds automatically or manually refreshing the page by clicking Refresh. Allow the backup to complete.
Any problems with the backup will appear in the Failure Message column on the Backup And Restore Job Status page. Failure messages can also be viewed in the Spbackup.log file. You can find the file in the backup folder at the location you specified with the UNC path during the previous task.
It’s possible to back up the farm using SQL Server tools but only the databases containing the farm’s content. To back up the entire farm including the configuration data, you must use either Windows PowerShell or Central Administration. If you need to back up only the content databases, Exercise 12-3 will illustrate the procedure. You must be a member of the SQL Server db_backupoperator fixed database role on the database server where the database is located to successfully complete this exercise.
In your farm, you will need to perform this process again for each of the databases, including the configuration and search databases.
In the previous exercise, you saw how to use SQL Server tools to back up the server farm database but not the configuration. Although it’s recommended that you periodically perform a backup of the complete farm including the configuration and the database, you can back up just the configuration using either Windows PowerShell or Central Administration. You cannot perform this task using SQL Server tools or the Data Protection Manager.
Exercise 12-3: Backing Up the Farm Databases with SQL Server Tools
1. Open the SQL Server Management Studio tool on your computer and connect to the desired database server.
2. In Object Explorer, expand Databases, as shown here.
(continued)

3. Right-click the desired database, point to Tasks, and then click Back Up.
4. When the Back Up Database dialog box appears, under Source, select the desired backup type in the Backup Type list based on the desired recovery model, such as Simple, Full, or Bulk Logged.
5. Under Backup Component, click Database.
6. Type a name for the backup set in the Name field or accept the default.
7. Specify an expiration date for the backup set, which indicates when this backup set can be overwritten by subsequent backup sets, or accept the default value of 0 days, indicating that the backup set never expires.
8. Under Destination, specify the location of the backup folder and then click OK.
Performing a farm configuration backup extracts the configuration settings from the configuration database. This will not be sufficient to allow you to restore service applications. You will need to perform a backup of both the configuration and content database to ensure such a restoration.
The following shows you how to back up the farm configuration with Windows PowerShell. To perform this task, either you must be a member of the db_backupoperator fixed database role on the desired database server or you must specify the value for the DatabaseCredentials parameter.
Backing Up the Configuration Database with Windows PowerShell
Open Windows PowerShell as an administrator, type the following command at the prompt, and then press Enter, substituting the sample values with your production values:
Backup-SPConfigurationDatabase -Directory <Backup folder> -DatabaseServer <Database server name> -DatabaseName <Database name> -DatabaseCredentials <PowerShell Credential Object> [-Verbose]
You can also back up the configuration database using Central Administration. You must be a member of the Farm Administrators group to perform this task. Exercise 12-4 will show you the steps.
Exercise 12-4: Backing Up the Configuration Database with Central Administration
1. On the Central Administration home page, click Perform A Backup under BackupAnd Restore.
2. On the page that says Perform a Backup – Step 1 of 2: Select Component To Back Up, select the farm in the available list and then click Next.
3. On the page that says Start Backup – Step 2 of 2: Select Backup Options, select Full under Backup Type.
4. Under Backup Only Configuration Settings, select Backup Only Configuration Settings.
5. Under Backup File Location, type the UNC path to the location of the backup folder and then click Start Backup.
6. Monitor the backup status, allowing the backup to proceed to conclusion.
7. Any problems with the backup will appear in the Failure Message column on the Backup And Restore Job Status page. Failure messages can also be viewed in the Spbackup.log file. You can find the file in the backup folder at the location you specified with the UNC path during the previous task.
Backing Up Applications and Services
Although it’s best practice to regularly back up your entire SharePoint farm, there may be a business or technical reason to back up web applications more often. While backing up the entire farm backs up all web applications at the same time, if you want to back up just web applications, you can back them up only one at a time. As with any other backup operation, access to the farm and web applications will remain available, but the backup may affect performance, so it’s best to perform the task after business hours if possible.
You can back up a web application using Windows PowerShell, Central Administration, or SQL Server tools. The following shows you the PowerShell method.
Backing Up a Web Application with Windows PowerShell
Open Windows PowerShell as an administrator, type the following command at the prompt, and then press Enter, substituting the sample values with your production values. If you are backing up the web application for the first time, select the Full option.
Backup-SPFarm -Directory <Backup folder>
-BackupMethod {Full | Differential}
-Item <Web application name> [-Verbose]
Backing Up a Web Application with Central Administration
The method of backing up a web application using Central Administration is almost identical to the previous Central Administration backup tasks you’ve performed. One significant difference is that on the Perform A Backup – Step 1 Of 2: Select Component To Back Up page, select the web application from the list; then click Next. Otherwise, follow the identical steps you performed in Exercise 12-2 and Exercise 12-4.
Backing Up a Web Application with SQL Server Tools
As with the server farm, you cannot back up the entire web application using SQL Server tools. You can only back up the databases associated with the application.
Backing up a web application with SQL Server Management Studio is identical with the steps you performed in Exercise 12-3. The only difference is, in step 3, you must choose the desired database for the web application rather than the database for the entire farm. Otherwise, follow the same steps.
Backing Up Search Using Windows PowerShell
Backing up search with PowerShell is substantially similar to performing other backup functions at the command prompt. Like other SharePoint features, it is optimal to back up SharePoint at the farm level, but you may have the occasion to back up just search.
If you are using FAST Search Server 2010 for SharePoint, you should also back up the Content SSA and Query SSA, which includes the People Search index, as well as backing up the FAST Search Server.
To back up search with PowerShell, type the following code at the prompt and then press Enter, replacing the sample code with your production code. If you are backing up search for the first time, use the Full option:
Backup-SPFarm -Directory <Backup folder>
-BackupMethod {Full | Differential}
-Item <Search service application name> [-Verbose]
Backing Up Search Using Central Administration
The method of backing up a web application using Central Administration is almost identical to the previous Central Administration backup tasks you’ve performed. One significant difference is that on the Perform A Backup – Step 1 Of 2: Select Component To Back Up page, expand Shared Services, and then expand Shared Services Applications to view the list of service applications in the farm. Select the search service application from the list of components and then click Next. Otherwise, follow the identical steps you performed in Exercise 12-2 and Exercise 12-4.
Backing Up the Secure Store Service with Windows PowerShell
Before you back up the Secure Store Service, you must first manually record the passphrase, which you will need to access the Secure Store Service once it has been restored after backup. Occasions when you would back up the Secure Store Service are when you change or refresh the master key.
Backing up the Secure Store Service with PowerShell is very much the same as the other backup procedures you’ve performed except that you must always use the Full option.
At the prompt, type the following code, substituting the sample values with yourproduction values, and then press Enter:
Backup-SPFarm -Directory <Backup folder>
-BackupMethod Full -Item <Secure Store Service > [-Verbose]
Backing Up the Secure Store Service with Central Administration
The method of backing up a web application using Central Administration is almost identical with the previous Central Administration backup tasks you’ve performed. One significant difference is that on the Perform A Backup – Step 1 Of 2: Select Component To Back Up page, expand Shared Services, expand the Shared Services Applications node, select the Secure Store Service application from the list of components, and then click Next. Otherwise, follow the identical steps you performed in Exercise 12-2 and Exercise 12-4.
Keep in mind that the Secure Store Service can consist of numerous components, and you must select the topmost component to ensure a complete backup.
Backing Up Databases
The single part of SharePoint that can continue growing and growing and eventually become huge is the content database. This holds all of the “stuff” that users create in SharePoint including site collections, sites, lists, libraries, list items, and library documents. For this reason, it’s best if you back up the content database separately from backing up the SharePoint farm. In an enterprise environment, you will likely have multiple content databases; however, you can back up only one content database at a time.
As with prior backup tasks, you can back up the content database using Windows PowerShell, Central Administration, and SQL Server tools. Exercise 12-5 will show you the Central administration method. You must be a member of the Farm Administrators group to successfully complete this task.
Exercise 12-5: Backing Up the Content Database with Central Administration
1. On the Central Administration home page, click Perform A Backup under BackupAnd Restore.
2. On the page that says Perform A Backup – Step 1 Of 2: Select Component To Back Up, select the desired content database in the available list and then click Next.
3. On the Start Backup – Step 2 Of 2: Select Backup Options page, select either Full or Differential under Backup Type, selecting Full if you have never backed up the content database before.
4. Under Backup File Location, type the UNC path of the folder to which you will be backing up the database and then click Start Backup.
5. Allow the backup procedure to continue, monitoring its progress on the Backup And Restore Job Status page.
Backing Up the Content Database with Windows PowerShell
Using Windows PowerShell to back up a content database is similar to other PowerShell backup tasks. At the prompt, type the following code and then press Enter, substituting the sample values for your production values and selecting the Full option if you have never previously backed up the content database:
Backup-SPFarm -Directory <Backup folder> -BackupMethod {Full | Differential} -Item <Content database name> [-Verbose]
In other backup tasks, when you used SQL Server tools, you were unable to perform a complete backup of the selected component. For the content database, this isn’t so, and you will be able to perform a complete backup. Exercise 12-6 shows you how. You must be a member of the SQL Server db_backupoperator fixed database role on the database server containing the desired content database to perform this task.
Exercise 12-6: Backing Up the Content Database with SQL Server Tools
1. Open the SQL Server Management Studio tool on your computer and connect to the desired database server.
2. In Object Explorer, expand Databases.
3. Right-click the desired database, point to Tasks, and then click Back Up.
4. When the Back Up Database dialog box appears, select the desired backup procedure from the Backup Type list under Source.
5. Under Backup Component, click Database.
6. You can either use the default name provided in the text area for the backup set or type the name you want.
7. Enter the expiration date for the backup set in days to determine how long the backup set will be preserved before it can be overwritten by a more recent backup, with 0 days meaning the backup set will never expire.
8. Under Destination, specify the location of the backup folder to which you will back up the content database.
9. Click OK.
You will need to perform this set of steps for every content database you intend on backing up, which should be all the databases you depend upon in your SharePoint environment.
You can also back up databases, including content databases, by backing them up to a snapshot. A database snapshot is a read-only static view of the source database as it existed at the moment of snapshot creation. Snapshots are particularly useful in the event of a user error in a database. The snapshot can be used to revert the database to the state it was in when the snapshot was created. You can also take a database snapshot right before making a major change to the database, such as the table structure or schema. If a problem occurs, you can revert to the snapshot and preserve all your data.This task has some specific requirements. You must be running Microsoft SQL Server 2008 with SP1 and with Cumulative Update 2 Enterprise Edition. Also, you can perform this task using SQL Server tools only and must be a member of the SQL Server db_owner fixed database role on the SQL server containing the desired database.
You cannot use a snapshot database to back up a site collection if a remote BLOB storage provider is being used.
A database snapshot is a read-only, static container of a source database as it existed at the moment you took the snapshot. This is very much like taking a photograph of a person or object, preserving the appearance of the person or object at the exact moment you opened the camera’s shutter.
Any uncommitted transactions existing at the moment the snapshot is taken are rolled back in a new database snapshot. This occurs because the database engine runs recovery after the snapshot has been created. All transactions already committed are not impacted by this process.
Snapshots are stored like any other backup file, so you must have a folder already created where you want to put the snapshot, prior to beginning this task. While backing up a database to a snapshot is performed with SQL Server tools, there are some interesting differences in the steps than in exercises you previously performed with this utility. Exercise 12-7 will provide the necessary information.
Exercise 12-7: Backing Up a Database to a Snapshot with SQL Server Tools
1. Open the SQL Server Management Studio tool on your computer and connect to the desired database server.
2. In Object Explorer, expand Databases.
3. In the list that appears, select the desired database and then click New Query.
4. Enter the following code, substituting the sample values with your production values:
CREATE DATABASE <snapshot name>
ON
(
NAME=<logical name of the database file>,
FILENAME = ‘c:WSS_Backup1.ss’)
AS SNAPSHOT OF <database name>;
Backing Up Site Collections, Sites, Lists, and Libraries
As with other SharePoint components, it’s generally recommended that you back up the entire farm, but there may be occasions when you will need to back up smaller elements, including site collections, sites, or individual lists and libraries.
For backing up a site collection, if the collection’s Lock Status is set to Not Locked or Adding Content Prevented, the site collection is set to Read-Only for the duration of the backup operation. This prevents SharePoint users from changing features of the site collection during the actual backup. Once the backup is complete, the site collection’s status is returned to normal.
You can perform a site collection backup using either Central Administration or Windows PowerShell. Exercise 12-8 will show you the Central Administration method. You must belong to the Farm Administrators group to perform this task. The SharePoint Service Timer V4 service must also have Full Control permissions to the folder to which you will be backing up the site collection.
Exercise 12-8: Backing Up a Site Collection Using Central Administration
1. On the Central Administration main page, click Perform A Site Collection Backup under Backup And Restore.
2. On the Site Collection Backup page, select the desired site collection in the Site Collection list.
3. Type the UNC path to the backup file in the Filename field and, if you want to reuse the file, select the Overwrite Existing File check box.
4. Click Start Backup.
5. Allow the backup to proceed and monitor the backup on the Granular Backup Job Status page or on the current page under Site Collection Backup.

To perform the same task with Windows PowerShell, open PowerShell as an administrator and enter the following code at the prompt, substituting the sample values for your production values; then press Enter:
Backup-SPSite -Identity <Site collection name>
-Path <backup file> [Force] [-NoSiteLock] [-UseSqlSnapshot] [-Verbose]
The following exercises are equally applicable for exporting individual sites, lists, and libraries, so there won’t be separate tasks for exporting each of the SharePoint components. You can use either Central Administration or Windows PowerShell for such export processes. Exercise 12-9 shows you how to export using Central Administration. You must be a member of the Farm Administrators group to proceed.
Exercise 12-9: Exporting a Site, List, or Library with Central Administration
1. On the Central Administration main page, click Backup And Restore.
2. On the Backup And Restore page, click Export A Site Or List under Granular Backup.
3. On the Site Or List Export page, select the desired site collection from the available list under Site Collection and then select the desired site from the site list.
4. To export a list, select the desired list or library from the List list, or ignore this step if you are exporting the entire site.
5. Under File Location, type the UNC path of the folder to which you are exporting in the Filename field.
6. If you want to overwrite a currently existing file in the folder, click the Overwrite Existing Files check box.
7. To export all the security settings and permissions for the list or library, click the Export Full Security check box under Export Full Security.
8. To specify a version of the list or library to export, in the Export Versions list, select one of the following: All Versions, Last Major, Current Version, or Last Major and Last Minor.
9. Click Start Export.
10. Monitor the export procedure on the Granular Backup Job Status page.
Exporting a Site, List, or Library with Windows PowerShell
Although you can perform this task with a relatively small command string at the prompt, there’s a little more to it than that. If you are exporting a larger site, list, or library, it’s better to use the GradualDelete parameter, which actually deletes the site, preventing further accessto any of its content. The deletion, as the name suggests, occurs over a period of time, managed by the Timer Job, minimizing the impact on server farm and SQL server performance.
If you want to specify a version of the site, list, or library, use the IncludeVersions parameter. The default version is LastMajor, but you can specify CurrentVersion, LastMajorandMinor, or All. To include the security settings and permissions that are associated with a list or library, use the IncludeUserSecurity parameter. To overwrite an existing file in the backup folder, use the Force parameter. Using the Verbose parameter lets you see the progress of the backup operation.
It’s sometimes helpful to prevent file compression during the export to conserve resource usage. You can use the NoFileCompression parameter to accomplish this; however, if you use this parameter in the export process, you must also use it in the import process.
With that in mind, to perform a site, list, or library export using Windows PowerShell, type the following string at the command prompt and press Enter, substituting the sample values with your production values and using the specific parameters that meet your requirements:
Export-SPWeb -Identity <Site URL> -Path <Path and file name> [-ItemUrl <URL of site, list, or library>] [-IncludeUserSecurity] [-IncludeVersions] [-NoFileCompression] [-GradualDelete] [-Verbose]
Backing Up Logs
Between backing up the SharePoint server farm environment and restoring it is a set of instructions for the restoration contained in the SQL Server transaction logs. Microsoft SQL Server 2008 R2, SQL Server 2008 with Service Pack 1 (SP1) and Cumulative Update 2, and SQL Server 2005 with SP3 and Cumulative Update 3 have transaction logs that record all the changes made to a database since the last checkpoint or full backup. Within the logs is also the information required to restore the farm.
Fortunately, these logs are automatically backed up whenever you perform a backup on the farm, a web application, or the databases using either Central Administration or Windows PowerShell. When the logs are backed up, they are automatically truncated, but the longer between backups, the larger the log becomes, affecting the time it takes to perform the backup and the impact on resources.
The transition logs are the only log files that you must absolutely back up, but they are not the only information source you can back up. Both Collect Usage Data and Archive Diagnostic Logs can also be backed up. The usage data log provides information on how websites are being used within SharePoint. The diagnostic logs record data on farm operation.
The default location for the Collect Usage Data files is on the same partition where SharePoint is installed, so if you back up the farm, these files are also backed up. However, since the files can grow to be very large, it’s recommended that you change the location to a folder on a separate drive. Since the location of this log is a farm-level setting, the information will still be backed up when you back up the farm.
You can back up the diagnostic logs using Windows PowerShell in a number of ways.
To archive diagnostic logs from all farm servers, type the following string at the prompt and then press Enter, replacing the sample values with your production values:
Merge-SPLogFile -Path "<path to merged log file>.log" -Overwrite
Here’s an example of what this command looks like with “real” values:
Merge-SPLogFile -Path "C:LogsMergedFilesMyFarm_merged_05-11-2010.log" -Overwrite
This is a very time-consuming operation since you are merging all the log data from all the farm servers. You can merge log entries that match only a certain set of parameters by using the following string:
Merge-SPLogFile -Path "<path to merged log file>.log"
-Area "<Area>" -Category "<Category>"
Area can contain one or more parameters including wildcards, as can Category. You can also filter by Level, Correlation, EventID, Message, StartTime, EndTime, Process, and ThreadID.
In addition to archiving diagnostic logs for all servers, you can perform the same action for a specific server. The command string to perform that task is as follows:
Copy-Item <Log folder path> -Destination <Archive folder path> -Recurse
Here’s an example of what that command looks like in “real life”:
Copy-Item "C:LogsFilesdiagnostics" -Destination"C:LogsMergedFilesMyFarm_merged_05-11-2010.log" -Recurse
Performing a restoration operation in SharePoint isn’t quite the reverse of performing backup operations. The permissions and qualifications are similar but not identical, and there are specific considerations to be aware of prior to performing a restore.
Restoring SharePoint Components
Once you have backed up the farm, you have the basis from which to restore the farm to its previous configuration should a disaster occur to your SharePoint environment. Details regarding the permissions required for people and systems must be observed, and there are restrictions regarding the restoration itself. Understand the following carefully before attempting to restore the farm.
Managing Account Permissions and Conditions
To perform a restore operation using Central Administration, you must belong to the Farm Administrators group. If you intend to perform a restore operation using Windows PowerShell, you must belong to the SharePoint_Shell_Access role for the specified database. Your account must have Read permissions to the backup folders.
The database server’s SQL Server account, the Timer Service account, and the Central Administration application pool account must all have Read permissions to the backup folder, and the database server’s SQL Server account must belong to the sysadmin fixed server role. The SharePoint Foundation Administration Service must be started on all farm servers prior to initiating the restore operation.
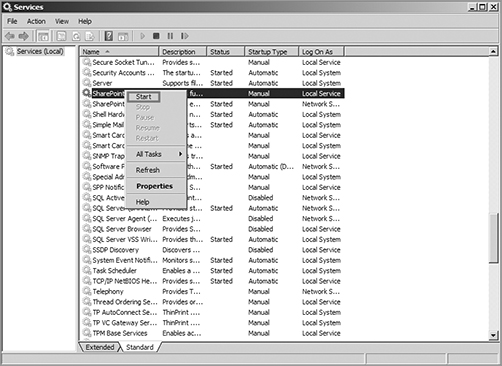
To do so, on the computer running SharePoint Server 2010, click Start Run, type services.msc in the Run field, and then click OK. When services.msc opens, scroll down until you see the SharePoint Foundation Administration Service in the list. Right-click the service and click Start in the list that appears, as shown in Figure 12-1.
The SharePoint Foundation Administration Service is not started by default on stand-alone SharePoint installations such as the one configured for the exercises in this book, so make sure to start this service or your restore operations will fail.
A caveat for restoring SharePoint includes not being able to perform more than one backup or recovery operation at a time. After the recovery operation is complete, you may still be unable to access search for up to 15 minutes. If the system has to perform a crawl, accessing search may take even longer. You are also unable to restore one version of SharePoint to another version.
Figure 12-1: The SharePoint Foundation Administration Service in Services.msc
Preparing to Restore the Farm
Although regularly backing up the entire farm is the backup method of choice, you will restore the entire farm only if a disaster has brought down the whole farm environment. If only a single SharePoint component such as a web application, database, or site collection has an issue, use a restore method that applies to just the affected component.
- There are limitations regarding what restoring the farm can and cannot do.
- Although backing up the farm includes backing up the configuration and content databases for Central Administration, you cannot restore these elements using SharePoint Server 2010 utilities.
- Restoring the farm with SharePoint Server utilities does not restart all the service applications within the farm.
- You must restart these services manually using either Central Administration or Windows PowerShell. Do not attempt to use the SharePoint Product Configuration Wizard.
- Although the wizard will restart the services, it will also reprovision the services and service proxies, causing you to lose your specific configurations for these elements.
The following sections regarding restore limitations and other aspects of preparing to restore the farm are particularly important, relative both to the certification exam and to the duties of administering SharePoint Server 2010.
The best-case scenario for restoring or reattaching a database using built-in tools is to employ the overwrite option. This allows the unique identifier (ID) for each content database to remain the same, resulting in the change logs for all databases to be retained. The advantage to this is that search continues its usual crawling schedule as defined by the crawl rules you set up prior to the system’s last backup. If you do not use the overwrite option, a new ID is assigned to the restored database, and the change log is lost. When the next crawl of the database occurs, new data from the content database will be added to the index. A full crawl will be required as opposed to an incremental crawl.
You can use SharePoint restore operations to restore remote BLOB stores only if you use the FILESTREAM remote BLOB store provider to put data in the BLOB stores. If you use another provider, you will have to restore the remote BLOB stores manually.
When you perform a farm restore, you cannot use a backup from a multiple server farm and restore it to a single farm environment, nor can you use a single farm backup to restore to a multiple-server farm. You also cannot use a backup from one version of SharePoint to restore to a different version.
Restoring the Farm
You will typically perform a restore operation on the entire farm if a disaster, such as a fire or flood, has caused significant hardware damage and data loss. You can also perform a full farm restore if you need to return SharePoint configuration and data settings to a previous date or if you are moving your SharePoint deployment from one farm environment to another.
As with the farm backup, you can restore SharePoint using Central Administration, Windows PowerShell, or SQL Server tools. Exercise 12-10 will show you the Central Administration procedure.
Exercise 12-10: Restoring the SharePoint Farm with Central Administration
1. On the Central Administration main page, click Restore From A Backup under Backup And Restore.
2. On the Restore From Backup – Step 1 Of 3: Select Backup To Restore page, in the available list of backups, select the backup that contains the farm backup and then click Next, as shown here.

3. On the Restore From Backup – Step 2 Of 3: Select Component To Restore page, select the check box next to the farm and then click Next.
4. On the Restore From Backup – Step 3 Of 3: Select Restore Options page, under Restore Component, verify that the word Farm appears in the Restore The Following Component list.
5. Under Restore Only Configuration Settings, verify that the Restore Content And Configuration Settings option is selected.
6. Under Restore Options, select the Same Configuration option for Type Of Restore.
7. When the confirmation dialog box appears, click OK.
8. Click Start Restore.
9. Monitor the recovery job under Readiness at the top of the Backup And Restore Job Status page or under the Restore section lower on the page.
10. Once the restoration operation has finished, go to the Central Administration main page and click Manage Services On Server under Application Management.
11. On the Services On Server page, start any necessary service applications by clicking Start in the Actions column next to each application.
For step 2, if the required backup job isn’t present in the list, type the UNC path to the backup folder in the Backup Directory Location field and then click Refresh.
For step 6, if the Restore Only Configuration Settings section is not present, you most likely selected a configuration-only backup. Select a backup job that contains the farm backup.
If, after you start the restore operation, you receive any error messages, review the errors in the Failure Message column on the Backup And Restore Job Status page. You can also review error messages in the Sprestore.log file located in the backup folder.
After restarting your services, you will still need to reestablish trust relationships between farms. Review Exercise 4-9 in Chapter 4, “Configuring Service Applications,” for details.
Restoring the SharePoint Farm with Windows PowerShell
You can perform the same operation using Windows PowerShell. You must be loggedin with an account belonging to the Farm Administrators group. Open PowerShell as an administrator, type the following code at the prompt, and then press Enter, replacing the sample values with your production values:
Restore-SPFarm -Directory <Backup folder>
-RestoreMethod Overwrite [-BackupId <GUID>]
Here’s an example of what this command looks like using “real-world” values:
Restore-SPFarm -Directory C:/backups/backup_folder/farmbackup
-RestoreMethod Overwrite [-BackupId 1234]
If you do not specify the unique ID number of the backup using the -BackupId switch, the most recent backup will be used.
To view the available backups for the farm, execute the following command, replacing the sample values with your production values:
Get-SPBackupHistory -Directory <Backup folder> -ShowBackup [-Verbose]
After the restore operation, to restart all service applications, use the following command:
Start-SPServiceInstance
To restart a specific operation, use the same command followed by the -Identity switch and the GUID for the specific service application, replacing the sample value for the actual GUID:
Start-SPServiceInstance -Identity <ServiceApplicationID>
Restoring the SharePoint Farm with SQL Server Tools
Just as you cannot perform a full farm backup with SQL Server tools, you also cannot perform a full restore. You can only restore the databases for the farm. You’ll still need to use either Central Administration or Windows PowerShell to restore the farm configuration. Also, if you choose to use this restoration method, search will not be restored, and you will be required to perform a full crawl after restoring the content database.
The recommended order to perform a database restoration is to first restore the last full database backup, then restore the most recent differential backup that occurred after the last full backup, and finally restore all transition log backups that occurred after the most recent backup, regardless if it was a full or differential backup.
Prior to beginning this procedure, stop the SharePoint Services Timer Service and wait until any running stored procedures have finished, which can take several minutes. You should restart this service only after the databases have been restored.
1. Start the SQL Server Management Studio tool on your computer and connect to the desired database server.
2. In Object Explorer, expand Databases.
3. Right-click the desired database, point to Tasks, point to Restore, and then click Database.
4. When the Restore Database dialog box appears, specify the source and destination of the backup or accept the defaults and then select the desired backup set or sets.
5. Click Options in the Select A Page pane.
6. Under Restore Options, select Overwrite The Existing Database without selecting any other options in this section.
7. Under Recovery state, select Recover With Recovery if you have included all transition logs that need to be restored or select Recover With Norecovery if you must restore more transaction logs.
8. Click OK.
You will need to repeat this procedure for each database you want to restore, except for the configuration database. To restore the configuration settings, you must use Central Administration or Windows PowerShell. After restoring the required databases, you can restart the SharePoint Services Timer Service and then restart any required service applications.
As previously mentioned, if you restore the SharePoint farm using SQL Server tools, after completing the procedure, you must still restore the farm configuration. You can perform this task using either Central Administration or Windows PowerShell. You can also restore the farm configuration when there has been an incident damaging that information but not a catastrophic event bringing down the entire farm.
Using Central Administration, the process of restoring the farm configuration is identical to the process of restoring the entire farm, as shown in Exercise 12-10. Using Windows PowerShell, you can use the same cmdlet string as you did in the section “Restoring the SharePoint Farm with Windows PowerShell” when you restored the entire farm. At the end of the string, add the following parameter to indicate that you want to restore only the farm configuration:
-ConfigurationOnly
You can use Windows PowerShell to enter a script that will record the entire server farm configuration. See Chapter 15, “Working with Windows PowerShell 2.0 Administration,” for details.
Copying the Configuration Settings from One Farm to Another Farm
You might want to back up the configuration settings from one farm and then copy those settings to a separate farm for a number of reasons. For instance, you might want to develop a SharePoint test environment that has identical settings to your production farm. You might also want to use identical settings for multiple farms in your organization.
One of the ways you can accomplish this goal is to back up and recover a farm without the content databases being attached. With this method, you get the farm settings and the web application settings as well as any service applications you may choose to include. You can also choose to back up and recover configuration settings only, which gives you only the core SharePoint Foundation 2010 settings.
To back up and recover a farm without content databases, open Windows PowerShell as an administrator and follow these steps. After entering each command, press Enter, substituting the sample values with your production values.
Use the following command to document the current web application URLs and content database mappings:
Get-SPWebApplication | %{$_.Name;$_.Url;%{$_.ContentDatabases|%{$_.Name};Write-Host ""}}
If you want to dismount all content databases, use the following command:
Get-SPContentDatabase | Dismount-SPContentDatabase
If, instead of dismounting all content databases, you want to dismount a specific content database, use the following command:
Get-SPContentDatabase WSS_Content | Dismount-SPContentDatabase
Now that the database or databases have been dismounted, back up the farm using this command:
Backup-SPFarm -Directory \servernameshare -BackupMethod Full
After the backup is complete, remount the content databases using the following command:
Mount-SPContentDatabase -Name <WSS_Content> -WebApplication http://servername/http://servername
You can restore the configuration settings to a different farm using the following command:
Restore-SPFarm -Directory <Backup folder> -RestoreMethod Overwrite [-BackupId <GUID>] -ConfigurationOnly
In Central Administration, you can back up the configuration settings as previously discussed and then restore them to a separate farm. The only difference is setting the specific destination for the other farm during the restore process. Any configuration settings already present on the farm to which you are restoring will be overwritten.
Restoring SharePoint Applications and Services
As in the various backup procedures chronicled earlier in this chapter, you can choose to restore the entire farm or just certain components or services. Among these specific components, you can choose to restore a web application, a service application, search, the Secure Store Service, and more. This section will start you off with restoring a web application.
You can perform this task using both Central Administration and Windows PowerShell. Exercise 12-11 will show you the Central Administration method. You must be a member of the Farm Administrators group. Make sure the SharePoint Services Timer V4 Service and Farm Database Access account both have Full Control permissions to the backup folder. You cannot use SQL Server tools to restore a web application.
Exercise 12-11: Restoring a Web Application with Central Administration
1. On the Central Administration main page, click Restore From A Backup under Backup And Restore.
2. On the Restore From Backup – Step 1 Of 3: Select Backup To Restore page, select the backup job containing the desired farm with the web application from the list and then click Next.
3. On the Restore From Backup – Step 2 Of 3: Select Component To Restore page, locate the desired web application, select the check box next to it, and then click Next.
4. On the Restore From Backup – Step 3 Of 3: Select Restore Options page, under Restore Component, verify that Farm<web application> appears in the Restore The Following Component list, where <web application> is the actual name of the web application you want to restore.
5. Under Restore Only Configuration Settings, verify that the Restore Content And Configuration setting is selected.
6. Under Restore Options, select Same Configuration for Type Of Restore.
7. When the verification dialog box appears, click OK.
8. Click Start Restore.
As with other backup and recovery jobs already documented, you can review the progress of the restore operation as it happens, and if an error occurs, you can find details in the Sprestore.log file in the backup folder as well as in the Failure Message column of the Backup And Restore Job Status page.
You can perform the same operation using Windows PowerShell. Open PowerShell as an administrator, type the following command string at the prompt, and then press Enter, replacing the sample values with your production values:
Restore-SPFarm -Directory <Backup folder name>
-RestoreMethod Overwrite -Item <Web application name> [-BackupId <GUID>] [-Verbose]
Use the -BackupID parameter to specify the desired backup using the backup’s GUID. For <Backup folder name>, type the actual name of the path to the folder containing the desired backup. For <Web application name>, type the name of the web application you want to restore.
Restoring a Service Application with Central Administration
The process of restoring a service application with Central Administration is substantially similar to Exercise 12-11. For step 4, under Restore Component, make sure the desired service application appears in the Restore The Following Component list in the format FarmShared Services Applications<Service application>, where <Service Application> is the actual name of the desired application. After that, follow the remaining steps just as you did in Exercise 12-11 to complete the task.
This task can also be accomplished using Windows PowerShell. Type the following command string at the PowerShell prompt and then press Enter, replacing the sample values with your production values:
Restore-SPFarm -Directory <Backup folder>
-Item <Service application name> -RecoveryMethod Overwrite [-BackupId <GUID>] [-Verbose]
The only difference between running this command and the PowerShell command for restoring a web application is entering the actual name of the service application rather than the web application. If you don’t type in a GUID, the most recent backup will be used.
Restoring a Service Application with SQL Server Tools
Unlike restoring a web application, you can restore a service application with SQL Server tools. Like other SQL Server tool backup and restore tasks, you cannot restore the complete service application; instead, you can only restore the databases associated with the application. You can only restore the complete service application using Central Administration or Windows PowerShell. To perform this task, you must belong to the SQL Server sysadmin fixed server role on the database server containing the desired database.
1. Open the SQL Server Management Studio utility on your computer and connect to the desired database server.
2. In Object Explorer, expand Databases,
3. Right-click the desired database, point to Tasks, and then click Restore.
4. Under Restore Component, click Database.
5. Either type the name of the recovery set in the Name field or accept the defaultname present.
6. Either accept the default expiration date of zero days for the recovery set, indicating that it will never be overwritten, or specify a date when the recovery set may be overwritten.
7. Under Destination, specify where you want the recovery to occur.
8. Click OK.
This procedure must be performed for every database you want to restore for SharePoint components.
Restoring SharePoint Search
You can restore search using Central Administration or Windows PowerShell, but not with SQL Server tools. Like other components, you can restore just search in SharePoint; however, if your search topology uses FAST Search Server 2010 for SharePoint, the following procedures will also restore the Content SSA and the Query SSA. In this case, you’ll additionally need to restore the FAST Search Server.
The process of restoring search using Central Administration is very much like the process of restoring a service or web application. You follow the steps for recovery for those tasks and, on the Restore From Backup – Step 3 Of 3: Select Restore Options page, under Restore Component, verify that the Search service application name appears in the Restore The Following Content list. Otherwise, follow the restore procedure as you did in the other recovery tasks using Central Administration.
The process of restoring search using Windows PowerShell is virtually the same as restoring a service or web application. The only difference is specifying the name of the Search service application for the -Item parameter as follows:
Restore-SPFarm -Directory <Backup folder> -Item <Search service application name> -RecoveryMethod Overwrite [-BackupId <GUID>] [-Verbose]
Just type in the actual values for the backup folder and the GUID for the backup ID. If you don’t enter a GUID, the most recent backup will be used.
Restoring the Secure Store Service
You can restore the Secure Store Service with either Central Administration or Windows PowerShell but not with SQL Server tools. The tasks are very similar to those you’ve already performed, but, in addition, you’ll need the passphrase you wrote down when you originally backed up the service. Without the passphrase, you will be unable to restore the Secure Store Service.
The process of using Central Administration to restore the Secure Store Service is similar but not identical to other Central Administration restore tasks.
1. On the Restore From Backup – Step 2 Of 3: Select Component To Restore page, you need to expand Shared Services Applications and then select the check box next to the desired Secure Store Service application backup group.
2. Click Next and on the Restore From Backup – Step 3 Of 3: Select Restore Options page, under Restore Component, make sure the name of the desired Secure Store Service appears in the Restore The Following Component list in the format FarmShared ServicesShared Services Applications<Secure Store Service name>
3. After that, continue with the steps you’ve used to restore other SharePoint components such as web and service applications.
After the restore operation is done, you will need to refresh the passphrase using the following steps:
1. On the Central Administration home page, click Manage Service Applications under Application Management.
2. On the Service Applications page, click the name of the desired Secure Store Service.
3. On the Secure Store Service page, select the check box next to the desired key and then click the Refresh Key button on the Ribbon.
4. When the Refresh Key dialog box opens, type the passphrase you previously recorded in the Pass Phrase field and then click OK.
The process for performing this restoration using Windows PowerShell is pretty straightforward. Type the following string at the prompt and then press Enter, replacing the sample values with your production values:
Restore-SPFarm -Directory <Backup folder>
-Item <Secure Store Service name> -RecoveryMethod Overwrite [-BackupId <GUID>] [-Verbose]
Replace <Secure Store Service name> with the actual name of the Secure Store Service. After the restore operation is complete, you can refresh the passphrase by executing the following command, typing the actual passphrase for the -Passphrase switch.
Update-SPSecureStoreApplicationServerKey -Passphrase <Passphrase>
Restoring SharePoint Databases
You can restore a content database using Central Administration, Windows PowerShell, or SQL Server tools, but you must use Windows PowerShell to attach and restore a read-only content database.
Restoring a Content Database
To restore the content database using Central Administration, follow the steps you performed for other Central Administration restore tasks. On the Restore From Backup – Step 2 Of 3: Select Component To Restore page, select the check box next to the desired content database and click Next. Afterward, proceed as you have in other similar tasks and start the restore. If the content database check box cannot be selected, you will need to use either Windows PowerShell or SQL Server tools to do the job.
You can perform the same task using Windows PowerShell. Type the following string at the command prompt and then press Enter, replacing the sample values for your production values:
Restore-SPFarm -Directory <Backup folder name> -RestoreMethod Overwrite -Item <Content database name> [-BackupId <GUID>] [-Verbose]
You’ll need to know the name of the content database and the GUID of the desired backup. If you don’t enter a GUID, the most recent backup will be used for the restore operation.
The procedure to restore the content database using SQL Server tools is similar but not exactly the same as other like procedures. Here are the steps:
1. Open the SQL Server Management Studio utility on your computer and connect to the desired database server.
2. In Object Explorer, expand Databases.
3. Right-click the desired database, point to Tasks, point to Restore, and then click Database.
4. When the Restore Database dialog box appears, specify the source of the backup set and the destination where you want it restored, or accept the default values.
5. In the Select A Page pane, click Options.
6. Under Restore Options, select Overwrite The Existing Database and no other options in this section.
7. Under Recovery State, select Recover With Recovery if you have included all transaction logs that must be restored or select Recover With Norecovery if you must still restore more transaction logs.
8. Click OK to start the restoration process.
Repeat this process for every database you need to restore.
Attaching and Restoring a Read-Only Content Database
There are a variety of reasons why you might want to restore a read-only content database including using such a database to allow users to access SharePoint during maintenance procedures. When you restore a read-only database, however, it becomes a read-write database.
To perform this task, type the following string at the Windows PowerShell command prompt and then press Enter, replacing all the sample values with your production values:
Mount-SPContentDatabase -Name <Database name> -WebApplication <Web application ID> [-Verbose]
The Mount-SPContentDatabase cmdlet associates the content database with a web application, allowing the contents to be read. This is different from performing this task using SQL Server tools.
Restoring Site Collections, Lists, and Libraries
You can use Windows PowerShell to restore a site collection, list, or document library if you are having an issue with just those individual elements in SharePoint. The following tasks will describe the procedures.
Restoring a Site Collection with Windows PowerShell
As with other, similar PowerShell tasks, you must be logged in with an account that has read permissions to the relevant backup folder and is a member of the db_owner fixed database role on both the farm configuration database and the content database where you want to restore the site collection.
Some caveats associated with this task are that if the site collection you are restoring is larger than 1GB, you can use the GradualDelete switch to get better performance during the restoration operation. This procedure overwrites the site collection and marks the site collection as deleted, preventing any further access to the content. The data is then deleted over a period of time rather than all at once.
To restore the site collection to a specific content database, use the DatabaseServer and DatabaseName switches to specify the desired content database. Otherwise, the SharePoint system will select the content database to which the site collection is restored. To restore a host-named site collection, use the Identity switch and specify the URL for the site collection. Also, use the HostHeader switch to specify the URL of the web application that will contain the host-named site collection.
To restore a site collection using Windows PowerShell, open PowerShell as an administrator, type the following command string at the prompt, and then press Enter, substituting your production values for the sample values:
Restore-SPSite -Identity <Site collection URL> -Path <Backup file> [-DatabaseServer <Database server name>] [-DatabaseName <Content database name>] [-HostHeader <Host header>] [-Force] [-GradualDelete] [-Verbose]
Importing a Site, List, or Library with Windows PowerShell
The account requirements for performing this task are the same as for restoring a site collection with Windows PowerShell. Caveats include using the Identity switch to specify the template of the site or subsite you want to restore. You can use the Get-SPWeb cmdlet and pass the ID to Import-SPWeb.
Use the Path switch to define the name of the export file you want to use in therecovery operation. To specify the user security settings for the list or library, usethe IncludeUserSecurity switch. Overwrite the desired list or library by using the Force switch and use the UpdateVersions switch to indicate how you want to manage any versioning conflicts.
For importing a site, open Windows PowerShell as an administrator and use the following, replacing the sample values with your production values:
Restore-SPSite -Identity <Site collection URL>
-Path <Backup file> [-DatabaseServer <Database server name>] [-DatabaseName <Content database name>] [-HostHeader <Host header>] [-Force] [-GradualDelete] [-Verbose]
Here’s an example of what this would look like in production:
Restore-SPSite -Identity http://lab-sp2010
-Path C://storage/backup/backupfile -DatabaseServer sqldb_101 -DatabaseName content_db -HostHeader hostheadername -Verbose
For importing a list or library, use the following sample code, substituting your production values for the example values:
Import-SPWeb -Identity <Site URL> -Path <Export file name> [-Force] [-NoFileCompression] [-Verbose]
Remember, the NoFileCompression parameter means that no file compression is performed during the import process. If you compressed the file during export, you must decompress it during import. If you specified no file compression for export, use the NoFileCompression switch for import. Also, the Verbose switch lets you see the progress of the restore operation in the PowerShell window. Finally, recall that you cannot import a site, list, or document library that was exported from a different version of SharePoint. The versions must match.
In this chapter, you learned how to set up user and system accounts and backup directories for the purpose of backing up and restoring the SharePoint environment:
- Understanding permissions necessary for the human and system accounts required for backup and recovery operations
- Learning the various tools required to perform backups of the SharePoint farm and its subelements, including services, applications, databases, lists, and libraries
- Comprehending the different procedures for initiating a SharePoint recovery, not only of the entire farm but also of its various subelements
- Learning which backup and recovery tasks are specifically managed by WindowsPowerShell
Understanding the Various Tasks Associated with Backing Up the SharePoint Farm and Its Various Components Understand the concepts behind planning the backup strategy, including assigning necessary permissions to user and system accounts, creating a backup directory on the local computer or network, and configuring and executing backups of the farm and its various elements.
Understand the Activities Related to Restoring the SharePoint Farm and Its Various Components Comprehend the various functions related to planning your recovery strategy, including assigning necessary permissions to user and system accounts and configuring and executing recovery methods for the server farm and its various components.
1. You are a SharePoint administrator for your company, and you are planning the backup and recovery strategy for your server farm. You know that certain services in SharePoint must have Full Control permissions to the folder where backups are stored. Of the following, which services must have this permission? (Choose all that apply.)
A. The SharePoint Services Timer V4 Service
B. The SharePoint Foundation Service
C. The SharePoint Backup Service
D. The SQL Server Service
2. You are a SharePoint administrator for your company, and you are planning the backup and recovery strategy for your server farm. You are developing your plan for access permissions for various accounts. A user must be a member of the Administrators account on the local computer to perform which of the following tasks in Central Administration? (Choose all that apply.)
A. Backing up and restoring the farm
B. Backing up and restoring applications
C. Backing up and restoring sites
D. Backing up and restoring document libraries
3. You are a SharePoint administrator for your company, and you are planning the backup and recovery strategy for your server farm. You are developing your initial plan for the backup directory or folder where you will back up your server farm. What is the recommended procedure for backing up the farm to a folder?
A. Back up the farm to a folder on the local computer.
B. Back up the farm to a folder on the network.
C. Back up the farm to a folder on the local computer and then transfer the backup to a remote location on the network.
D. Back up the farm to a remote location on the network and then transfer the backup to a folder on the local computer.
4. You are a SharePoint administrator for your company, and you are planning the backup and recovery strategy for your server farm. You are developing your backup and recovery strategy. Backing up the entire farm regularly is a necessary task, but not all necessary elements are backed up during this process. Of the following, what is not backed up when you back up the farm? (Choose all that apply.)
A. Business Data Connectivity service external content definitions
B. Business Data Connectivity data sources
C. Binary Large Object stores when using the FILESTREAM store provider
D. Certificates required to establish trust relationships
5. You are a SharePoint administrator for your company, and you are planning the backup and recovery strategy for your server farm including the Windows PowerShell method. Of the following, which cmdlet would you use to initiate a farm backup?
A. Backup-SPFarm
B. Import-SPFarm
C. BackupMethod-SPFarm
D. AddBackup-SPFarm
6. You are a SharePoint administrator for your company, and you are about to perform a backup of the entire farm using Central Administration. You go to the Central Administration home page and you want to click Perform A Backup under Backup And Restore, but you see the option isn’t available. You notice that the Backup A Site Collection option is available. Of the following, which is the most likely explanation for this occurrence?
A. You are logged into Central Administration as a site collection administrator but not a farm administrator.
B. You are working on a single-server deployment of SharePoint with a built-in database and not a true server farm environment.
C. You must click Backup And Restore to go to the Backup And Restore page before you can see the Perform A Backup option.
D. The farm is currently in the process of being backed up, and the Perform A Backup option automatically disappears from the page during the backup process.
7. You are a SharePoint administrator for your company, and you are about to perform a backup of the entire farm using Central Administration. You are specifying the location of the backup directory. How are you supposed to indicate this location?
A. Using the web location such as www.backup.local/backup1.bak.
B. Using the Fully Qualified Domain Name (FQDN) such as backup.domain.local/backup1.bak.
C. Using the UNC path such as //backupfolder/backup1.bak.
D. You can input the location using HTTP, FQDN, or UNC, and they are equally accepted.
8. You are a SharePoint administrator for your company, and you are performing a backup of the server farm using Central Administration. You want monitor the progress of the backup. Of the following, what are valid options for doing so? (Choose all that apply.)
A. Review the status of the backup under Readiness on the Backup And Restore Status page.
B. Review the status of the backup under Backup on the Backup And Restore Status page.
C. Review the status of the backup under Status on the Backup And Restore Status page.
D. Review the status of the backup in the Spbackup.log file in the backup folder.
9. You are a SharePoint administrator for your company, and you are developing a strategy for backing up the server farm. Of the following, which tools and utilities can you use to perform a complete backup of the farm? (Choose all that apply.)
A. Central Administration
B. Windows PowerShell
C. SQL Server tools
D. Data Management Console
10. You are a SharePoint administrator for your company, and you are currently backing up the server farm using SQL Server tools. You are required to select a recovery model. What are the valid options the SQL Server Management Studio? (Choose all that apply.)
A. Simple
B. Full
C. Differential
D. Bulk logged
11. You are a SharePoint administrator for your company, and you are planning the backup and recovery strategy for your server farm including the Windows PowerShell method. You want to have the ability to back up just the configuration database using PowerShell. Of the following, which is the correct cmdlet?
A. Backup-SPConfigurationDatabase
B. Import-SPConfigurationDatabase
C. BackupMethod-SPConfigurationDatabase
D. AddBackup-SPConfigurationDatabase
12. You are a SharePoint administrator for your company, and you are planning the backup and recovery strategy for your server farm including the Windows PowerShell method. You add the -Verbose parameter to the end of the command to back up the server farm. Of the following, what do you expect this parameter to do?
A. -Verbose will print a detailed list of the actions the backup performs to theSpbackup.log file.
B. -Verbose will print a detailed list of the actions the backup performs to the Statuscolumn of the Backup And Restore Status page in Central Administration.
C. -Verbose will print a detailed list of the actions the backup performs in the PowerShell window as the backup operation executes.
D. -Verbose will print a detailed list of the actions the backup performs to thebackup.txt file in the backup folder on the local computer.
13. You are a SharePoint administrator for your company, and you are planning the backup and recovery strategy for your server farm including the Windows PowerShell method. You want to have the ability to back up just a web application using PowerShell. Of the following, which is the correct cmdlet?
A. Backup-SPWebApplication
B. Import-SPWebApplication
C. BackupMethod-SPFarm
D. Backup-SPFarm
14. You are a SharePoint administrator for your company, and you are developing your backup plan for different SharePoint components using Windows PowerShell. You want to be able to back up search using PowerShell, and you use FAST Search Server 2010 for SharePoint. In addition to backing up SharePoint search, what else must you back up? (Choose all that apply.)
A. Content SSA
B. Query SSA
C. FAST Search Server 2010
D. The Bing Search add-on
15. You are a SharePoint administrator for your company, and you have backed up the entire server farm in a testing environment to evaluate the performance of the SharePoint backup and recovery tools. You now want to perform a restore of the farm using Windows PowerShell. Of the following, which is the correct cmdlet?
A. Restore-SPFarm
B. Export-SPFarm
C. RestoreMethod-SPFarm
D. RestoreBackup-SPFarm
16. You are a SharePoint administrator for your company, and you have backed up the entire server farm in a testing environment to evaluate the performance of the SharePoint backup and recovery tools. You now want to perform a restore of the farm using Windows PowerShell. How do you specify which backup file you want to use?
A. Use the -BackupName parameter and specify the name of the backup such asbackup1.bak.
B. Use the -BackupId parameter and specify the GUID of the backup such as 1234.
C. Use the -BackupDate parameter and specify the date of the desired backup.
D. There is no way to specify a backup file. The most recent backup file will be used for the restore operation.
17. You are a SharePoint administrator for your company, and you are currently restoring the server farm using SQL Server Management Studio. You have included all the backed-up transition logs in your recovery, so which selection do you need to make?
A. Recover With Recovery
B. Recover With Norecovery
C. Recover With Nonrecovery
D. Recover With Transitionlogs
18. You are a SharePoint administrator, and you are planning to copy the farm configuration from your production farm environment to a testing farm environment. Your plan is to test new features and customizations in a testing farm environment that has the identical configuration settings to your production environment. This action must be performed using Windows PowerShell. What is the first cmdlet you use in this operation?
A. Get-SPContentDatabase
B. Get-SPWebApplication
C. Get-SPFarm
D. Backup-SPFarm
19. You are a SharePoint administrator for your company, and you are planning on backing up the database to a snapshot using SQL Server Management Studio. While most backup tasks performed with Management Studio follow a similar set of steps, what is significantly different about backing up a database to a snapshot?
A. In Object Explorer, you expand Snapshots rather than Databases.
B. After selecting the desired database, you click New Query and type in code within the Management Studio tool.
C. You follow the usual instructions but do not have the option to set an expiration date for the snapshot.
D. This task can be performed using either SQL Server tools or Windows PowerShell only.
20. You are a SharePoint administrator for your company, and you want to restore a particular site collection using Windows PowerShell. What parameters must you use to specify the required content database for the site collection? (Choose two.)
A. DatabaseGUID
B. DatabaseHeader
C. DatabaseName
D. DatabaseServer
1. A,D. The SharePoint Services Timer V4 (SPTimerV4) and the SQL Server service account must have Full Control over the folder used for backups.
2. A, B. To perform recovery operations from Central Administration, being a member ofthe Administrators group for the local computer is required for backing up and restoring the farm, service applications, and content database. Being a member of the Farm Administrators group is required for backing up and restoring site collections, as well as sites, lists, and document libraries.
3. C. The recommended procedure is to first back up the farm to a folder on the local machine and then transfer the backup to a remote location on the network.
4. B, D. Although the SharePoint farm backup process backs up the Business Data Connectivity (BDC) service external content type definitions, it doesn’t back up the actual data source. Backing up the farm does not back up any certificates used to create trust relationships. SharePoint backs up the remote Binary Large Object stores, also called BLOB stores, only if you use the FILESTREAM remote BLOB store provider to move data in remote BLOB stores.
5. A. The Import-SPFarm and AddBackup cmdlets are bogus. -BackupMethod is a parameter used with the Backup-SPFarm cmdlet that lets you determine whether you are performing a Full or Differential backup.
6. B. The Perform A Backup link under Backup And Restore will not appear on the main page of Central Administration if you are working on a single-server installation of SharePoint with a built-in database.
7. C. Under Backup File Location, type the UNC path to the backup folder. If you attempt to use any other method, you will receive an error.
8. A, B. Review the status of the backup under Readiness at the top of the Backup And Restore Status page and under Backup lower on the page. The Status area of that page is a bogus option. You review the Spbackup.log file only if an error occurred.
9. A, B. You can perform a complete backup of the server farm only using Central Administration and Windows PowerShell. SQL Server tools will only back up the databases containing the farm’s content. Data Management Console is a bogus option.
10. A, B, D. Although you can specify a differential backup in Central Administration or Windows PowerShell, it is not a recovery option in SQL Server tools. All the other options are valid options.
11. A. The Import-SPConfigurationDatabase and AddBackup cmdlets are bogus.BackupMethod is a parameter used with the Backup-SPFarm cmdlet but not theBackup-SPConfigurationDatabase cmdlet.
12. C. Using the -Verbose parameter lets you see the progress of the backup in the PowerShell window as it occurs.
13. D. You use the same cmdlet, Backup-SPFarm, that you use when you back up the entire farm. The way you specify that you want to back up only a web application is using the -Item parameter and then indicating the name of the web application.
14. A, B, C. If you are using FAST Search Server 2010 for SharePoint, you should also back up the Content SSA and Query SSA, which includes the People Search index, as well as backing up the FAST Search Server. The Bing Search add-on is a bogus option.
15. A. Export-SPFarm and RestoreBackup-SPFarm are bogus options. RestoreMethod is a parameter you can use with Restore-SPFarm to specify eithera Full or Differential restore.
16. B. Use the BackupID parameter and specify the GUID number of the backup. If you don’t specify the desired backup file, the most recent backup file will be used by default.
17. A. Use the Recover With Recovery option. The Recover With Norecovery option is used when you still need to restore the transition logs. The other two options are bogus.
18. B. The first action you take is to document the current web application URLsand content database mappings using the Get-SPWebApplication cmdlet. TheGet-SPContentDatabase is used to dismount and later remount all content databases, and the Backup-SPFarm cmdlet is used to back up the farm configuration once the content databases are dismounted. Get-SPFarm is a bogus option.
19. B. After expanding Databases in Object Explorer, in the list that appears, you select the desired database and then click New Query. Then you enter a specific set of code similar to the following:
CREATE DATABASE <snapshot name>
ON
(
NAME=<logical name of the database file>,
FILENAME = ‘c:WSS_Backup1.ss’)
AS SNAPSHOT OF <database name>;
20. C, D. You must use the DatabaseServer and DatabaseName parameters to indicate the required server and database name. The other options are bogus.