
1 - YOU ARE WELCOME!
Overview

The purpose of this tool is to do just that, welcome your participants to the meeting. Your poster doesn’t need to be complex or particularly artistic, unless you want it to be. Placing your poster either on the door of the meeting room or just outside will orientate your participants to the right room. It might even be the start of your own meeting brand!
The Meeting Kaleidoscope
A great tool for making your participants feel included and part of something special, even before they have entered the room. Consider who your participants are and whether any particular imagery or colour might be especially attractive or topical.
Flow flavour

- Make sure you’ve placed the poster in good time before participants arrive.
- If your meeting is one of a series on the same subject or with the same group of participants, consider a common theme for each poster.
Watch out!

If your meeting is confidential, or likely to be sensitive, place the poster just inside the room, for example on a flipchart easel, so it can be easily seen when participants enter.
Resources and kit

A sheet of flipchart paper, marker pens and tape.
Catherine’s expert insight
‘This tool is super-speedy and simple to execute yet delivers a multitude of positive subliminal messages to the people taking part in your meeting. It’s a little like going to a formal meal and finding a handwritten card with your name on it in your place-setting. You feel expected, thought about, valued and welcome at the table. This simple tool can do a lot of work on your behalf, supporting you in establishing trust and confidence within the group and supporting you in creating a truly welcoming environment.’

2 - PREP
Overview
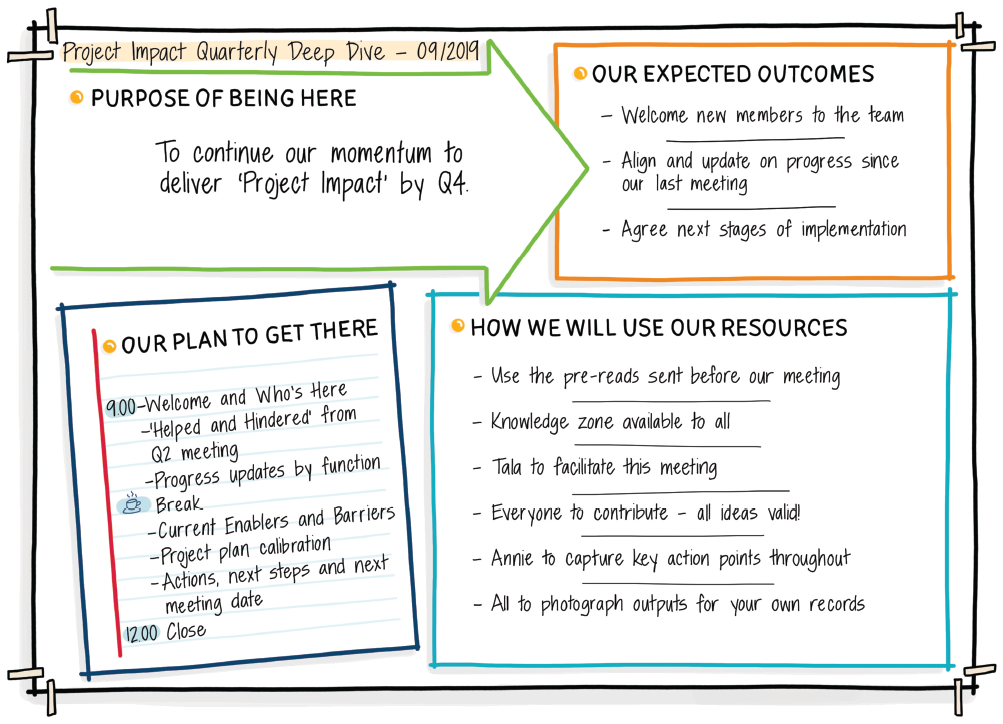
If there’s a tool that can be used in absolutely every meeting – it’s PREP. This tool is not only used at the outset to focus your participants on what’s to be achieved and how, but it forms a regular check-in point during your meeting to check you are on-track. For some this could be described as an agenda chart, but it’s much, much more than that.
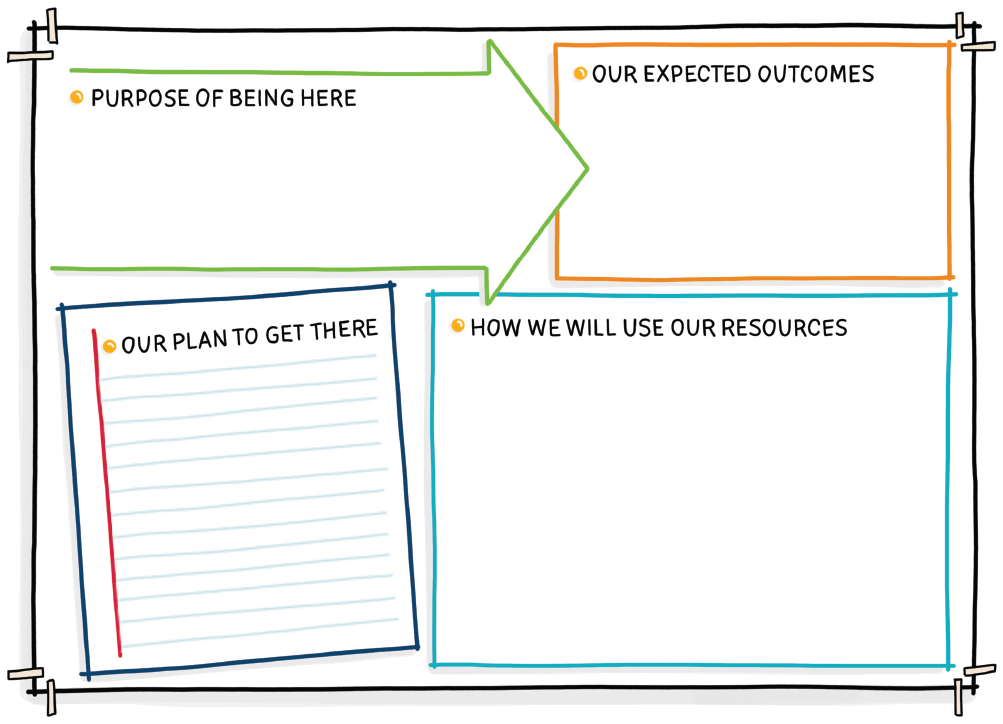
PREP is divided into four key areas. These are:
- Purpose for being here (why does this meeting need to happen?)
- How we will use our Resources (including the brains in the room, roles and how we will work: for example is the meeting a combination of presentation and group working etc.?)
- Our Expected outcomes (what we aim to achieve by the end of the meeting)
- Our Plan to get there (the key conversations we need to have).
The Meeting Kaleidoscope
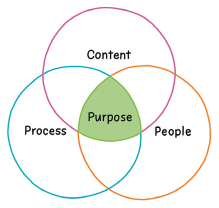
This tool represents an intersection of People, Content and Process, centred around the Purpose as described in the Meeting Kaleidoscope.
Flow flavour
- Prepare a chart using the example illustration for inspiration. Ideally all sections should be on one chart so they can be viewed together, but if you need to create on more than one flipchart that will also work well.
- Clearly position the chart in the room so that all participants can see it at all times during the meeting.
- Starting with the Purpose, remind your participants why this meeting is taking place (they will know this from the meeting invitation), then move to expected outcomes, and the plan to get there. Finally, agree with the group about how it intends to work. For example, there may be different roles being played in the room, and it is recommended that you draw attention to these at the outset to avoid surprises later.
- Check with the group for clarification on the PREP chart before moving into the next stage of your meeting, and respond to any questions they may have.
- Refer back to the chart during your meeting as a way of helping participants to understand where they are in the meeting plan. Do this sparingly, at key points such as after breaks, lunch and at the end of the meeting.
- Take a photo of the chart at the end of the meeting and send to participants (alongside other chart photos) to clearly remind them of the conversation.
Watch out!
- You will have communicated the purpose and expected outcomes to your participants before your meeting, so they are clear about why they are attending and what’s to be achieved. Make sure your chart mirrors the previous description, as significant differences may cause confusion.
- Never take the PREP chart down or cover it during the meeting. It should act as an important focal point throughout the conversation.
Resources and kit
A large sheet of flipchart paper, a good range of coloured marker pens, tape and ruler/straight edge.
Helen’s expert insight
‘Can you make a direct connection between your meeting and the purpose of your organisation? If you can’t explain the connection (out loud) to somebody clearly and simply, you should think twice about why you’re having the meeting.
It’s easy to fall into the trap of ‘meetings for meetings’ sake.’ We get sucked into a maelstrom of competing priorities and it seems sensible to put yet another meeting in the diary just to keep up.
I wonder when does the work get done? People tell me they arrive at work earlier and stay later to do the work they couldn’t do because their day was spent in meetings! Like running hard only to stand still; a lot of energy is expended, but for what real value?
PREP is a simple framework that will help you achieve clarity: Why this meeting? Why these people? Why now?
Notice that Purpose, Resources and Expected Outcomes come before the Plan (the agenda). That’s because an agenda without a clear foundation can end up being a random list of things to discuss. PRE provides clear focus and gives P substance and reason.
3 - MUGSHOT
Overview
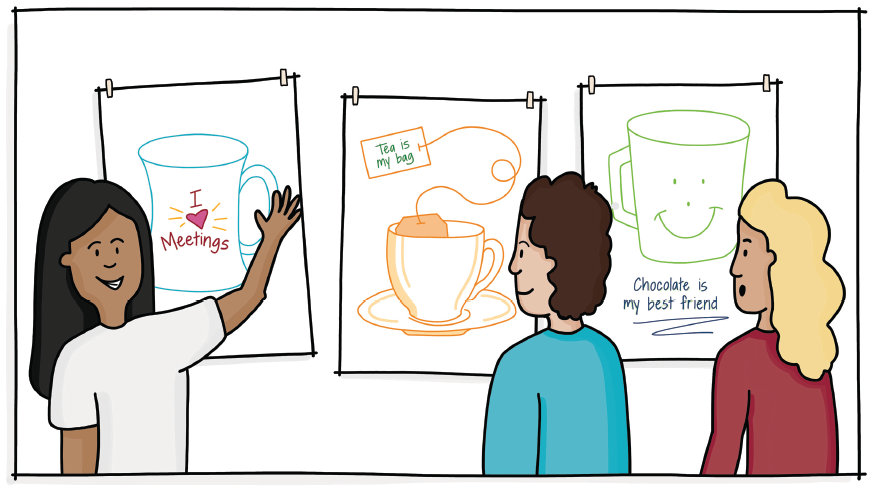
A fun visual activity designed to help participants get to know each other and feel comfortable. This tool is based on the idea that most people have a favourite mug used for their coffee or tea at work, and usually everyone knows to whom each mug belongs. This tool will help develop a sense of each participant’s character as they design a fictional mug that tells other participants about them.
The Meeting Kaleidoscope
Very much focussed on people in the early stages of your meeting. A good tool to use to get participants ready for visual working later in the meeting.
Flow flavour
- Provide one sheet of flipchart paper for each participant. Smaller sheets of paper are also great if you have less space in which to work.
- Ideally, you will have drawn a blank mug on each sheet beforehand, so the image takes up as much space on the paper as possible. Alternatively you could ask participants to draw the mug outline themselves, copying a template you have prepared. Even drawing the mug itself can be an amusing experience.
- Ensure participants have access to a range of coloured markers, the more colours the better, and ask participants to create a design on their mug that tells others about them. This could be their interests, or maybe a statement.
- Allow approximately 10 minutes, and ask participants to present their mugs to each other and explain why they have chosen their specific design. Encourage others to ask questions.
Watch out!
If you are leading a large group, guide participants to be concise in their explanation of their mug if you are short of time, or simply encourage a ‘gallery walk’ whereby participants take a walk around the room and look at each other’s work.
Resources and kit
Flipchart paper (or slightly smaller), a good range of coloured marker pens and tape.
Tom’s expert insight

‘What I love about this tool is the fun it brings to the group through something very simple. Even if people don’t have a specific mug at work most can identify with owning something that tells everyone about their personality. I’ve used this exercise with clients who I know have their own ‘mug culture’, and the advantage of the mug is that it is often found in the office, where meetings are usually held. What other items can you think of that might be relevant to the meeting you are leading, which could serve as a fun way of getting to know each other?’
4 - WHO’S HERE?
Overview
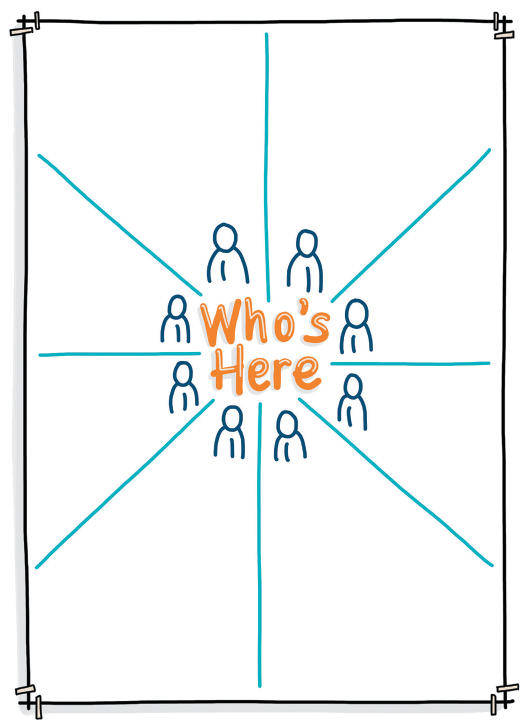
Who’s Here? is a simple tool designed to generate a sense of mutual trust and help participants feel comfortable as they start the meeting. The tool is based on a simple circular theme, with a central ‘Who’s here?’ point (or any other title you wish to use, such as the name of the meeting) and a number of segments fanning out from the centre, rather like sunbeams, matching the number of meeting participants.
An advantage of using this tool is that you can refer back to it at the end of your meeting. For example, if you ask your participants what they wish to get out of the meeting you can return to it to check whether they achieved their aim.
The Meeting Kaleidoscope
Whilst primarily focussed on participants and who they are, this tool can signpost individual aspirations if you draw the group’s attention to the meeting purpose.
Flow flavour
- Draw up your centre point and segments in advance of the meeting, assuming you know how many people will be attending. When ready to start, have several colour markers ready (use the tip in Section 5 to keep your marker pens together).
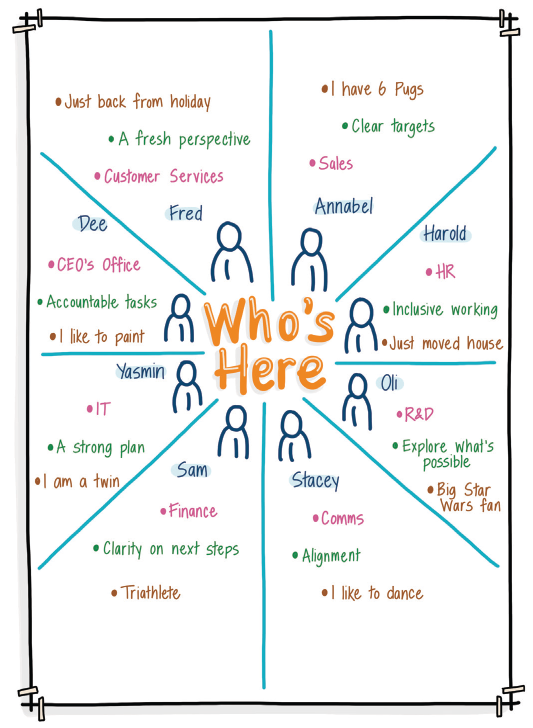
- Invite each participant to introduce themselves by their name, and other information you would like to know. For example, you may want to find out the function they work in, what their big hope is for this meeting, or maybe a fact that other participants may not be aware of.
- Record the responses yourself, or ask someone to do that for you. Aim to use one colour for each category of information, which will make it easier to distinguish content.
- When completed, keep the chart visible so participants, and you, can refer to it throughout the meeting. Return to the chart at the end of the meeting as appropriate.
Watch out!
- Asking for too much information can lead to a very messy chart. Keep it to two to three simple points, and summarise when you capture the information.
- If you have a larger group, you may wish to use a larger sheet of paper.
Resources and kit
A sheet of flipchart paper, three to four cool colour pens, plus one ‘hot’ colour for highlighting and tape.
Catherine’s expert insight
‘This simple visual way of working serves many purposes for you in a meeting. It gives you a great data reference point to work with and add to, a low-risk way of giving everyone the opportunity to speak and by its visual structure demonstrates:
- that everybody is welcomed and expected as an important part of the meeting
- everybody is expected to share their view and play an active role in the meeting
- the group share a common bond.
Not bad for a simple poster! Genius!’
5 - THE ESSENCE OF…
Overview
For many participants sharing information about themselves can be an engaging activity. We all tend to like talking about ourselves and we’re probably the best person to do it too. The Essence of… is designed to be highly versatile, and uses visual materials to communicate the essence of someone to others. This tool will help your participants to become comfortable with others, particularly if you have people of different hierarchical levels in the meeting.
The Essence of… could also be used in other stages of your meeting, such as to stretch thinking and encourage conversation about a concept or idea that might otherwise be difficult to articulate.
The Meeting Kaleidoscope
This tool ‘opens the window’ on fellow participants, highlighting things they enjoy as people rather than as leaders, managers and colleagues in a work setting. This can lead to an eye-opening conversation at times, so be prepared to learn things you may not have expected!
Flow flavour
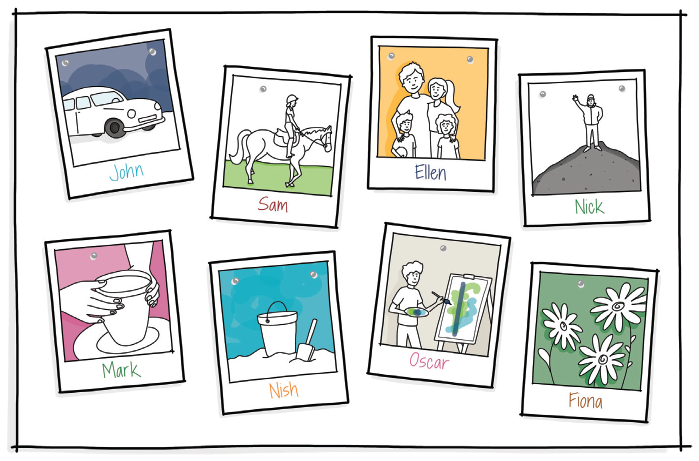
- Before the meeting, ask your participants to bring with them an image that conveys the essence of themselves. This can be a photograph or image that a participant can easily explain to the group. For example, a participant may choose to share a photo of them and their family, an image of a hobby, their favourite book, or a photo of their new car. Whatever it is will be the right image to choose, as everyone is gloriously different.
- Invite each participant to share their image that conveys the essence of them. Encourage them to explain why it has been chosen and allow other participants to ask questions if needed.
- Give everyone the chance to share, and thank everyone for their contribution.
- You may wish to display the images around the room during the meeting as a reminder of how different we all are.
Watch out!
- Remember to give plenty of notice to participants when requesting the image.
- In the case of photographs it may be wise to encourage photocopies to be brought into the meeting rather than the originals, especially if they are precious.
Resources and kit
Printed images (provided by participants) and tape.
Helen’s expert insight
‘Whenever using a tool like this, it is important to explain why so that the group see the connection between the purpose of the meeting and the essence they are sharing about themselves. For example, when using The Essence of… in a group of people meeting for the first time it is best to ask them to share their ‘get to know me essence’. In contrast, with a group who have known each other longer, it is possible to ask them to share their ‘when I’m tired essence’ or ‘what you may not know about me yet essence’. Whichever angle you choose, explain to the group why sharing their essence will benefit the work to be done together.’
6 - 3 WORD INTRODUCTION
Overview
The 3 Word Introduction is a very simple tool, which can be used visually or not depending upon the resources you have available, although taking a visual approach will help participants to absorb the information more effectively than using a verbal approach alone.
This tool is a powerful method of encouraging participants to get to know and understand one another, and using it at the beginning of your meeting will help to develop a sense of community and trust within the group.
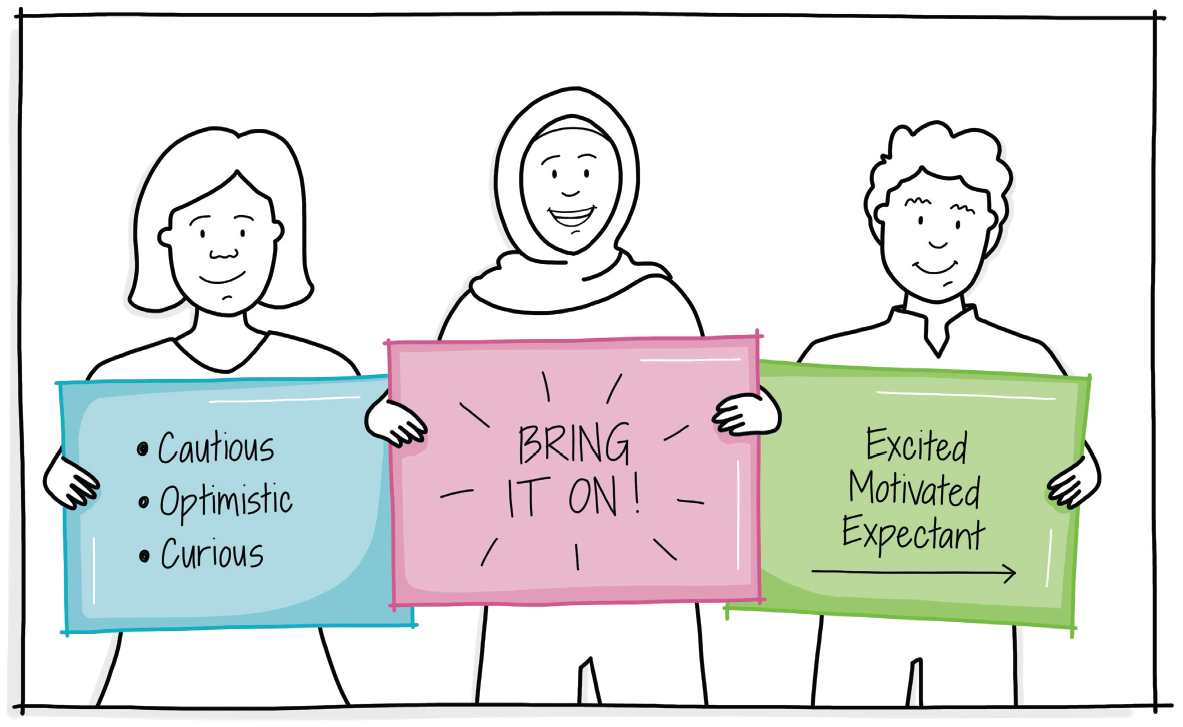
You can also choose different topics for the three words, for example you might ask participants to describe how they are feeling right now, what they are most looking forward to in the meeting, or what’s important to them about the topic to be discussed – the choice is yours.
The Meeting Kaleidoscope
Great at highlighting the current mood or thinking of participants. Not only a strong way of getting to know each other better but potentially a useful barometer for the meeting leader to sense how participants are feeling or the common thoughts the group have.
Flow flavour
- Provide participants with a sheet of paper and a marker pen.
- Ask each participant to write down the three words that reflect the question you have asked, for example ‘Describe how you are feeling right now in three words’.
- Allow participants the opportunity to write down their three words on the paper.
- If energy is lower, invite participants to stand up together and share whilst standing.
- In any order, ask participants to share their three words with the group. You will find that other participants will comment and enjoy what has been offered.
- When everyone has offered their words, thank the group and summarise the essence of what has been shared. For example: ‘There seems to be real energy right now, let’s unleash it on our first topic for exploration!’
- Display the words on the wall or around the room if appropriate.
Watch out!
No significant watch outs here, it’s all good!
7 - HELPED AND HINDERED
Overview
The purpose of Helped and Hindered is to reflect on what helped or hindered a meeting in achieving its desired outcomes, so that participants can learn from the insights shared and contribute to a more productive meeting either now or in the future. One option is to use this chart in the Opening stage of your meeting, inviting participants to think back to the previous meeting. This works well if you have regular meetings and the time between them is short. Alternatively, this tool could be used in the Moving stage of your meeting, harnessing the group’s thinking whilst it is fresh.
The Meeting Kaleidoscope
I have highlighted all three elements of the Meeting Kaleidoscope here as this tool allows meeting participants to explore their thoughts on the previous meeting, which could include all three areas, and indeed the meeting purpose too.
Flow flavour
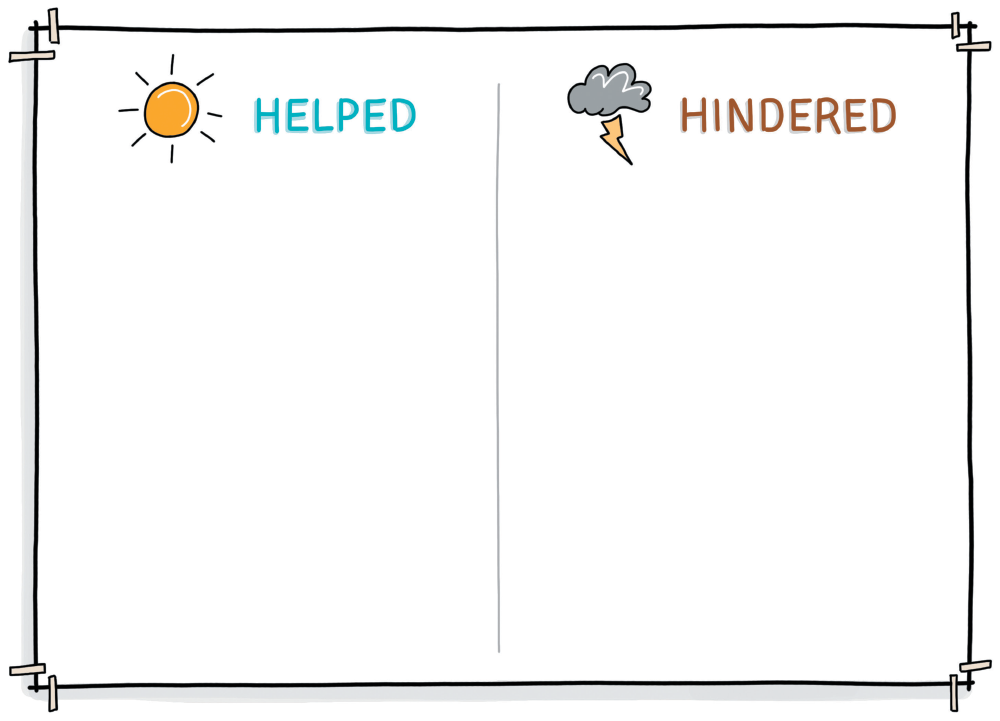
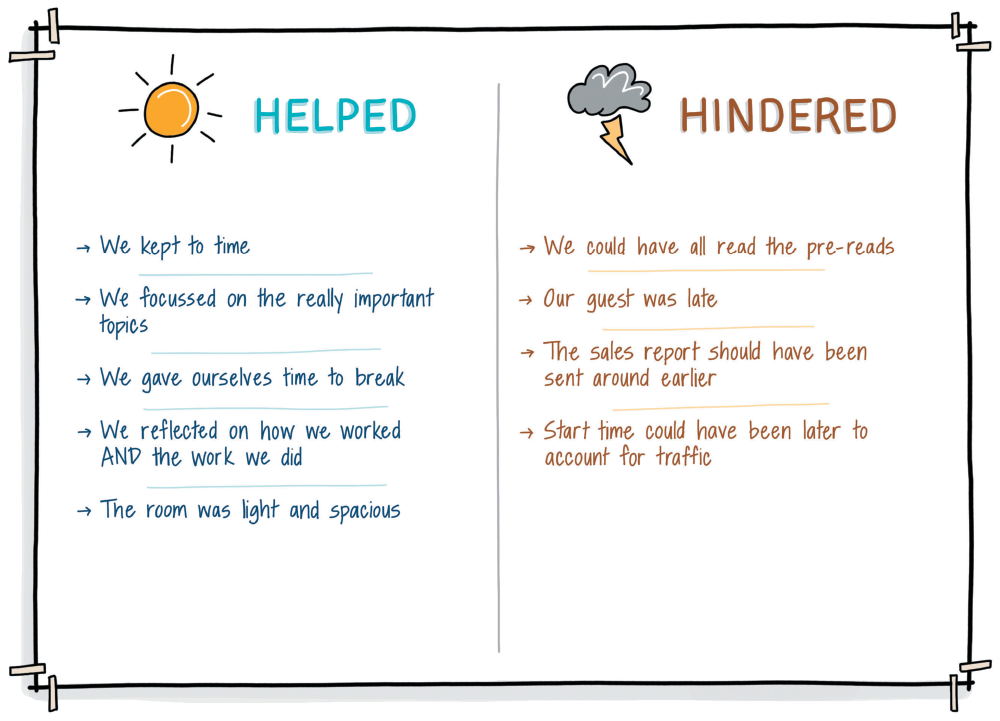
- Prepare your flipchart templates using the example illustration as inspiration.
- Explain the purpose of the process to the group, emphasising that the focus is on an objective view of the meeting in service of making the next meeting even better.
- Start with either Helped or Hindered, and keep to one section before moving to the other. To ensure that you get everybody’s best thinking ask people to make their own notes of any points that they will want to raise later as you move to the other section.
- Invite participants to call out their observations, noting them on the chart as you progress (or ask someone to do that for you). Encourage participants to offer specific observations, rather than general comments. Five to 10 minutes should be ample for this conversation.
- When everyone has had a chance to contribute move to the other half, again encouraging suggestions. Lead the process at a swift and steady pace.
- Encourage the group to seek clarity if there are any points that are unclear.
- Now that you have all your content, use your second chart to pose the question ‘So what will we do more of/differently at our next meeting?’ Add emphasis to ‘will’ to focus attention.
- Again, encourage the group to be specific in their suggestions, which will help everyone to understand what is being requested. Make sure these points are captured on the chart. This should take approximately 5 to 10 minutes.
- Draw the group’s attention to the whole set of suggestions, and seek agreement from the group to make these a reality.
Watch out!
- It is possible that participants may want to debate an observation about what helped or hindered the last meeting. Of course if you have time this may be useful; however this tool is focussed on making things work even better in the future rather than reviewing the details.
- If you have participants who are quieter (or louder) than others, get participants to write their suggestions on sticky notes in silence instead of calling out their views. This will encourage everyone to contribute equally.
- Should you choose to use this tool at the end of your meeting, be aware that participants may offer superficial answers due to tiredness or a desire to finish, in which case use the tool as a brief ‘sweeping up’ exercise to capture comments quickly and then refer to them at the beginning of your next meeting when people have the energy to do some quality work.
Resources and kit
Flipchart, marker pens and tape.
Ben’s expert insight
‘This simple tool has multiple direct and indirect benefits but the overwhelming motive for me is continuity. Using this in the Opening stage of your meetings will connect people to the previous meeting. What did we achieve? What were the outputs? Have we progressed? It will help them to evaluate and see the value whilst also identifying where there are missed opportunities and improvements.
Running the tool in the Closing stage of the meeting will enable you to use that data and look for continuity whilst planning the next meeting.
Bonus tip – this is a handy tool when reviewing nearly anything, not just meetings!’
8 - GIVES AND GETS
Overview
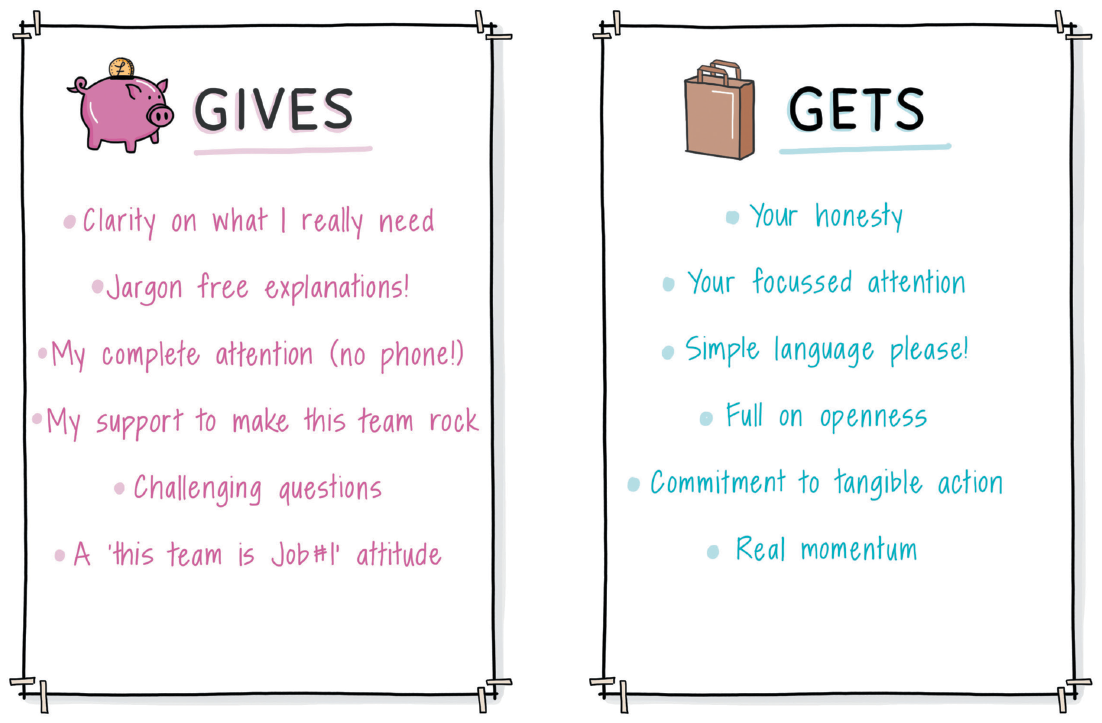
Gives and Gets is an effective tool that draws attention to both what participants bring to the meeting (or give to others), including knowledge, expertise and perspective, and what they wish to get out of the meeting itself, thus creating a sense of balance and mutuality. Remember the intersection where diversity of thinking creates super conditions for innovation? This tool will highlight these differences well, encouraging participants to make the most of the ‘brains in the room’.
This tool can be run with or without sticky notes. I have explained a process below which includes sticky notes, although you can simply capture the points on a flipchart.
The Meeting Kaleidoscope
Focused on people for the benefit of the people in the room. This tool is, unsurprisingly, focussed on the core element of any meeting – people!
Flow flavour
- Prepare a flipchart, or two flipcharts, with the titles ‘Give’ and ‘Get’, using the example as inspiration.
- Invite participants to reflect on what they bring to the meeting, including what they offer that may be unique to the group, and what they would like to get from the meeting (e.g., their ‘big wish’).
- Invite someone to start, capturing their give and get headlines on the relevant area of the chart. Ask questions if any points are unclear.
- Invite others to follow, until you have captured all suggestions.
- Summarise the content, drawing out key themes, or where you see differences that may be important to the conversation. Or ask members of the group to offer that summary to increase their interaction and ownership.
- Return to the chart, especially the ‘Gets’, at the end of the meeting as a way of checking to see whether participants all achieved their ‘get’.
Watch out!
- How you frame this tool will be key. Ensure that when you refer to gives and gets (especially gives) you provide clarity on the context of the ‘gives’ in relation to the meeting. For example, you might ask for suggestions on what participants might bring that others don’t, which may lead to responses such as ‘a detailed knowledge of our information technology capability’. These types of suggestions are very different to (and far more useful than) generic responses such as ‘a good sense of humour’.
- If you are using sticky notes, ensure there is enough space for all notes to be easily seen. Using separate charts may be a wise move.
Resources and kit
Flipchart, marker pens and tape. Sticky notes if required.
Ben’s expert insight
‘Let’s be clear, everyone within any meeting room should know exactly what value they can add and what is in it for them in their job role. Sometimes this is not always clear to them or indeed to other participants in the room so it is excellent meeting practice to call it out especially if this meeting or group will continue working together afterwards.
Using this quick and handy tool in the Opening stage of the meeting lets you have that important conversation early on in a team’s lifecycle. The crucial thing is to follow up on it. For example, if you feel you are missing a particular perspective in the meeting, fill the gap and find that person. If there are people who genuinely cannot find anything to offer – be generous and give them their time back.’