
Several variables affect how your slide show will run. For example, you can set up a slide show to be presented by a live speaker or to be browsed by a viewer. You can specify that a show should loop continuously or be shown with or without a recorded narration. You can even choose to have only a subset of the slides in the presentation included in a particular slide show. You can set up your show to advance manually when a presenter clicks or automatically according to recorded timings. Finally, you can specify that more than one monitor will be used; with this feature the presenter can have one monitor to use to orchestrate the show while the audience sees the presentation on another monitor.
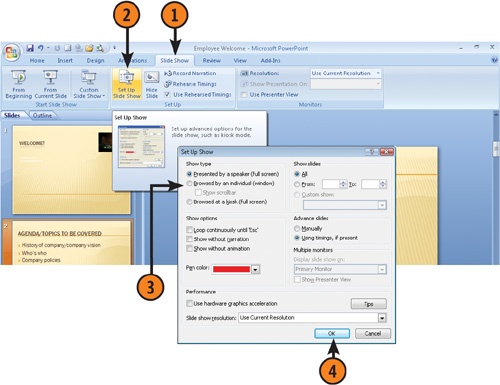
 Click one of the three radio buttons in the Show type section:
Presented By A Speaker displays the slide show in full screen mode and assumes a live presenter is running the show
Browsed By An Individual is the setting to use if an individual will view the show from a computer or CD. This presentation runs in a window, rather than full screen.
Browsed At A Kiosk provides a self-running, full screen presentation that might be set up at a kiosk.
Try This!
Click the Show Scrollbar checkbox if you choose the Browsed By An Individual setting to enable a viewer to scroll through a presentation. This works well with a presentation that will run from a computer that is unattended, such as a computer showing a demonstration at a booth in a trade show.
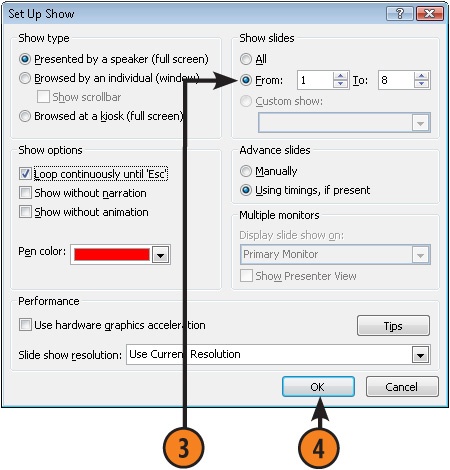
- Click one of the three check boxes in the Show options section:
Loop Continuously Until ‘Esc’. Choose this option if you are running the show unattended and want it to continuously repeat.
Show Without Narration. If you recorded a narration but now want to give the show with a live presenter, you would choose this option.
Show Without Animation. Because animations may not run smoothly on slower computers, you might choose to disable them using this setting.
 Click the arrow on the Pen Color field and choose an ink color from the drop-down palette for annotations you can make while running a show.

Tip
You can choose additional colors for the pen by clicking More Colors at the bottom of the drop-down palette. This displays the Colors dialog box, where you can select a Standard or Custom color to apply.
See Also
For information about working with the pen to make annotations during a presentation, see "Make Annotations on Slides".
- In the Show Slides section, click a radio button to choose one of three options:
Choose All to include all slides in the presentation (except for slides you’ve hidden).
Enter beginning and ending slide numbers in the From and To field to show a range of slides.
Use Custom Show to pick and choose any number or range of slides you wish to present. This feature enables you to present different versions of your show to different audiences.

Try This!
If you have a large slide show and find it’s running slowly on the presenting computer, don’t shorten your show. Instead, you can adjust the Slide Show Resolution in the Set Up Show dialog box. A lower resolution such as 600 x 800 will run your slides faster, though the image quality will be grainier.

See Also
For more information about how to move from slide to slide in a presentation, see "Navigating through Slides".
Tip
The Show Presenter View option is a setting in the Set Up Show dialog box that can come in handy if you have a system with multiple monitors. This is useful if you want to control the show from one screen, on your laptop for instance, but use another screen to display the presentation to your viewers. Using the Show Presenter View on your screen, you can navigate the slide show and your actions will be invisible to your viewers. For example, you can use thumbnails of your slides to build a custom presentation, reordering slides to offer a recap of key ideas on the fly.
Try This!
When you record a narration, you are offered the option of saving timings as well. If you do, those timings will be used to advance slides based on when the narration for each slide is complete. Note that there is a Use Rehearsed Timings check box on the Slide Show tab you can check to override narration timings.